Set Up Scene
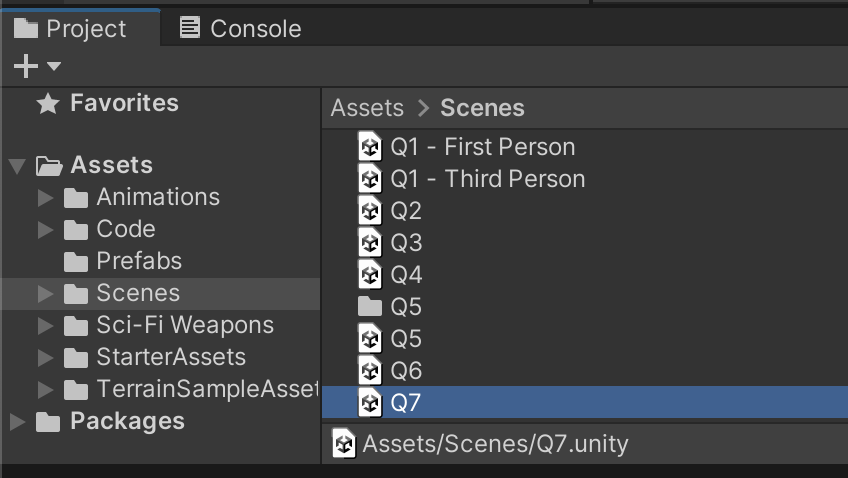
We will continue to re-use all scene setup from the prior assignment. Duplicate your Q6 scene and name it Q7. Make sure you have opened Q7 and are conducting your edits in the correct scene.
Supporting files for VG2 quests are part of a single archive that you can download here.
We will continue to re-use all scene setup from the prior assignment. Duplicate your Q6 scene and name it Q7. Make sure you have opened Q7 and are conducting your edits in the correct scene.
When downloading a character from the internet, often the model is only the 3D mesh and lacks rigging and animations. Rigging is the process of assigning portions of the 3D model to a skeleton. Without a skeleton, animations would specifically reference specific vertices on the 3D model, and those animations would be completely unusable on a separate 3D model that has different vertices. Animating using a skeleton (instead of manually deforming the mesh of the 3D model) allows us to re-use animations on other models, so long as they use the same skeleton.
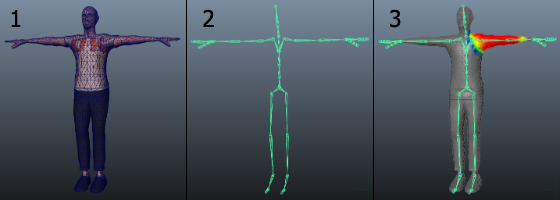
Given the nuances of the art, it is preferable that the original artist do the model rigging, but in the artist's absence, there are some automated tools that can approximate the process.
Mixamo is an online service by Adobe for downloading free 3D characters and animations. It also has a tool that tries to automatically rig 3D character models. Visit https://www.mixamo.com/ and log in. You will need a free Adobe account to use Mixamo.

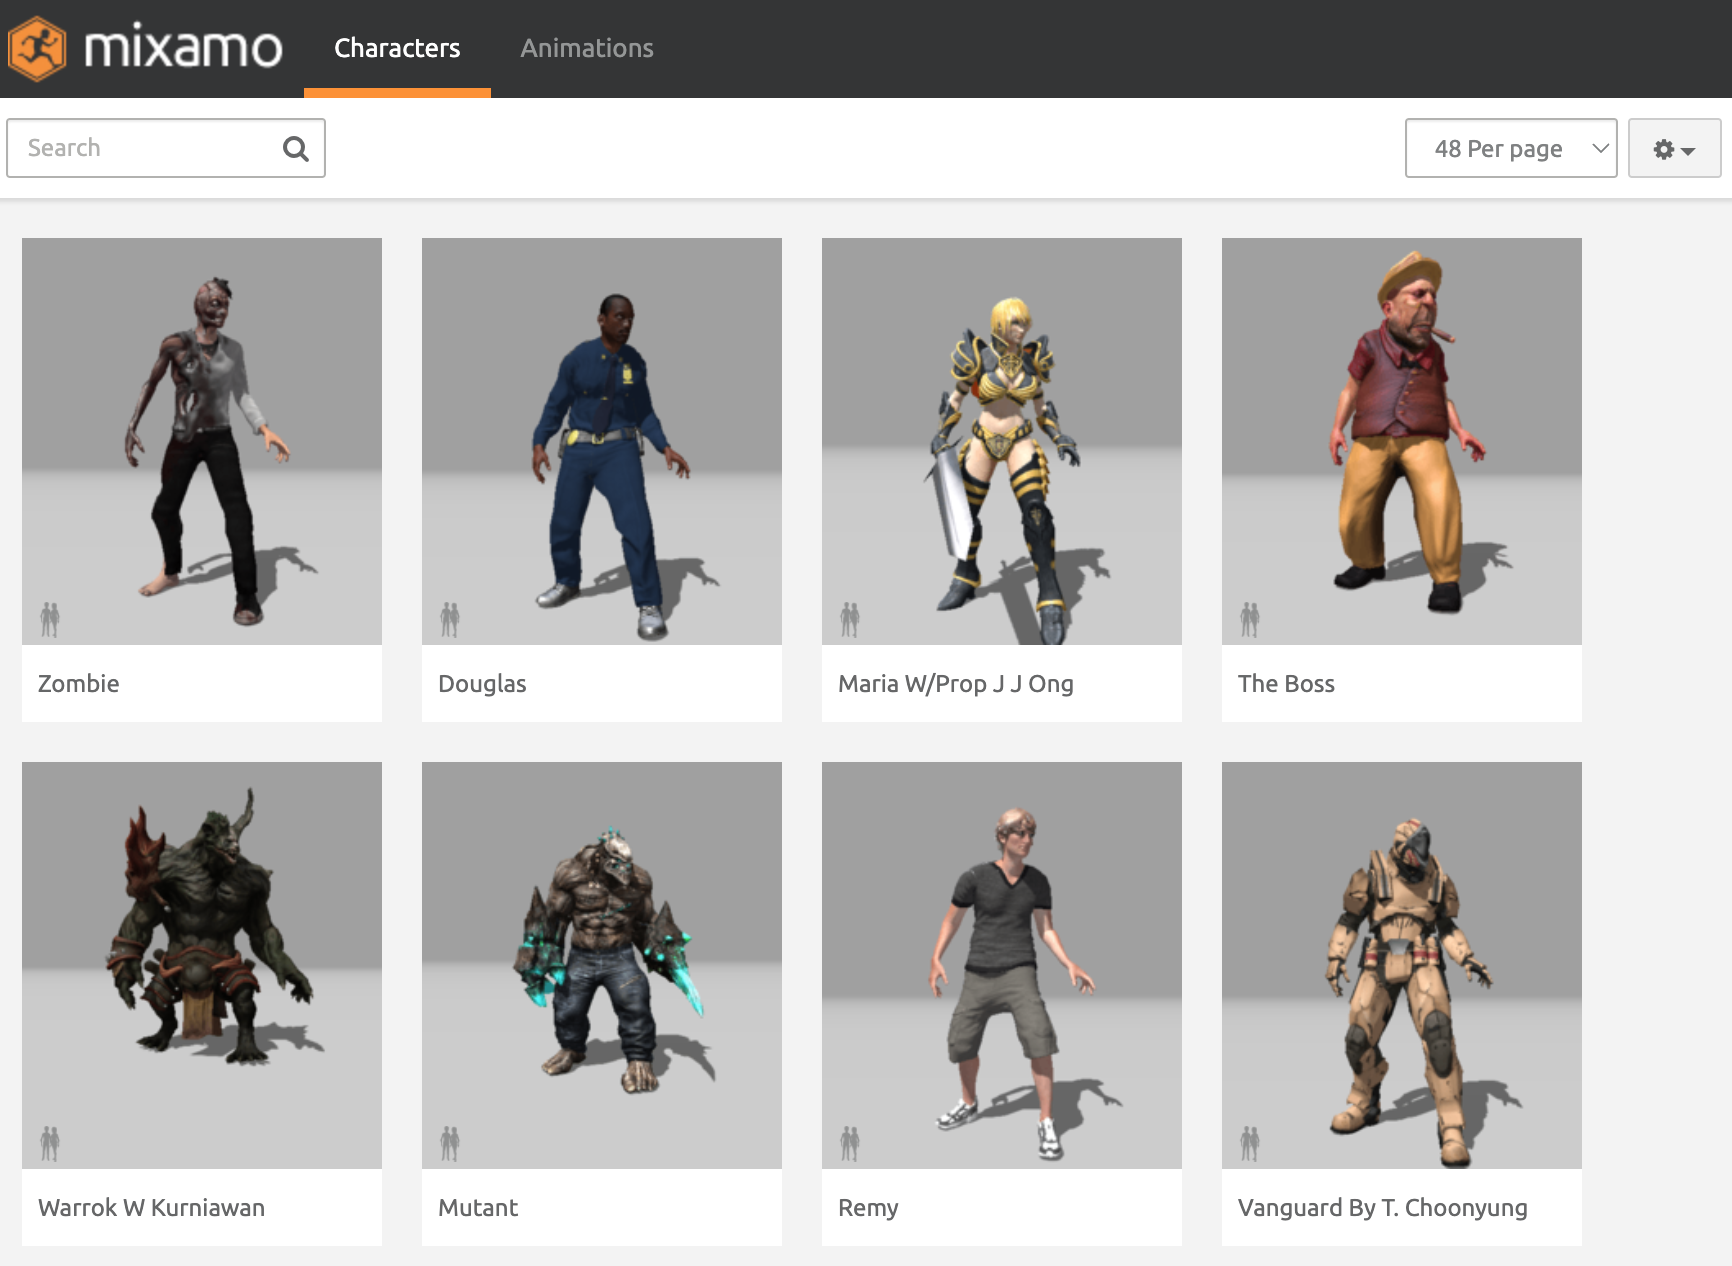
Once you are logged in, you will see Mixamo has sections for Characters and Animations.
Within the Characters section, Mixamo provides a variety of characters that can be animated and downloaded into compatible 3D software including Unity. This tutorial will use the crash-test "Dummy" character, but you can use whichever character you want. (In my testing, I've found a few rare cases in which characters will import with corrupted animations, and this appears to be a Mixamo error. If you run into this problem in future steps, simply repeat this step with a different character.)
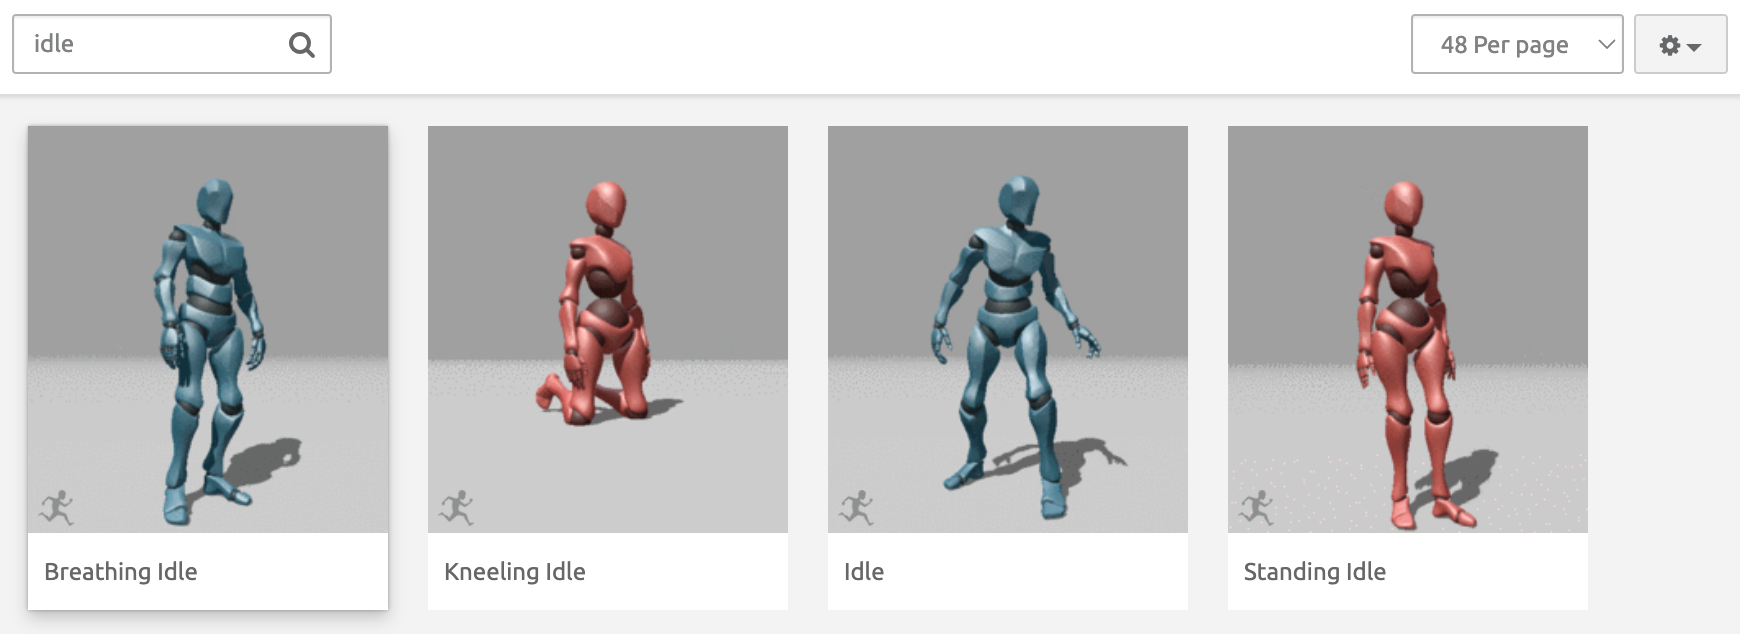
With your character selected, switch to the Animations section. Although the thumbnails may preview different models, you can see your selected character perform any animations you select. Feel free to experiment with different character models and animations.
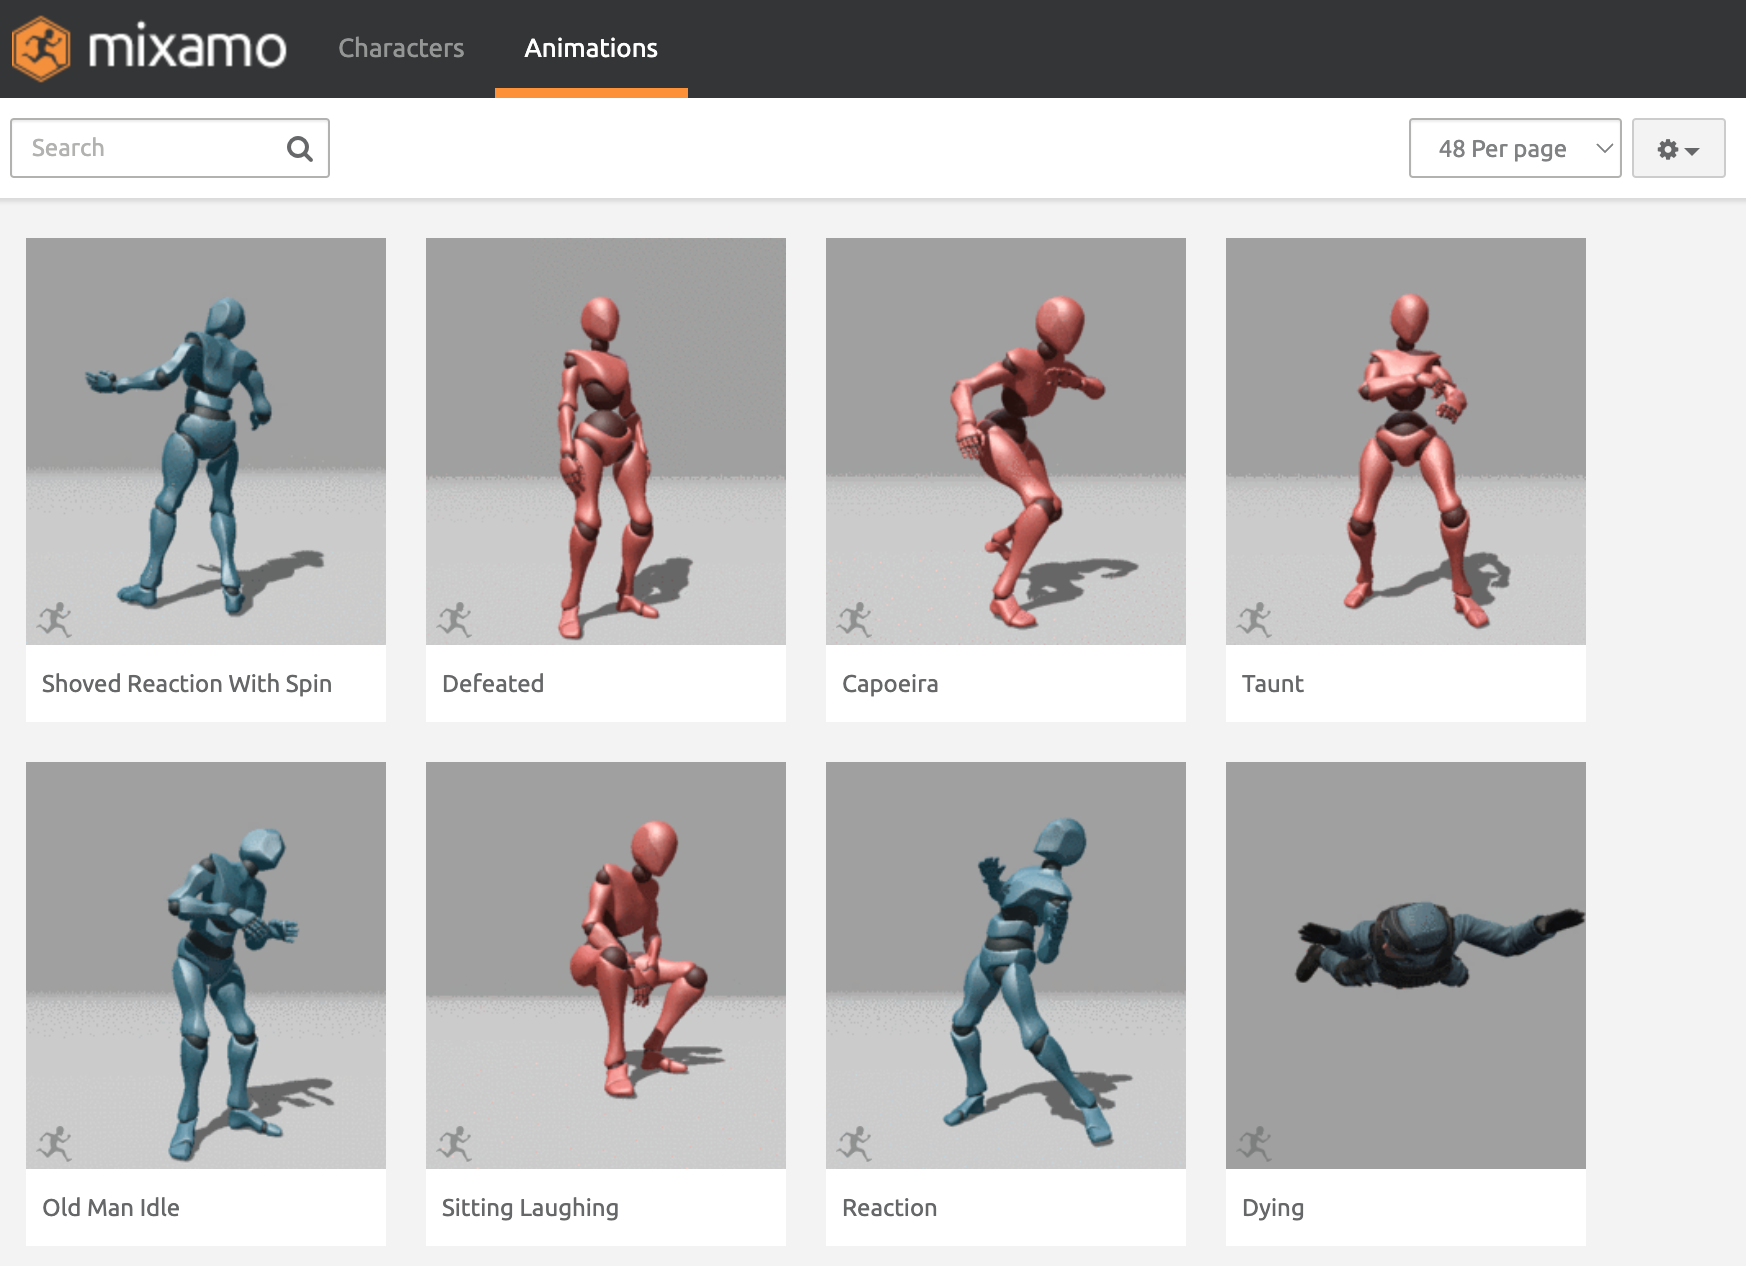
For this assignment, we want to select 3 animations: walk, run, and idle.
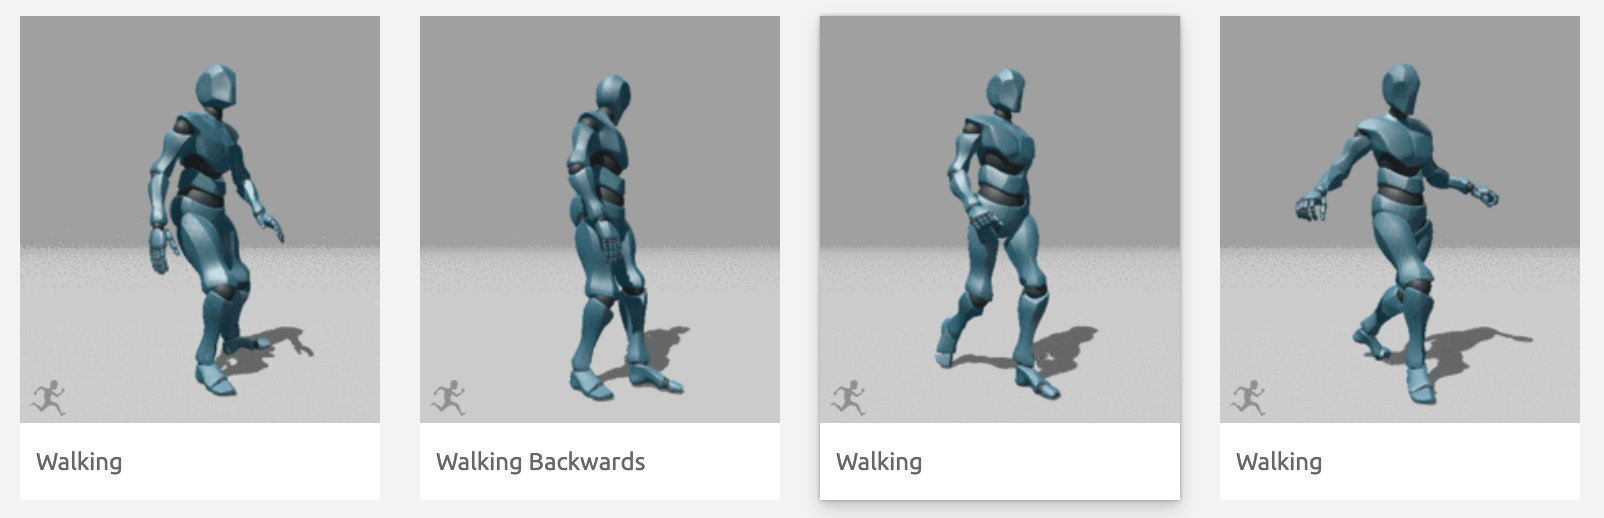
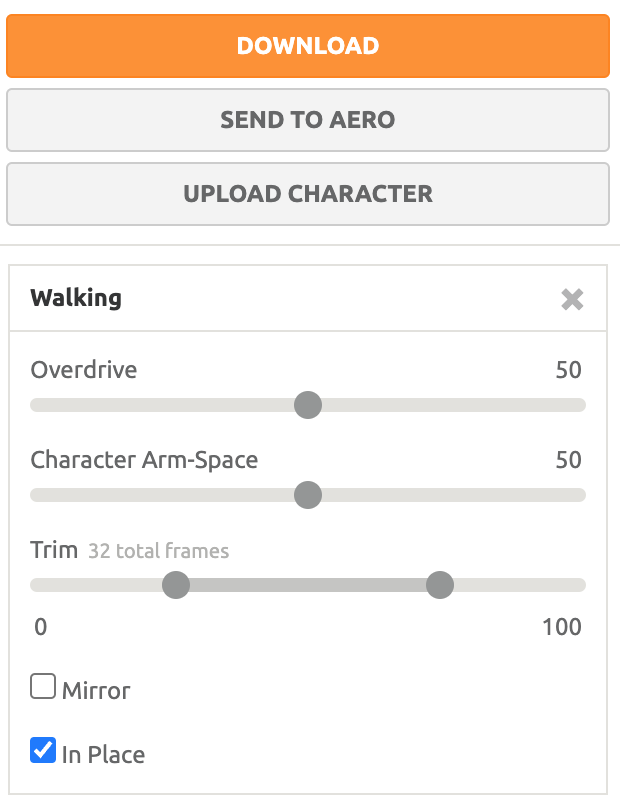
For the walk animation, try to find the most "normal" forward walk possible. Avoid the specialized/combination walks such as "Crouch Walk," "Left Walk," or "Sword Walk" since those won't match our gameplay. In the preview, you may notice that in some animations, the character actually moves forward as part of the animation. Because we already handle movement separate from animations in our game, "In Place" must be checked, otherwise your animation movement may contradict our gameplay movement. Click Download when you have selected an animation.
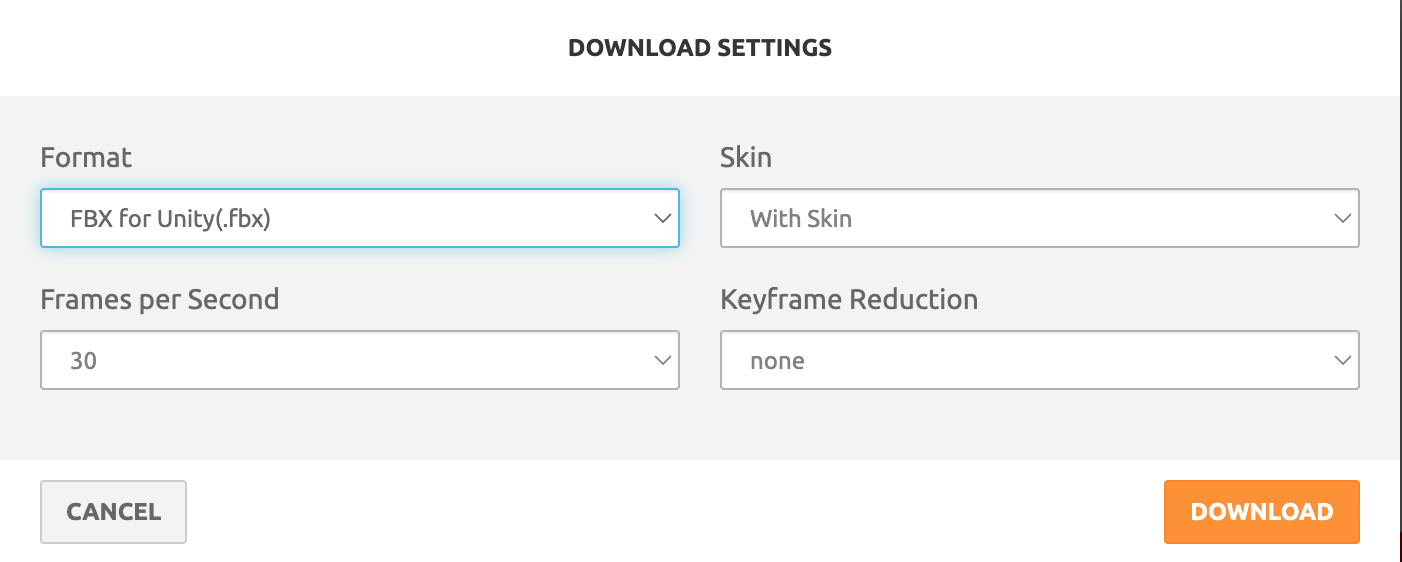
In the download screen, change the format to FBX for Unity. Detailed animations can produce a lot of data, and these other settings enable various optimizations for reducing file size. For now, we can leave them on their defaults. Download the animated character model.
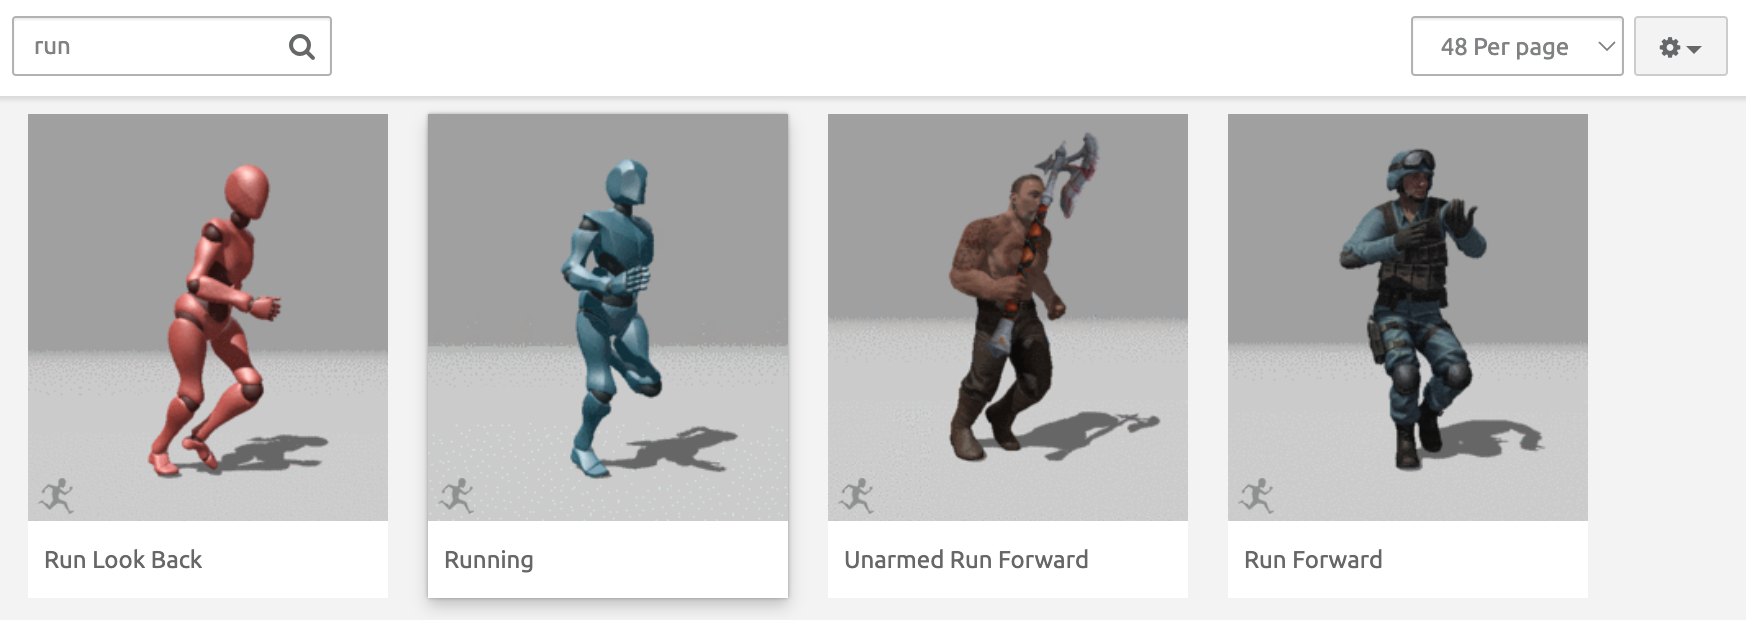
Repeat this process for a run animation. Try to find the most "normal" run animation possible. Make sure to follow the same settings as your prior animation and download.
Finally choose some sort of standing idle animation. Make sure to follow the same settings as your prior animation and download.
At this point, you should have downloaded 3 separate animated character FBX files for idle, walk, and run.
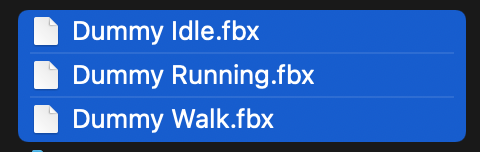
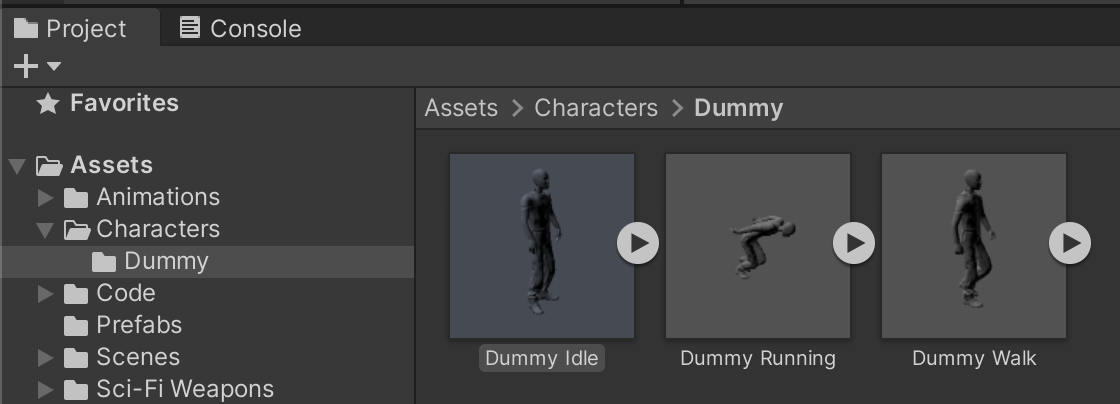
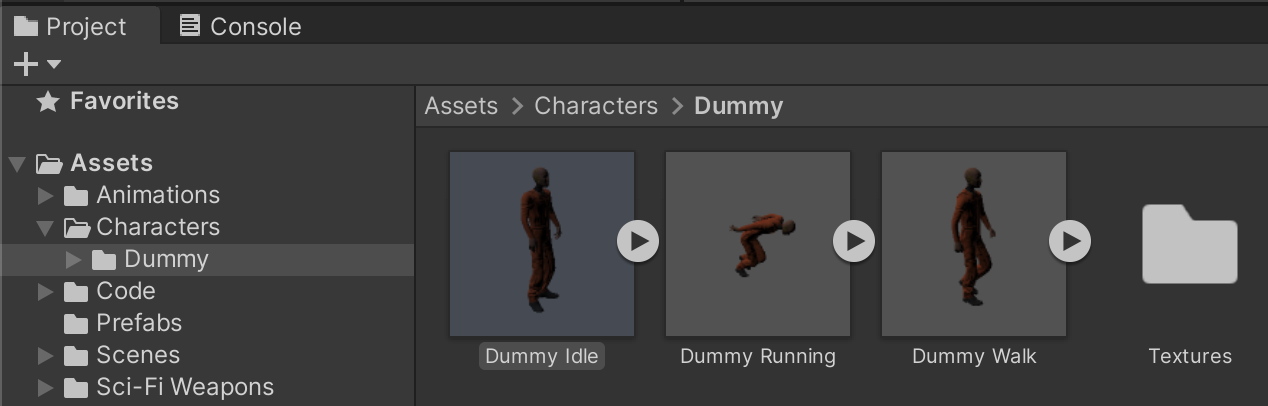
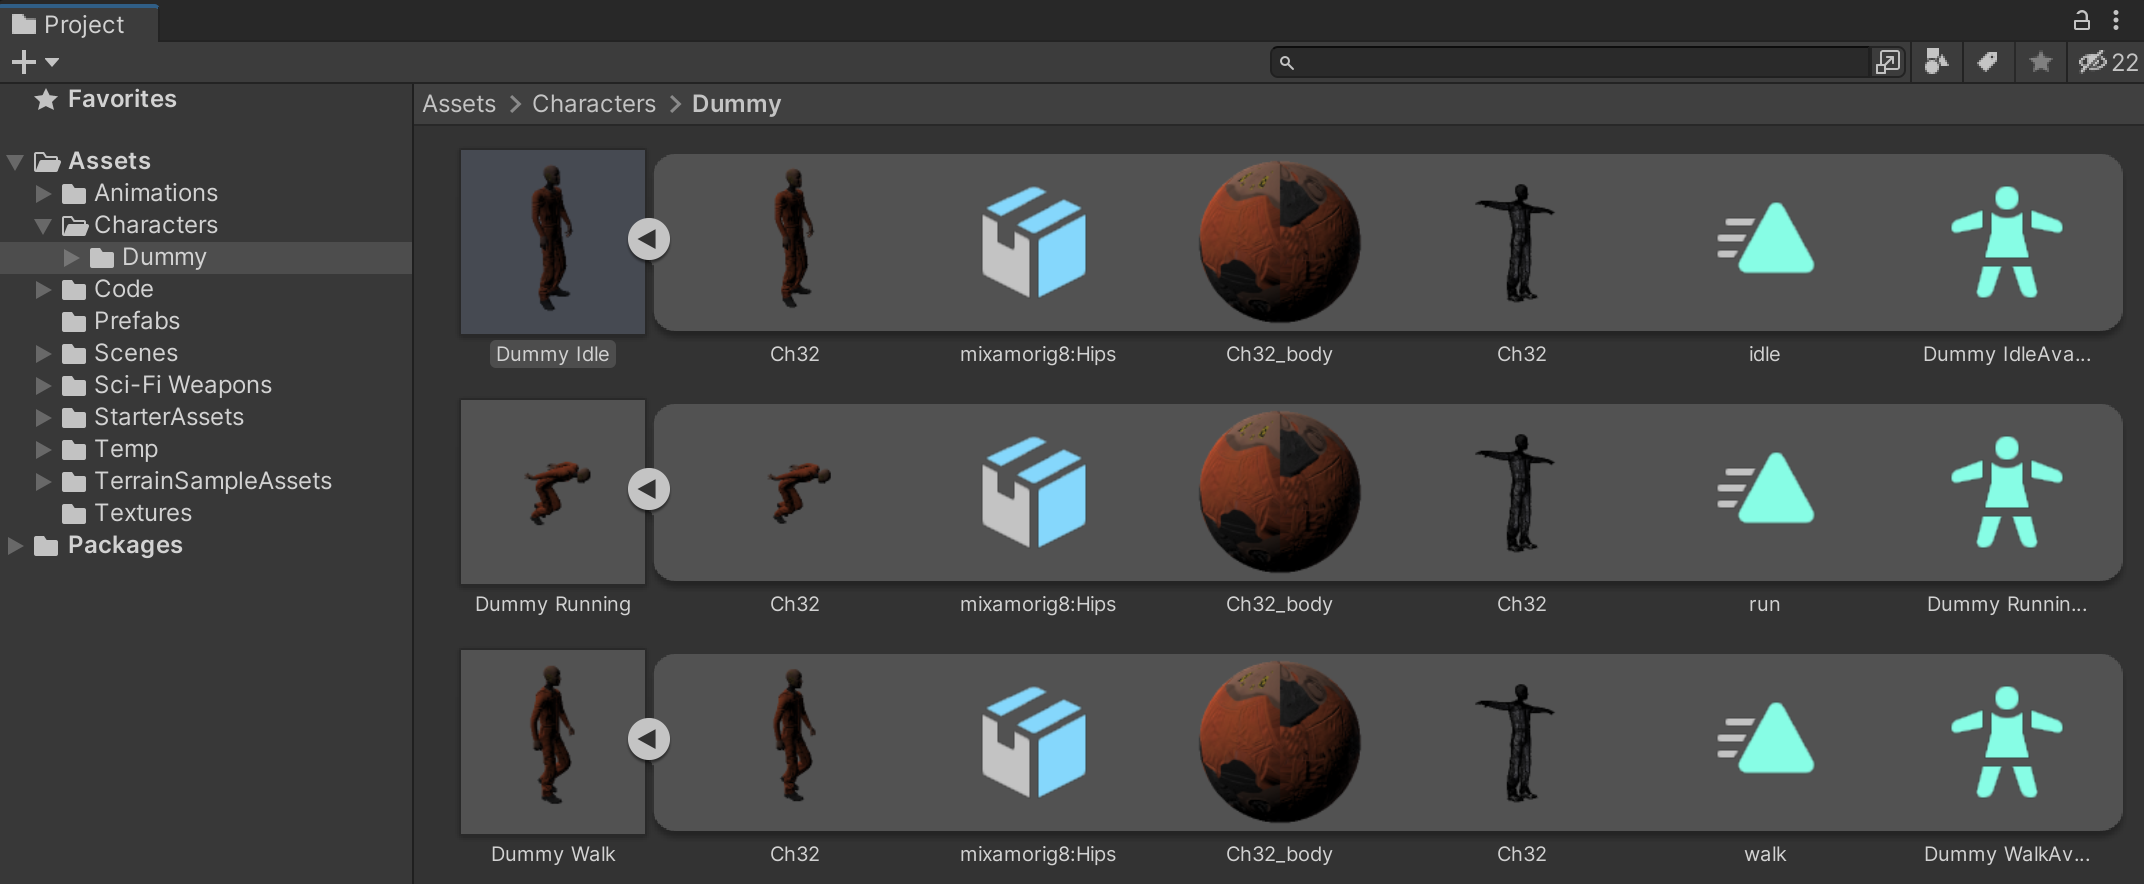
Create an Assets/Characters/Dummy/ folder in the project and drag the 3 FBX files into this folder. We will use the Idle Dummy for both its character model and animation. We will be using Dummy Walk and Dummy Run only for their animations.
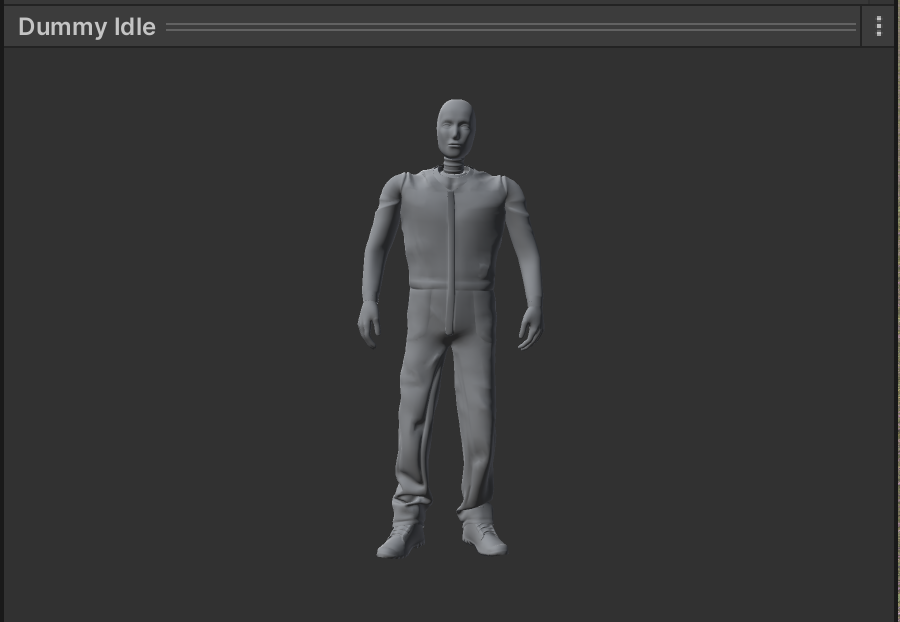
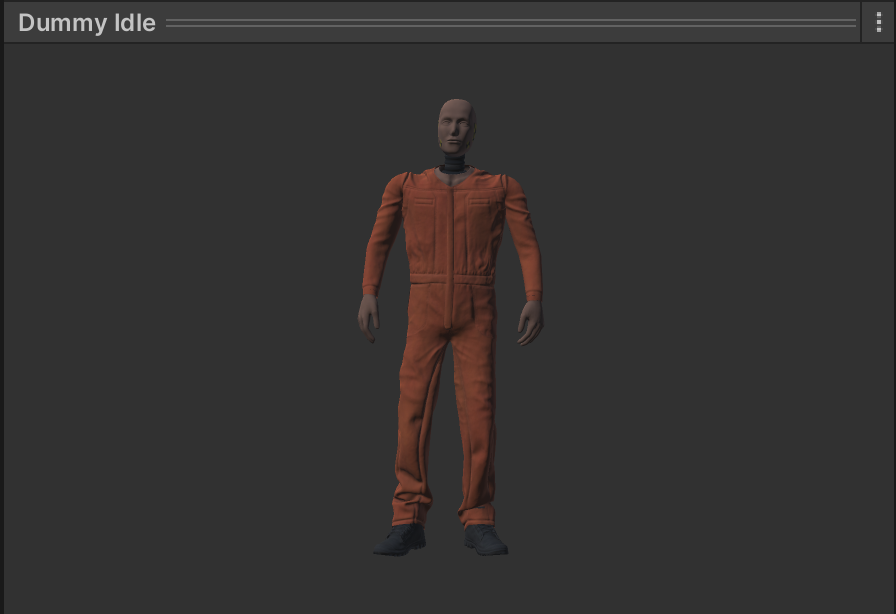
There are settings we need to change that will fix the character's textures and animations. On first inspection, the character appears as all grey with the textures missing.
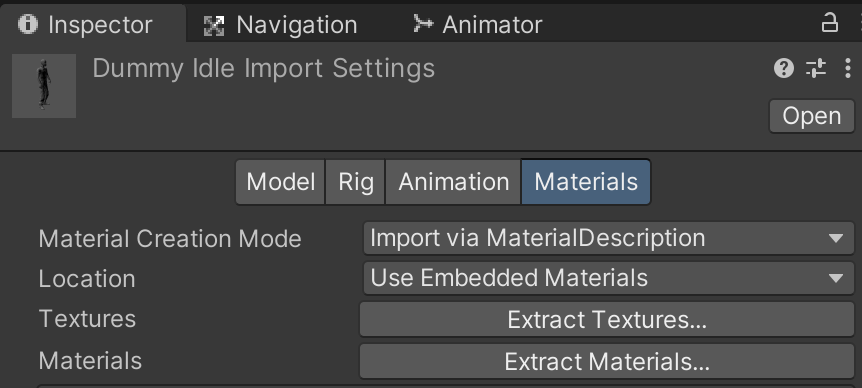
Sometimes Unity cannot access textures stored inside the 3D model. In the Inspector, switch to Materials and click "Extract Textures" and save into a separate Dummy/Textures/ folder to allow Unity to access them for gameplay.
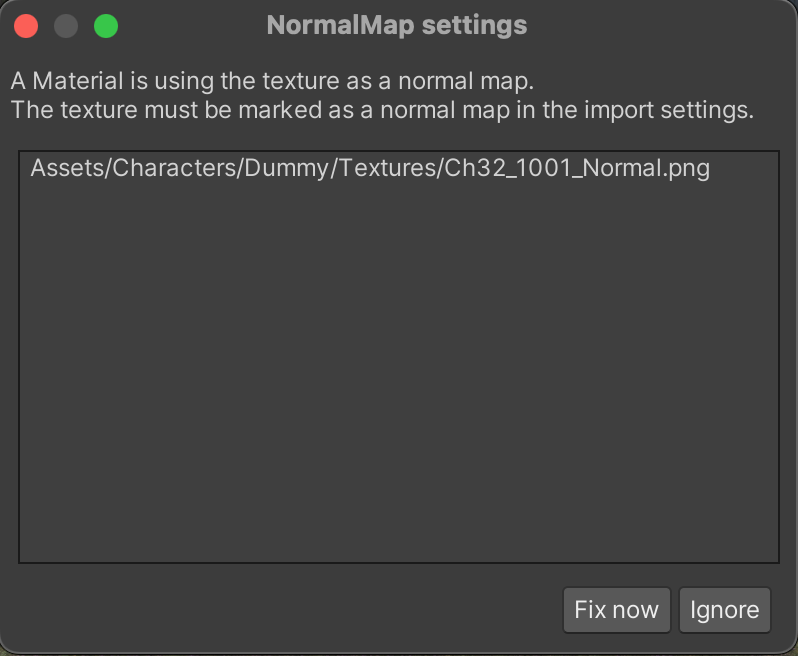
You may be prompted to fix the texture settings for use on a 3D model. Click "Fix now."
In the Project window, check that all 3 models are rendering properly now thanks to the exported textures.
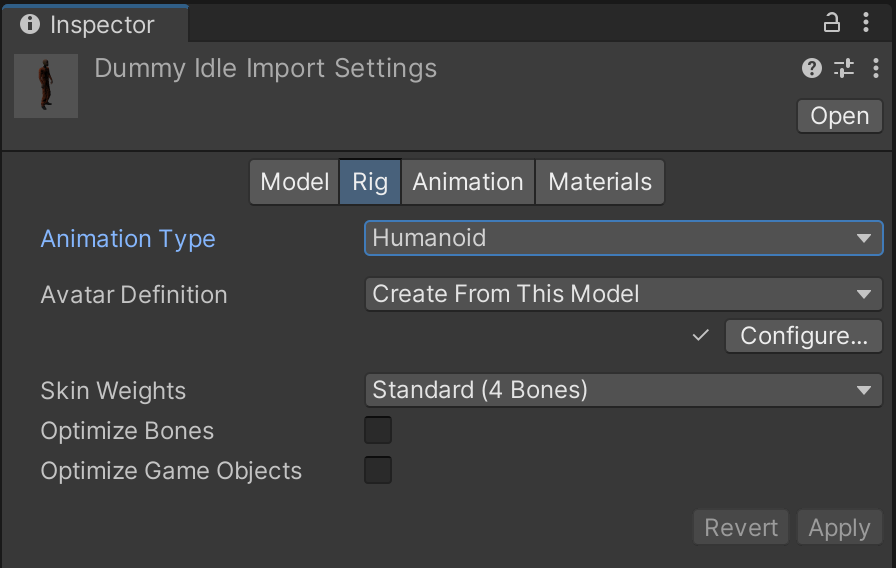
Now that Dummy is rendering properly, we'll need to change other settings on the model assets for them to animate properly. Within the Rig tab, switch Animation Type to Humanoid. Hit the "Apply" button to confirm the change. By telling Unity that the character is humanoid, the game engine is able to supply a wealth of additional tools and options specialized for characters that implement a human skeleton.
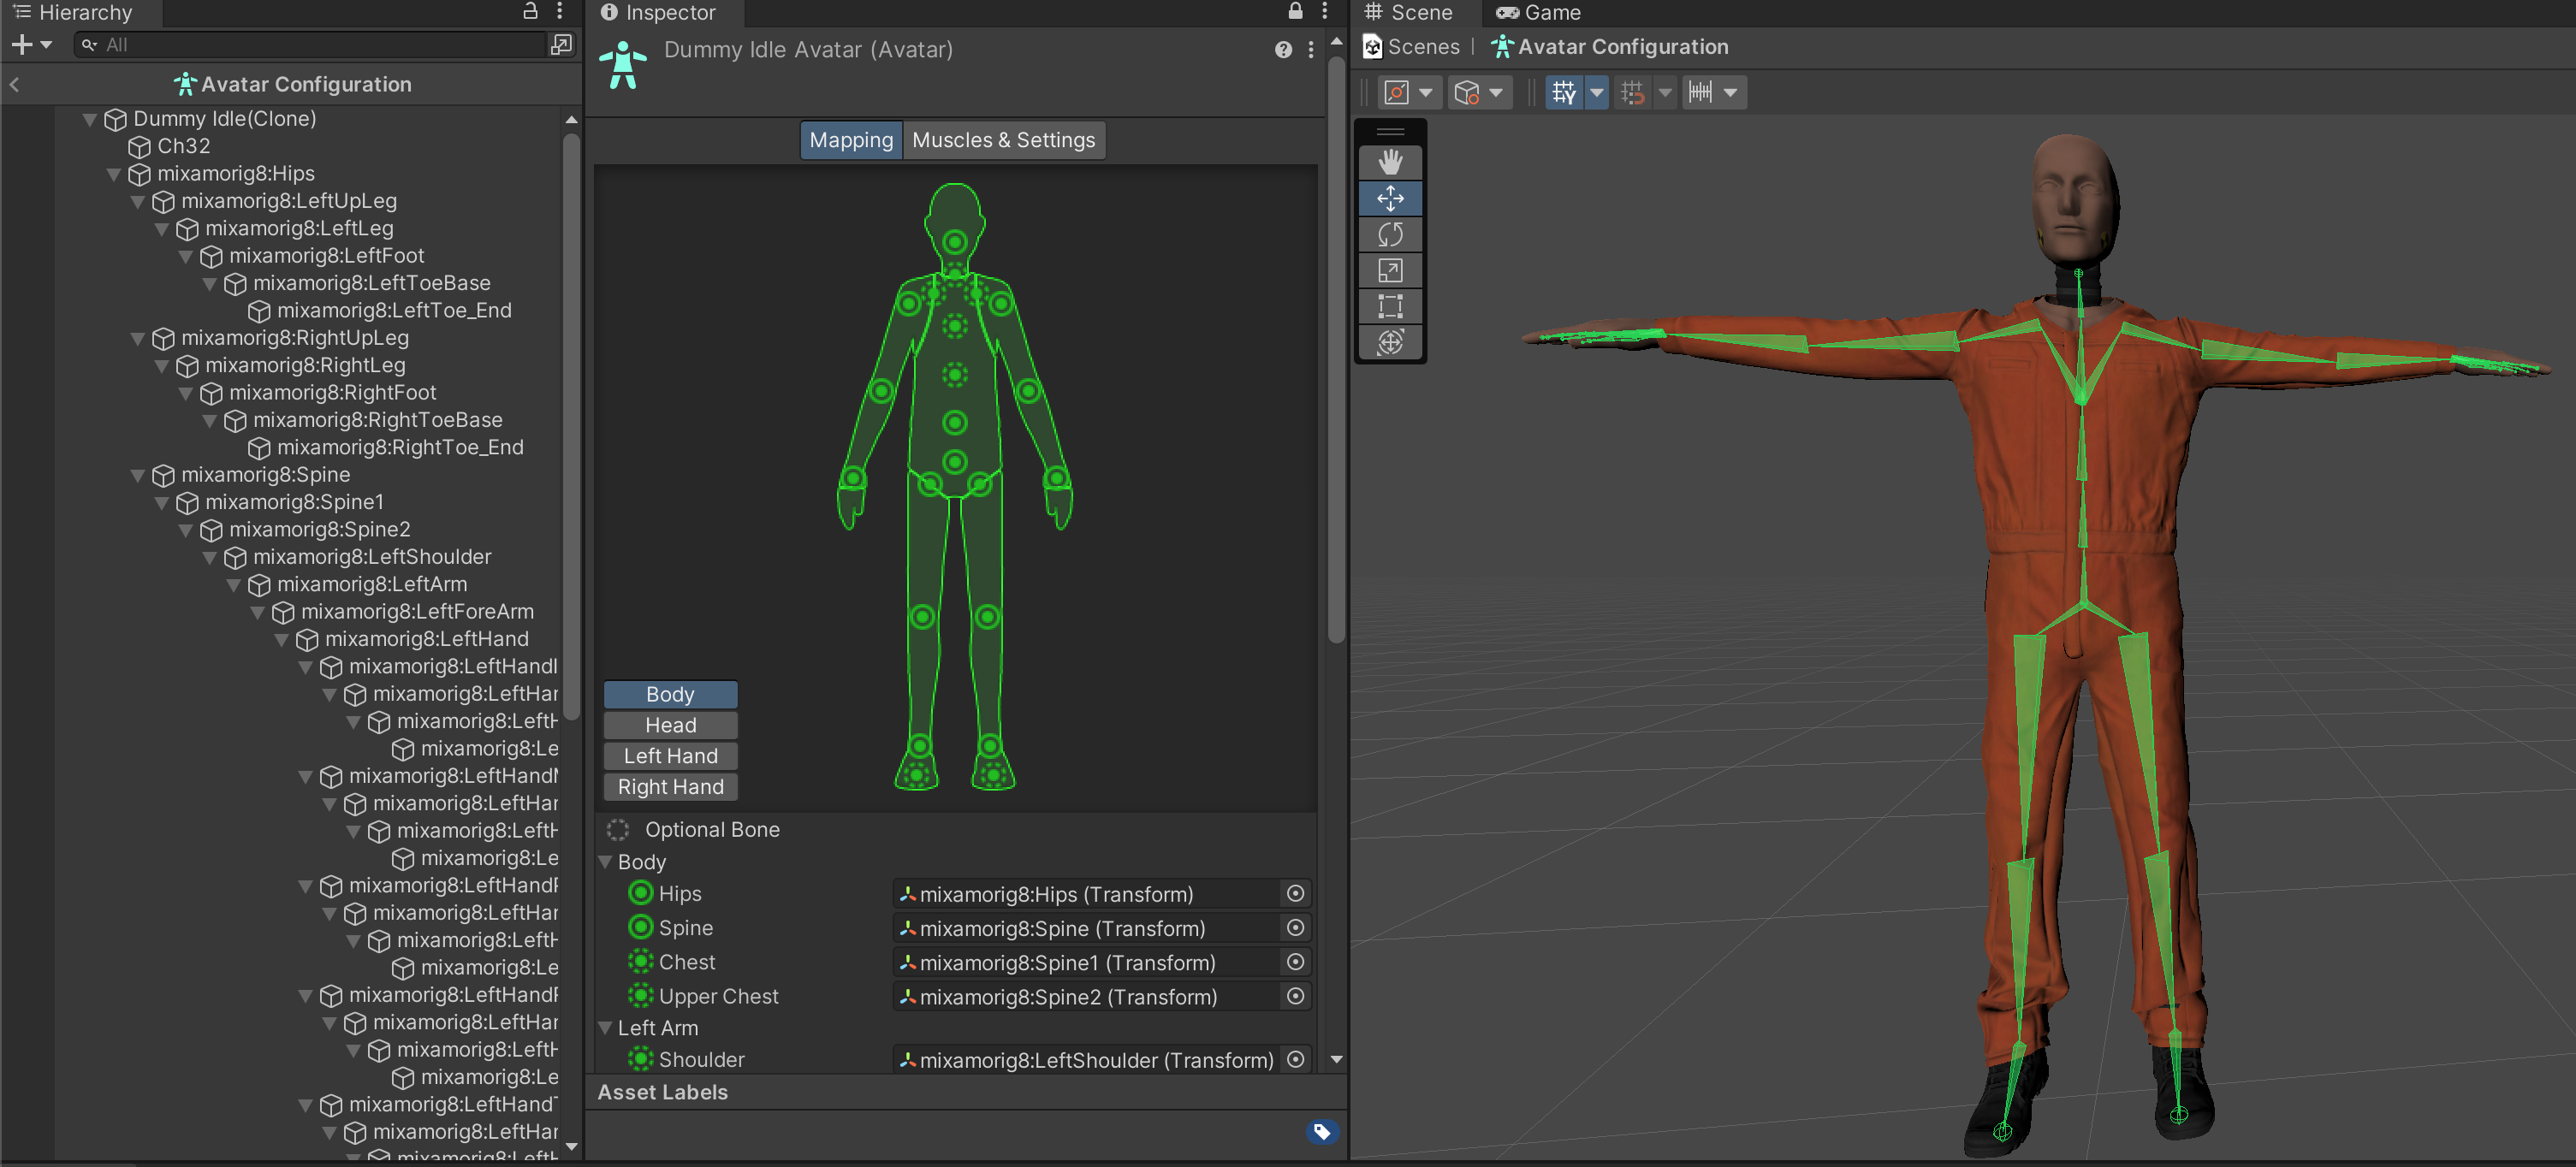
Click Configure next to Avatar Definition to preview how Unity has interpreted the Mixamo skeleton as a humanoid skeleton. The purpose of checking this screen is to confirm that the game engine has correctly interpreted the humanoid limb layout of the character by accurately portraying them in a T-Pose. (Common errors include the wrong limbs being assigned to incorrect body parts or limbs being twisted out of place.) We don't need to make any changes in this window because the character was processed correctly, but it is interesting to see the amount of detail that has been automatically configured in our character asset. Because we've used Mixamo and Unity to automate our character rigging, it is possible that there are some animation inaccuracies that an artist would be able to fix.
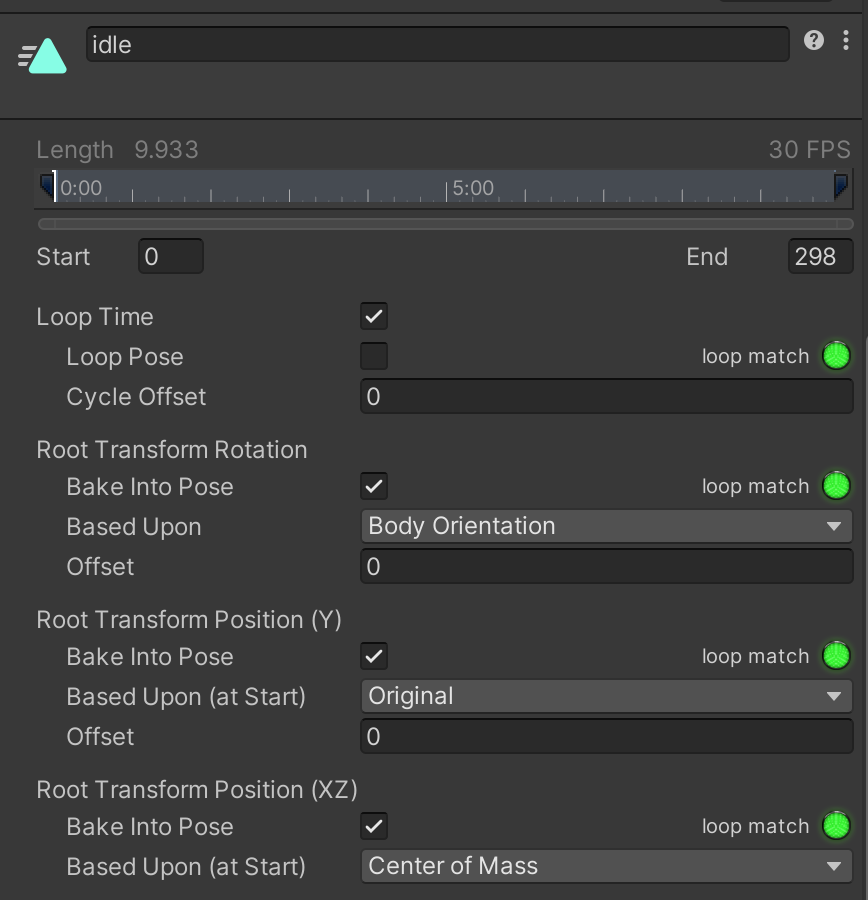
Back in the Inspector window, switch to the Animation tab. Make sure for the Idle asset, the animation is named "Idle" to match. (Default Mixamo names can be inconsistent. For the other two assets, you will name them Run and Walk as needed.) The idle animation should also loop, since the character may be in this state for a prolonged amount of time. Finally, despite selecting "In Place" in Mixamo, animations frequently still have some rotation and movement that can conflict with gameplay. Select "Back into Pose" for Rotation, Position (Y), and Position (XZ) to make sure the character is still held in place despite the animated movement. Without these settings, you might experience such animation glitches as the character slowly sinking into the floor when they walk.
Repeat updating the same Rig and Animation settings for the other two Walk and Run character models.
Now that the Dummy character assets are prepared, it is time to test them in gameplay. If you expand each of the Dummy character assets, you'll see that they are actually composed of several different kinds of media such as 3D meshes, animations, and graphics.
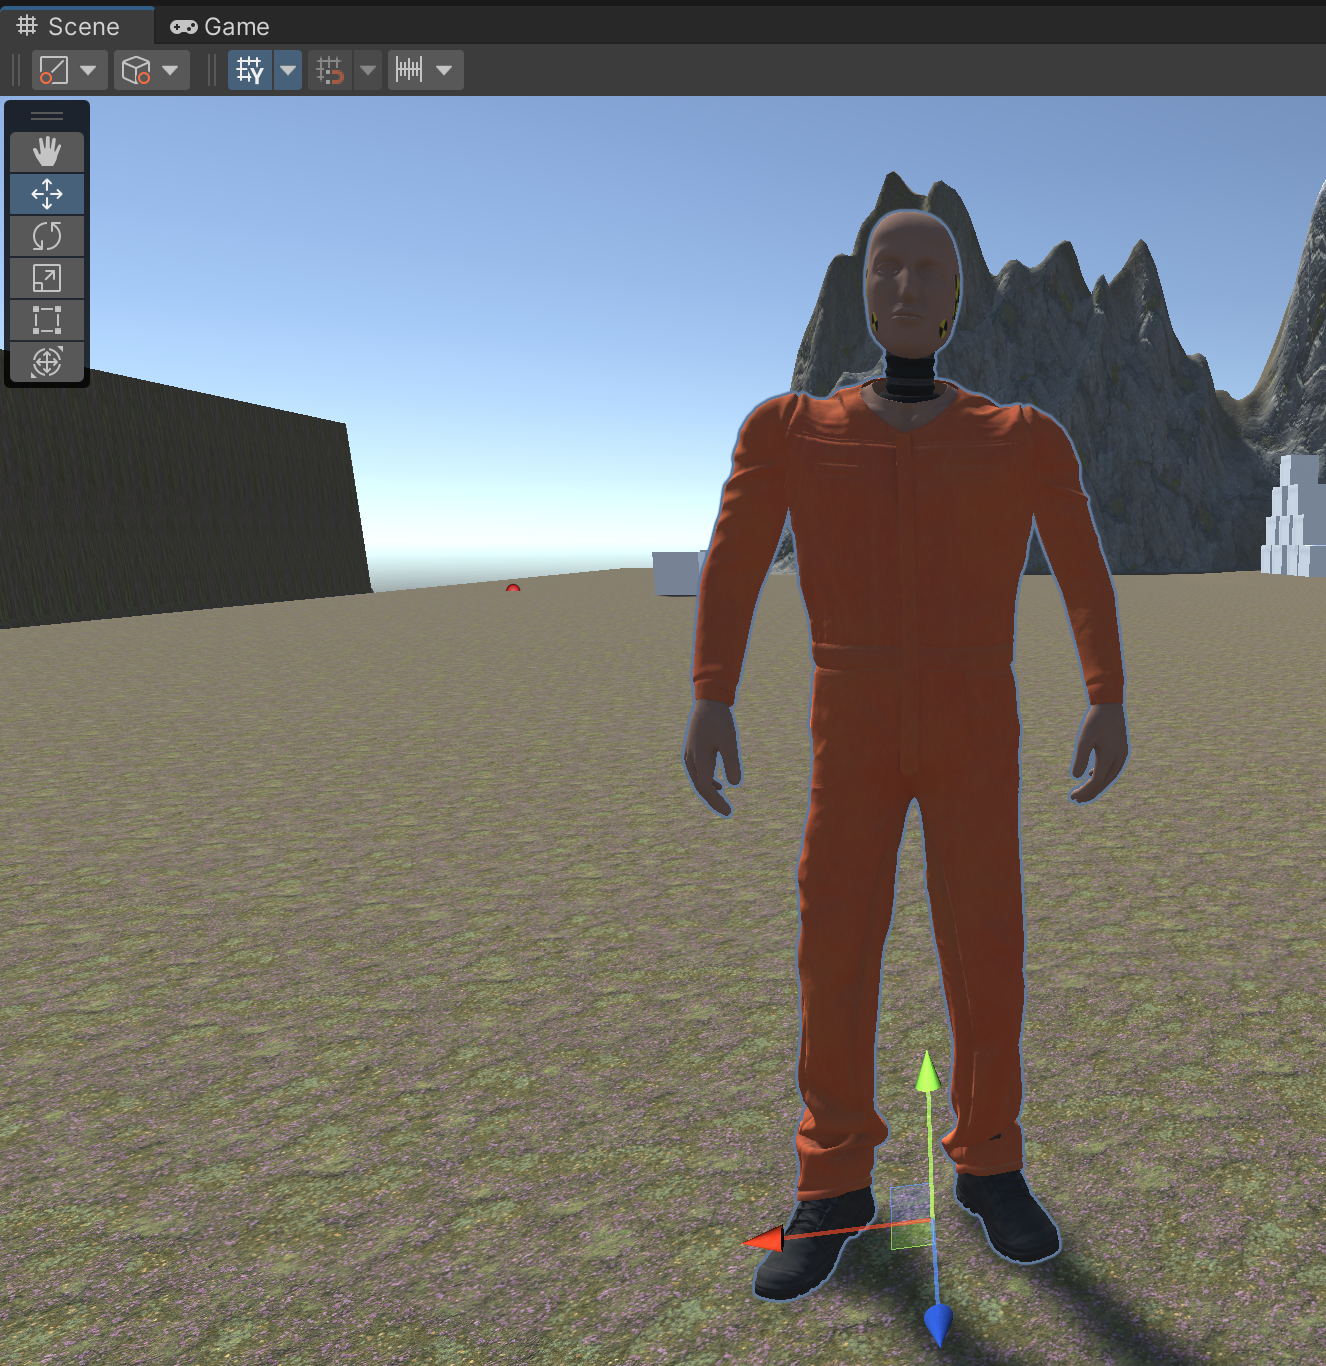
In order to coordinate all these media types, implementing a 3D character in gameplay will require a variety of components across many game objects. Most of them will be set up automatically. Drag the parent Dummy Idle asset into your scene. If you play the game at this point, you will see that it does not animate yet.
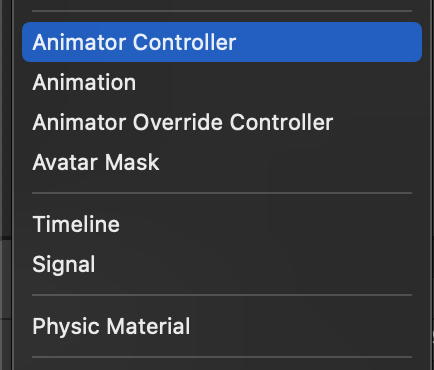
In order to enable movement and combine the 3 idle, walk, and run animations which are held in 3 separate assets, we will utilize an Animator Controller to coordinate all these assets. Because this Animator Controller will be reused for multiple humanoid characters, we will store it in the /Assets/Characters/ folder. Create an Animator Controller named CharacterController from the Project window.

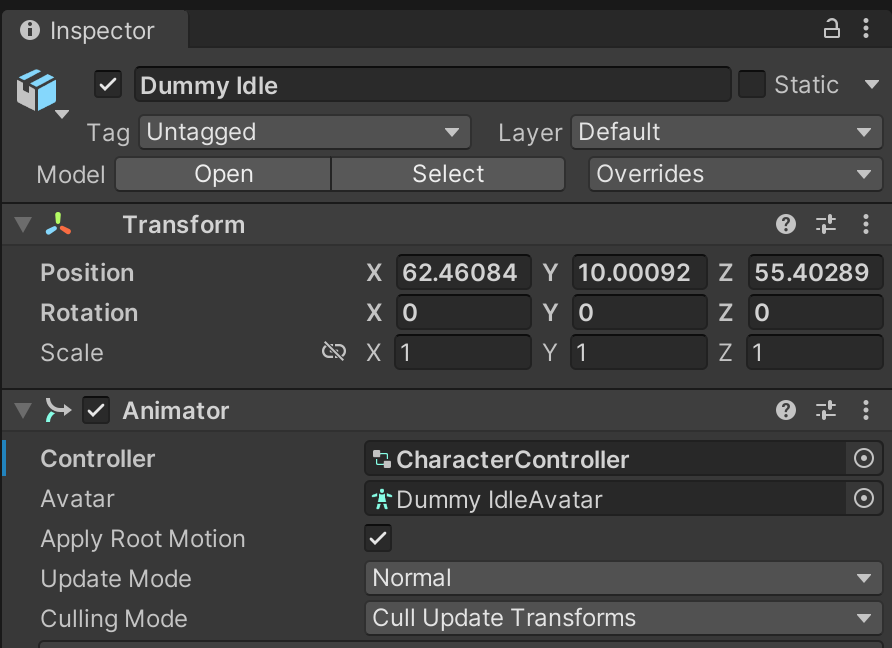
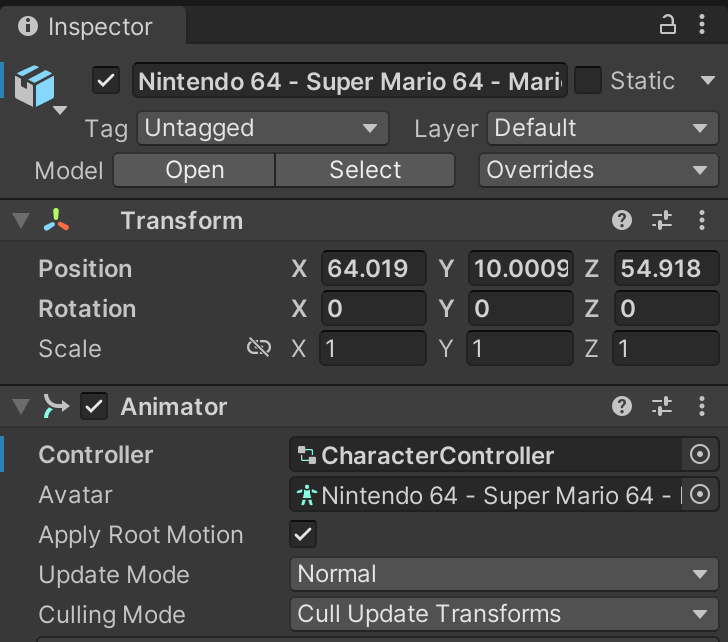
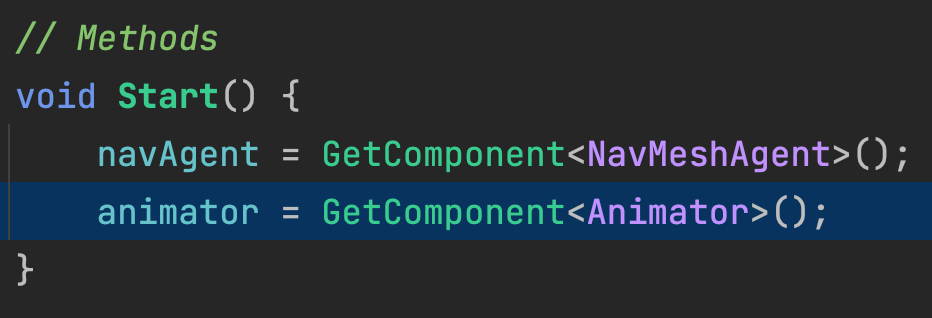
Inspect the Dummy character you just added to your scene and set it's Animator's Controller value to the CharacterController you just created.
Double-click the CharacterController to open it in the Animator window. With your 3 Dummy character assets expanded, drag the idle, walk, and run animations into the Animator window. With these animations and the animator added to your in-game character, you can now play the game and see the character animating.
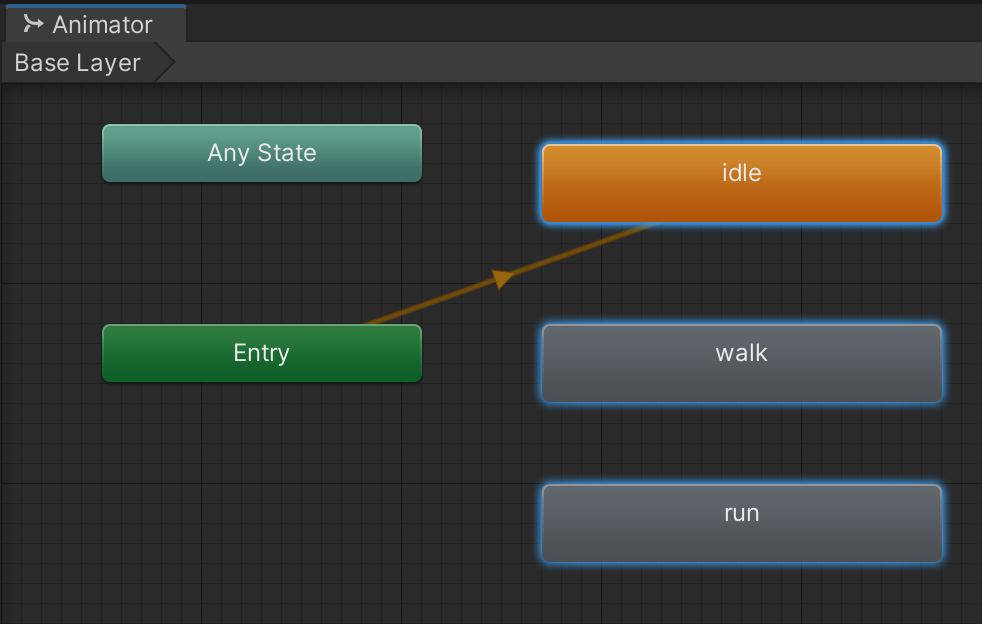
We will set up transitions in a future step. For now, you can test each of the 3 animations by changing which one is the animator's default and resuming gameplay. Confirm that all 3 animations work for your character in-game.

Before we implement the logic for switching between these animations dynamically during gameplay, we are going to demonstrate how to re-use our animations on another character through a process known as animation retargeting.
Animation Retargeting is the process of applying the same animations from one character onto another character. This process is possible only because Unity Humanoid rigs share a consistent skeleton.
Our game currently has two kinds of enemies: a chasing enemy and a patrolling enemy. By setting up two different animated characters, we'll be able to use a different one for each of these enemy types. We will also use this opportunity to show how to set up a character model that is not from Mixamo.
We will be borrowing an extracted 3D model of Mario from Nintendo's Super Mario 64. The model can be downloaded from Canvas.
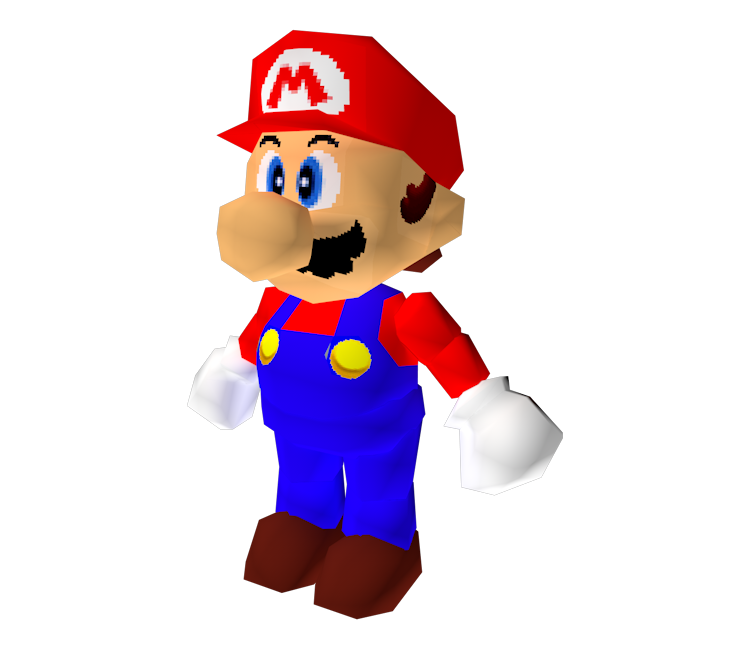
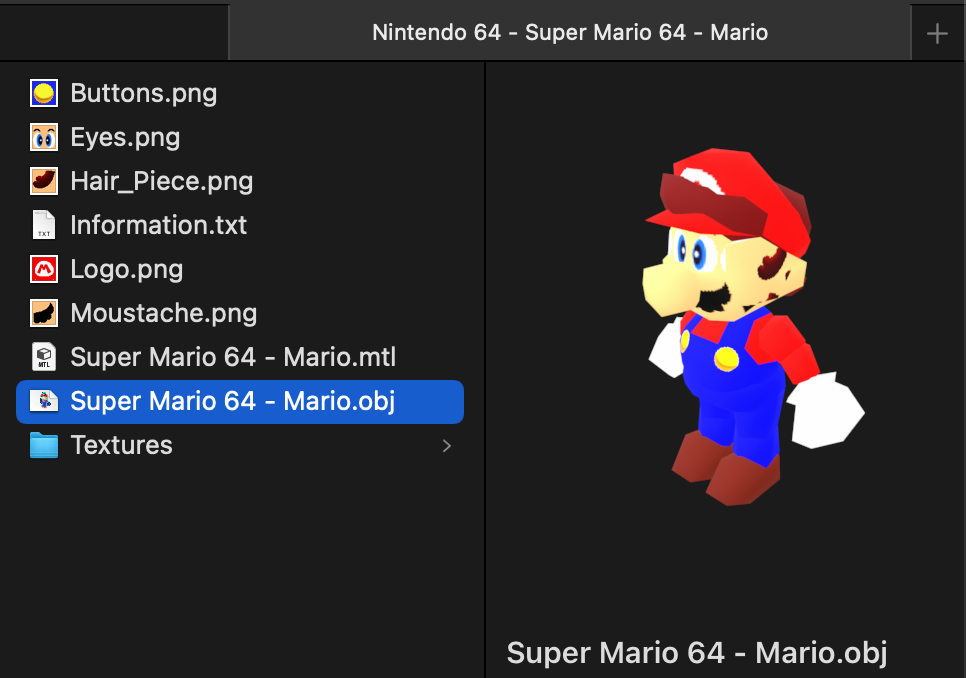
Upon download, you will receive a zip file. Keep this zip file, even after you extract its contents. Unzip the archive, you'll see that it contains a variety of file types. The 3D model data is stored in the OBJ file instead of an FBX like our other character, while the textures are in image formats. The MTL file is the material data which describes how the images are applied to the 3D model. This arrangement is very similar to Unity's own Material system. There are many other 3D modeling formats besides OBJ that are also supported by Unity.
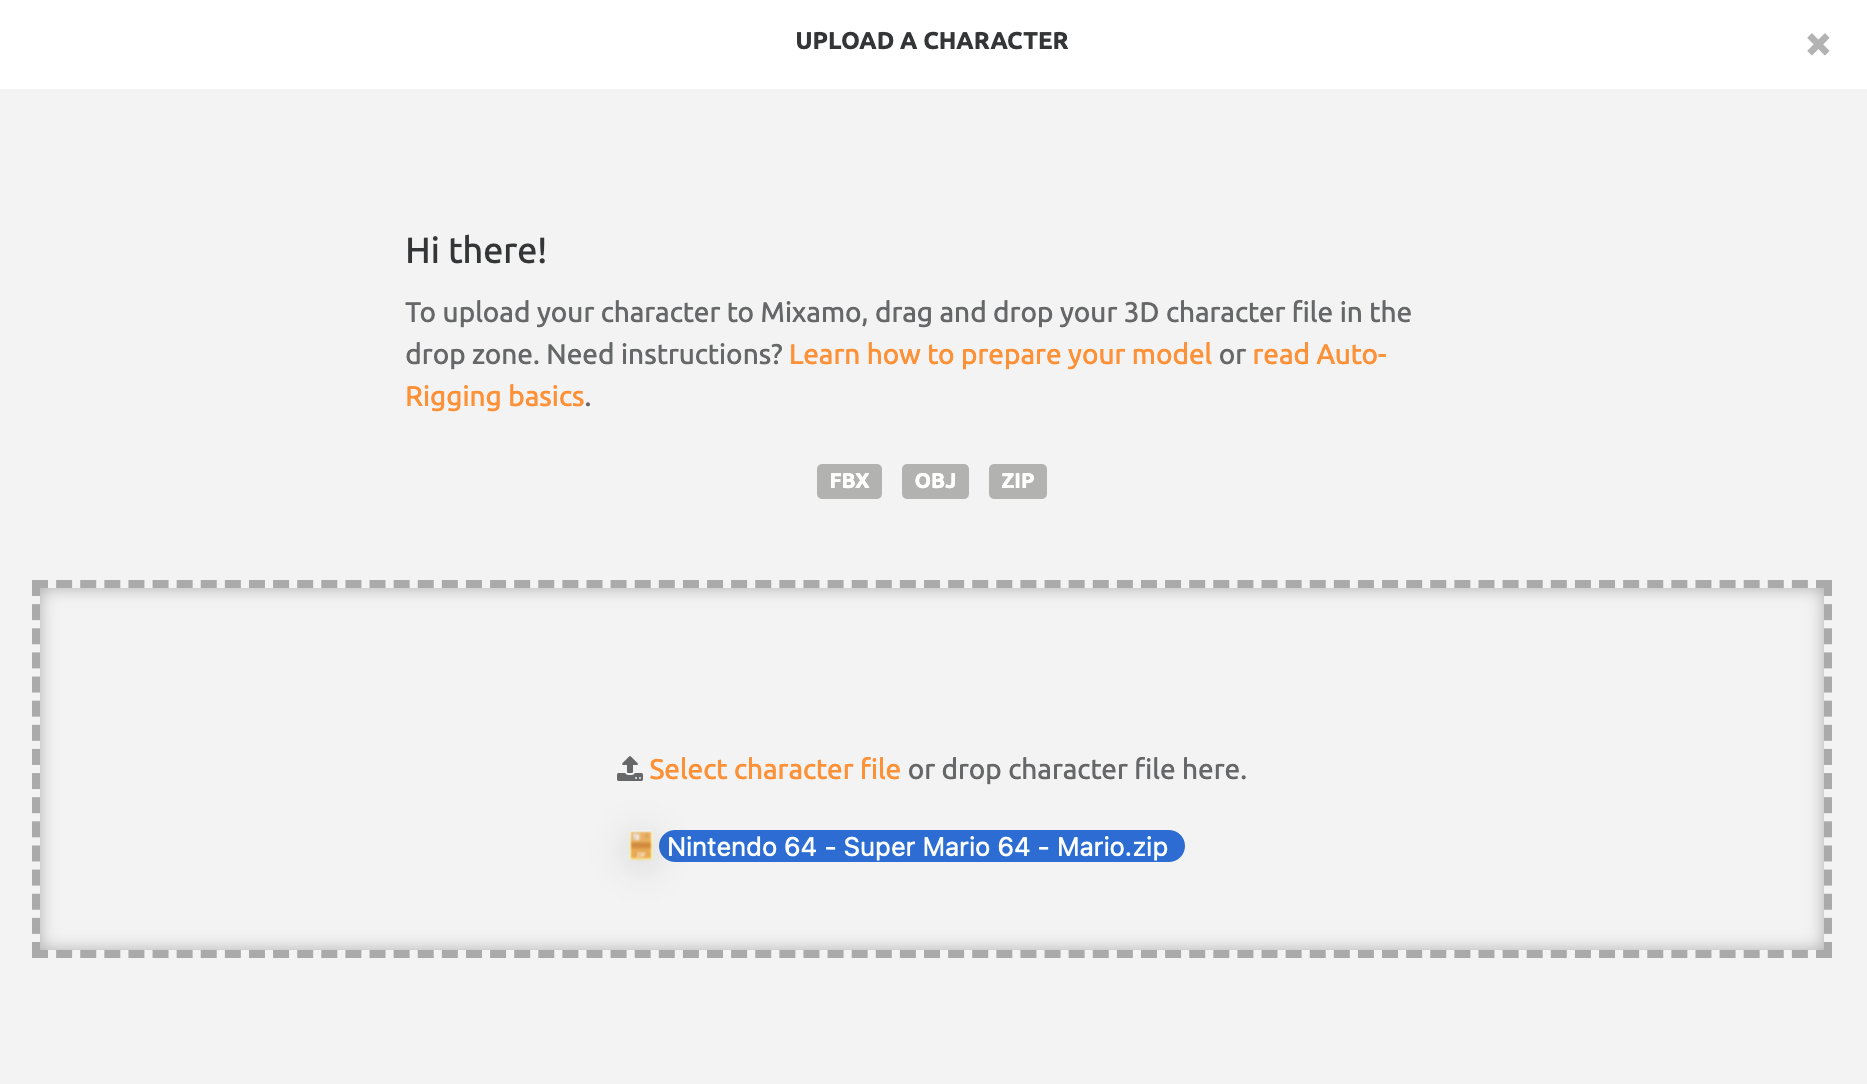
Return to the Mixamo website. Because we are supplying our own character model, click the "Upload Character" button and drag the ENTIRE ZIP file (not the extracted files) for Mario that you downloaded in the prior step. We have to supply the entire ZIP file because the model depends on several files within the archive to render properly and not just the OBJ.
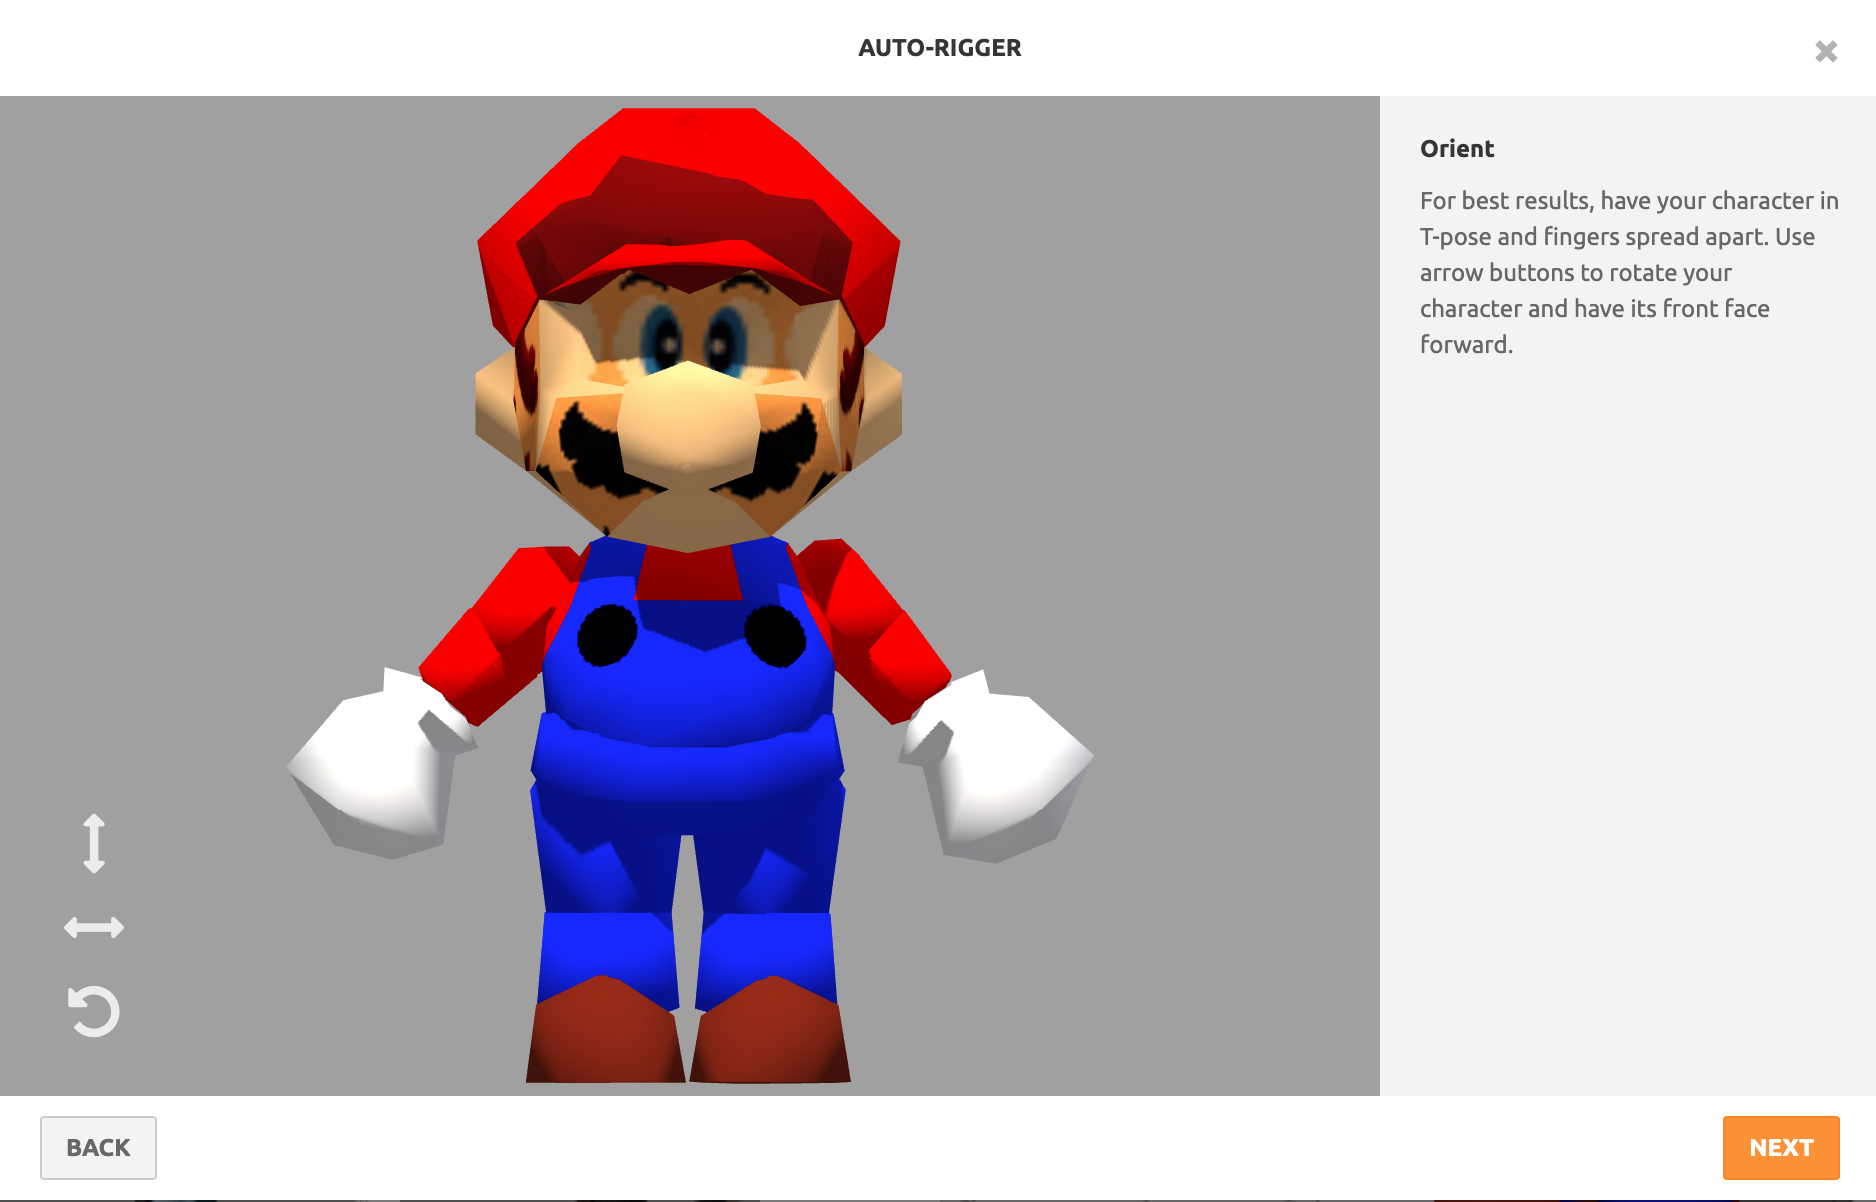
You should see a fully colored and textured rendition of Mario's 3D model in the preview screen. If the model appears as just grey, make sure you upload the ZIP file and not just the OBJ file. The purpose of this window is to make sure the tool is properly interpreting which side of the model is the front. Ensure your character is rotated to match the picture below, and click Next.
This next screen is extremely important because it normally requires an artist to understand the nuances of rigging the 3D model. To help Mixamo's auto-rigger, we need to give it some guidance on how to interpret the model. First, switch the skeleton level of detail to "No Fingers." Since our character literally has no fingers, we will reduce the complexity of the skeleton to match our simple Mario model. Next, drag each of the markers to the locations shown below and click Next. (Pay special attention to which markers are for left vs. right.)

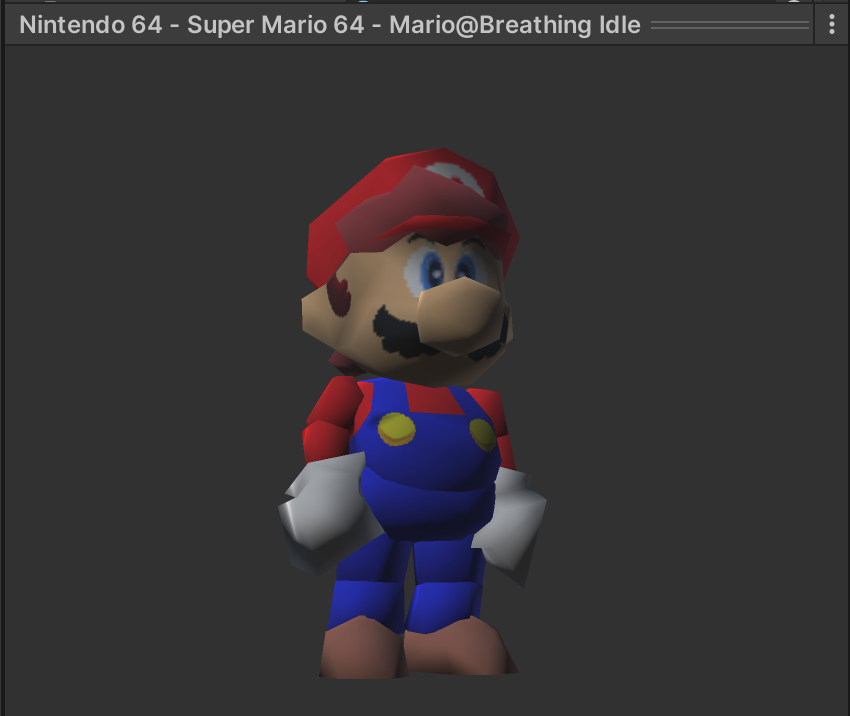
After a few minutes of computation, you will be shown a preview of animated Mario. Try selecting various animations from Mixamo's library to see Mario perform those moves. If Mario does not animate properly, you may have to try the auto-rigger again, being careful to properly mark Mario's body parts.
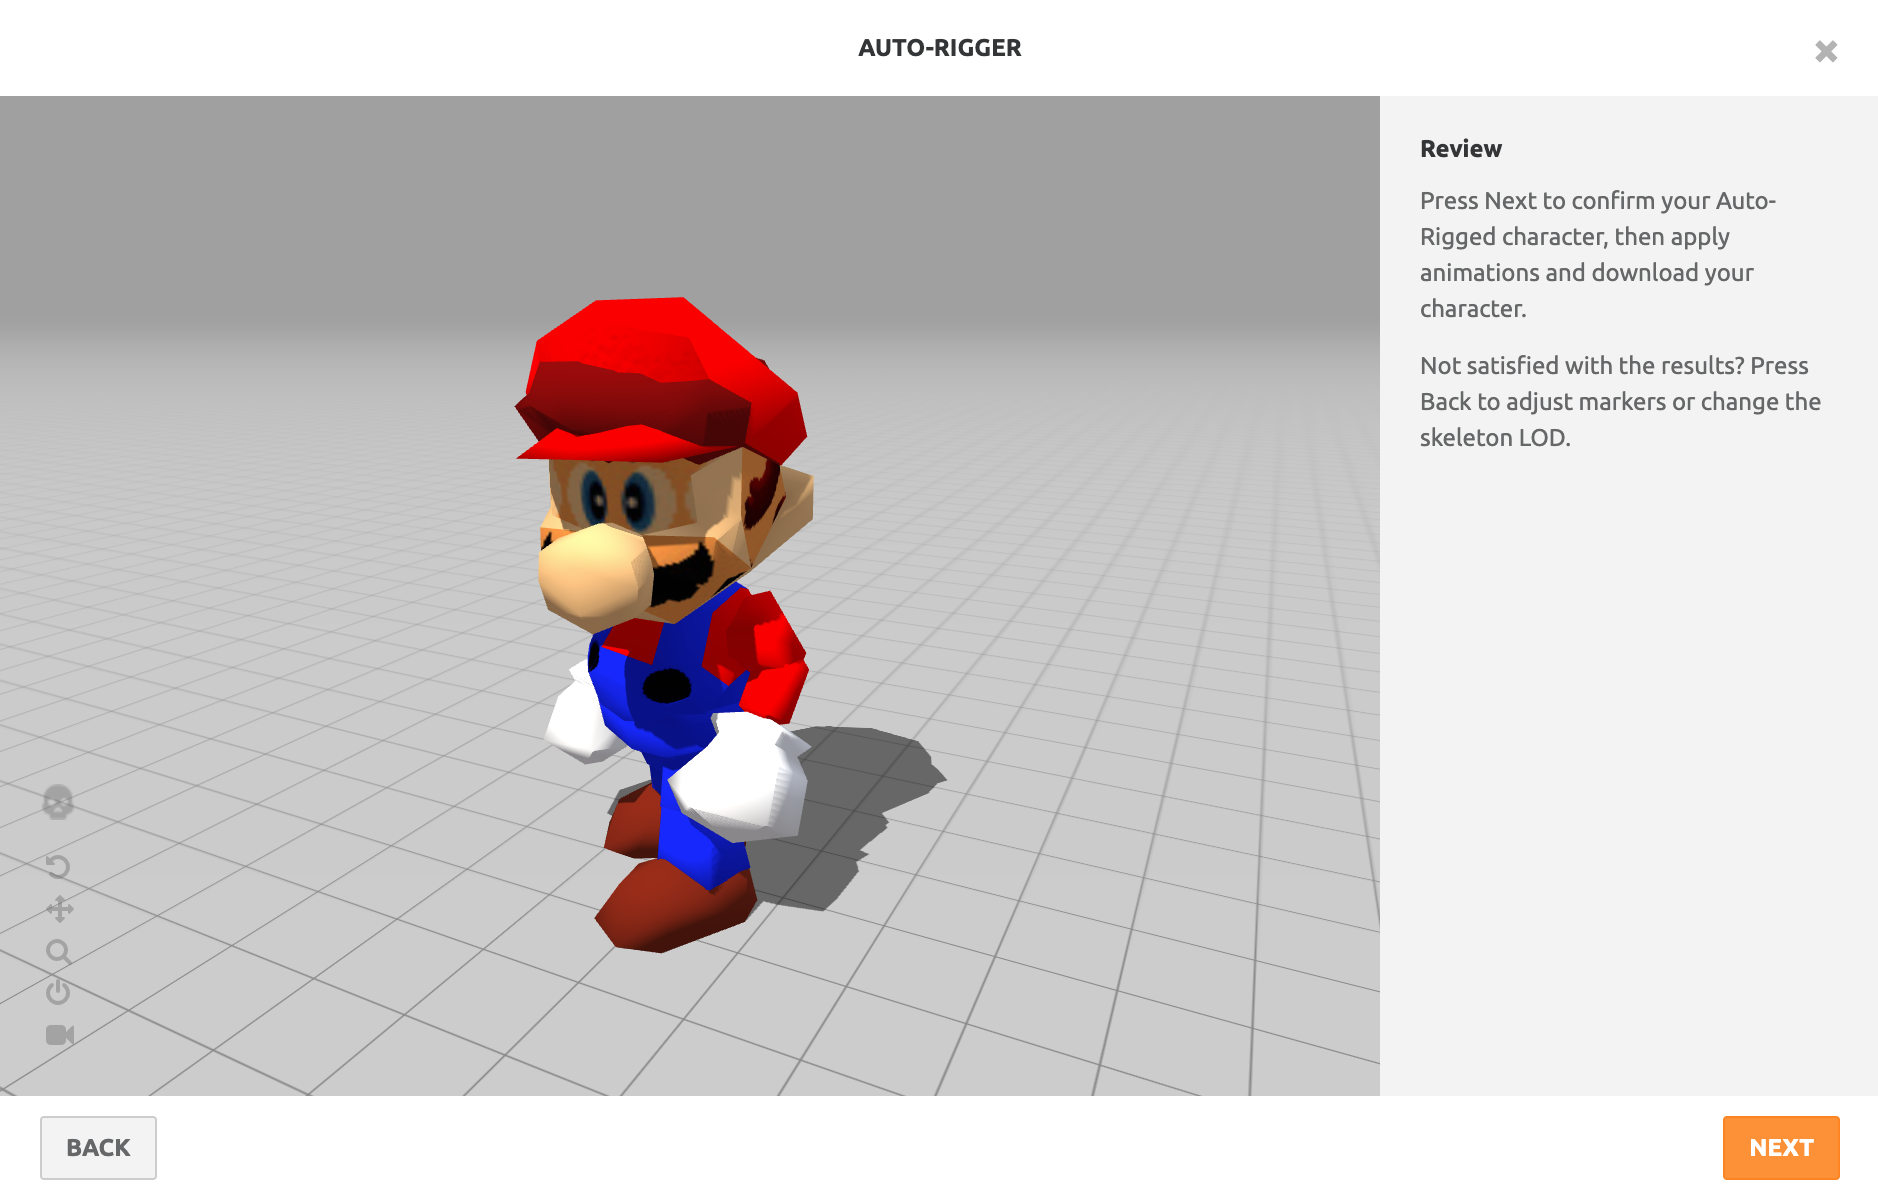
Now that Mario's model mesh is rigged to a reusable skeleton, we are able to apply an entire library of animations to the character model. Because we already downloaded the 3 animations of idle, walk, and run with our other character, we can simply download Mario with any basic animation such as idle.

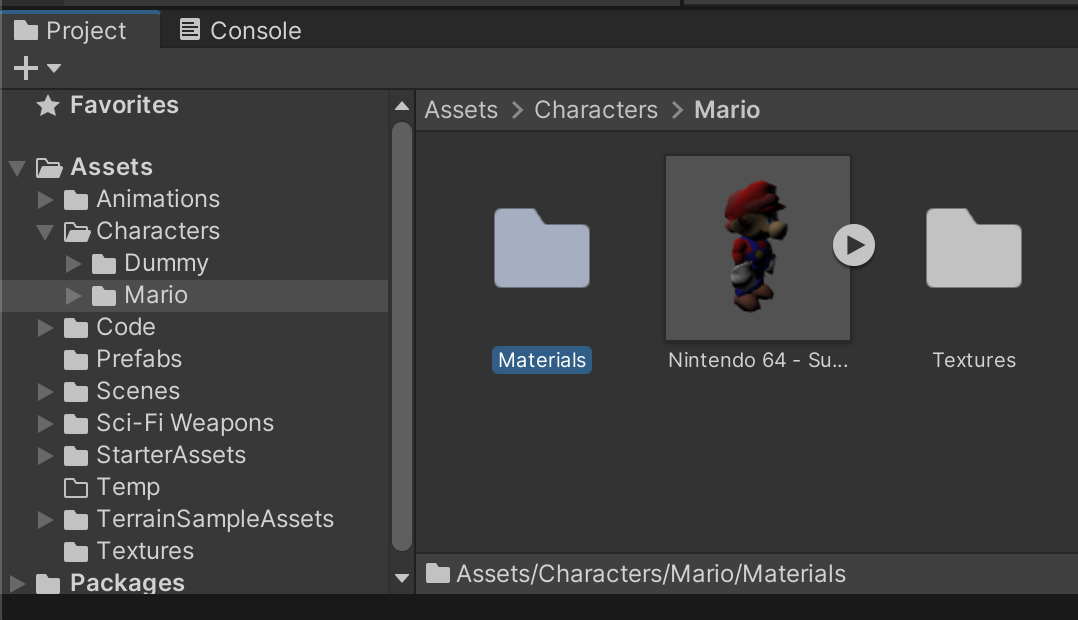
Create a folder /Assets/Characters/Mario/ and drag your Mixamo-generated Mario file into your project.
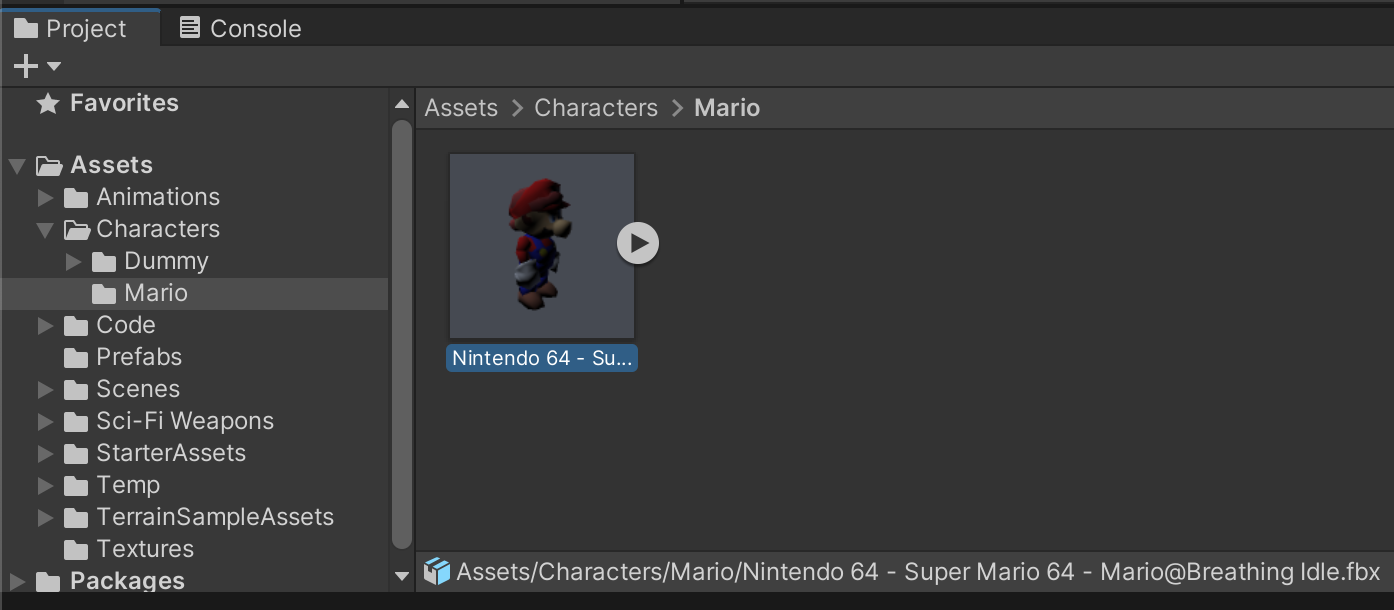
We'll need to change some settings on the model asset for it to work properly. If you inspect the Mario Idle model, you'll notice that some of the texturing is missing. Depending on how your 3D assets were made, some models may need extra clean-up before they render correctly.
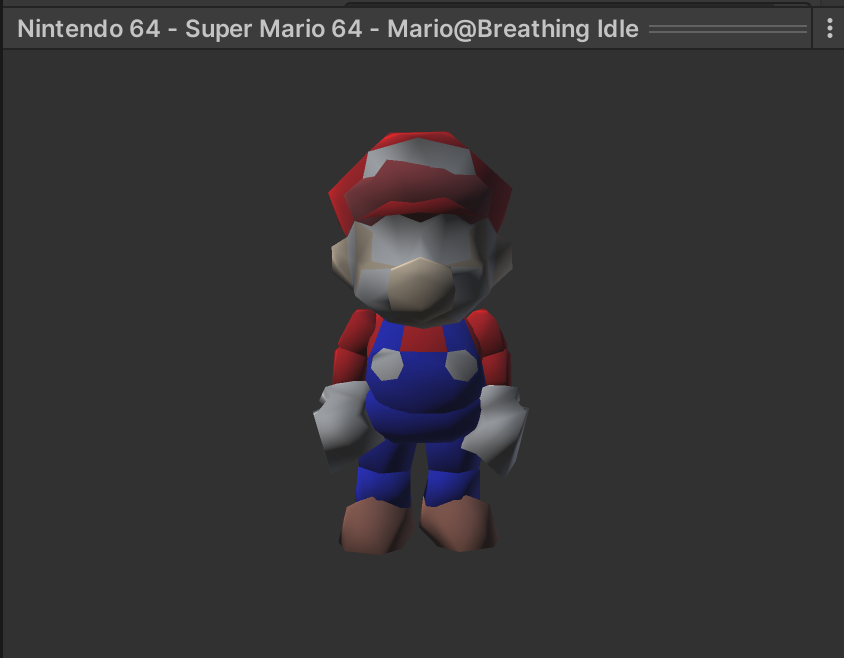
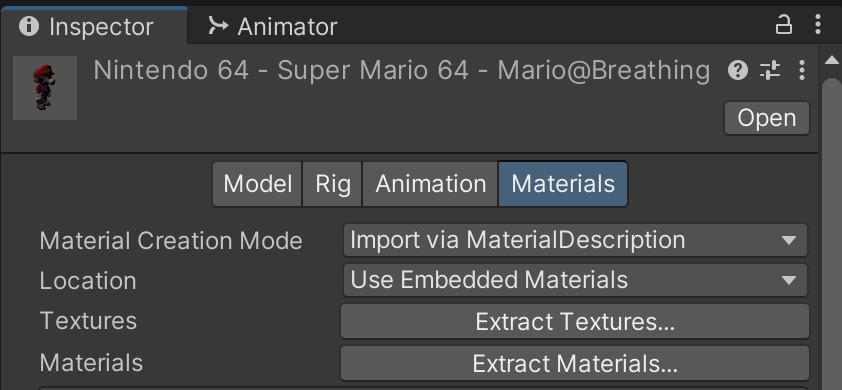
To fix these missing graphics, switch to the Materials tab when inspecting the Mario Idle asset. Click "Extract Textures" and save these in a Textures folder inside the Mario folder.
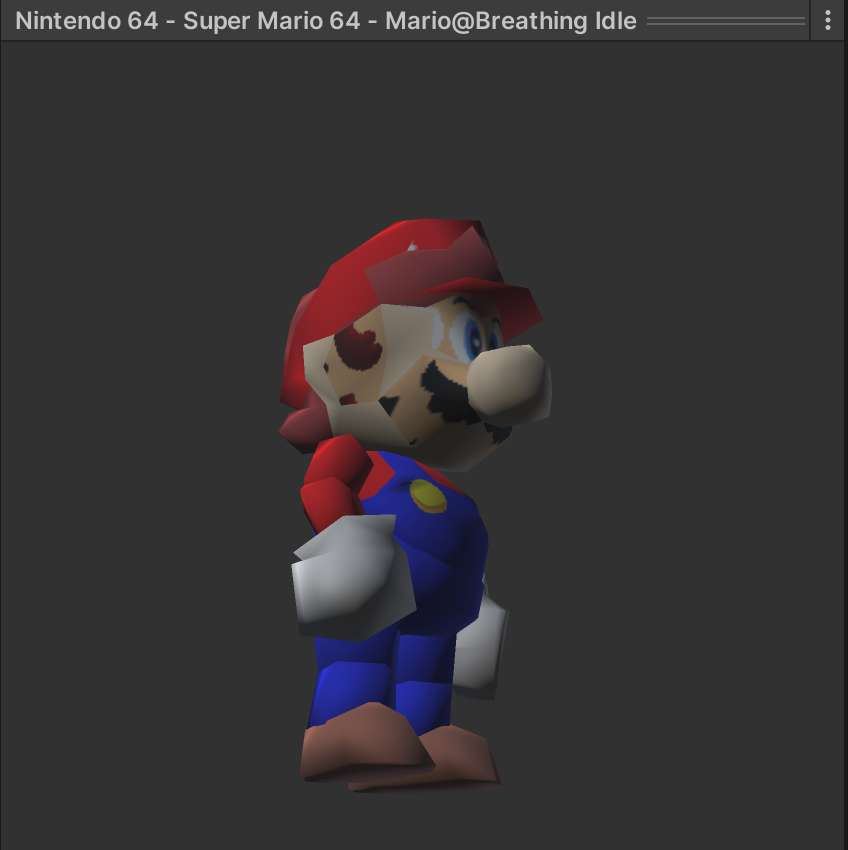
Extracting the textures restores access to the missing graphics, but some other graphical issues remain. Notice how Mario's graphics repeat/tile giving him extra eyes and hair on the edges of his face.
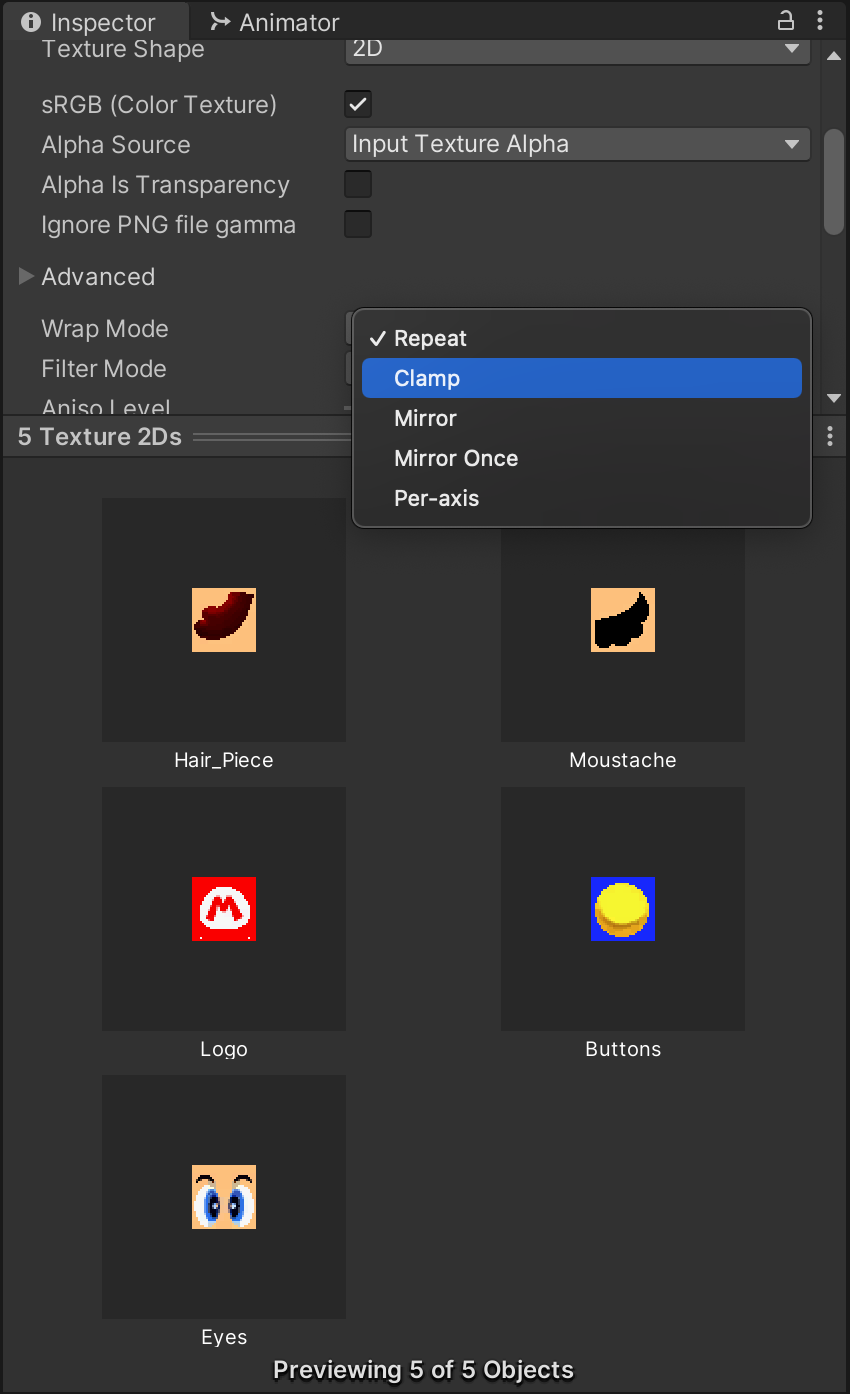
To fix this graphical anomoly, Mario's textures (which you just exported into the Mario/Textures/ folder) need to switch their wrap mode from "Repeat" to "Clamp." This ensures the textures only appear once on the 3D model and do not repeat as they wrap around the edges of the mesh. This setting should be applied to all of Mario's textures.
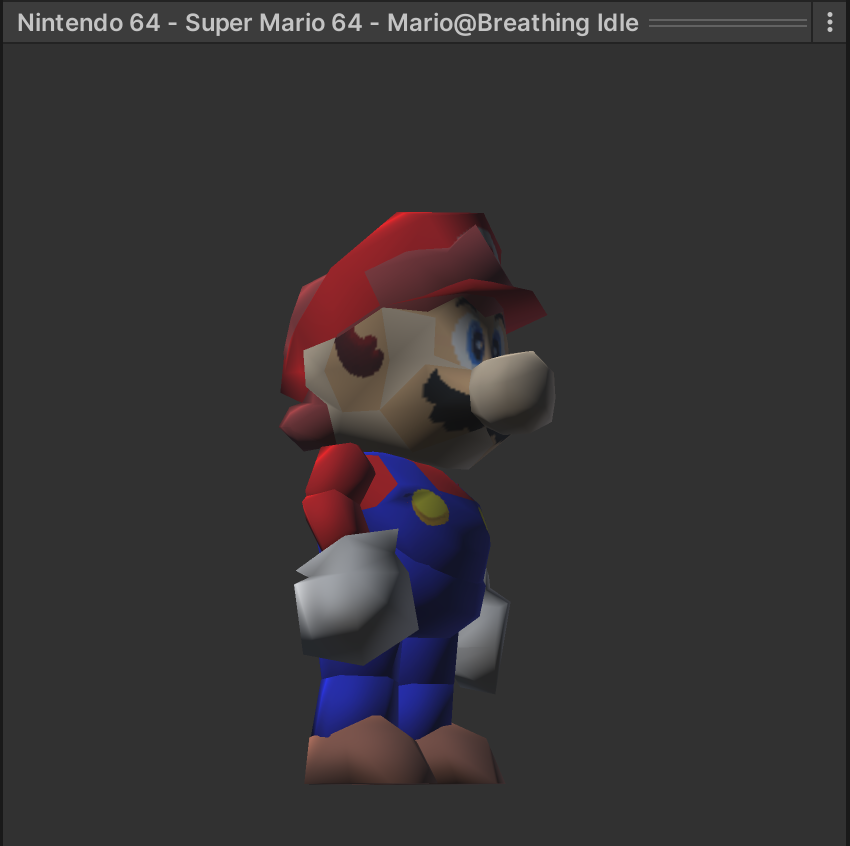
If you look at the model preview once more, nearly everything is fixed. The only problem is Mario's skin is slightly discolored allowing you to see the seams of the textures on the mesh's surface.
To fix this final graphical anomaly, return to the "Materials" tab when inspecting Mario Idle and click "Extract Materials." Save these materials in Materials folder inside the Mario folder.
Find "Skinmat" in the newly created Materials folder and adjust the Albedo to match Mario's skin color to the rest of his graphics. Albedo is the base coloring that this material applies to the model.
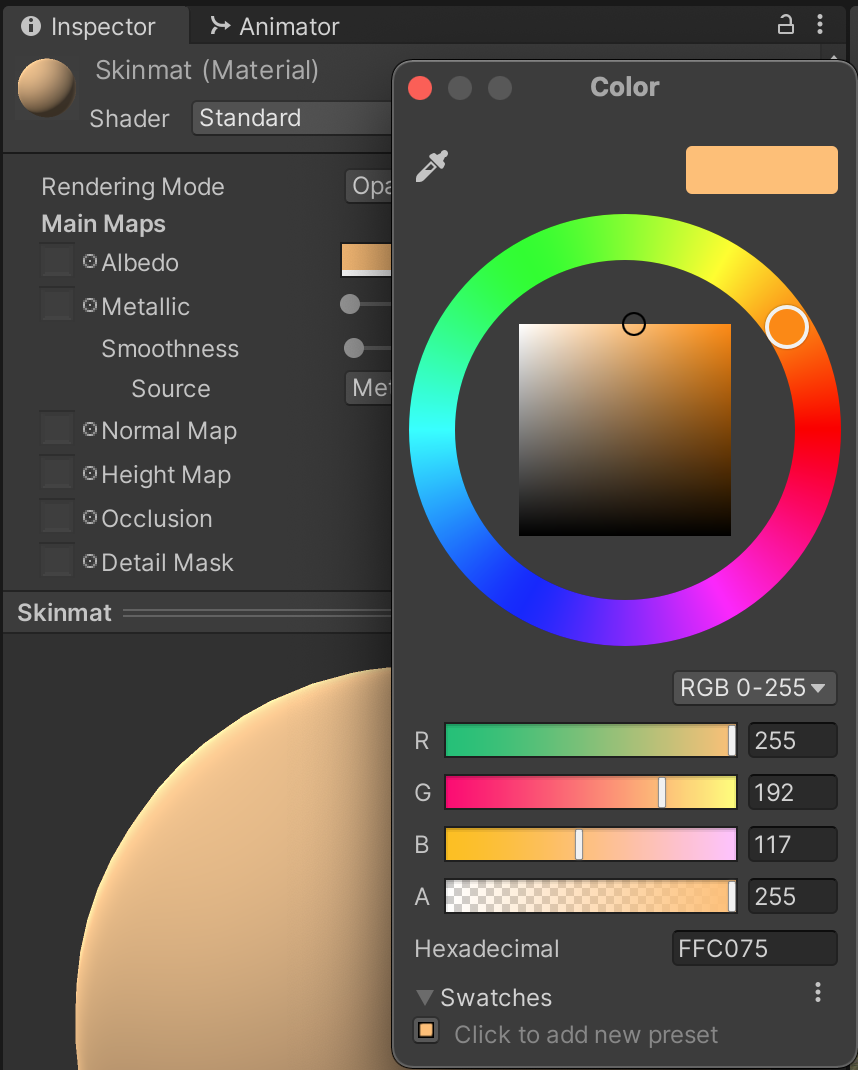
With the right coloring, Mario's textures should all blend seamlessly with the rest of the model. These graphical issues stem from Mario originating in an old format stored in the original 1996 video game. Converting this old Mario model through several formats and processing it through tools that didn't exist in 1996 is certain to create slight misconfigurations which we just fixed. Other 3D models may exhibit their own unique issues depending on their format and history.
Now that Mario is rendering properly, we'll need to change other settings on the model asset for it to animate properly. Within the Rig tab, switch Animation Type to Humanoid. Hit the "Apply" button to confirm the change. This enables the same expanded set of humanoid features as our other character.
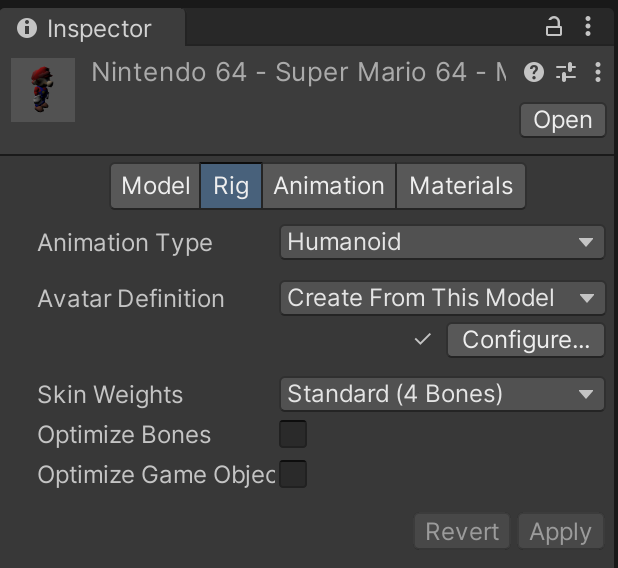
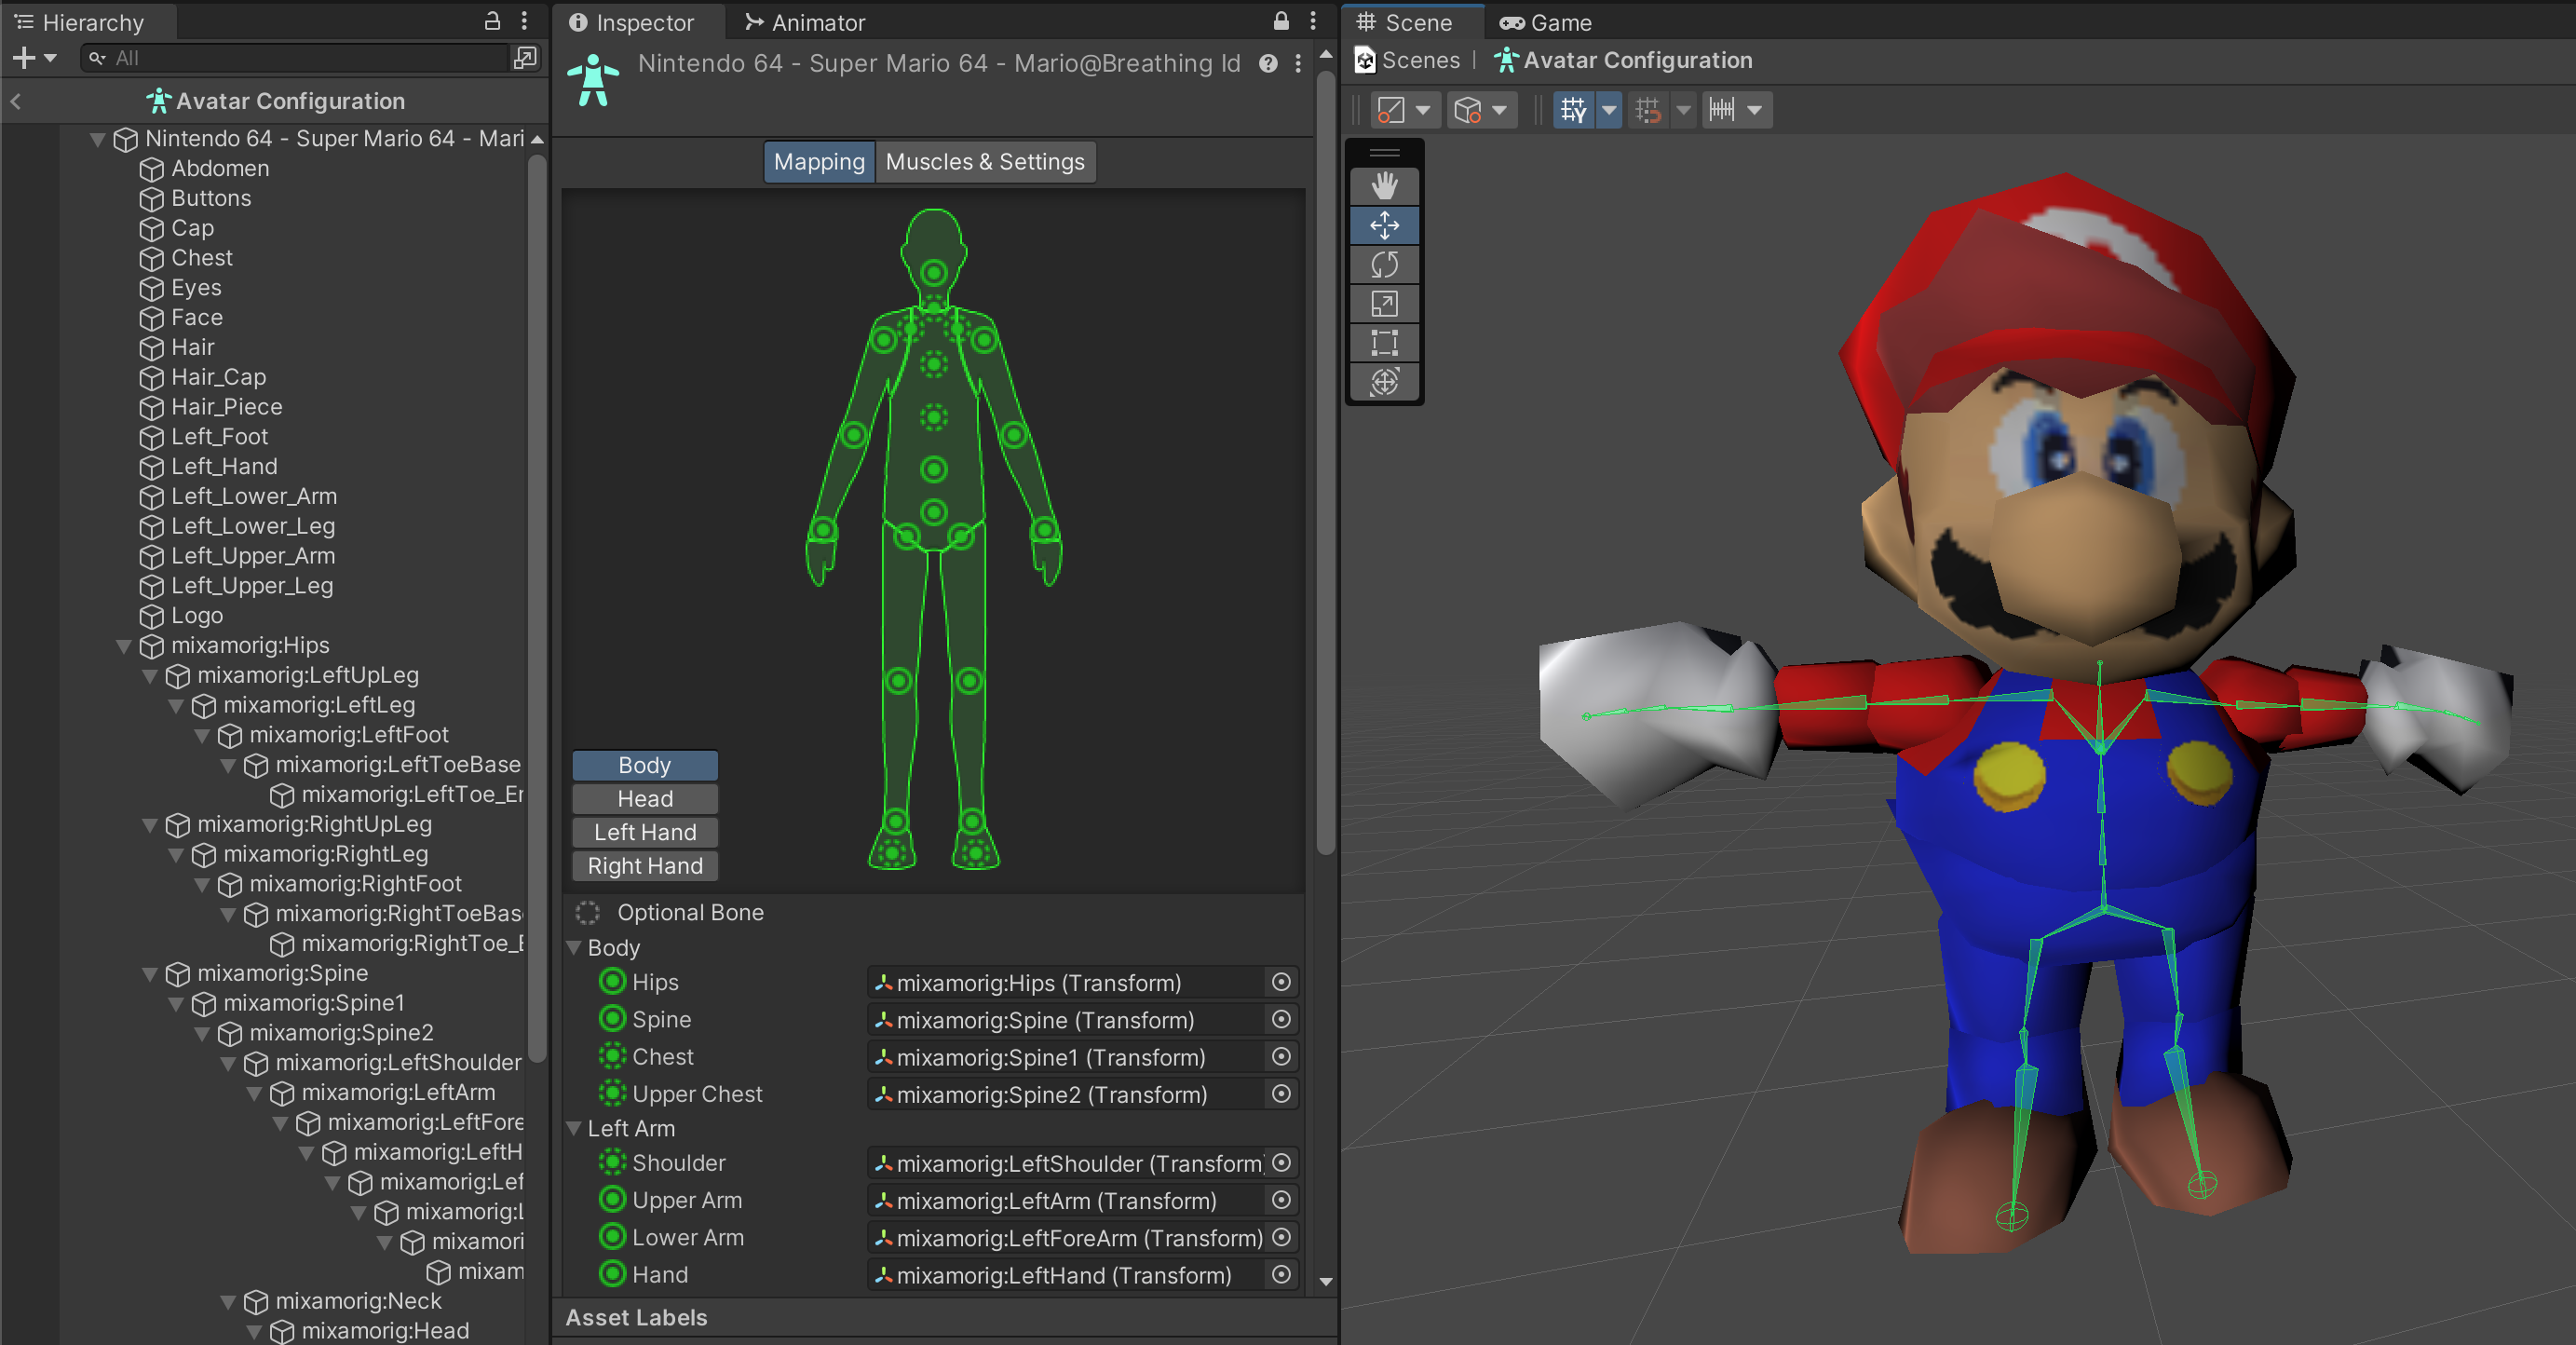
Click Configure next to Avatar Definition to preview how Unity has interpreted the Mario rigging. You should be able to confirm that Mario has been properly configured based on his t-pose.
Drag Mario onto your scene next to your first character.
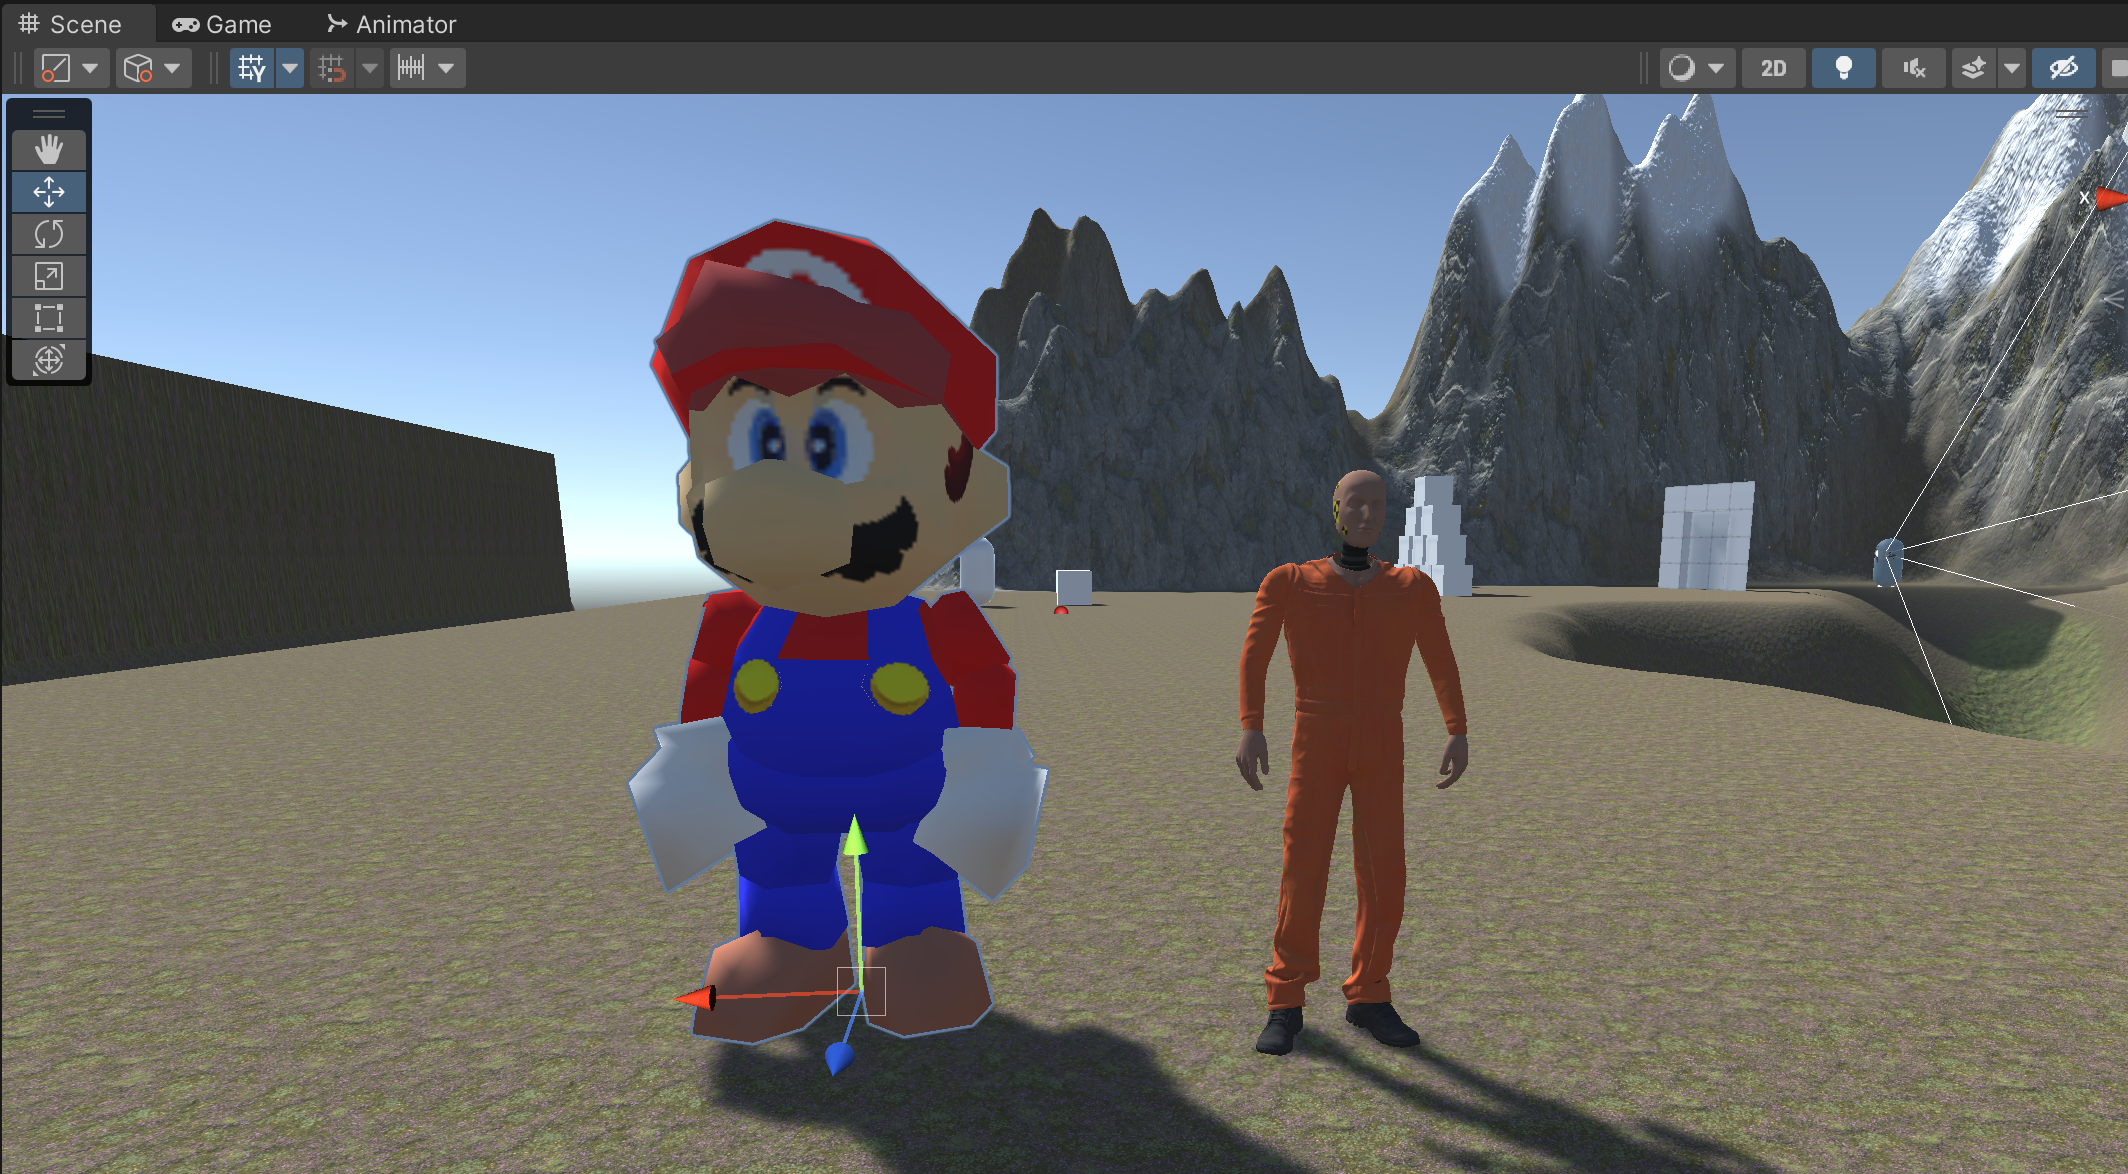
Mario should also use the same character animator controller you made previously. The ability to re-use these animator and animation assets is the benefit of animation retargeting, which requires using the Unity humanoid rig.
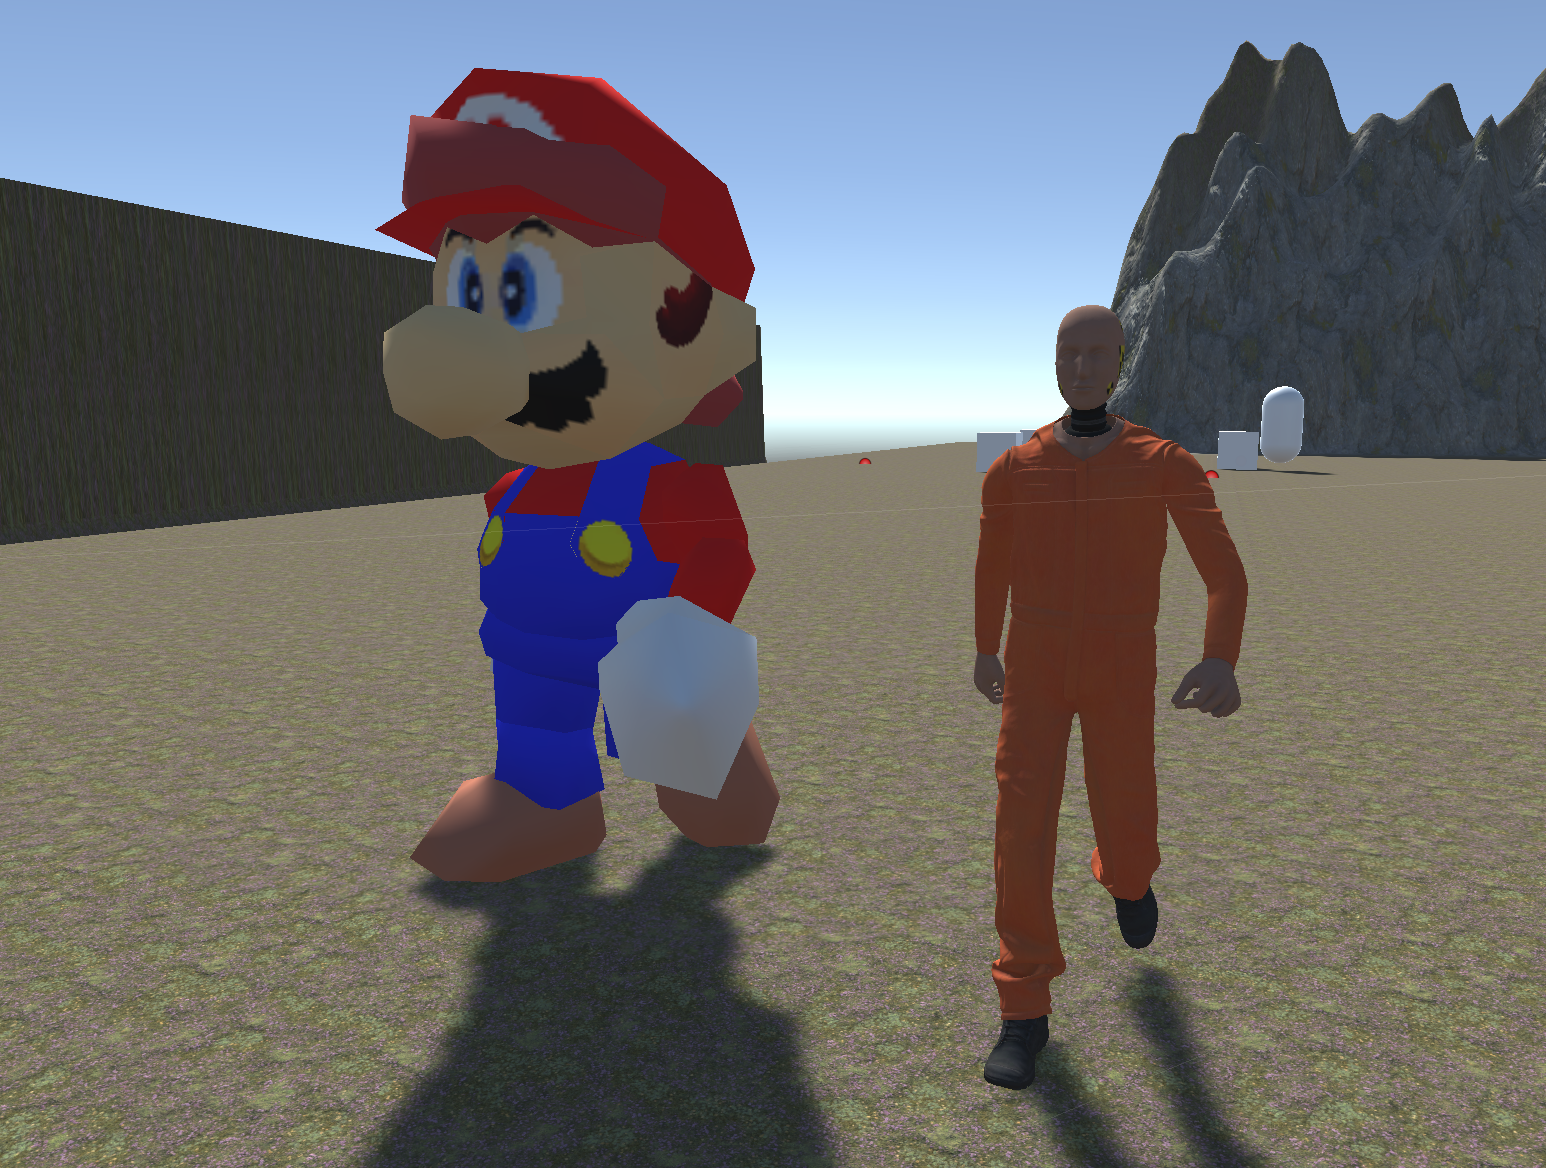
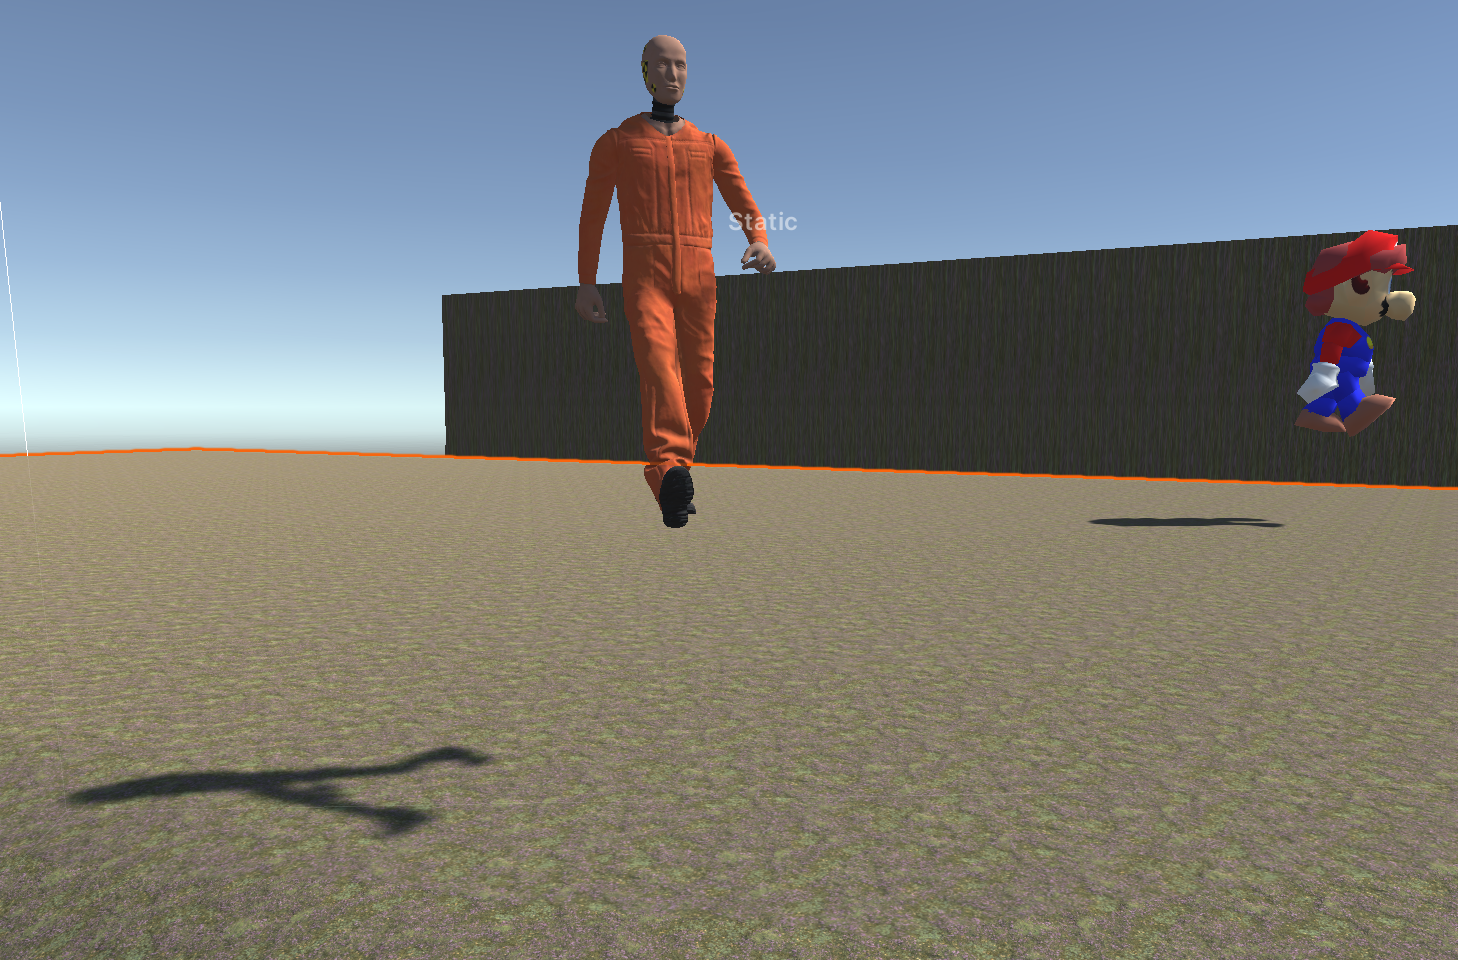
Play the game and test all 3 animations again to confirm that both characters animate properly and (for now) move in sync.
With all of the character assets prepared, the final step is to create the logic for playing the correct animations based on dynamic character movement during gameplay.
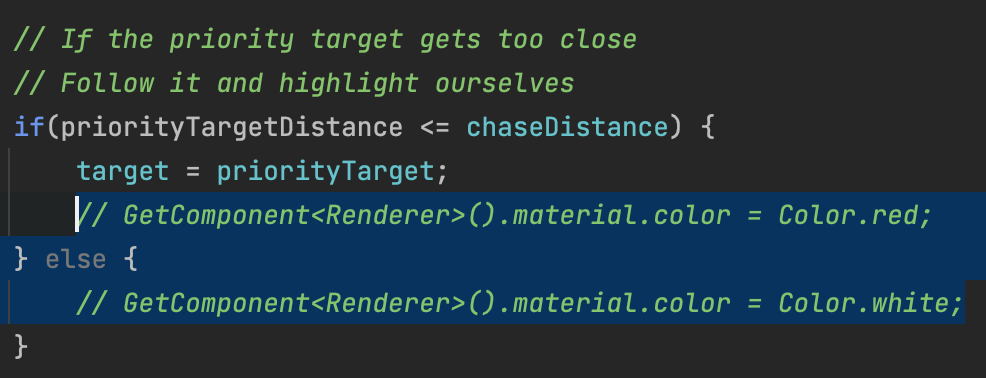
We will be reusing all of our old enemy code, but we have to make a small change because our new characters do not have the same mesh renderer structure as the old capsule enemies. In the enemy script, comment out the code that highlights the character in red when it is chasing you. This approach does not work on more complex character models.
Next, we will implement our old enemy behaviors on our new characters. Using enemy #1 and enemy #2 from the prior assignment as a reference, configure Enemy and NavMeshAgent components on both Dummy and Mario. (A shortcut is to just copy and paste the components from your old enemies onto your new characters to retain the prior settings.) The new characters should function identically to the old enemies in the prior assignment: one of the characters should follow you all the time, and the other should patrol. Turn off the old capsule enemies once your new characters have been set up. Test the game now and confirm that while the characters chase/patrol, there are a couple glitches: 1) The characters are not grounded. 2) The motion of the characters' feet do not match their speed.
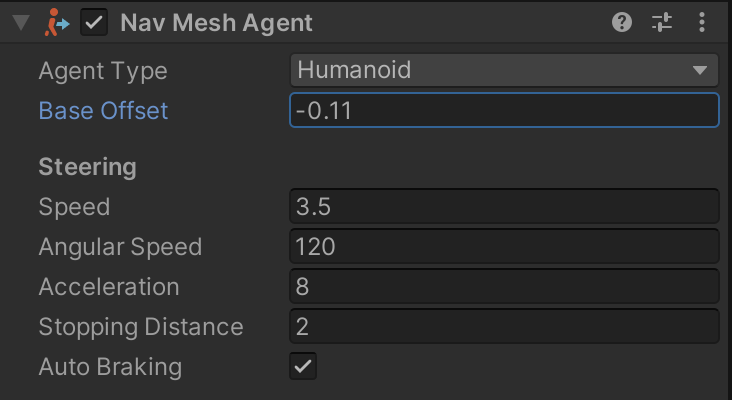
To place the character's feet on the ground, adjust the "Base Offset" of each NavMeshAgent. 0 is not automatically the correct value. Test until you find the right value. Each character will differ.
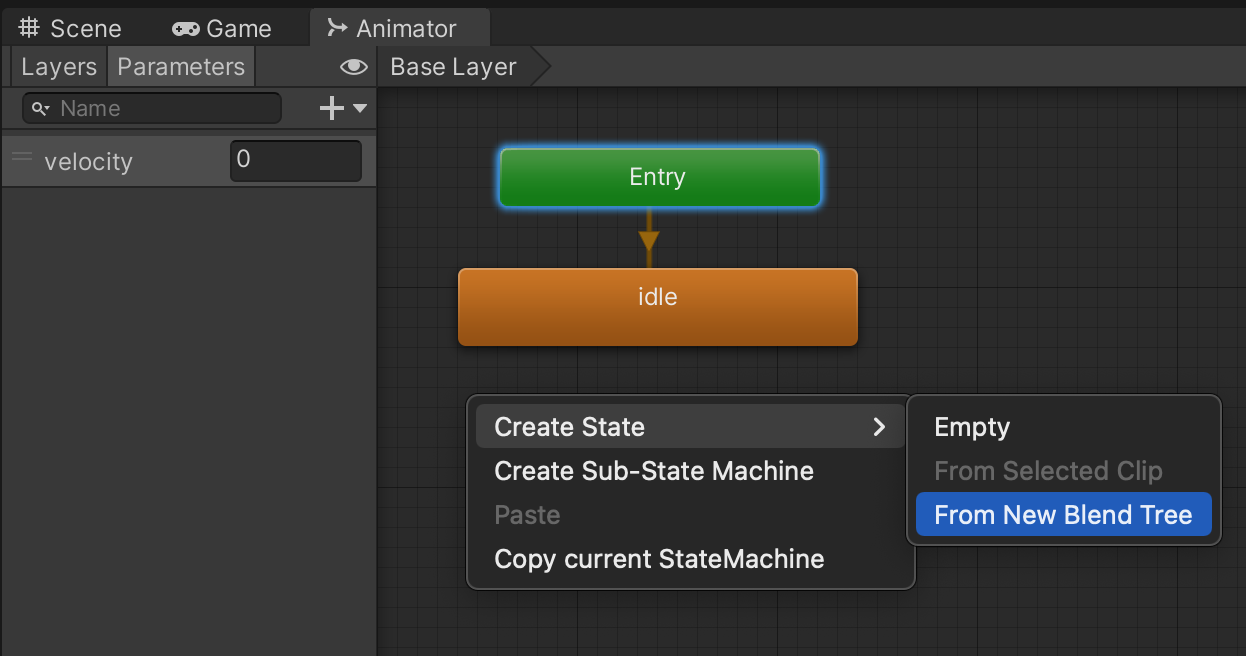
After you've confirmed the characters are properly grounded, double-click your character animator controller to open it in the animator tool. Delete "walk" and "run." Add a float parameter for "velocity" and right-click to create a new blend tree.
Using the inspector, rename this new blend tree to "moving" and set up transitions both directions between "idle" and "moving." The animation is moving when the velocity is high enough. Notice that (unlike with 2D animations) we use a Transition Duration value to create a blending animation where we can be partially idle and partially walking.
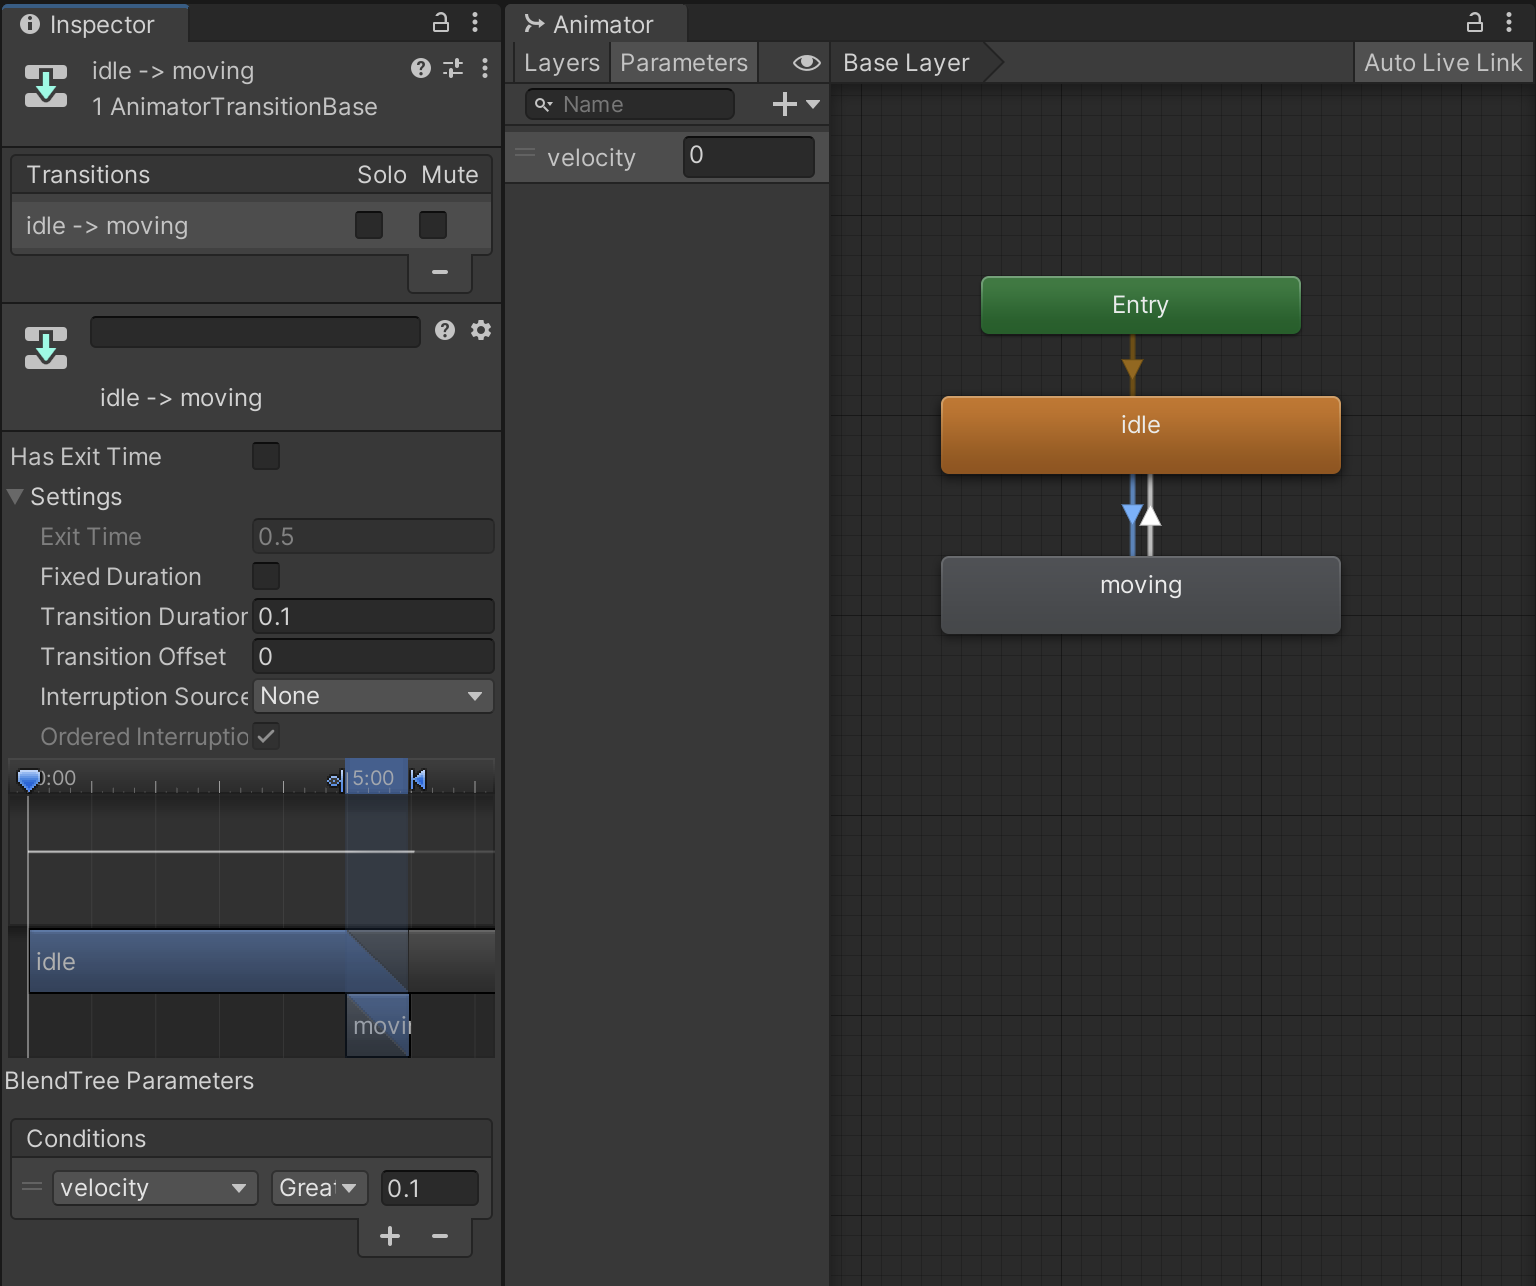
We transition back to idle once the velocity slows down.

Double-click "moving" to enter the blend tree. Select the blend tree node and configure a 1-dimensional blend using the "velocity" parameter. The two motions we are blending will be the "walk" and "run" animations you downloaded from Mixamo. (Expand your character assets to select them.)
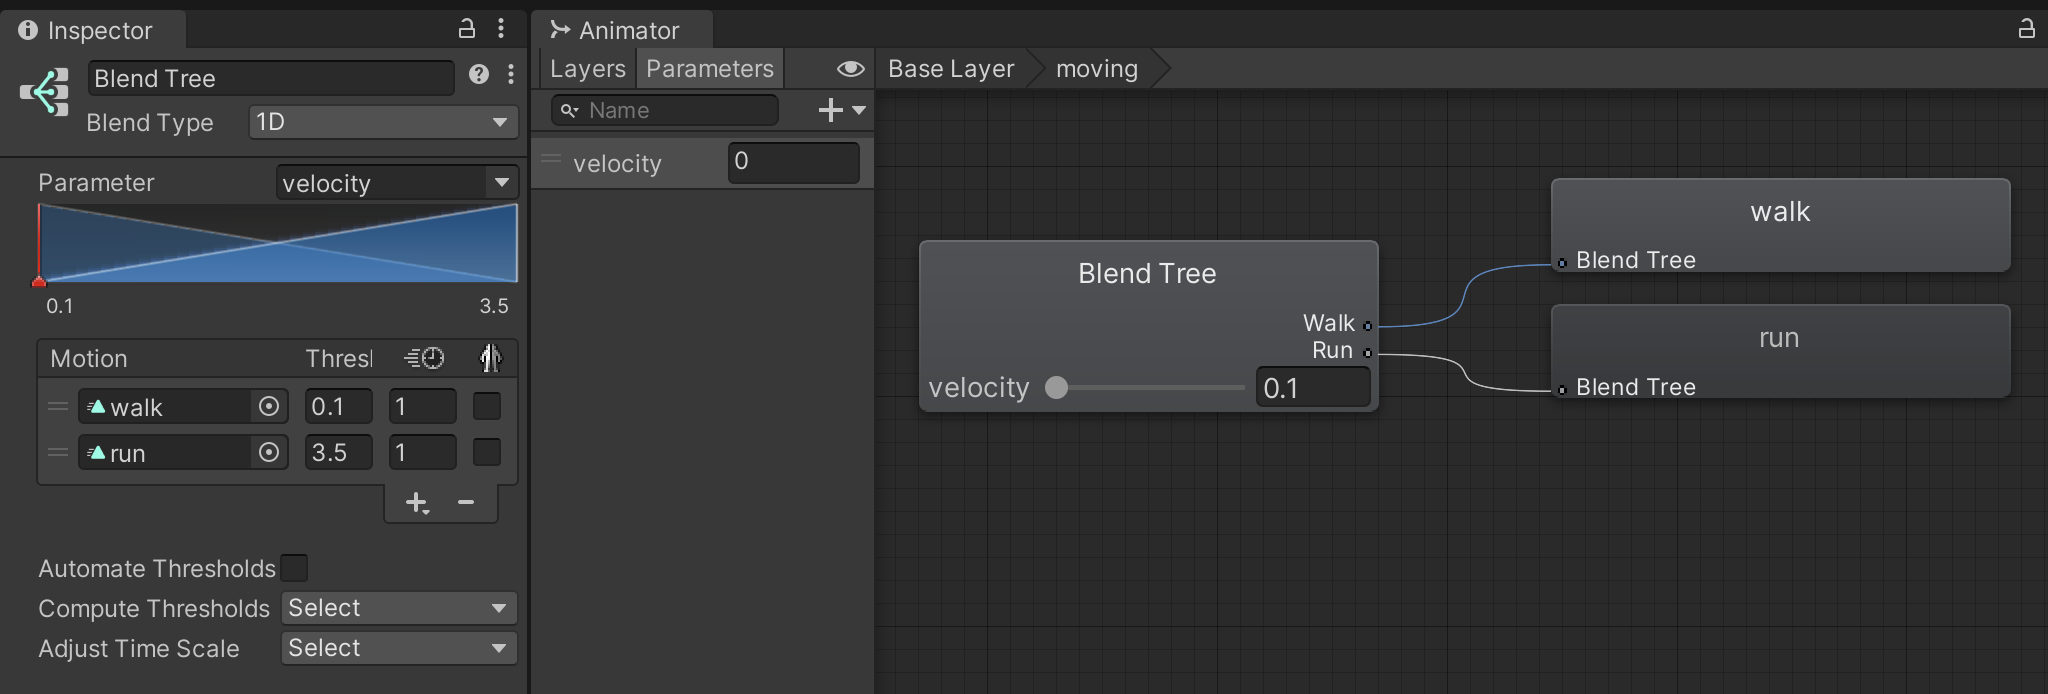
Notice how the graph potrays a blending of the two motions as one decreases and the other decreases. We change the threshold values for each motion to adjust where each motion is at its fullest. "Walk" has a starting threshold that matches the earlier transition conditional. It doesn't make sense to have "walk" start at 0, if we are not even showing the walk animation yet. We push "run" to a farther threshold so that the "run" animation is shown fully only once we have reached the full speed of our character.
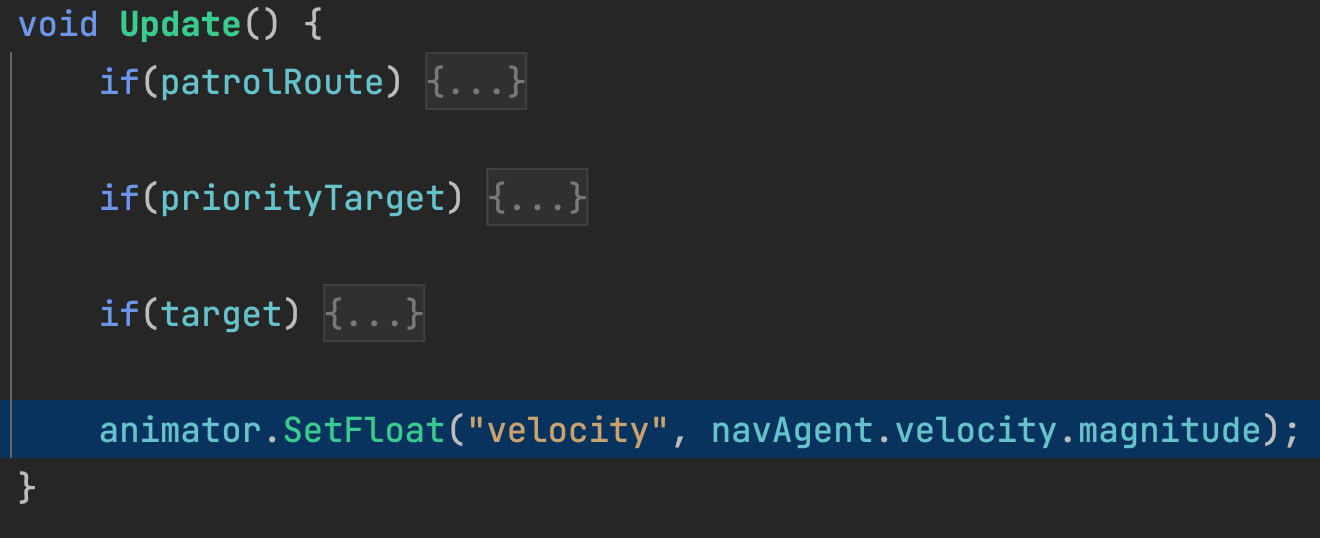
Finally, we enhance our enemy behavior to share the velocity measurement from NavMeshAgent with the Animator through the velocity parameter.

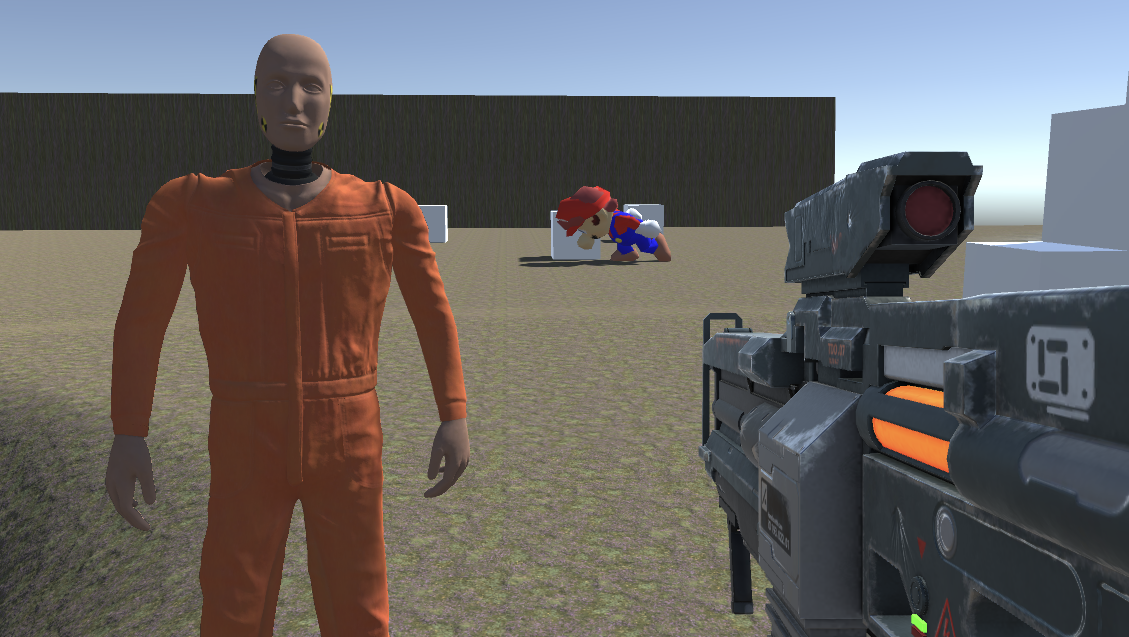
Playtest your game. Each character should exhibit the different behaviors of enemy #1 vs enemy #2. As the characters go through their movements, they should smoothly blend and transition between idle, walk, and run. Their feet should move at an appropriate speed for the overall motion of the body with minimal foot dragging or gliding.
This technique used only a 1-dimensional blend between walk and run. There are many other advanced techniques and blends you can do in the future, such as this 2-dimensional blend tree (shown below) that includes turns and backtracking as depicted in this example screenshot from Unity's documentation. (This is described only as an example. You do not need to create this right now.)

Playtest to ensure all interactions work as expected and that the addition of any new features hasn’t broken any earlier interactions.
SAVE any open files or scenes.
Submit your assignment for grading following the instructions supplied for your particular classroom.