Set Up Scene
We will re-use all of the terrain and character setup from your prior assignment. Duplicate your Q3 scene and name it Q4. Make sure you have opened Q4 and are conducting your edits in the correct scene.
Supporting files for VG2 quests are part of a single archive that you can download here.
We will re-use all of the terrain and character setup from your prior assignment. Duplicate your Q3 scene and name it Q4. Make sure you have opened Q4 and are conducting your edits in the correct scene.
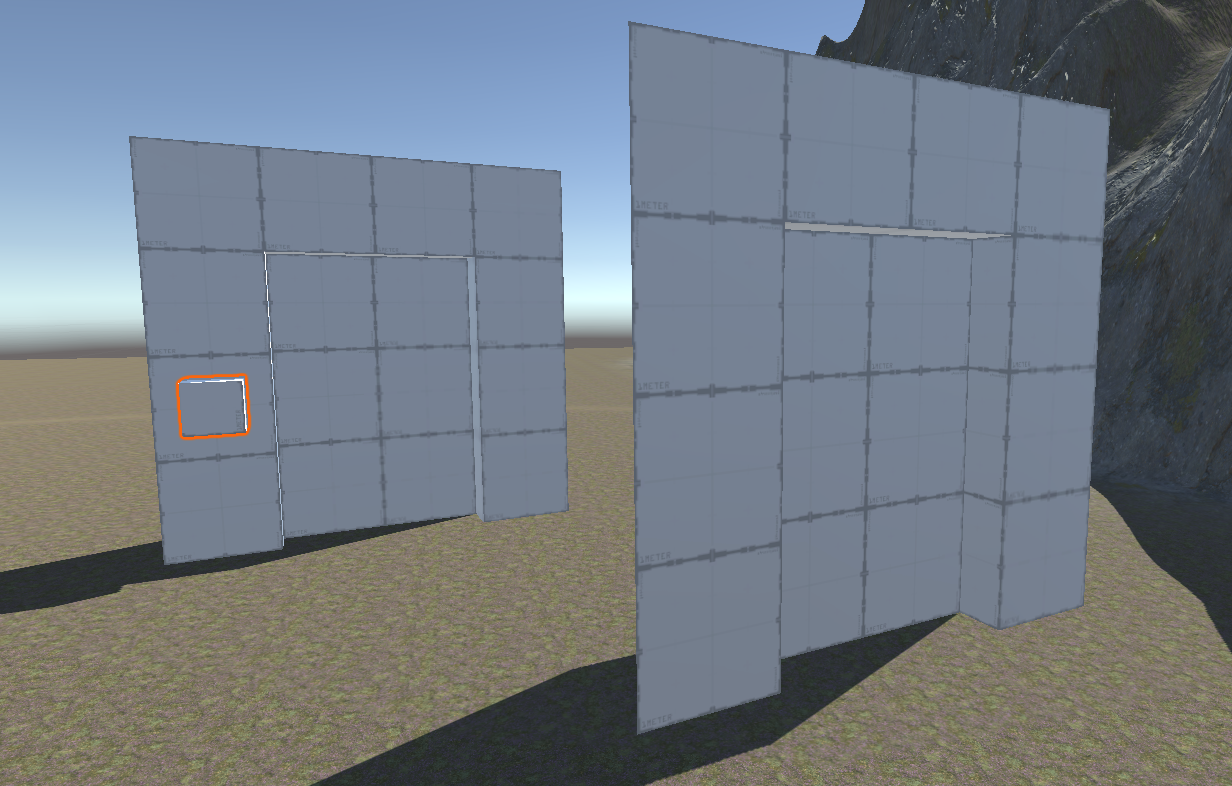
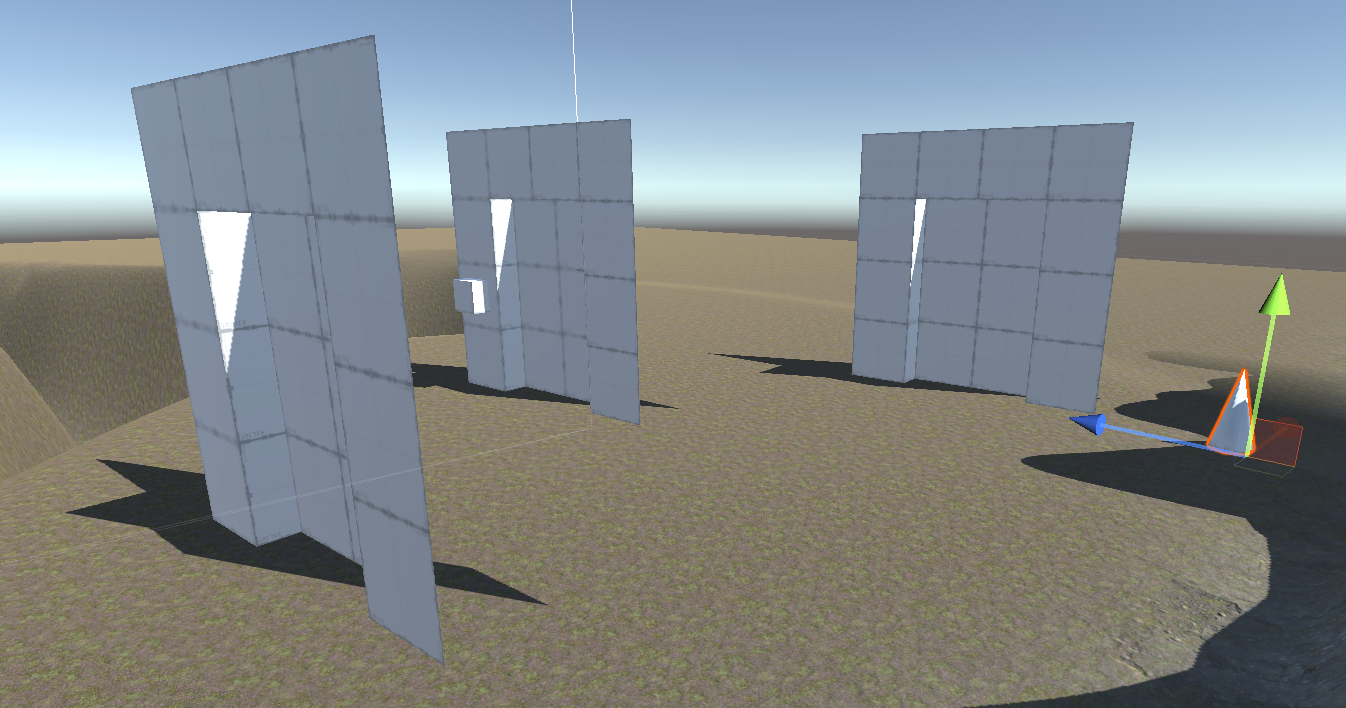
Using ProBuilder, create an object named "DoorWay". (The ProBuilder preset for this object is actually called "Door".)
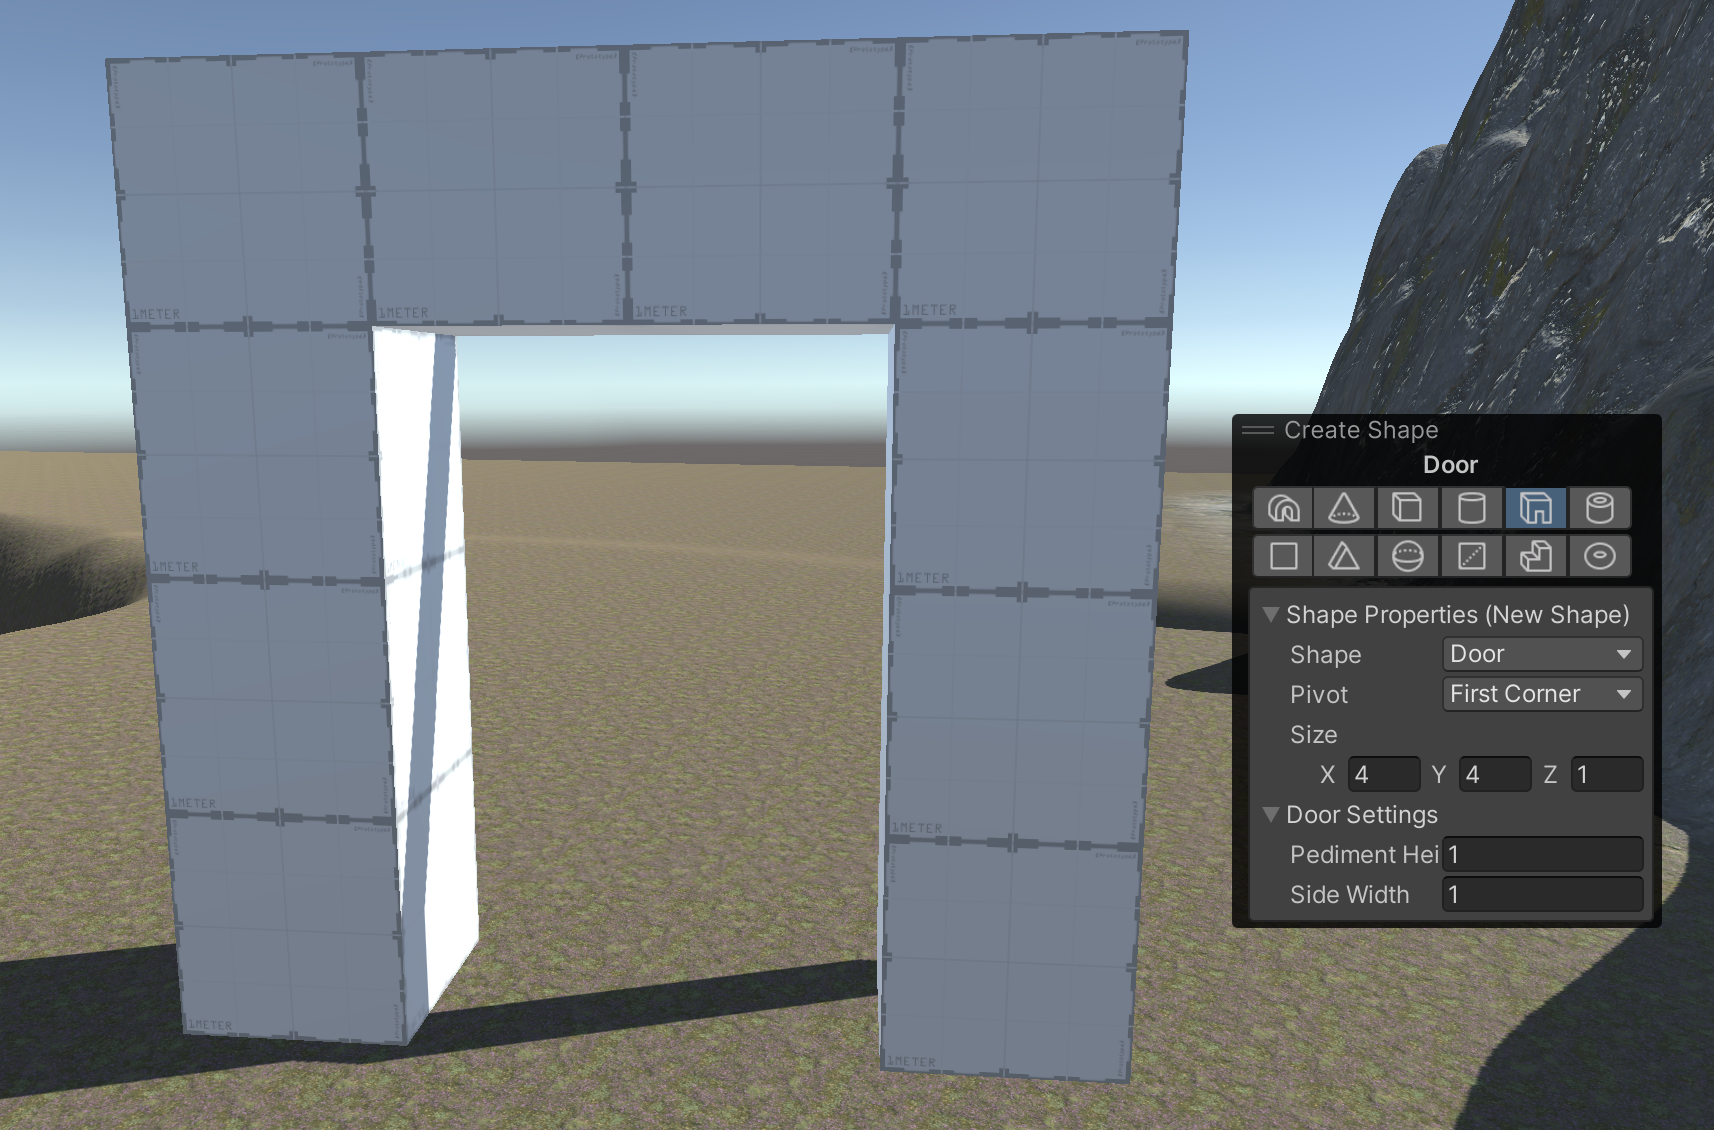
Use the ProBuilder "Cube" preset to create the Door. Make sure the Door is thin enough that you can distinguish it from the door way.
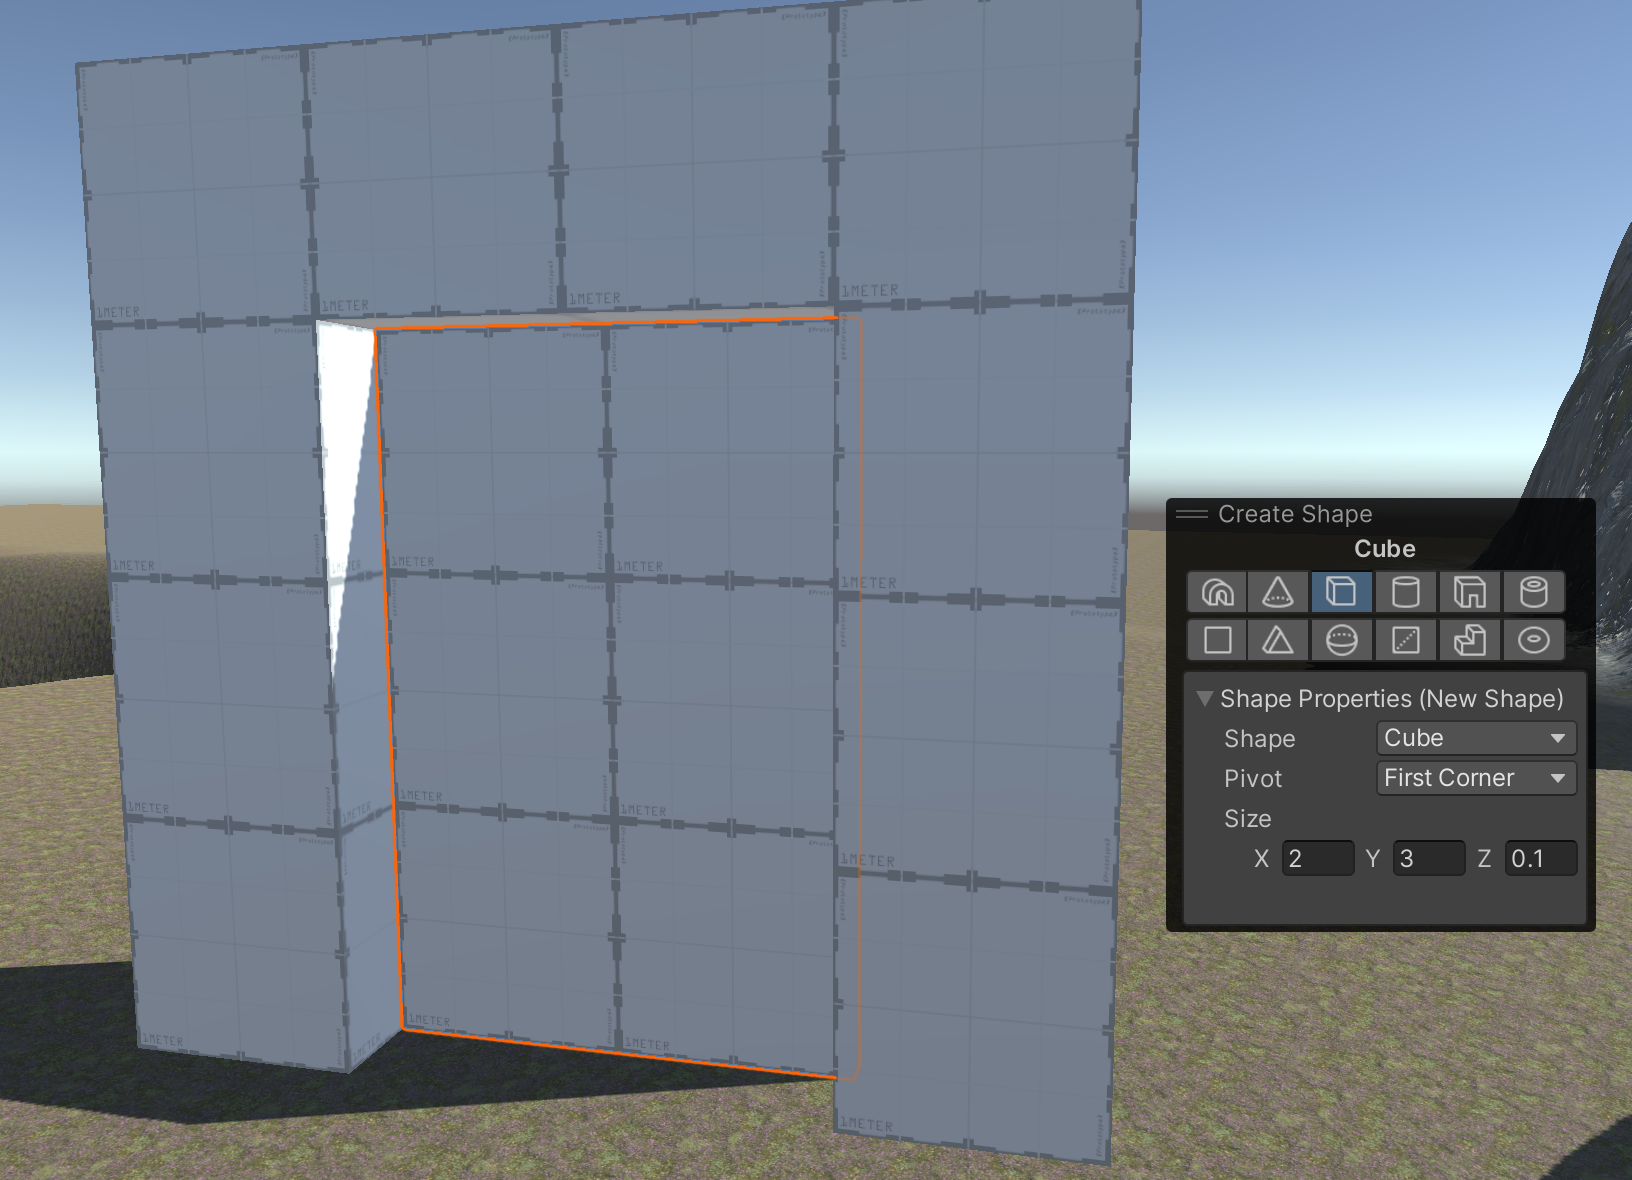
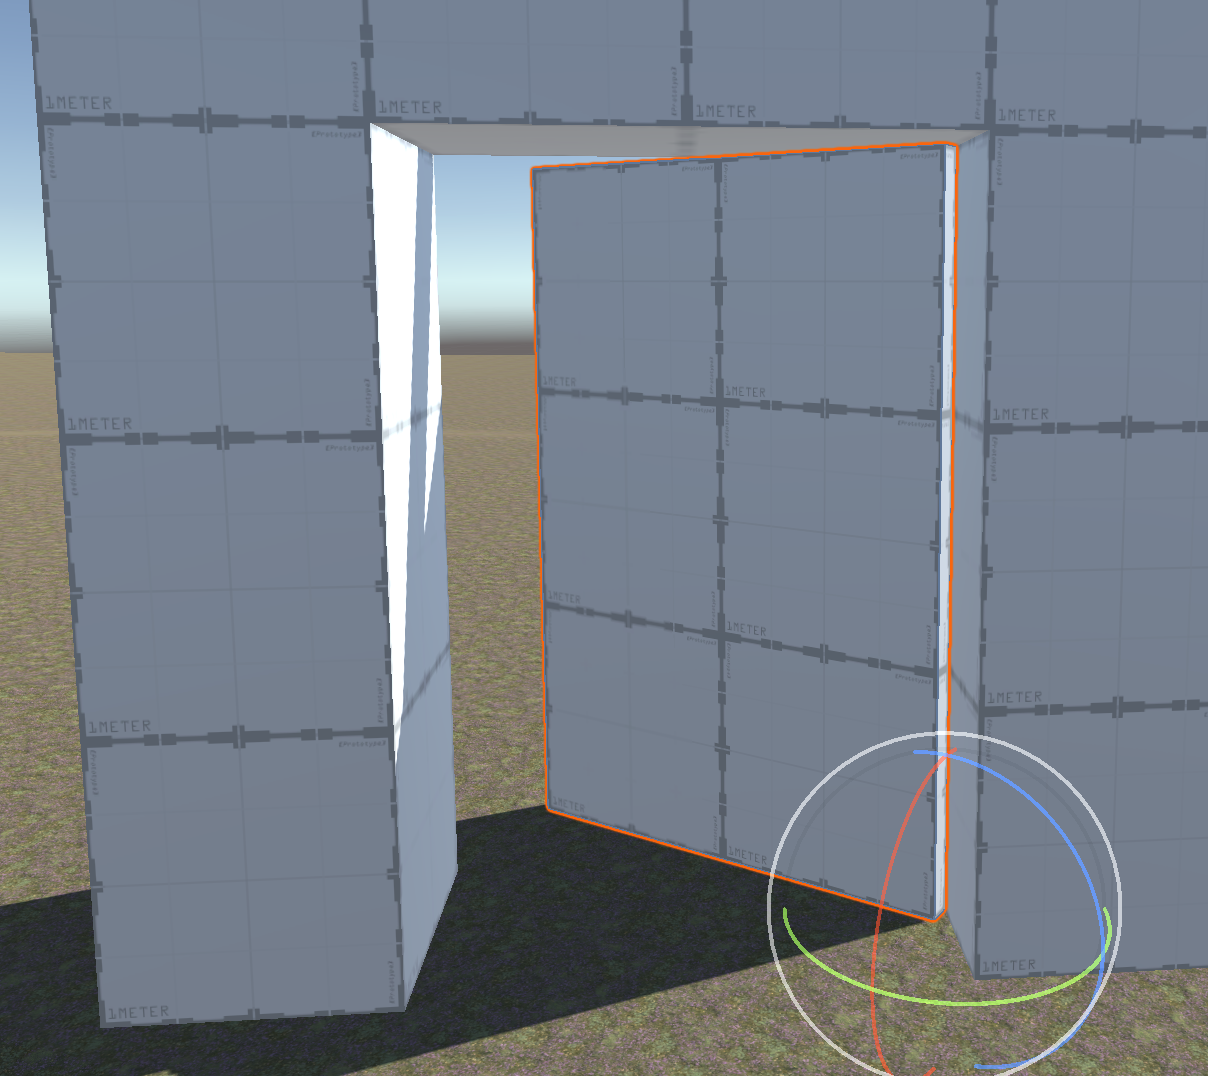
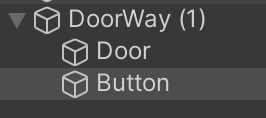
Nest "Door" within the "DoorWay" so that the two move together as a unit when placed on the map.

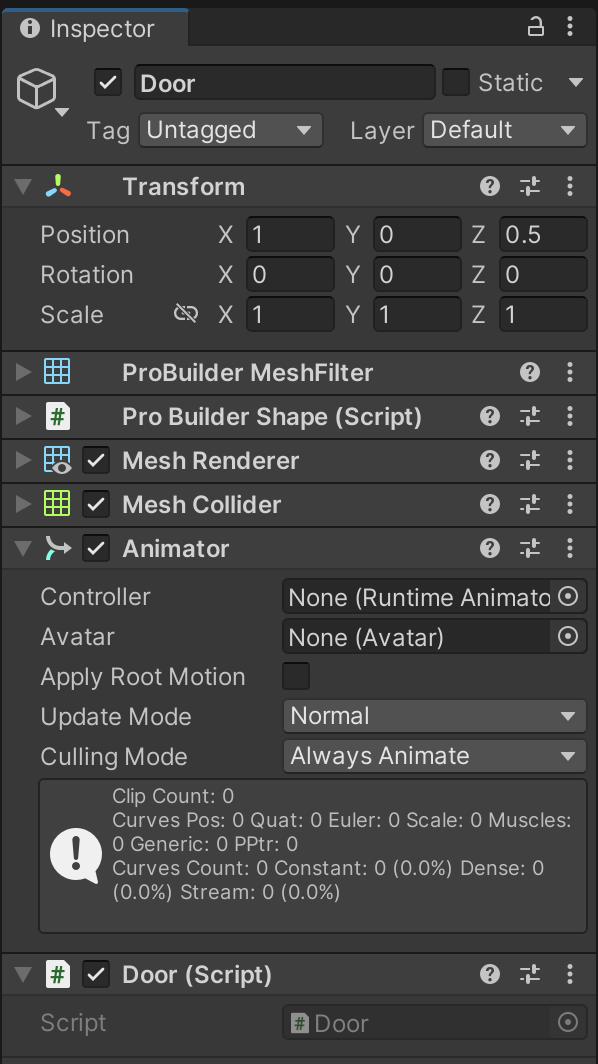
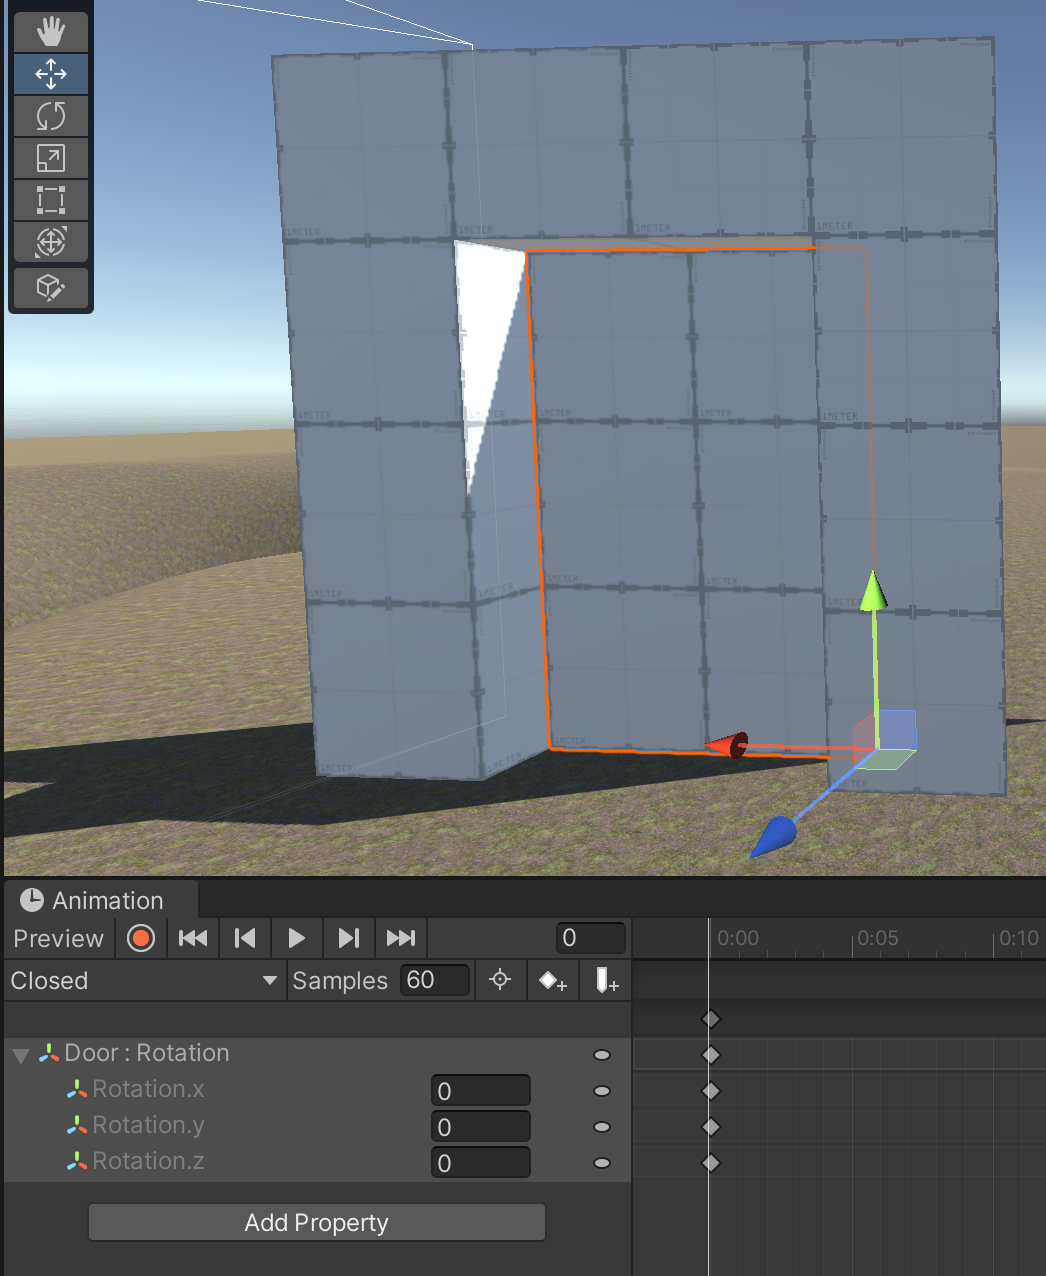
It is very important to match the pivot setting shown in the diagram. Notice how putting the pivot in the corner allows the door to rotate as if it's on a hinge.
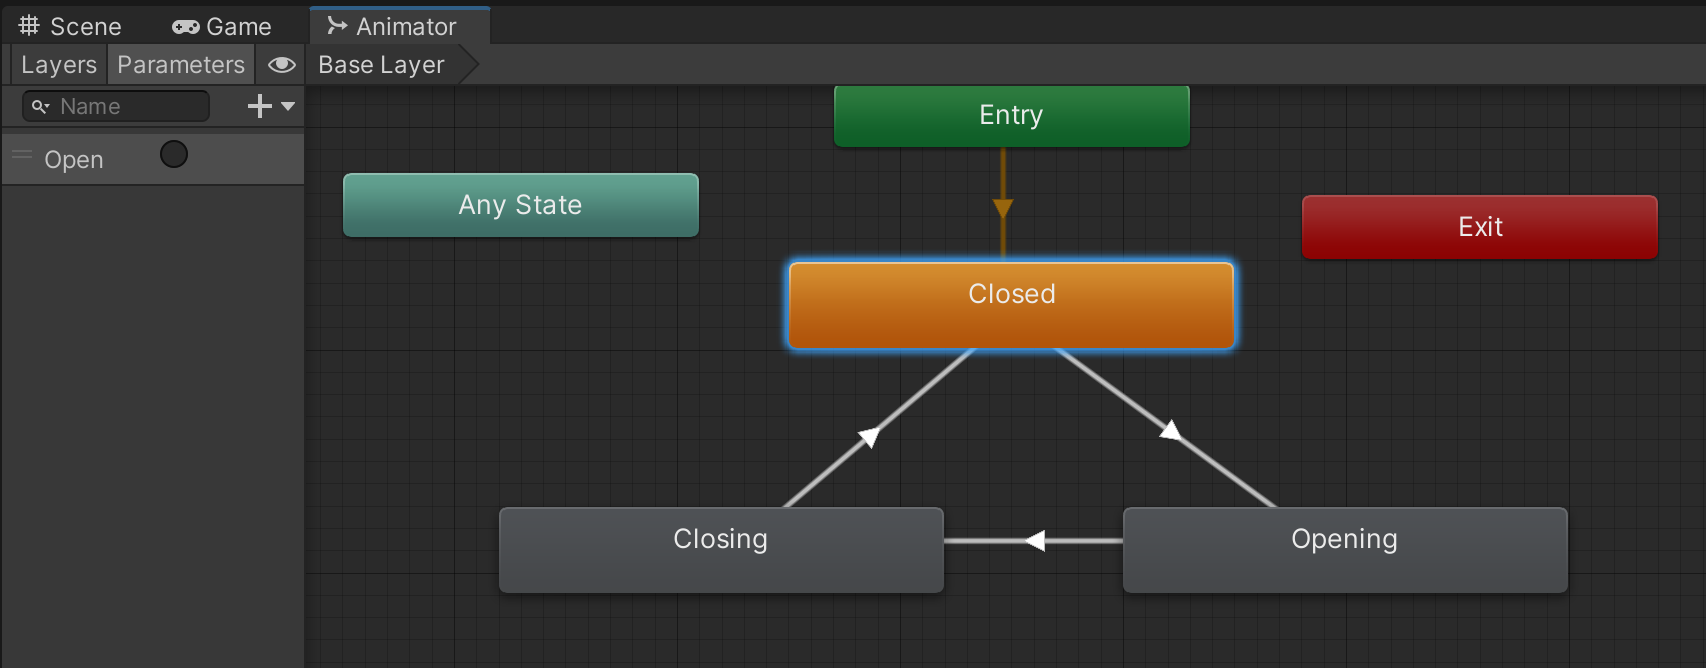
We will need three animations for our Door interactions: Closed, Opening, and Closing. (Notice how there is no dedicated "Open" animation. The door will remain open for a limited time during the end of the "Opening" animation.
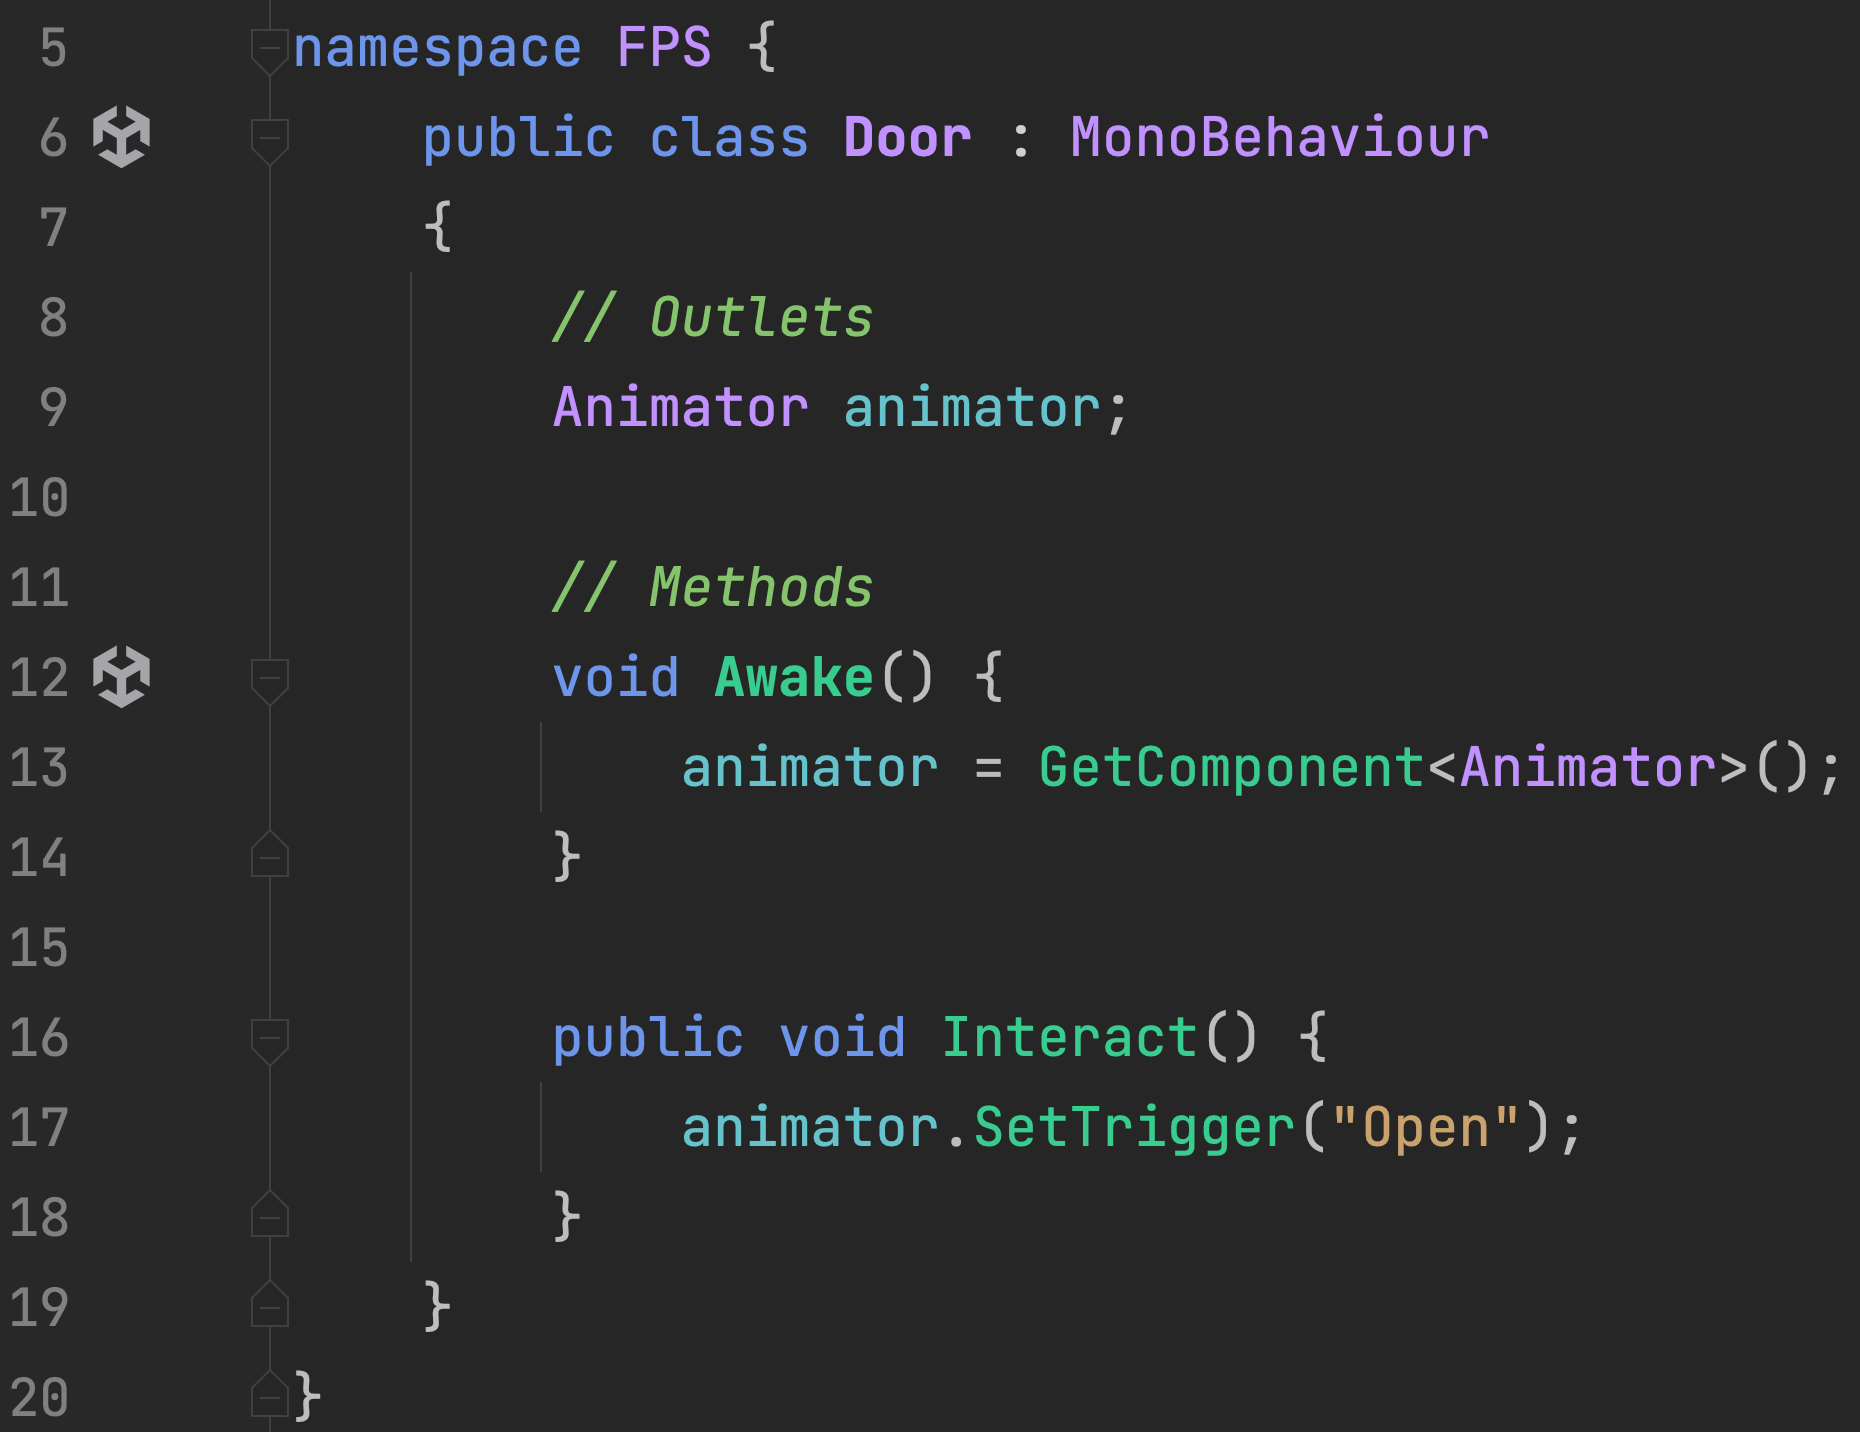
Add an Animator to the Door. Do NOT add it to the DoorWay. Also create a Door.cs script in /Assets/Code/Q4/ and attach it to the Door. Do NOT add it to the DoorWay.
Create your three animations within the folder "/Assets/Animations/Q4/Door/":
The Closed animation is just the door sitting closed.
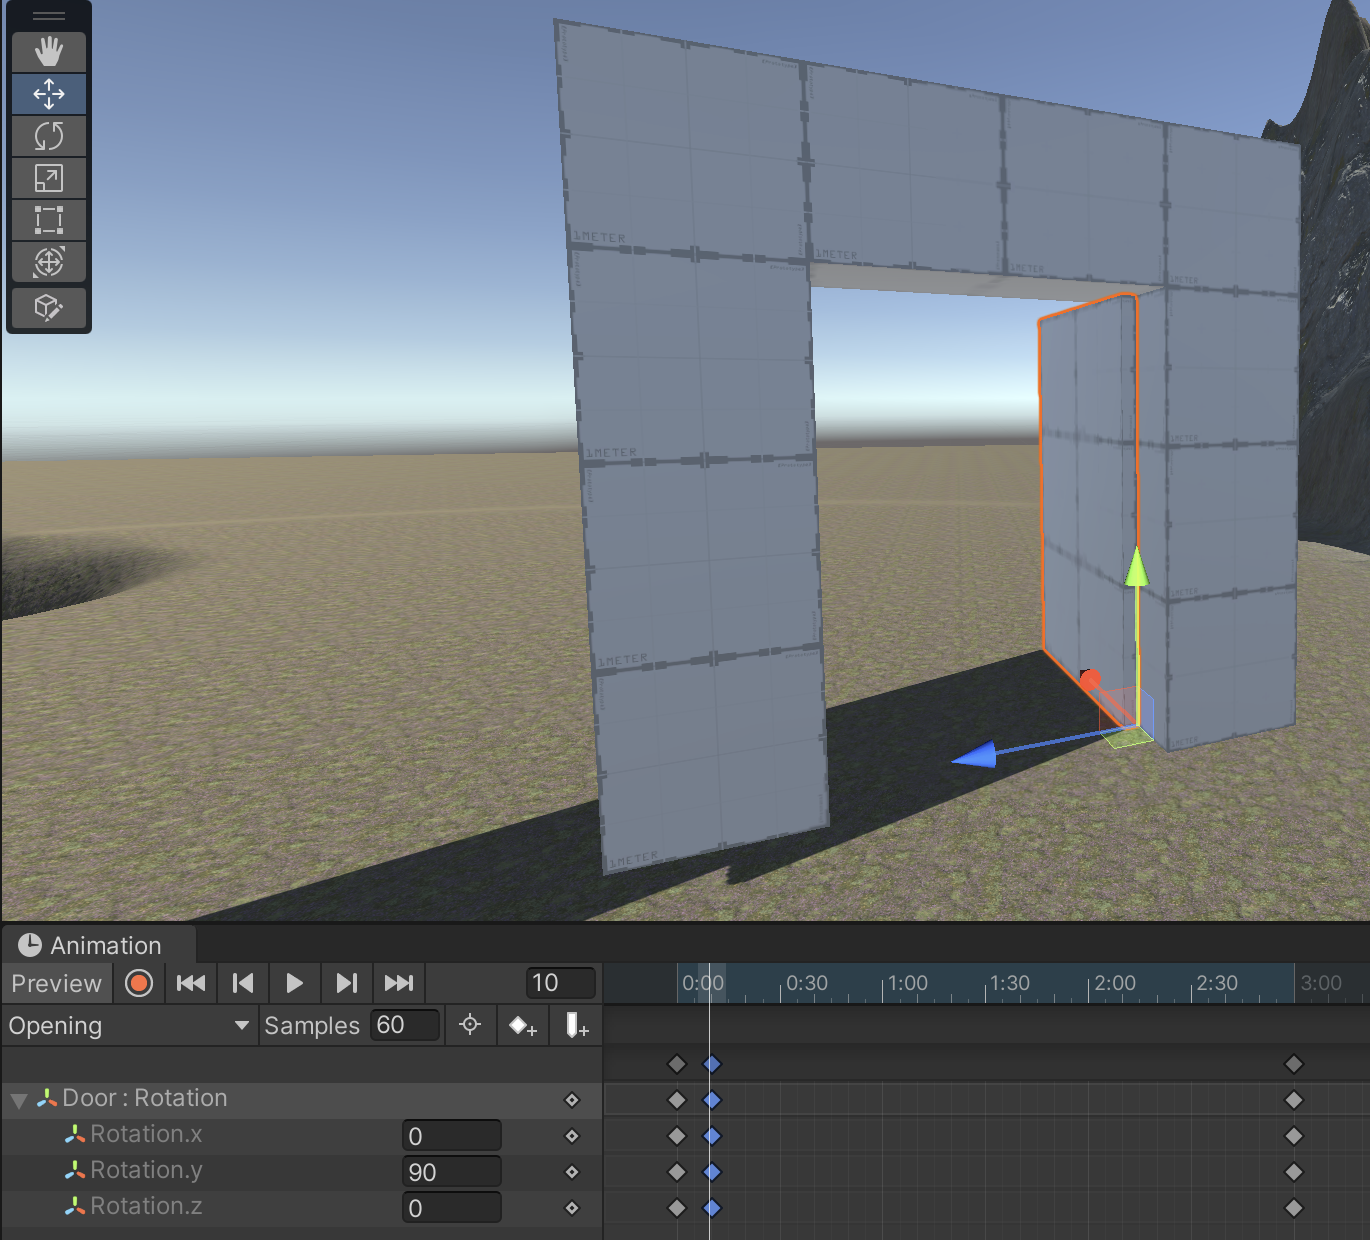
The Opening animation is the door in the process of opening using a Y-rotation. These doors will auto-close, so make sure the animation includes time in which the door stays open long enough for the player to walk through.
In this screenshot, the door is at 0 degrees (closed rotation) on frame 0, 90 degrees (opened rotation) on frame 10, and stays at 90 degrees all the way to frame 60.
The Closing animation is the door in the process of returning to a zero-rotation from the same open rotation found in the Opening animation.
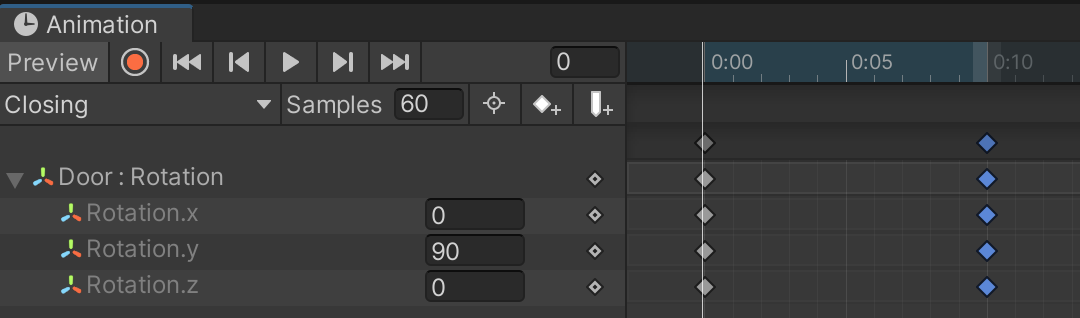
The timing of your animations should NOT have any unnecessary delays that make the door feel unresponsive. The animation transitions from Closed to Opening to Closing to Closed should be seamless.
The Animator flow goes like this:
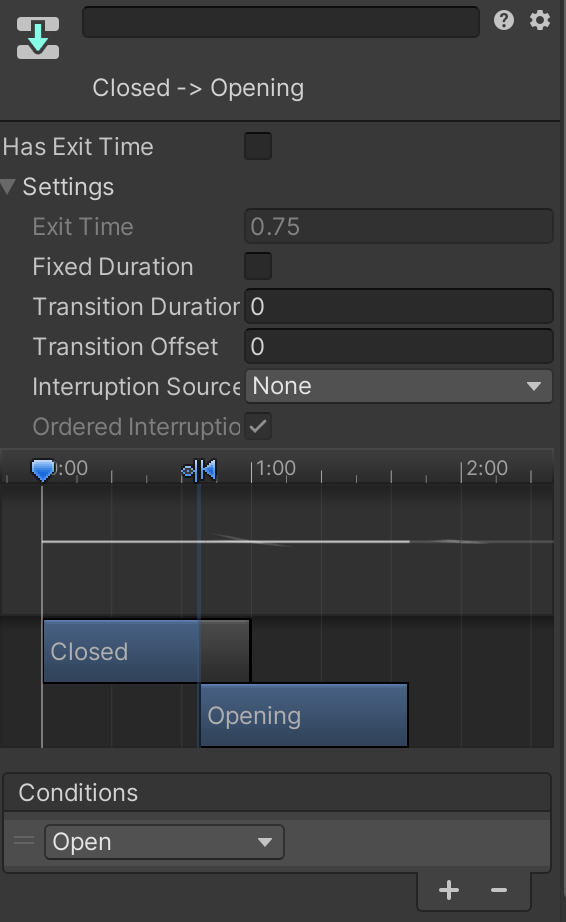
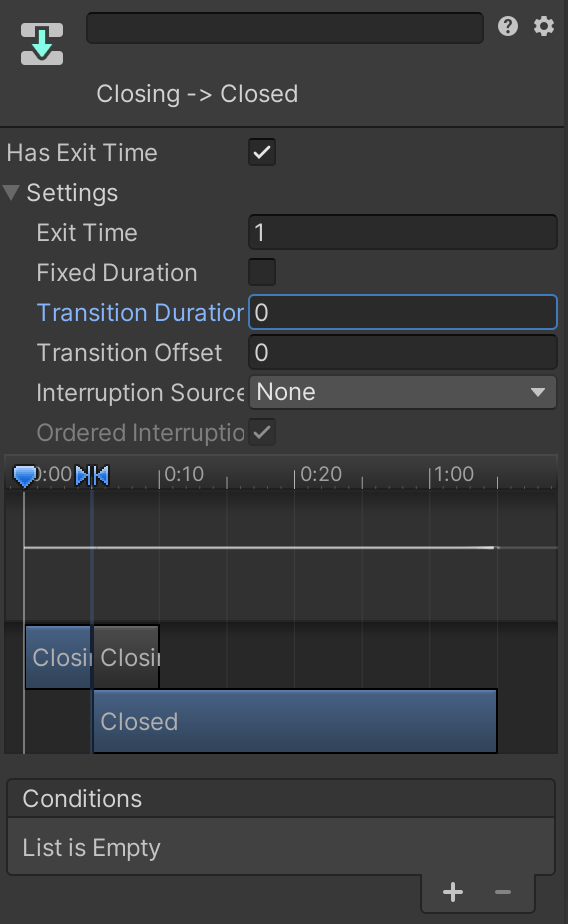
Settings for these three transitions

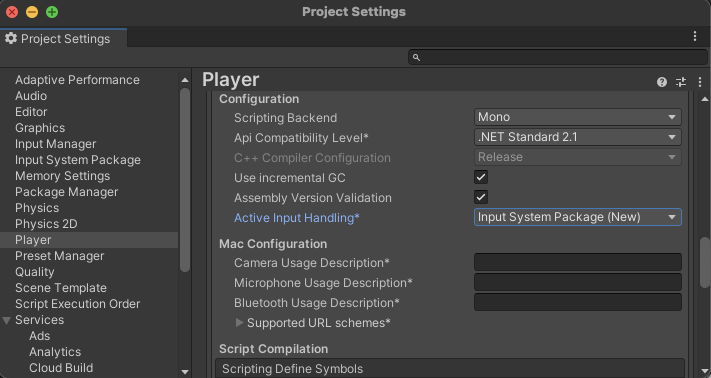
When we installed Unity's Character Starter Pack, we also switched the project to Unity's new input system which enables more advanced input configuration. We will be learning more about this system in a future assignment. For now, we will access the new input system directly via code instead of using the configuration tool. First, confirm that the new input system is active in your project by opening Edit > Project Settings > Player.
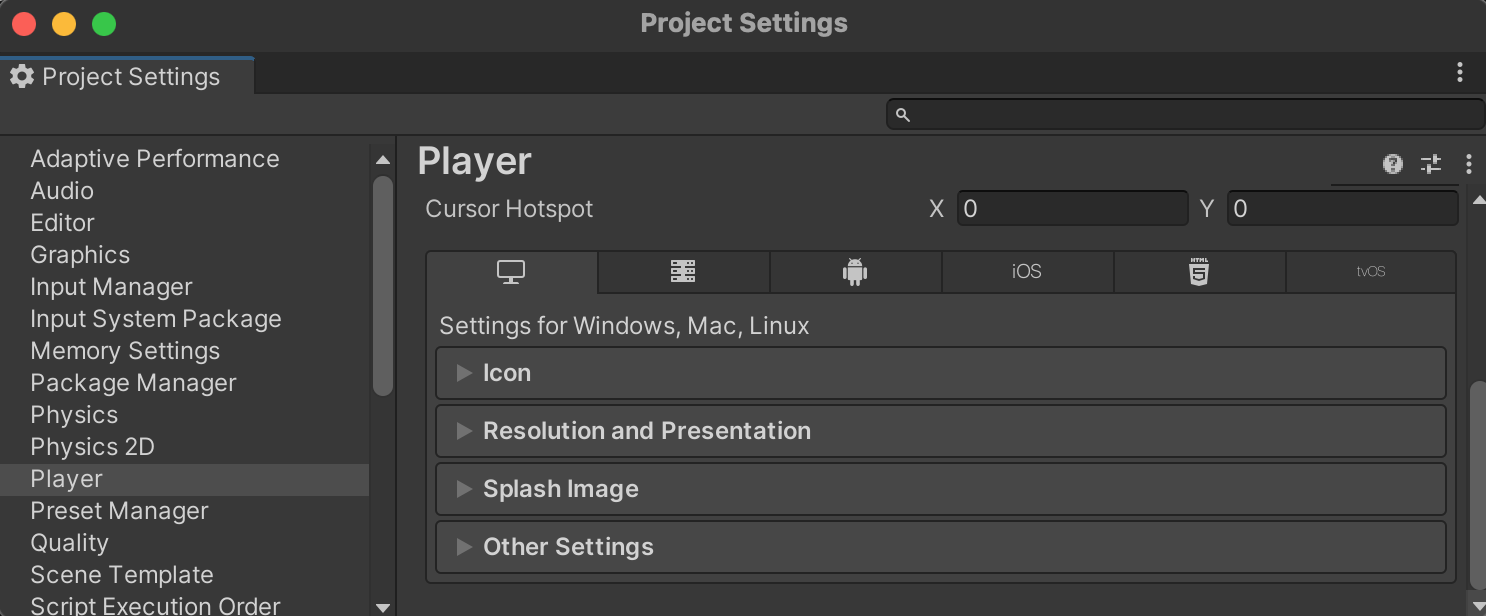
Open the "Other Settings" category and scroll down to the "Configuration" header. Double-check that Active Input Handling is set to "New" or "Both".
Open Edit->Project Settings->Input System Package. Make sure the "Update Mode" is set to "Dynamic Update". These settings are similar to the Update and FixedUpdate loops in your code with similar consequences on input lag and physics responsiveness. Dynamic Update ensures we don't miss capturing momentary inputs such as quick mouse clicks or button presses.

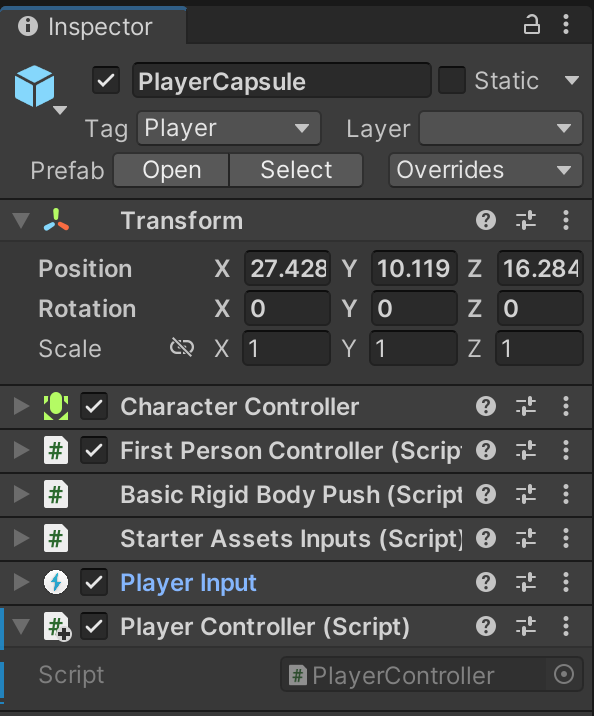
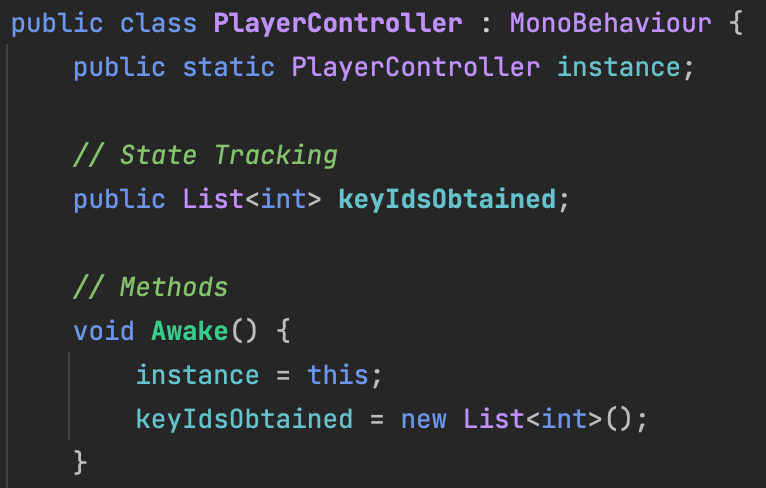
Create a PlayerController.cs in your /Assets/Code/Q4/ folder and attach it to your first-person PlayerCapsule.
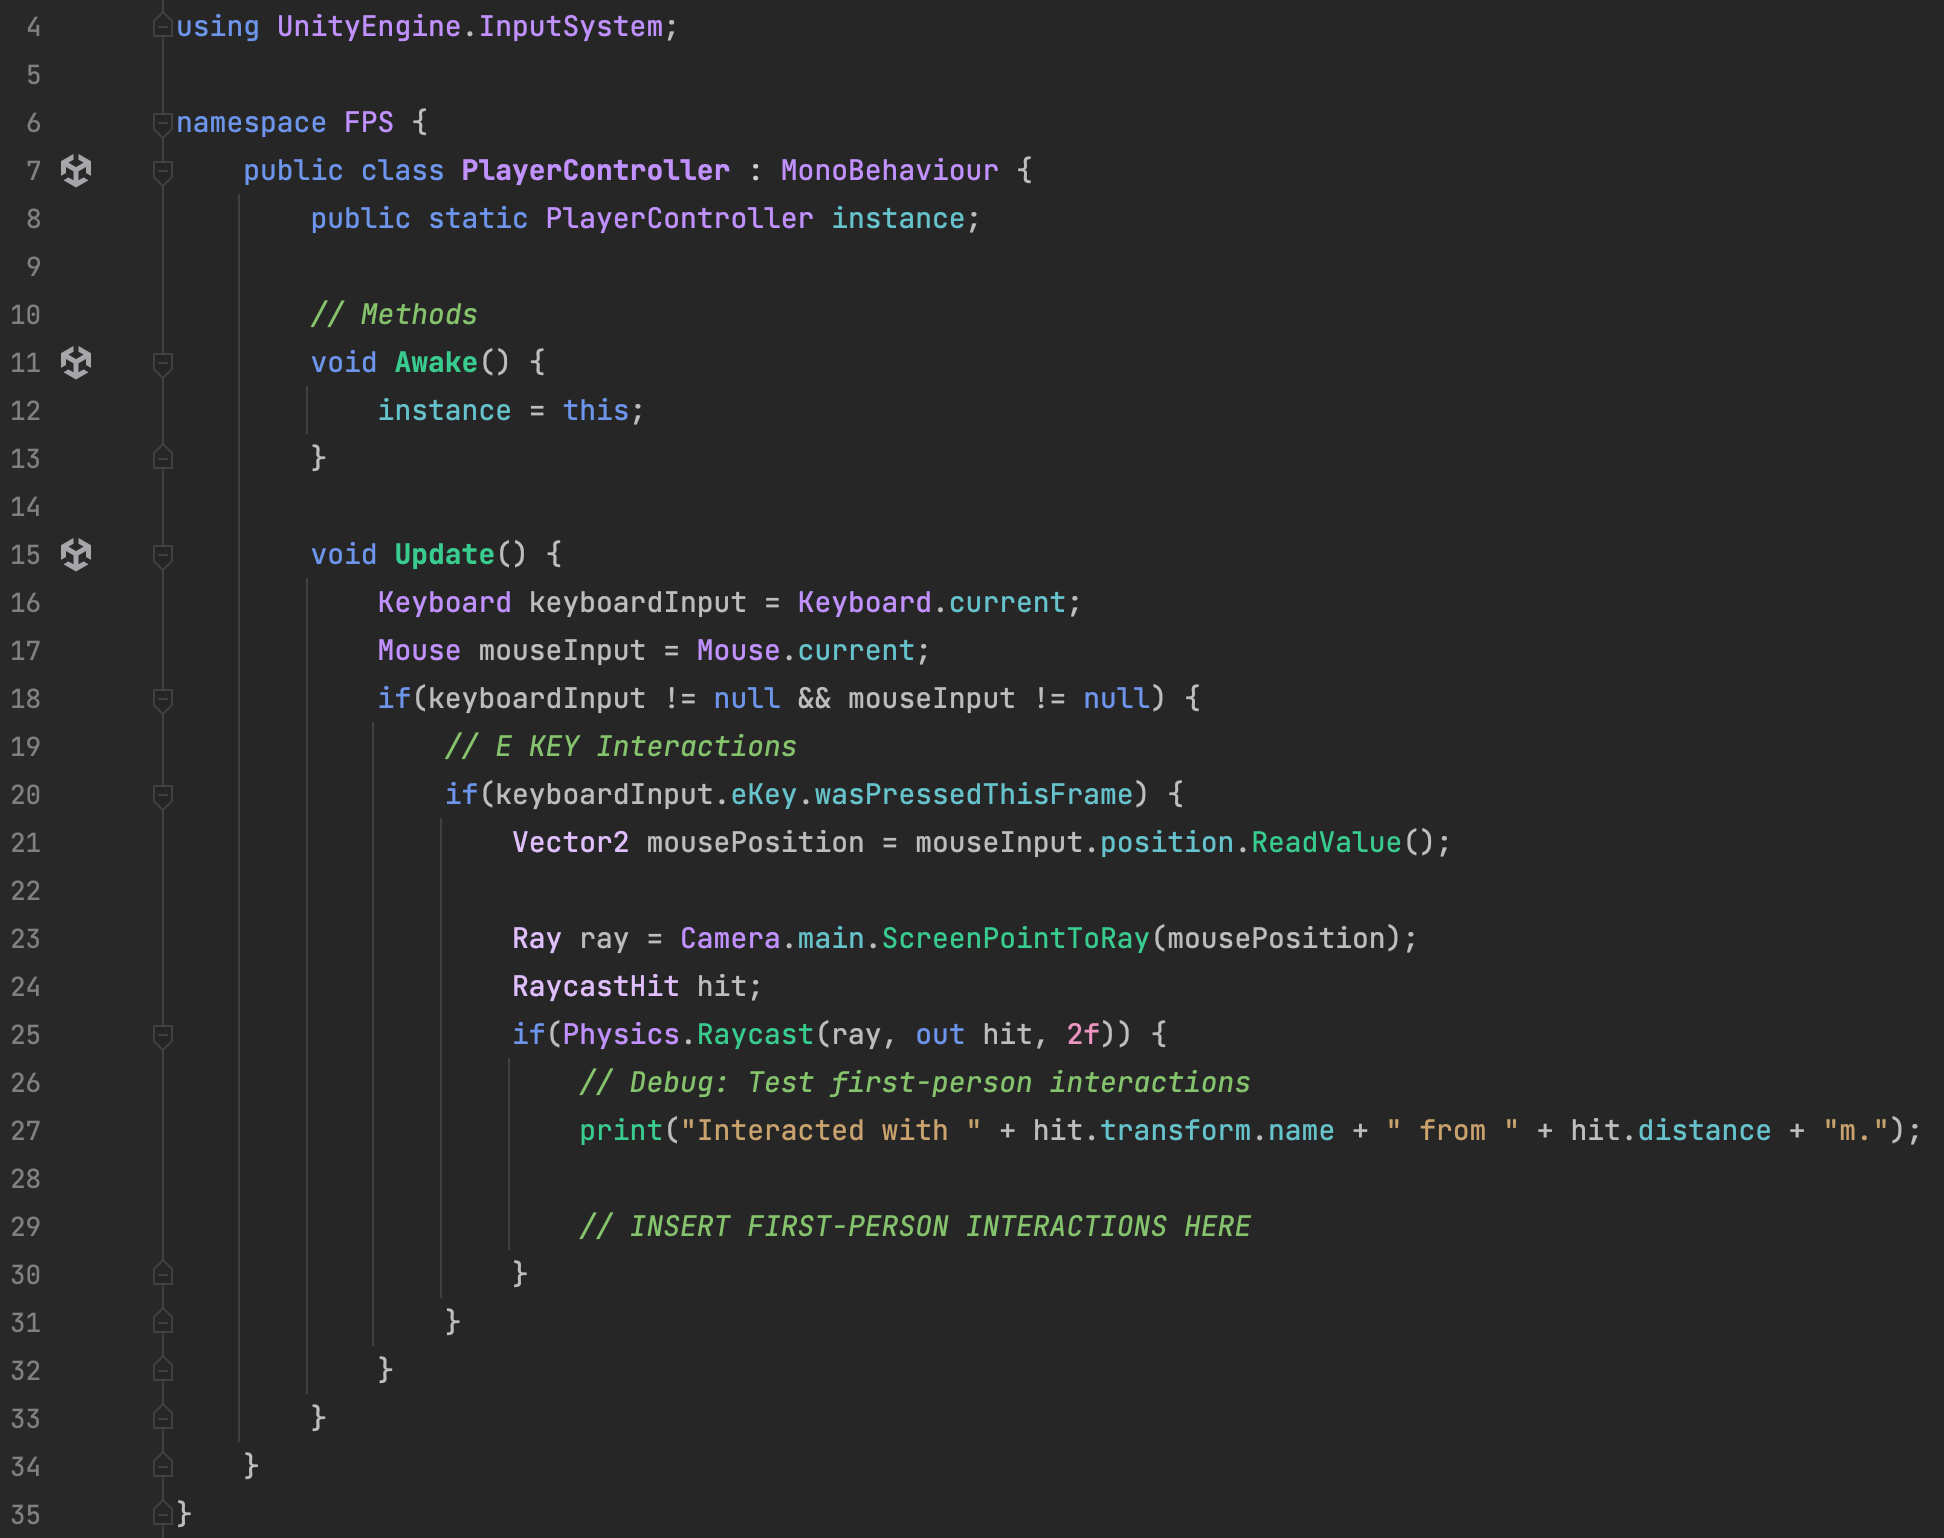
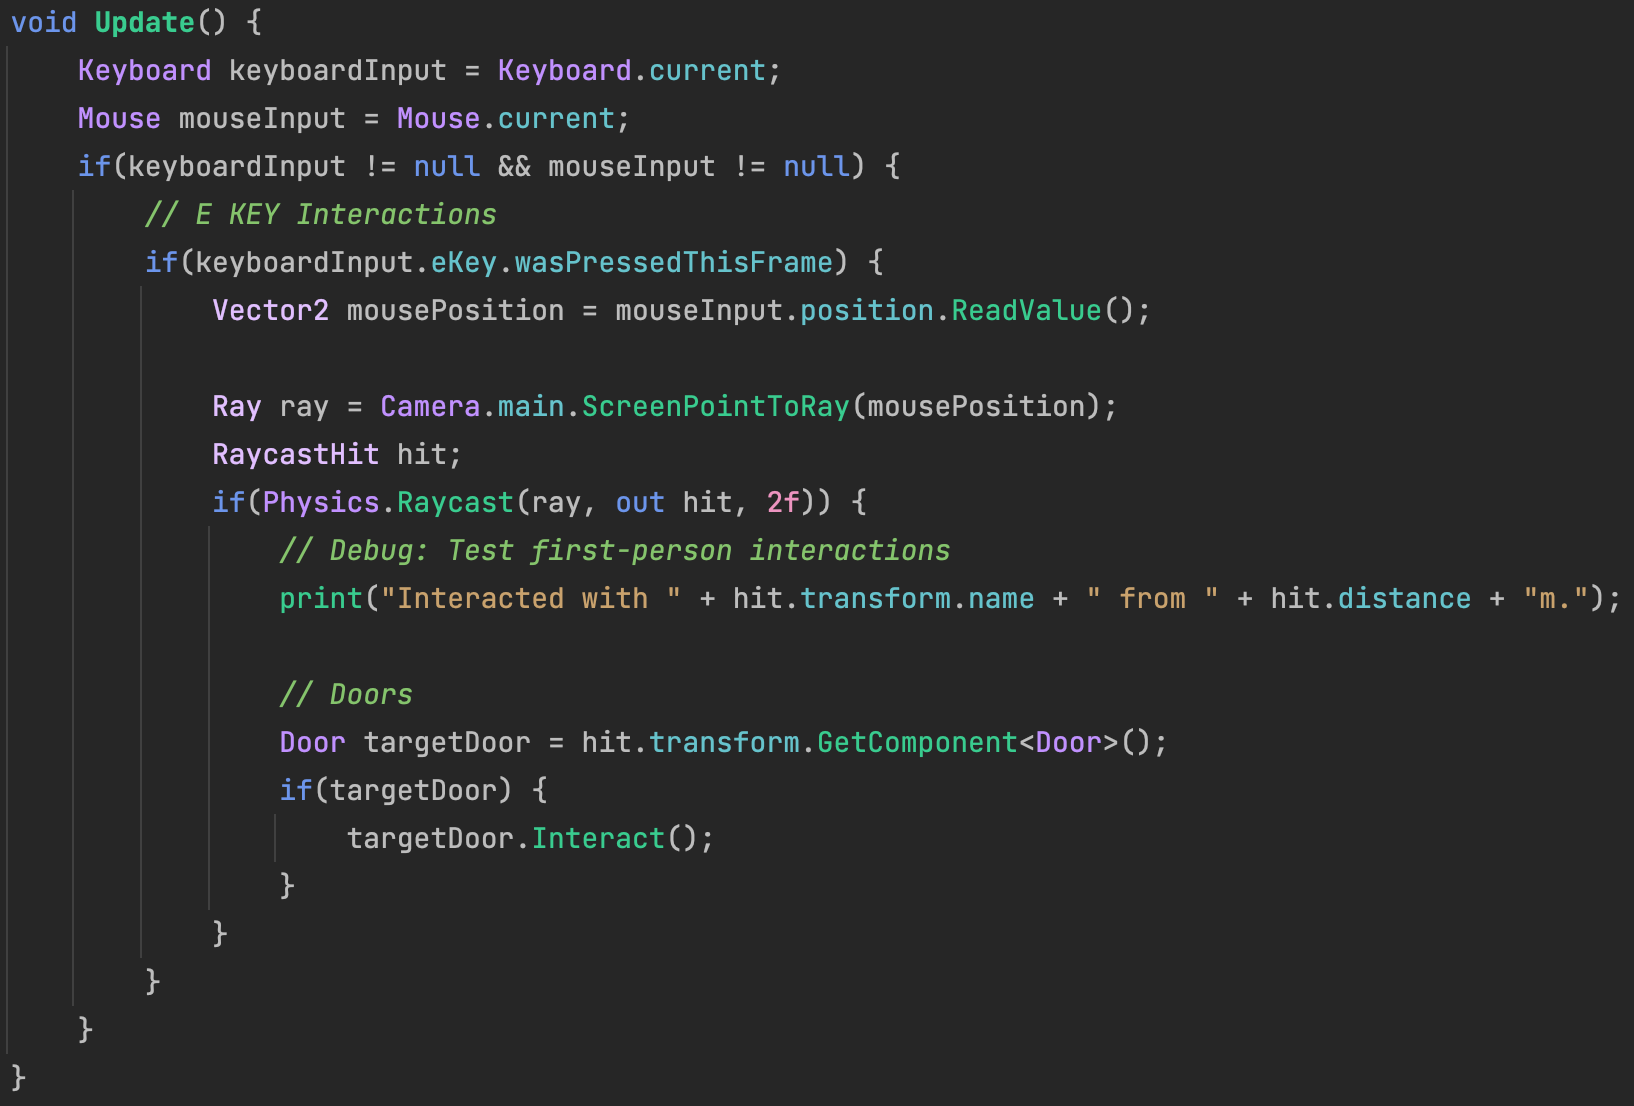
The PlayerController will respond to the E key by raycasting a short distance in front of the player's gaze to trigger interactable objects. Think of this as the player interacting with objects within arm's reach.
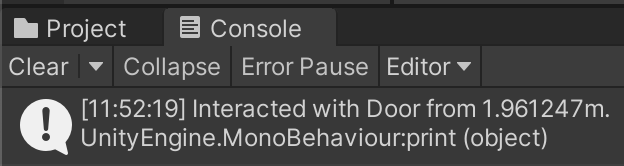
Test your code: Play the game, walk up to the door, and press E. Your debug console should say that you have tried to interact with the door. Test other objects and note the results.
We will add more code in the "First-Person Interactions" section in future steps.
Back in the Door script, add a public Interact function that triggers the door's animation cycle.
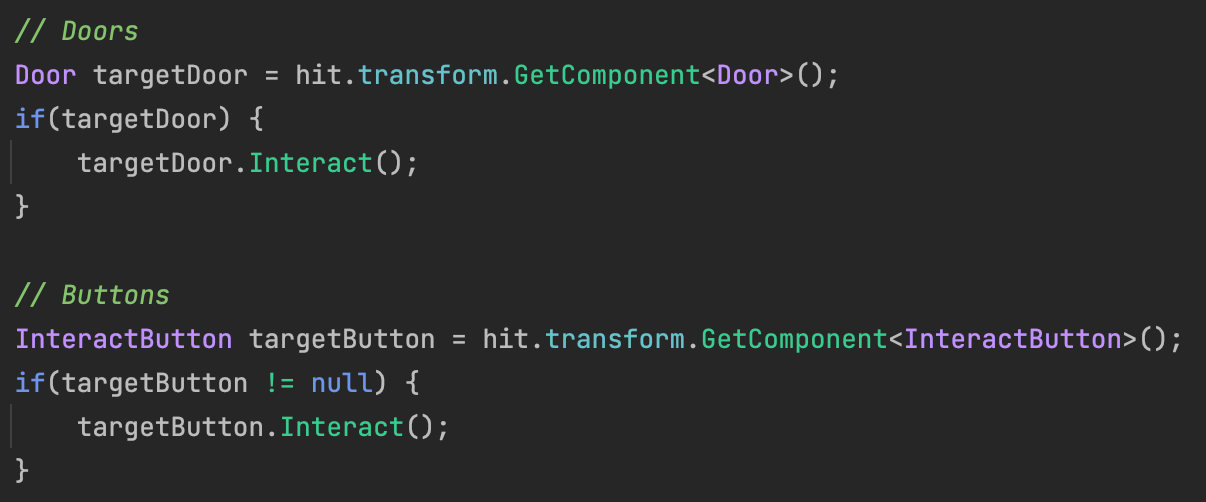
The PlayerController will check if the interacted object has a Door script and will trigger it accordingly.
Play the game and notice that the door responds when the player interacts with it using the E key. The door should stay open long enough for the player to comfortably pass through and automatically close soon after.
Duplicate your first DoorWay. Move your new DoorWay behind the original DoorWay, and add a cube to its hierarchy to represent a button.
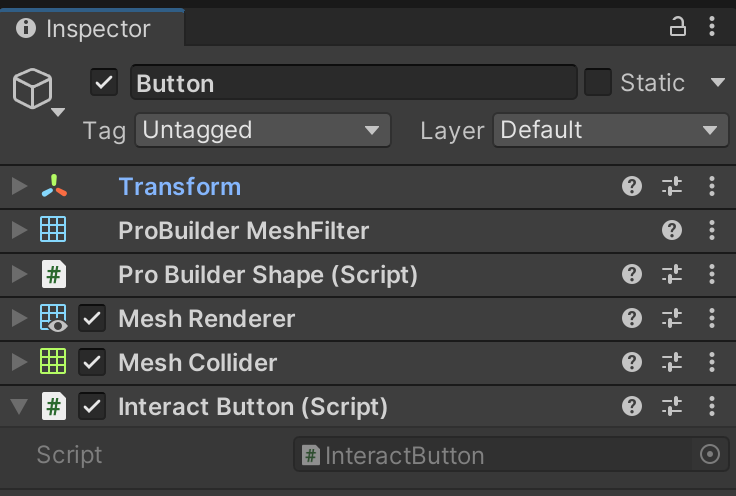
Create and attach an InteractButton.cs component to the Button gameObject.
The goal of this setup is to have a door that opens ONLY by using the button, and not from the player interacting with the door. The other door's behavior should be unaffected.
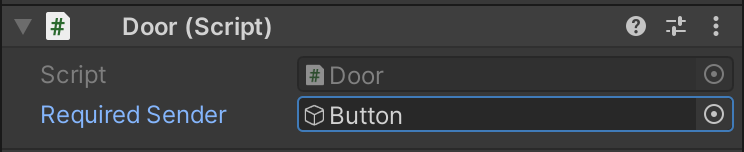
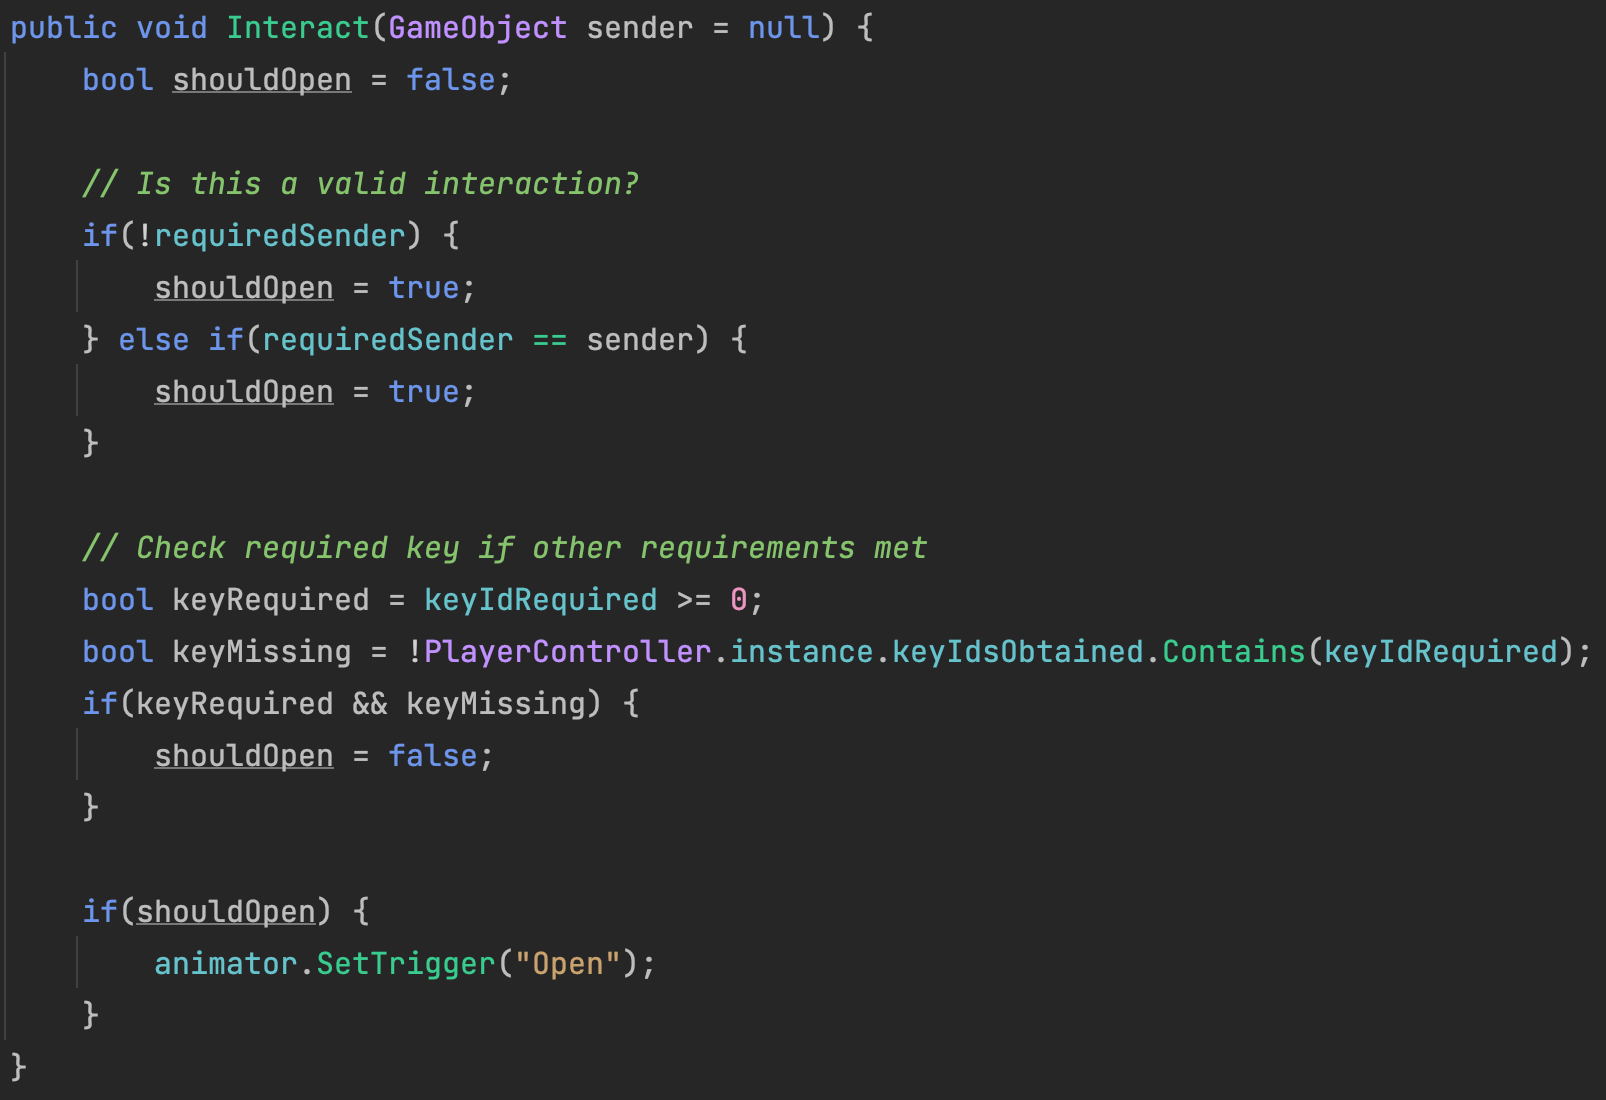
First, revise the Door code to be more intelligent in checking the source of interactions. Add a configuration option that Doors can only be opened by a specific sender (a given player, a specific button, etc.)
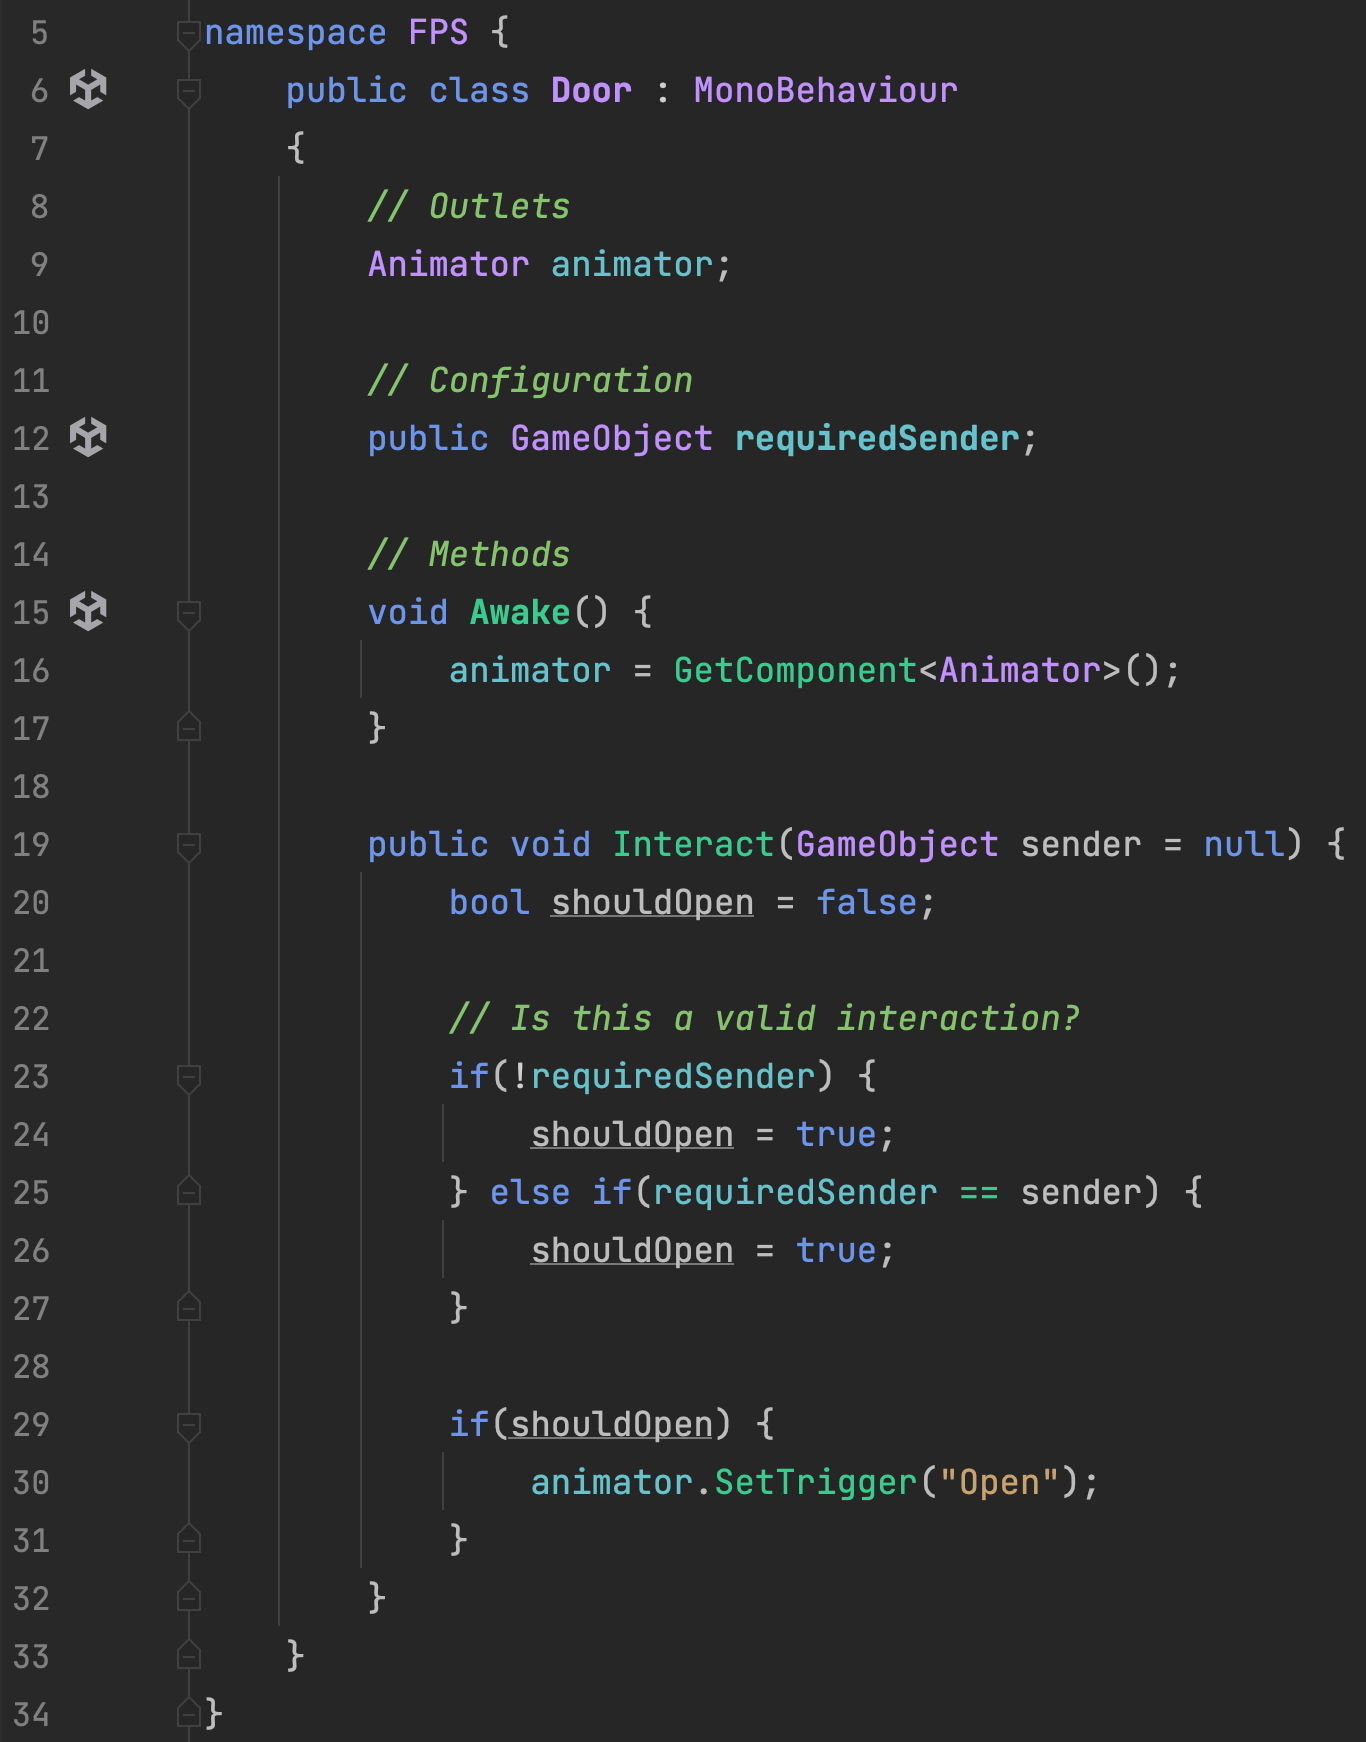
Notice that by specifying a default argument value for sender in the Interact function, we are able to avoid breaking existing functionality for the first doorway.
Write InteractButton.cs to forward any interactions to its target door.
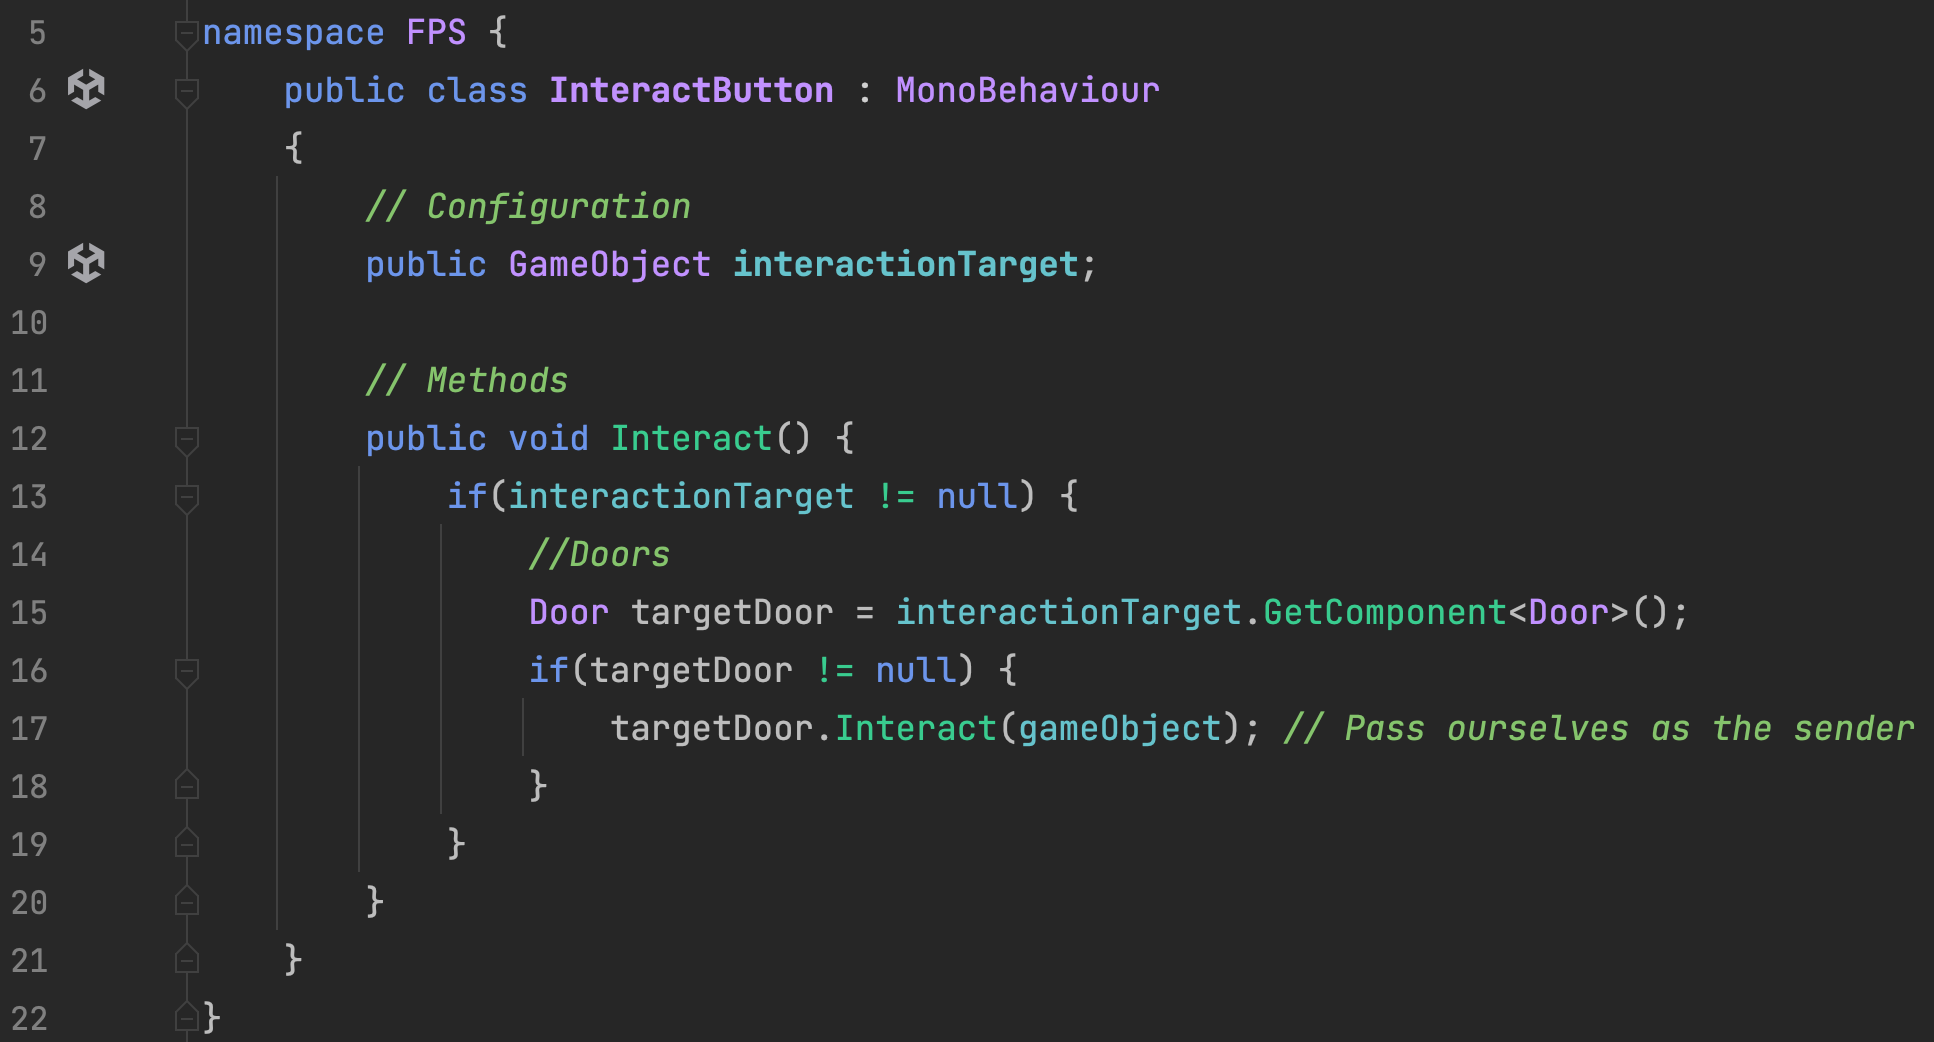
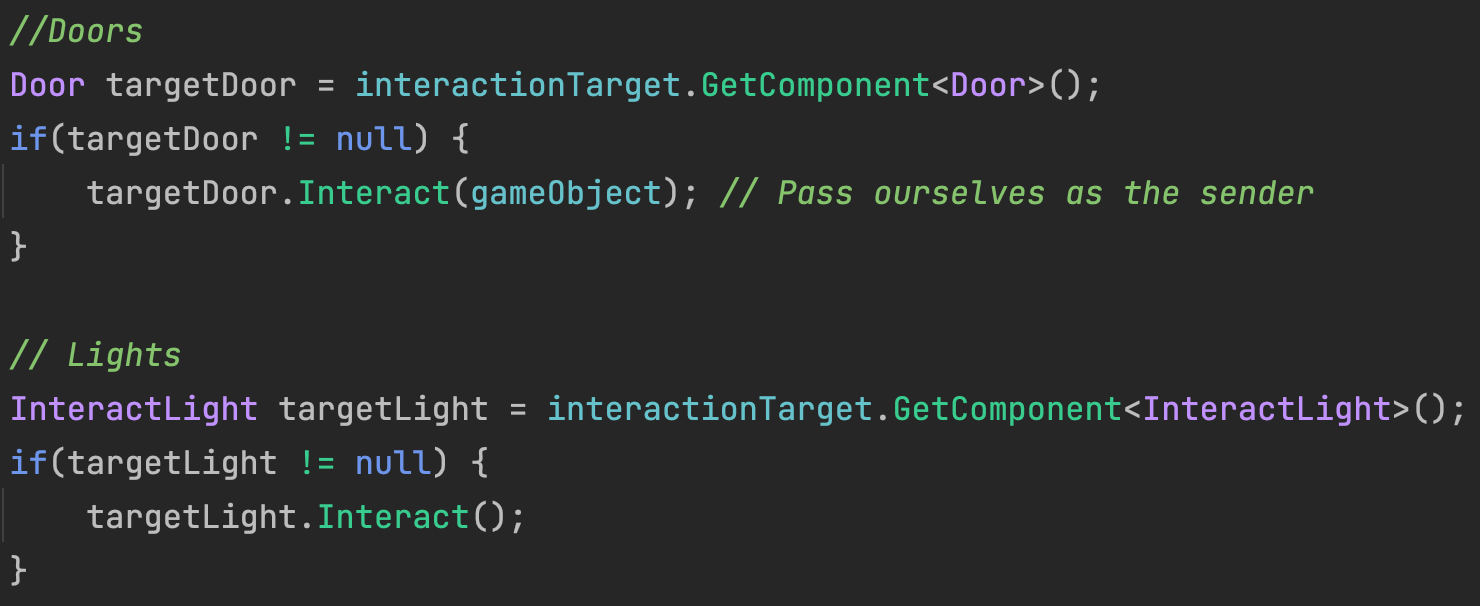
Expand the available PlayerController interactions to include the new InteractButton. Notice that the Door code remains unchanged because of the default argument value from earlier. All of our interactions will follow a similar pattern for maintainability.
You must specify the Door as the target of the Button. Be sure to pick the correct Door.

You must specify the Button as a valid sender for the Door. Later, when you have multiple buttons, be sure to pick the correct one.
Playtest and ensure that:
Duplicate your first DoorWay and move it to be your third DoorWay. (This DoorWay does NOT have a button.)
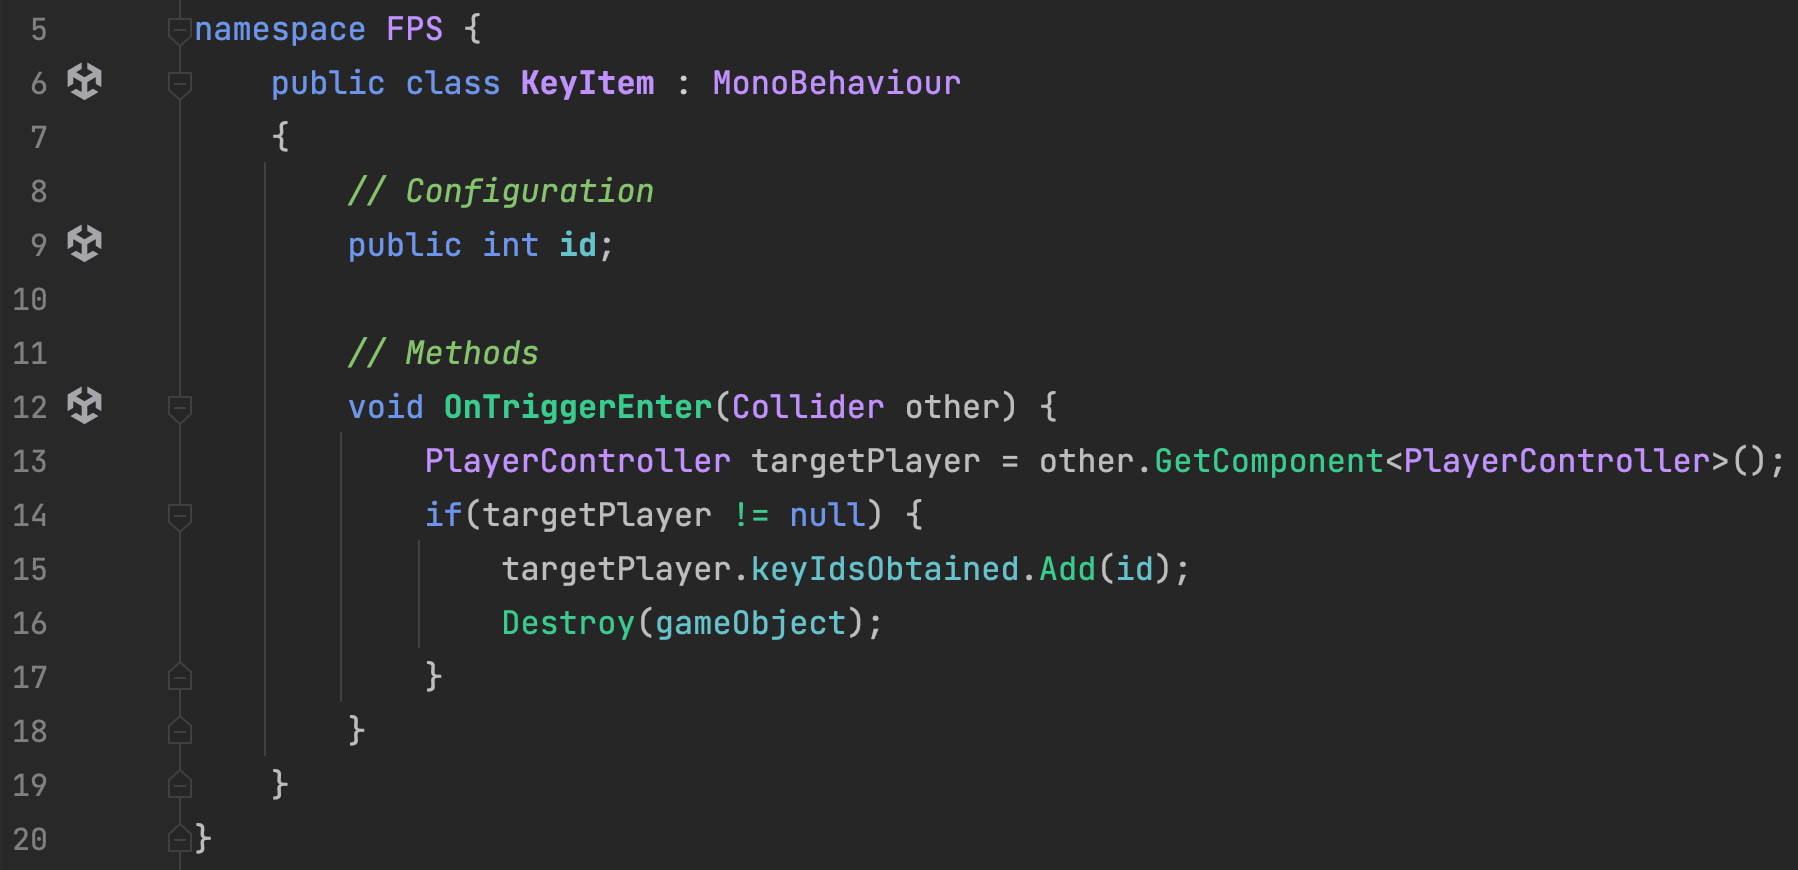
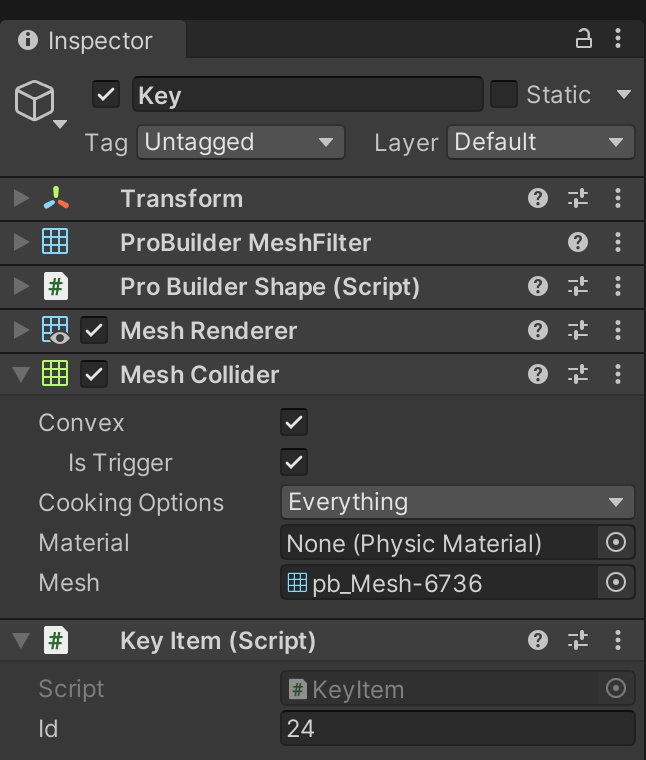
Create a Key object and put it near this third DoorWay and attach a KeyItem.cs script to it.

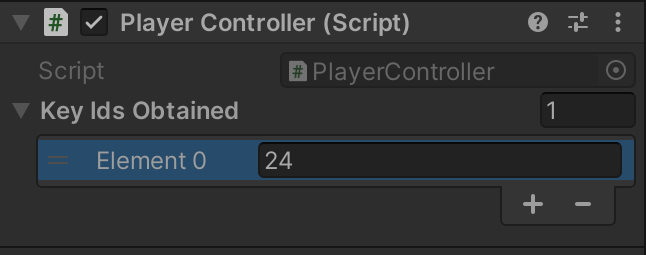
When the player collects a key, the KeyItem component will add its ID to the player's list of collected keys. This allows us to specify that certain key items are relevant to different interactions.
The key's ID is added to the player's collection on trigger collision.
Note the Collider and KeyItem component configuration. Each key should be given a different ID.
Test the game and check that when you touch the key, it disappears from the game world and is added to your inventory.
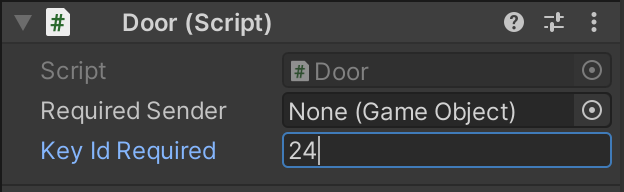
The Door code must be revised again to support this third interaction scenario (Key Required, No Button) without breaking the prior two interaction scenarios of Door 1 (No Key, No Button) and Door 2 (No Key, Button Required). Add another configuration value to the Door, so that it checks not only for senders, but also for collected keys.
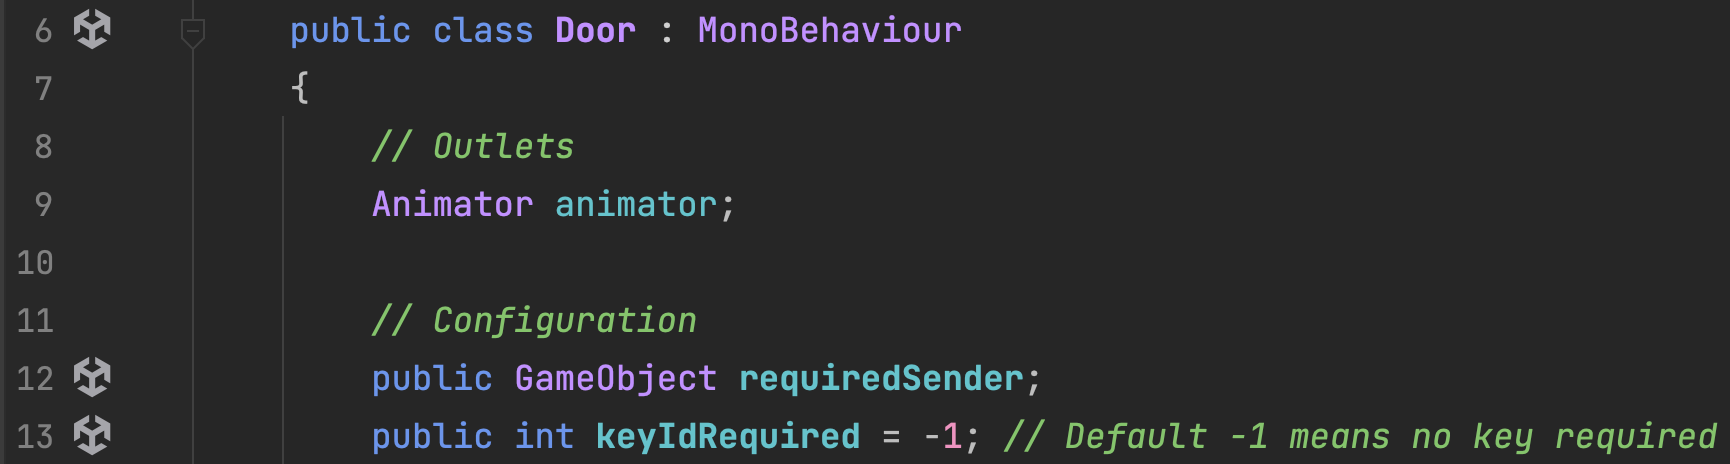
To avoid breaking the functionality of existing doors, the default key ID required value is set to -1, which is a value that will be ignored in the Door's Interact function.
The key check happens after all other requirement checks. Both requirements for a sender and a key are able to overlap by being evalulated in sequence.
Assign a required ID to the third door. The default value of -1 means it won't check for a key. Use the same key ID as the key added in the earlier steps.
Playtest. Ensure that all the previous doors still work as expected. This new door should only open if the player has collected the correct key.
Repeat and combine prior steps to create a fourth Door that opens if the player collects a different key AND responds ONLY to the fourth Door's button. The first key should not be valid on this new door. This new door should only open by using its button when you have the second key.
No new code is required because the button and key mechanics were already programmed to work together.
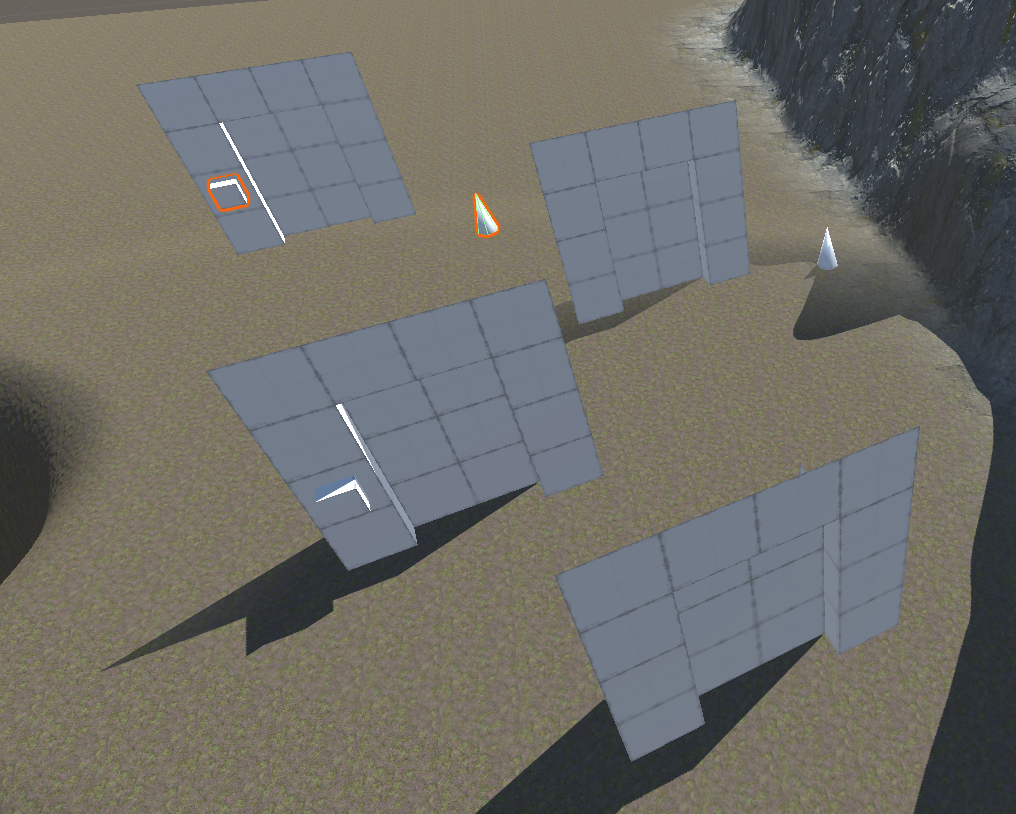
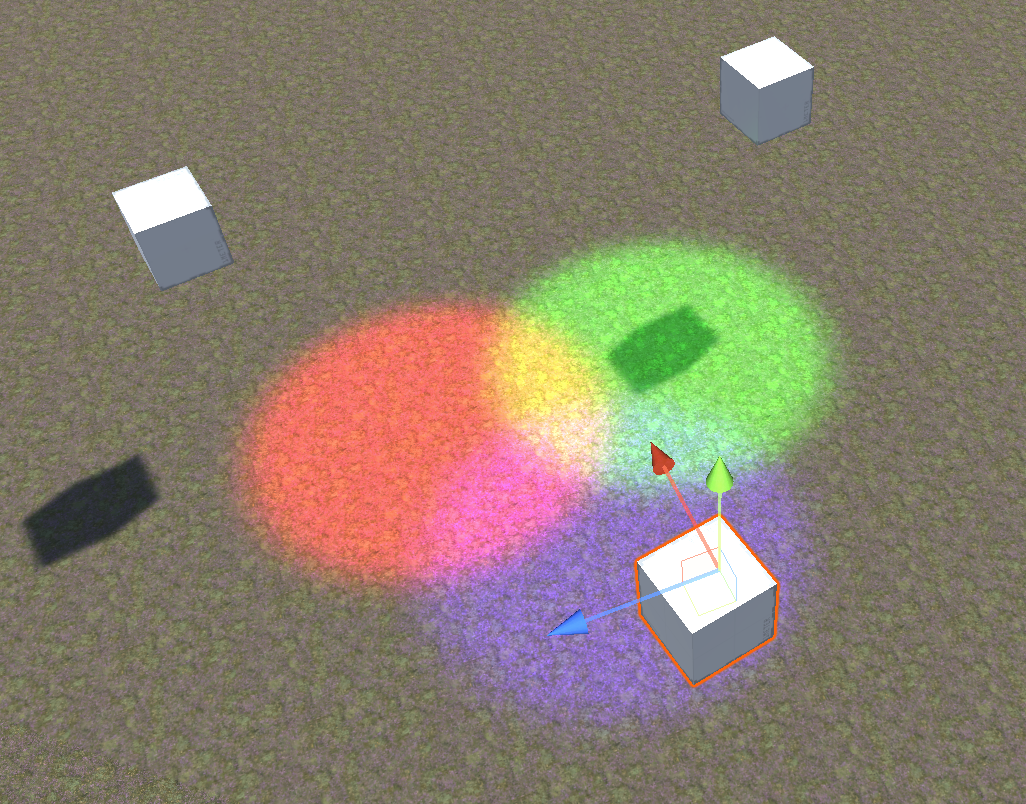
Create three overlapping spotlights using 3 different colors. To each spotlight, attach an InteractLight.cs script.
Create three buttons, one for each light.
For each button, specify its Interaction Target as the light that is closest to it.

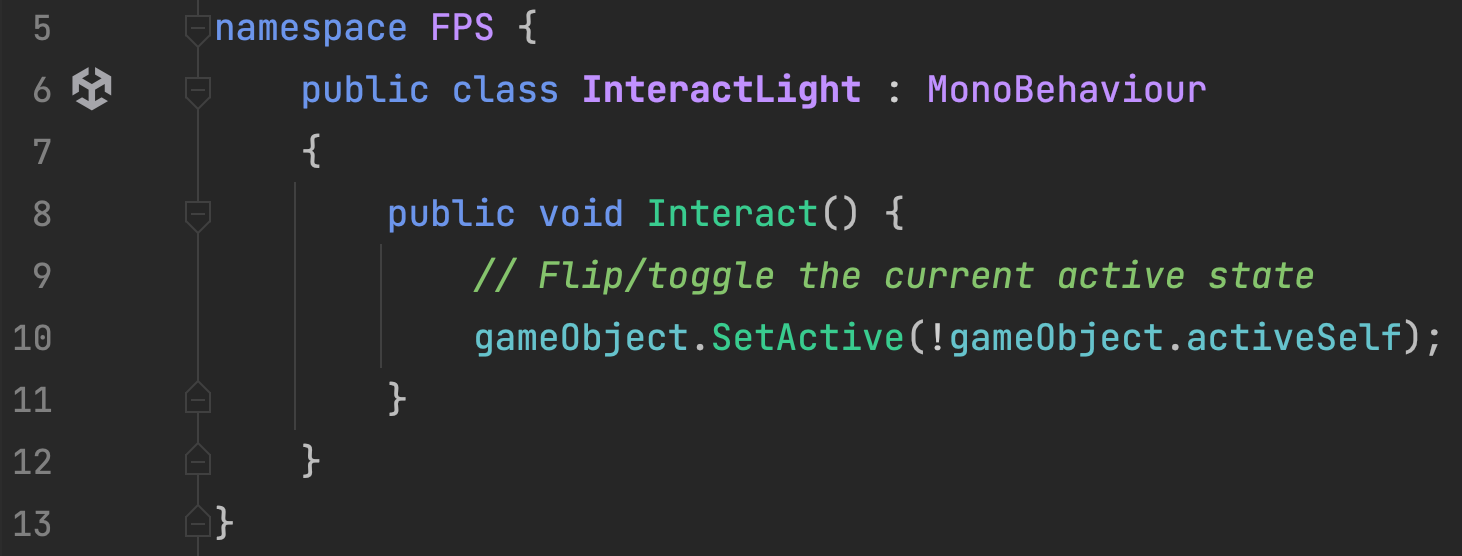
Program an interaction event for the lights that will toggle their current active state in the scene.
Revise the InteractButton functionality to include InteractLights similar to how it handles Doors.
Playtest to ensure all interactions work as expected and that the addition of any new features hasn’t broken any earlier interactions.
Ensure you've included all required interactable content:
SAVE any open files or scenes.
Submit your assignment for grading following the instructions supplied for your particular classroom.