VG2, Quest 10 - Real-Time Strategy (RTS) Genre, Part 2

Download Files

Supporting files for VG2 quests are part of a single archive that you can download here.

Setup

This project builds upon the RTS foundations in the prior assignment. You must have completed part 1 before continuing with these steps.

Multi-Unit Select Box

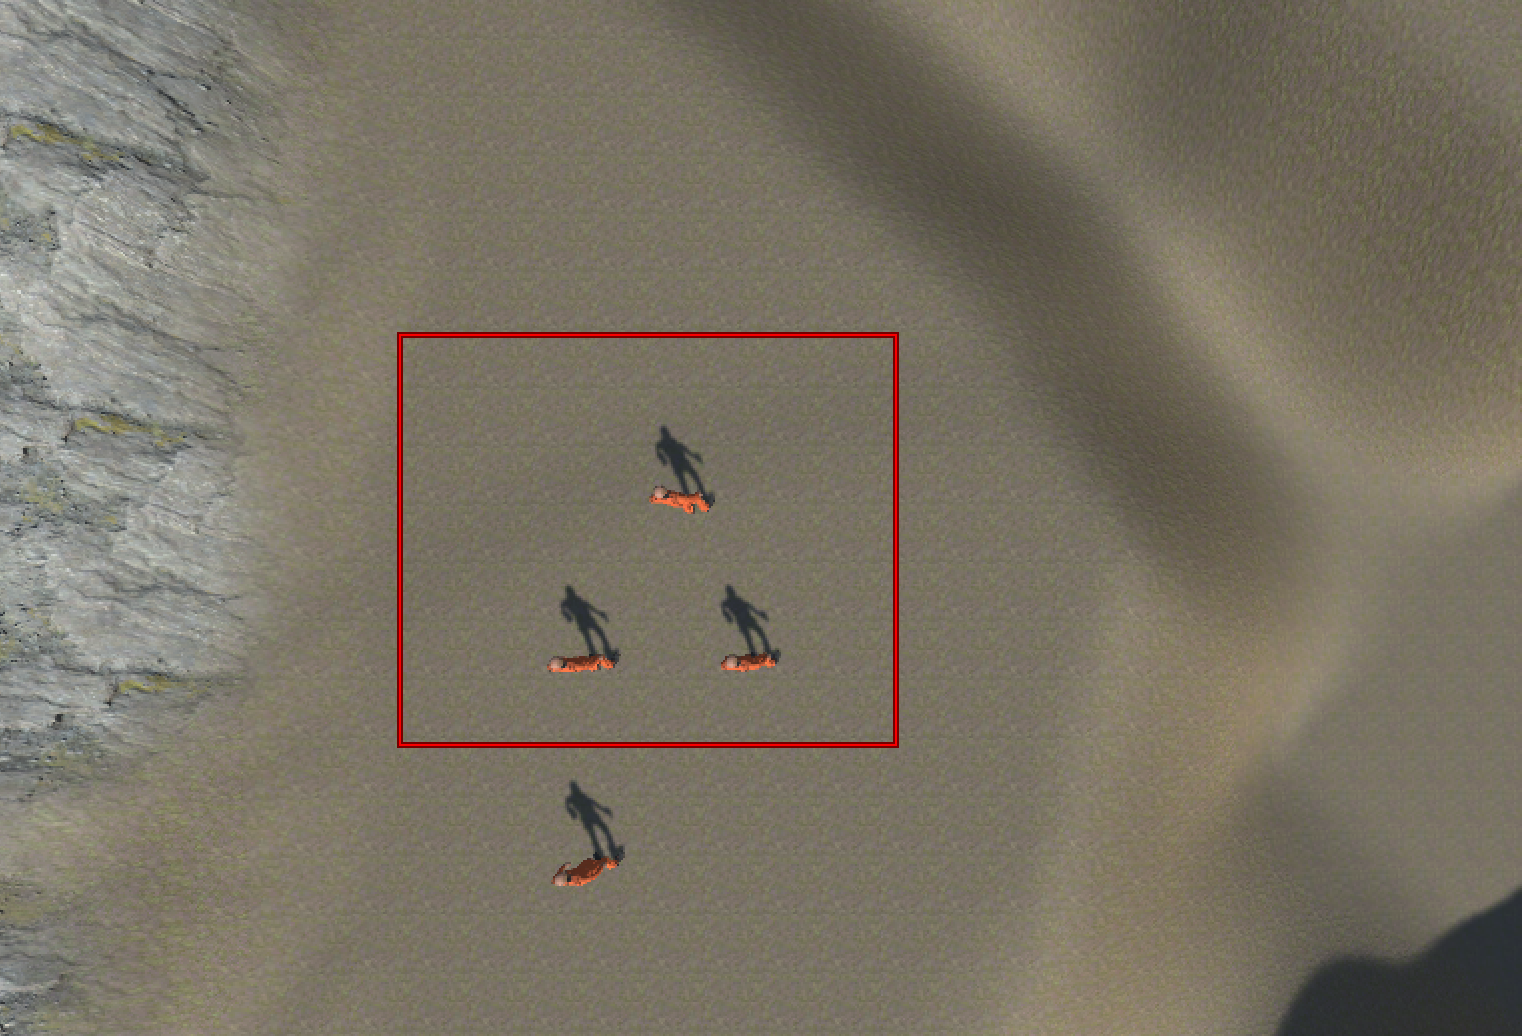
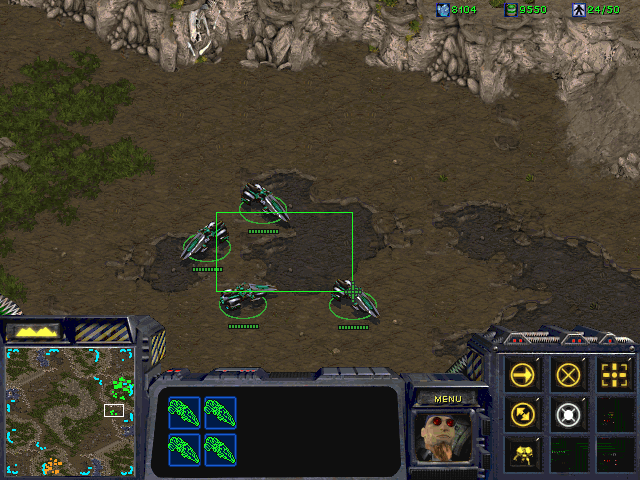
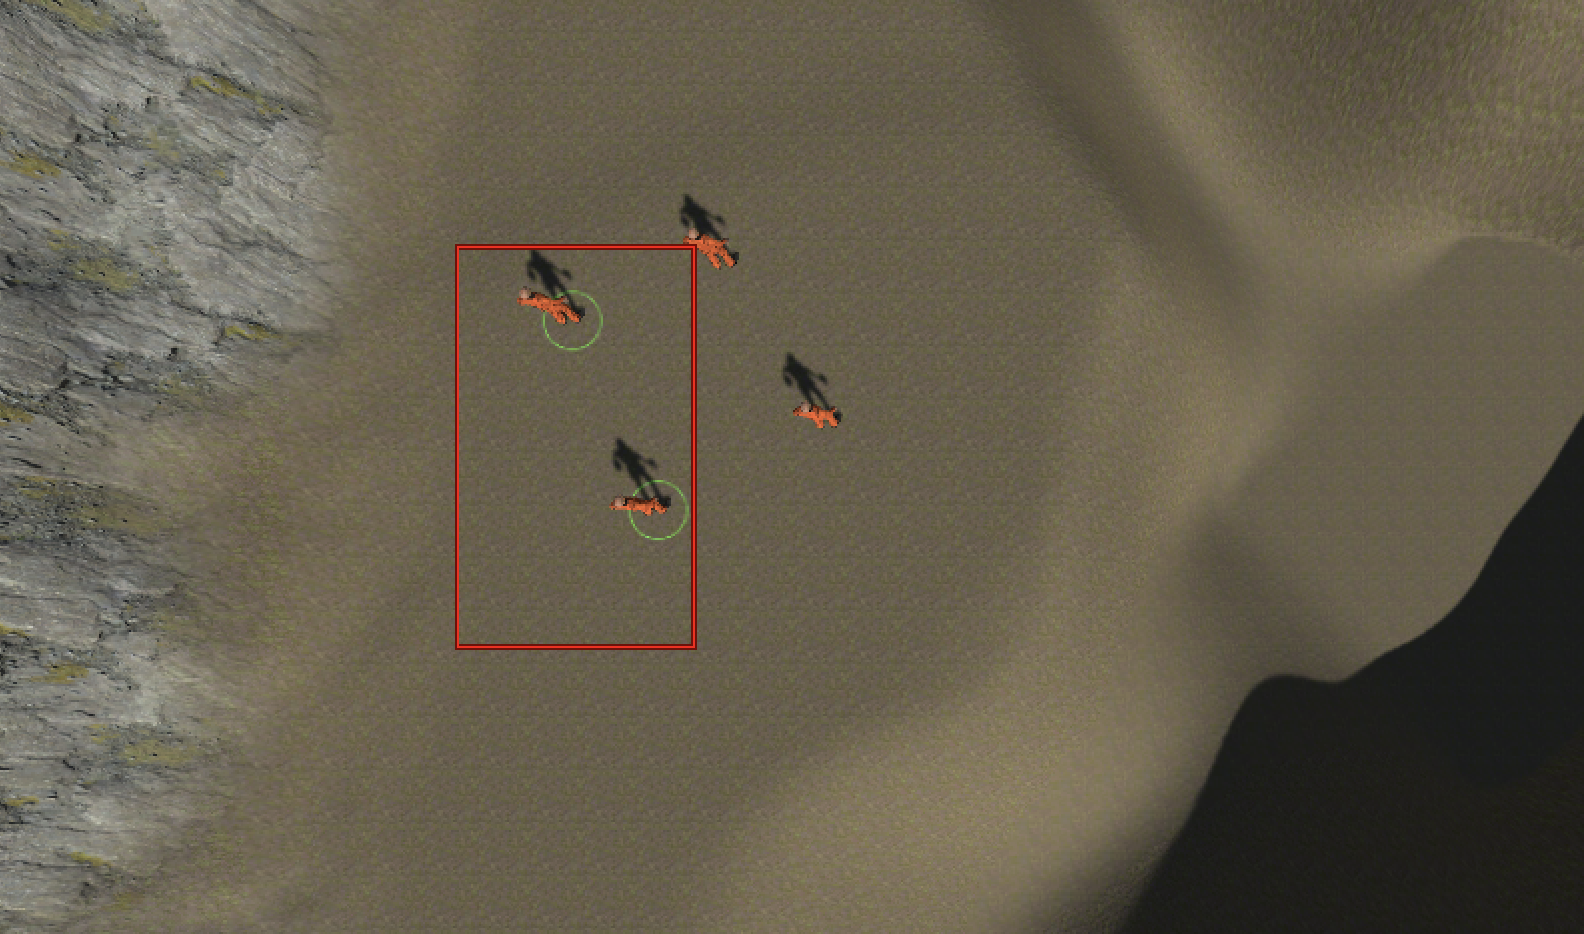
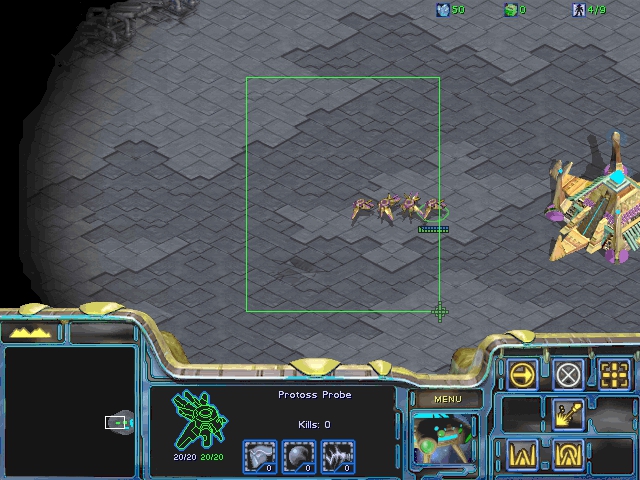
The first mechanic we will add is a selection box you can drag onto the screen with the mouse in order to select multiple units, as shown in this screenshot from the game StarCraft.

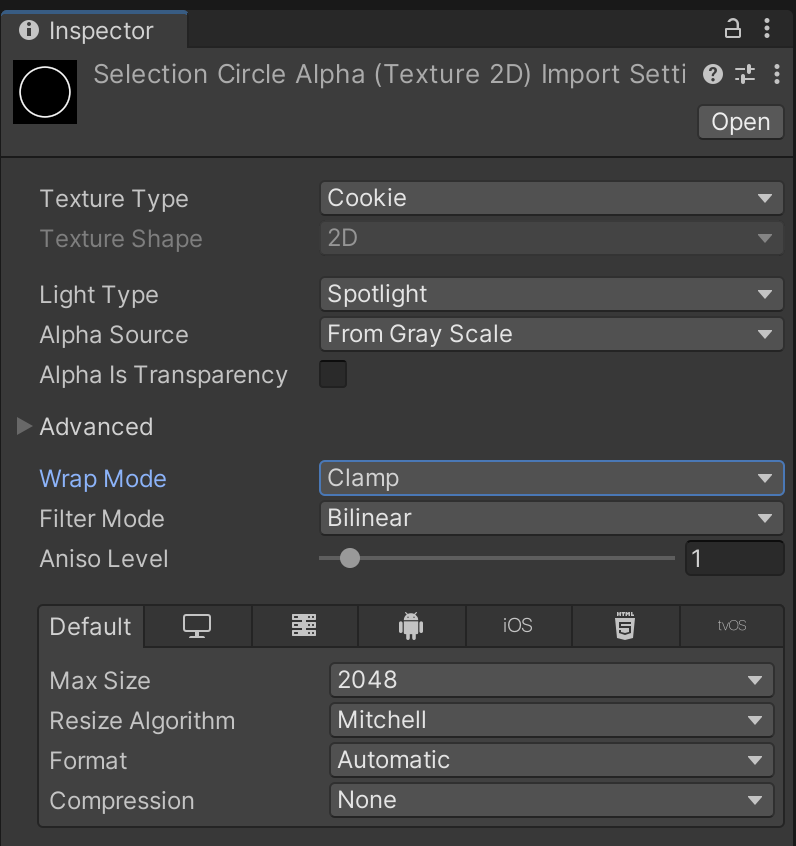
outline.png is supplied with your course files. Add this image to your project with the following import settings: Texture Type = Sprite (2D and UI), Filter Mode = Point, Compression = None.

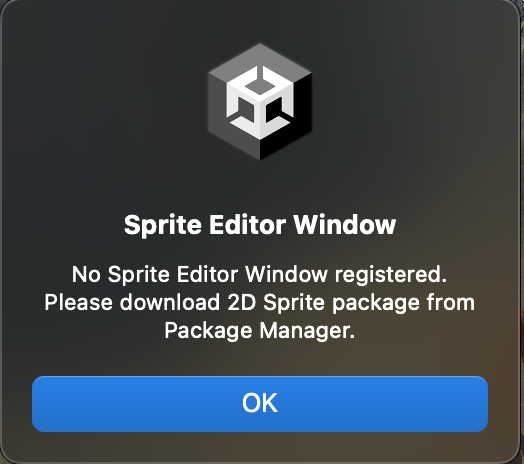
From the Inspector, open the Sprite Editor. (Depending on your Unity project settings, it may ask you to install the "2D Sprite" package using Window > Package Manager.

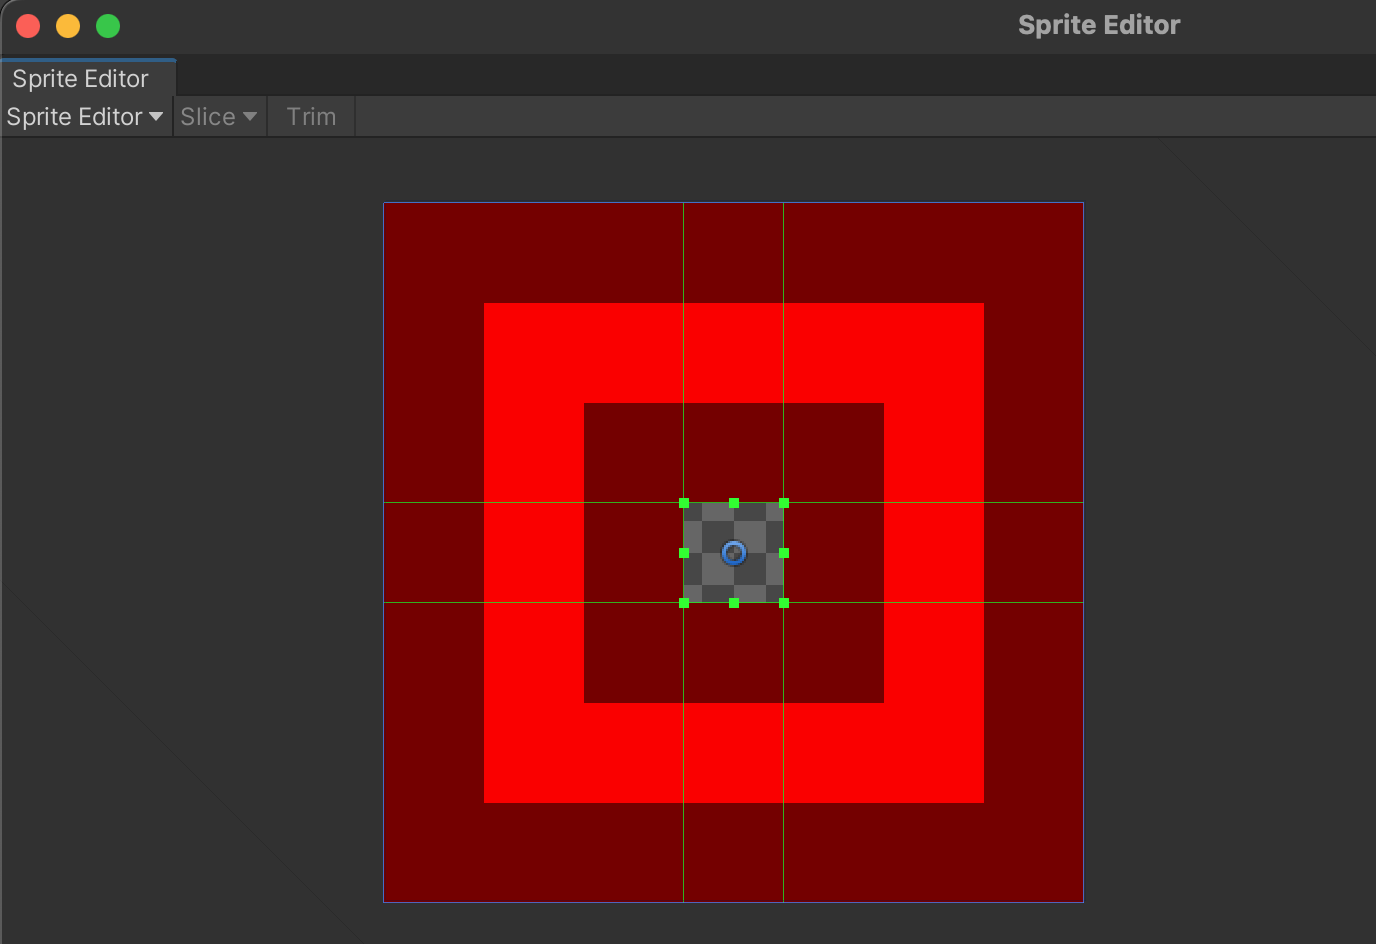
Within the Sprite Editor, drag the green handles inward from the edges to create a 9-slice grid of the sprite. This is used to specify which sections stretch when making a resizable UI out of an image. In this example, the corners will never stretch, but the sides in between each corner will stretch to accommodate drawing a rectangle of any size with these graphics. Apply any changes as requested.

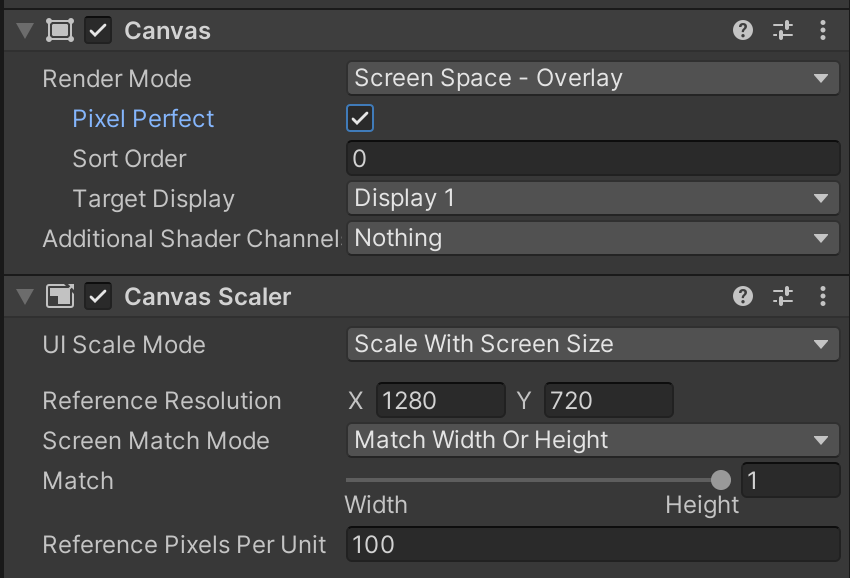
Prepare your UI by creating a Canvas with destop-responsive settings.

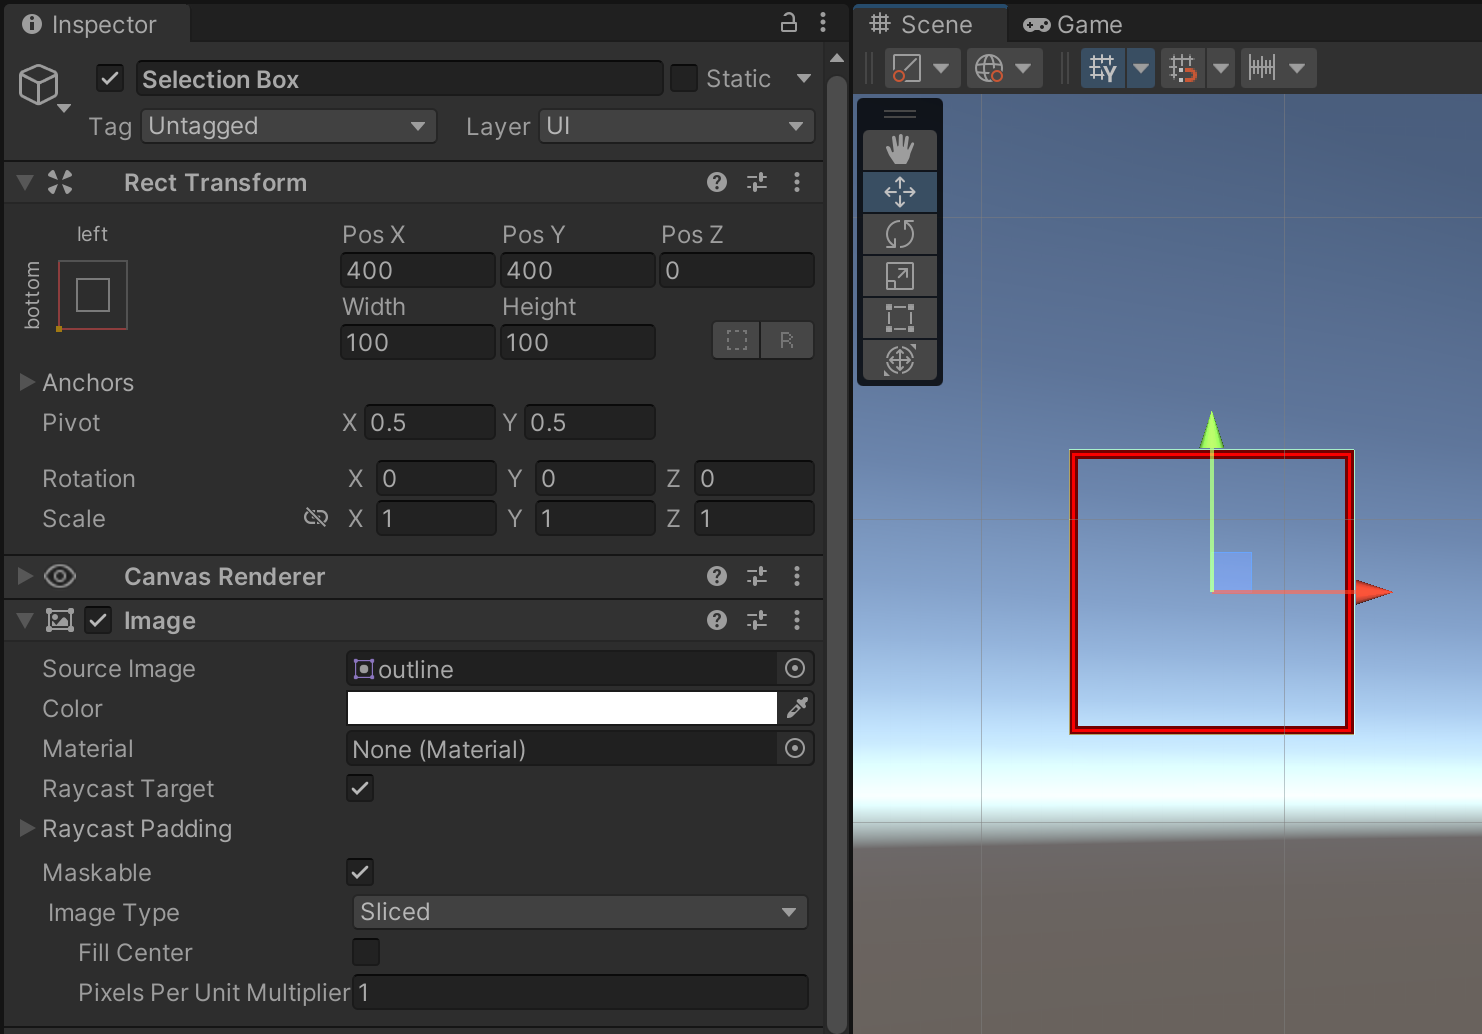
Create a UI Image and name it "Selection Box." Assign the outline.png as the Source Image with Image Type = Sliced and Fill Center = Unchecked. These settings enable using the 9-slice segmentation of the image. (You can experiment with the consequences of not using the "Sliced" setting to better understand why 9-slice is useful.)

Configure the Anchoring of the UI Image to be in the bottom-left. This will simplify coding the position of the rectangle in future steps, since Unity's UI system places the coordinate origin in the same bottom-left corner. Leave Pivot at center since we don't know what direction the player will drag the rectangle. (You can have a rectangle whose size is in a negative axis relative to the mouse drag's starting position.)

When you are done experimenting with the Selection Box object, disable it in the hierarchy.

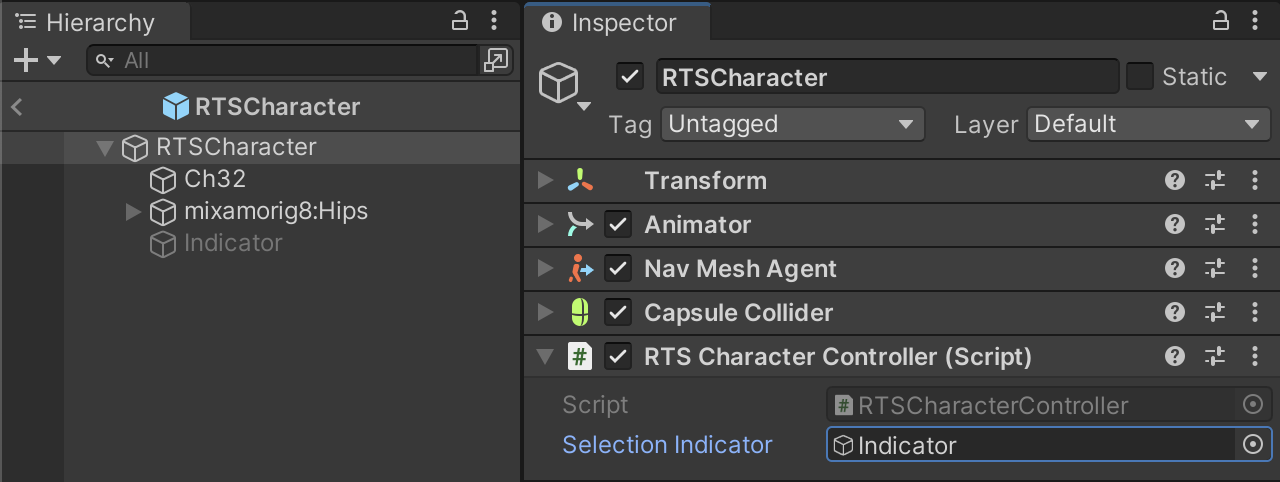
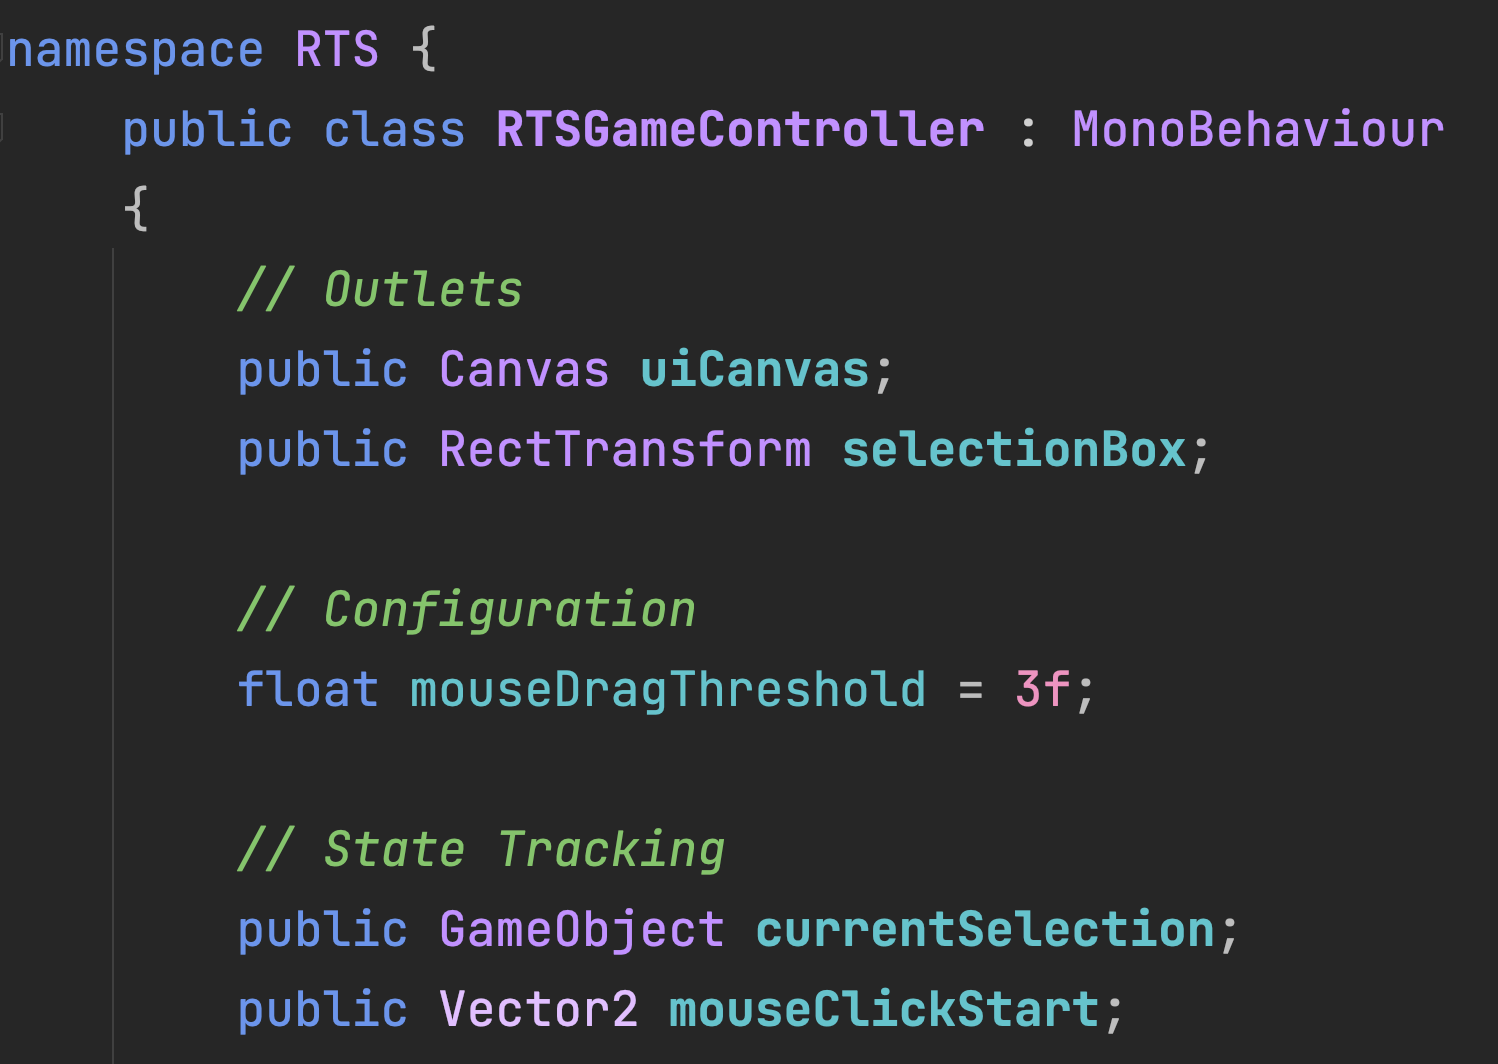
In RTSGameController, add outlets to reference the UI Canvas and Selection Box Rectangle. The variable mouseDragThreshold will configure how far the mouse has to move before it's considered a drag gesture, and mouseClickStart will keep track of where the drag gesture started.

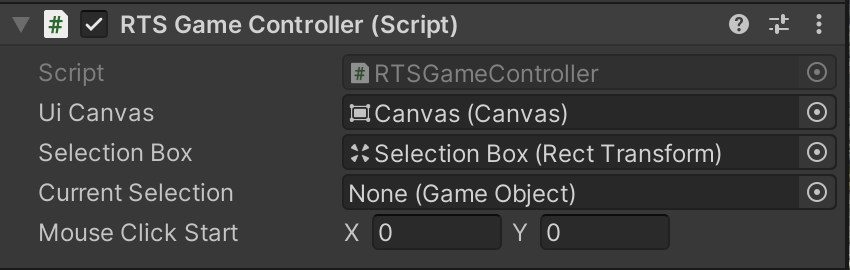
Configure the new outlets.

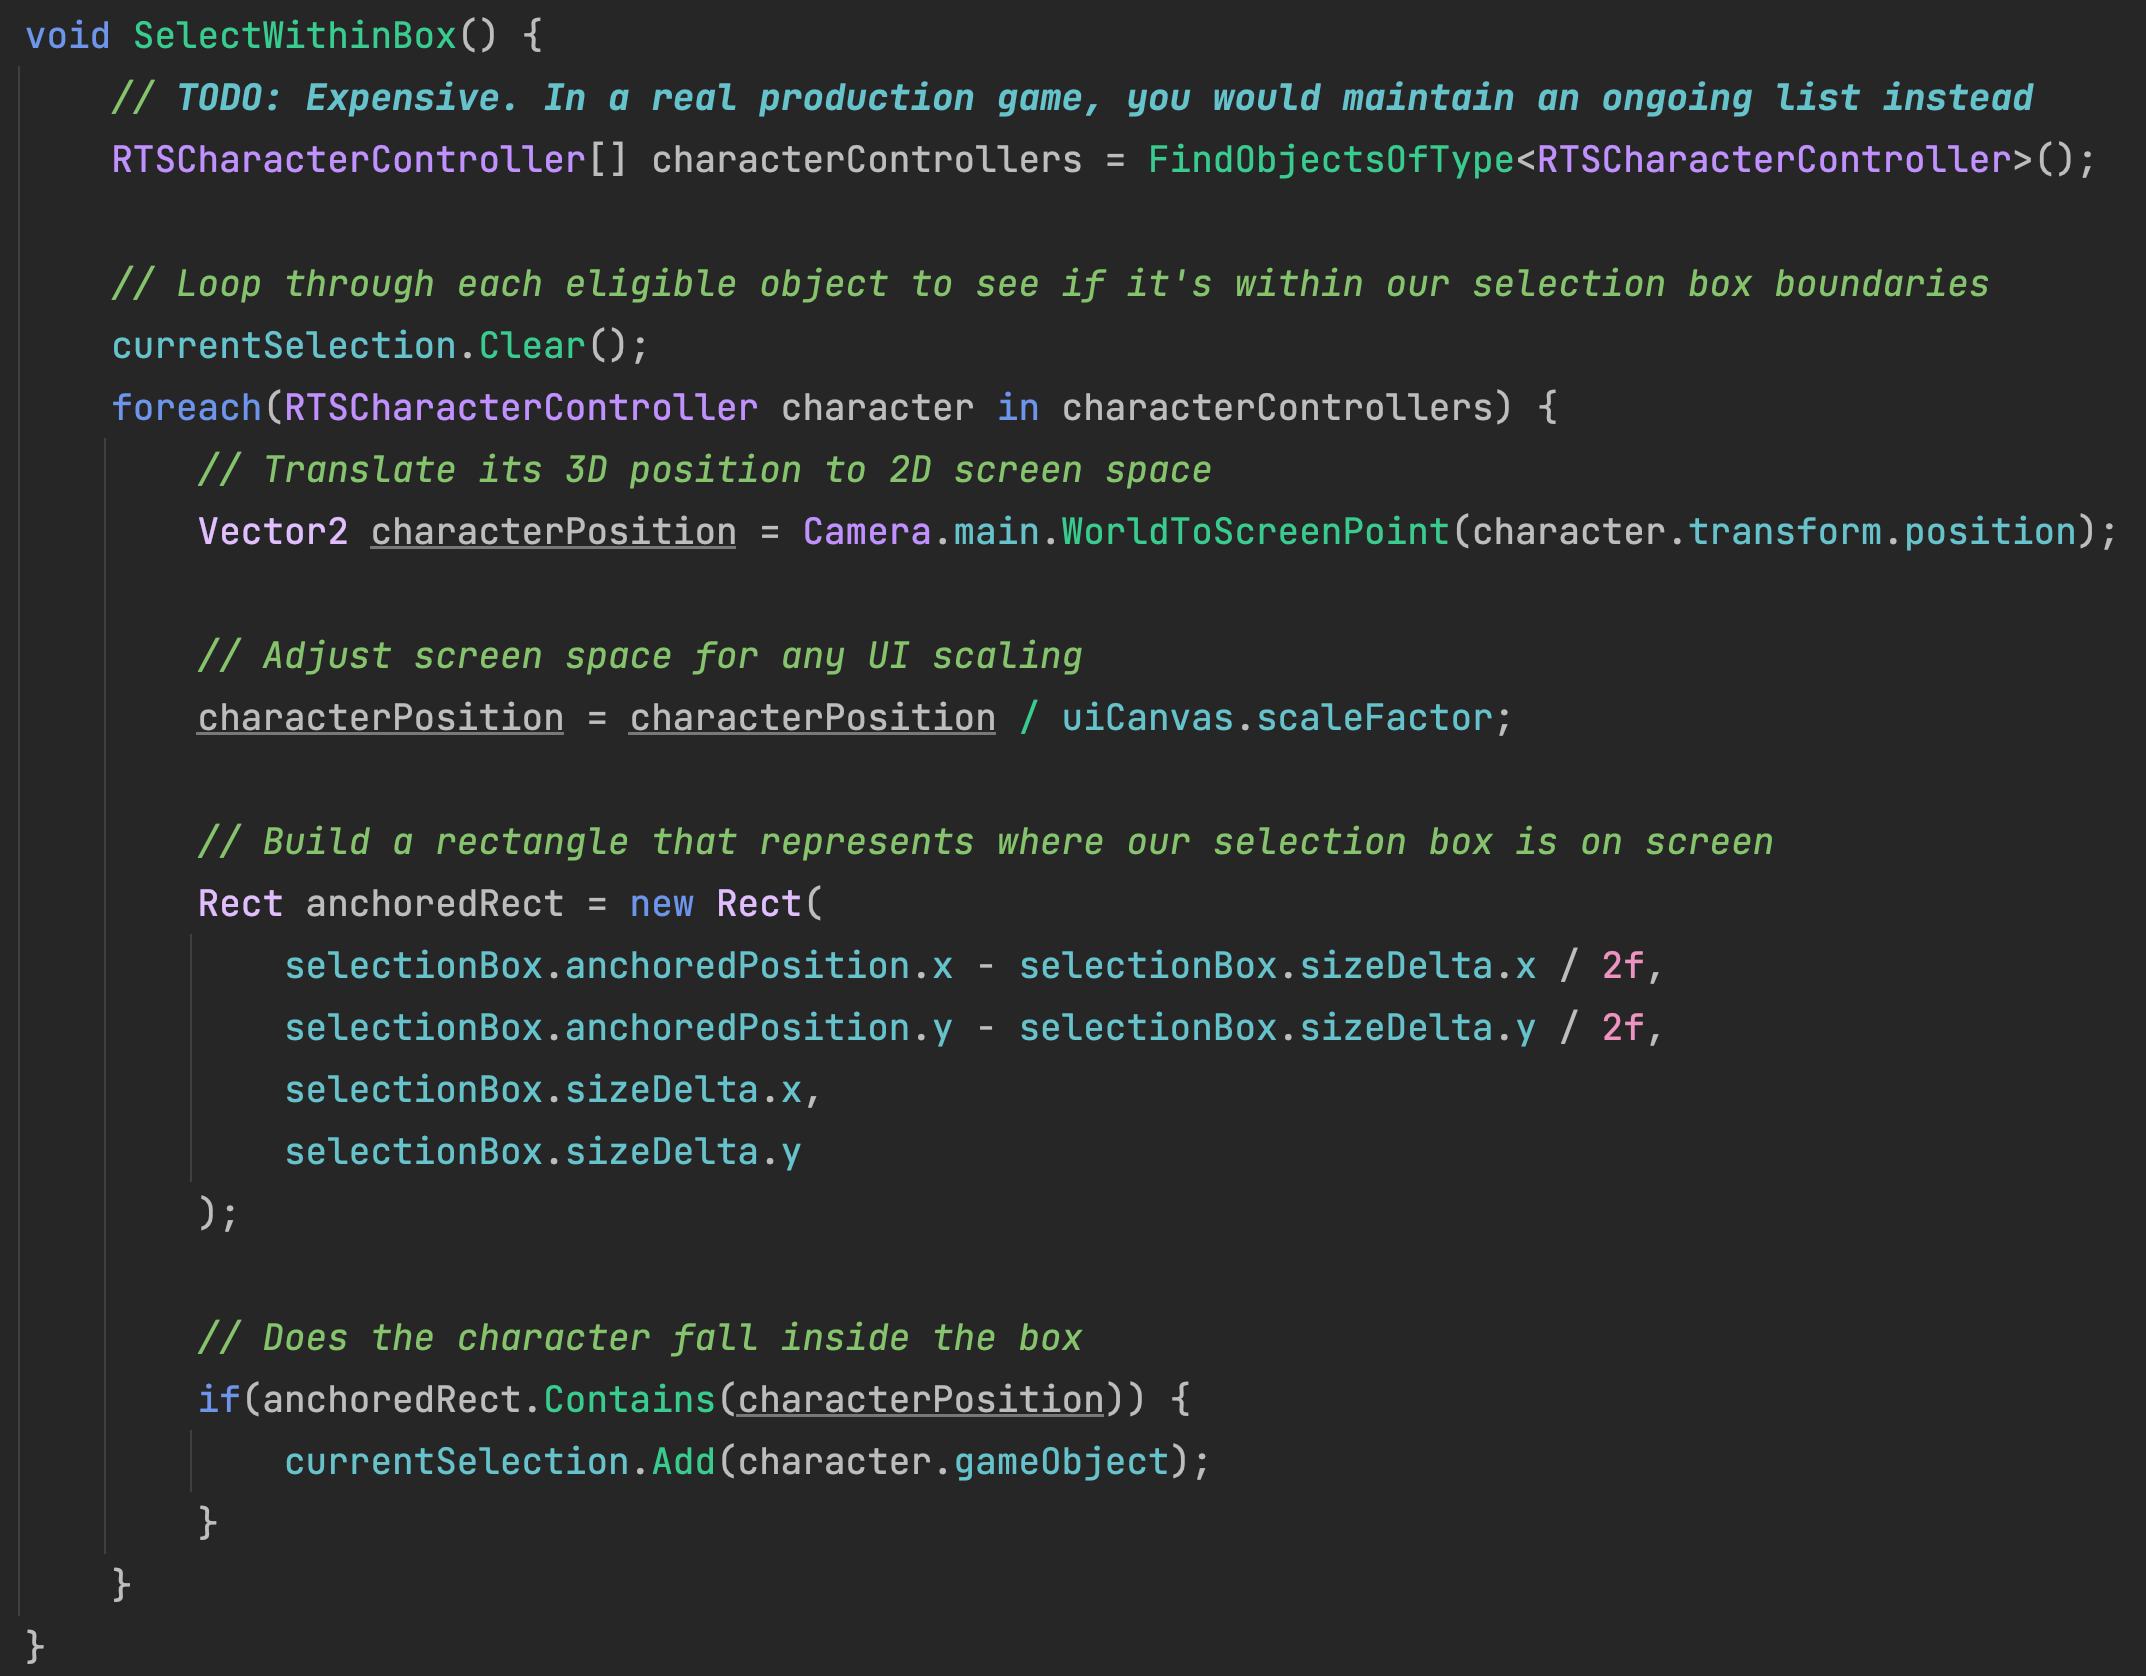
We will need to revise some of our prior code to accommodate our new drag gesture. In this revision of our game, character selection happens after we have determined whether the player tried to drag a selection box onto the screen.

Old Approach: Left Mouse Button Down > Select Character

New Approach: Left Mouse Button Down > Test for Drag Gesture > Left Mouse Button Up > Select Characters

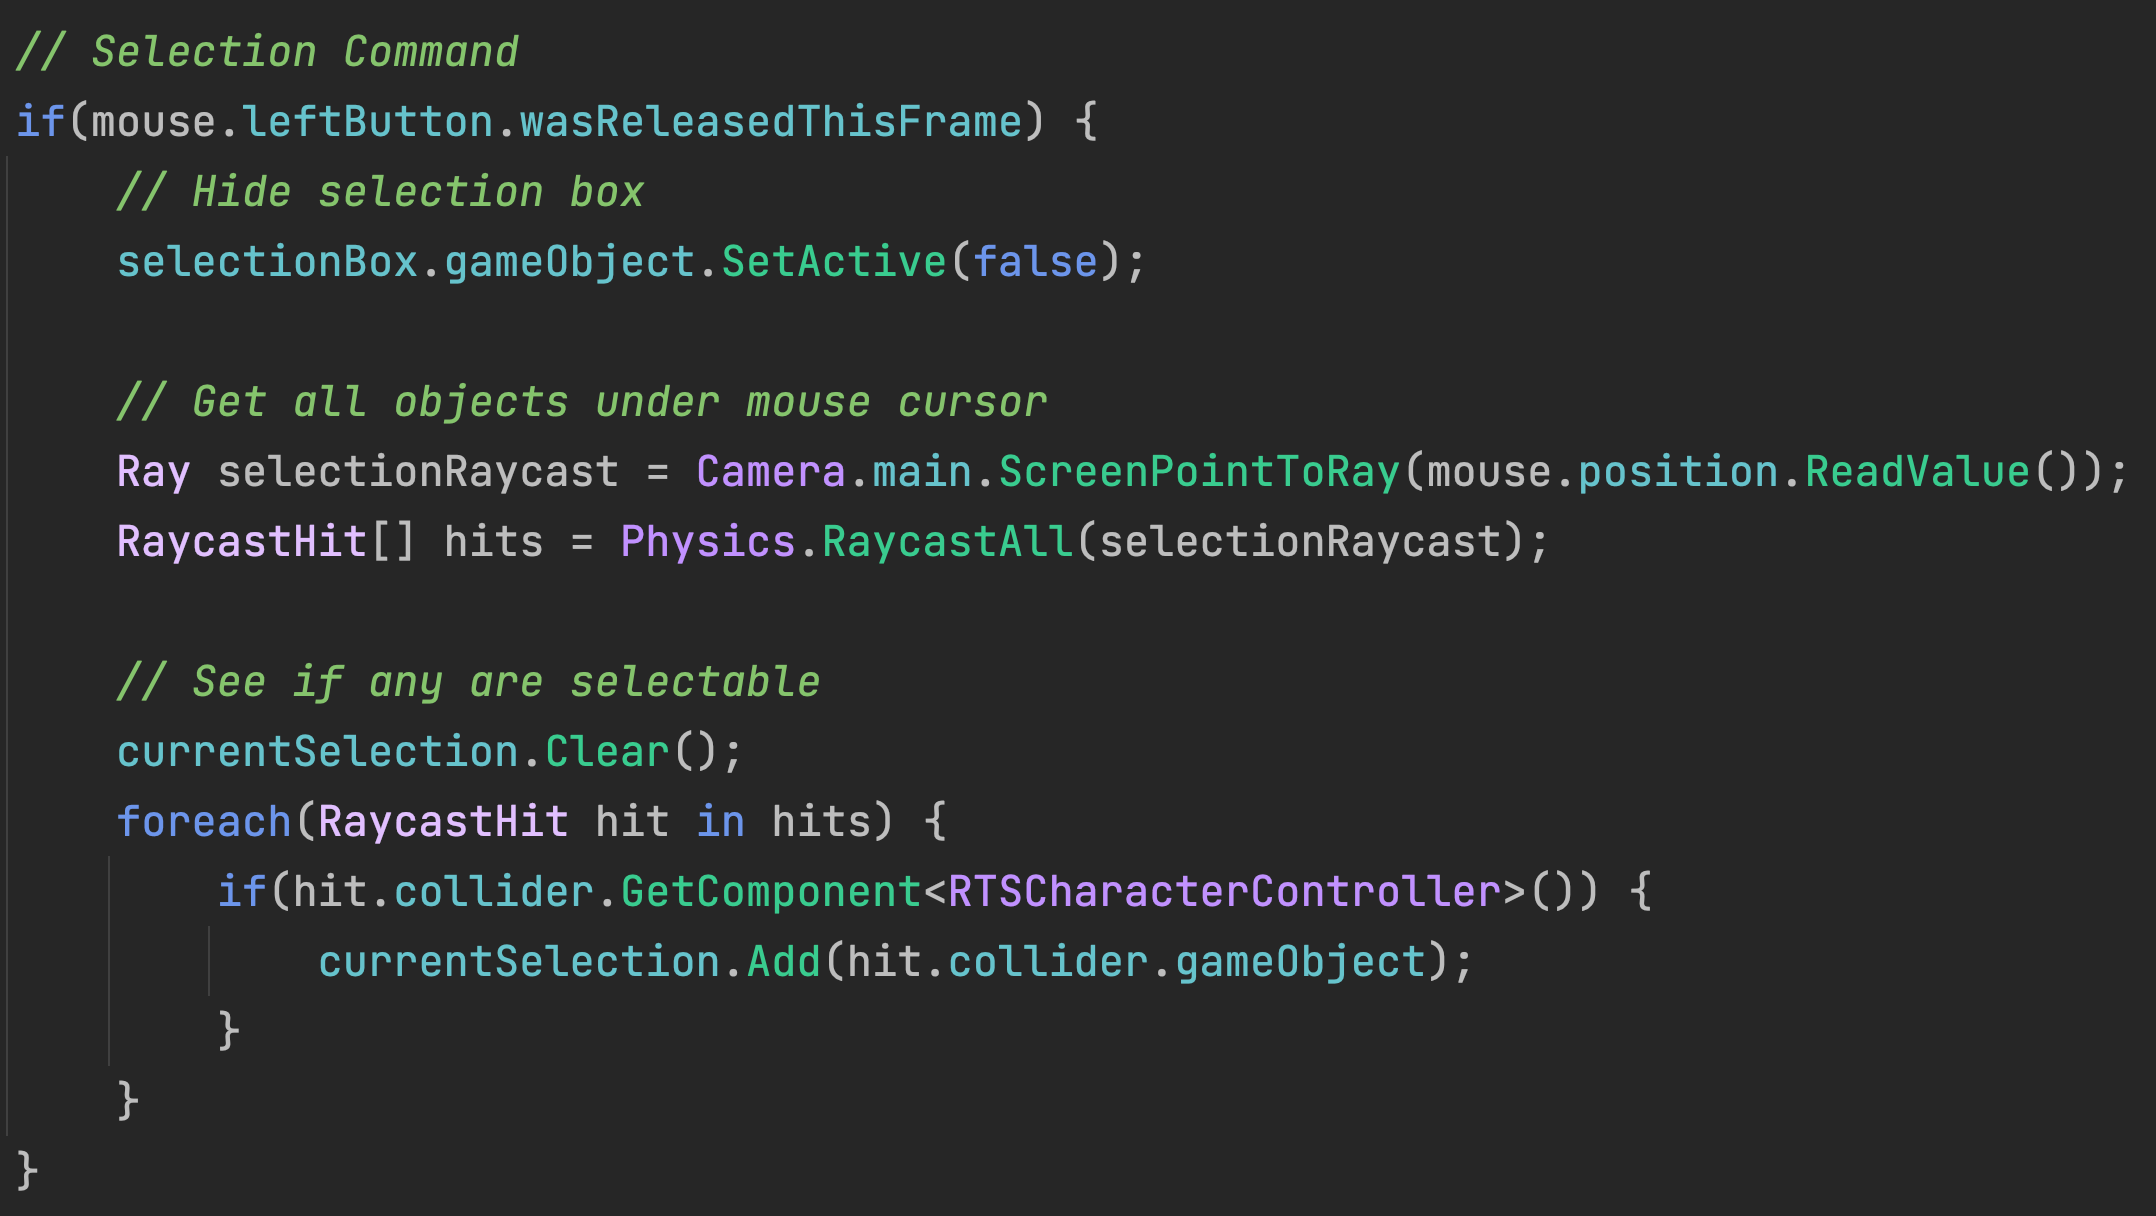
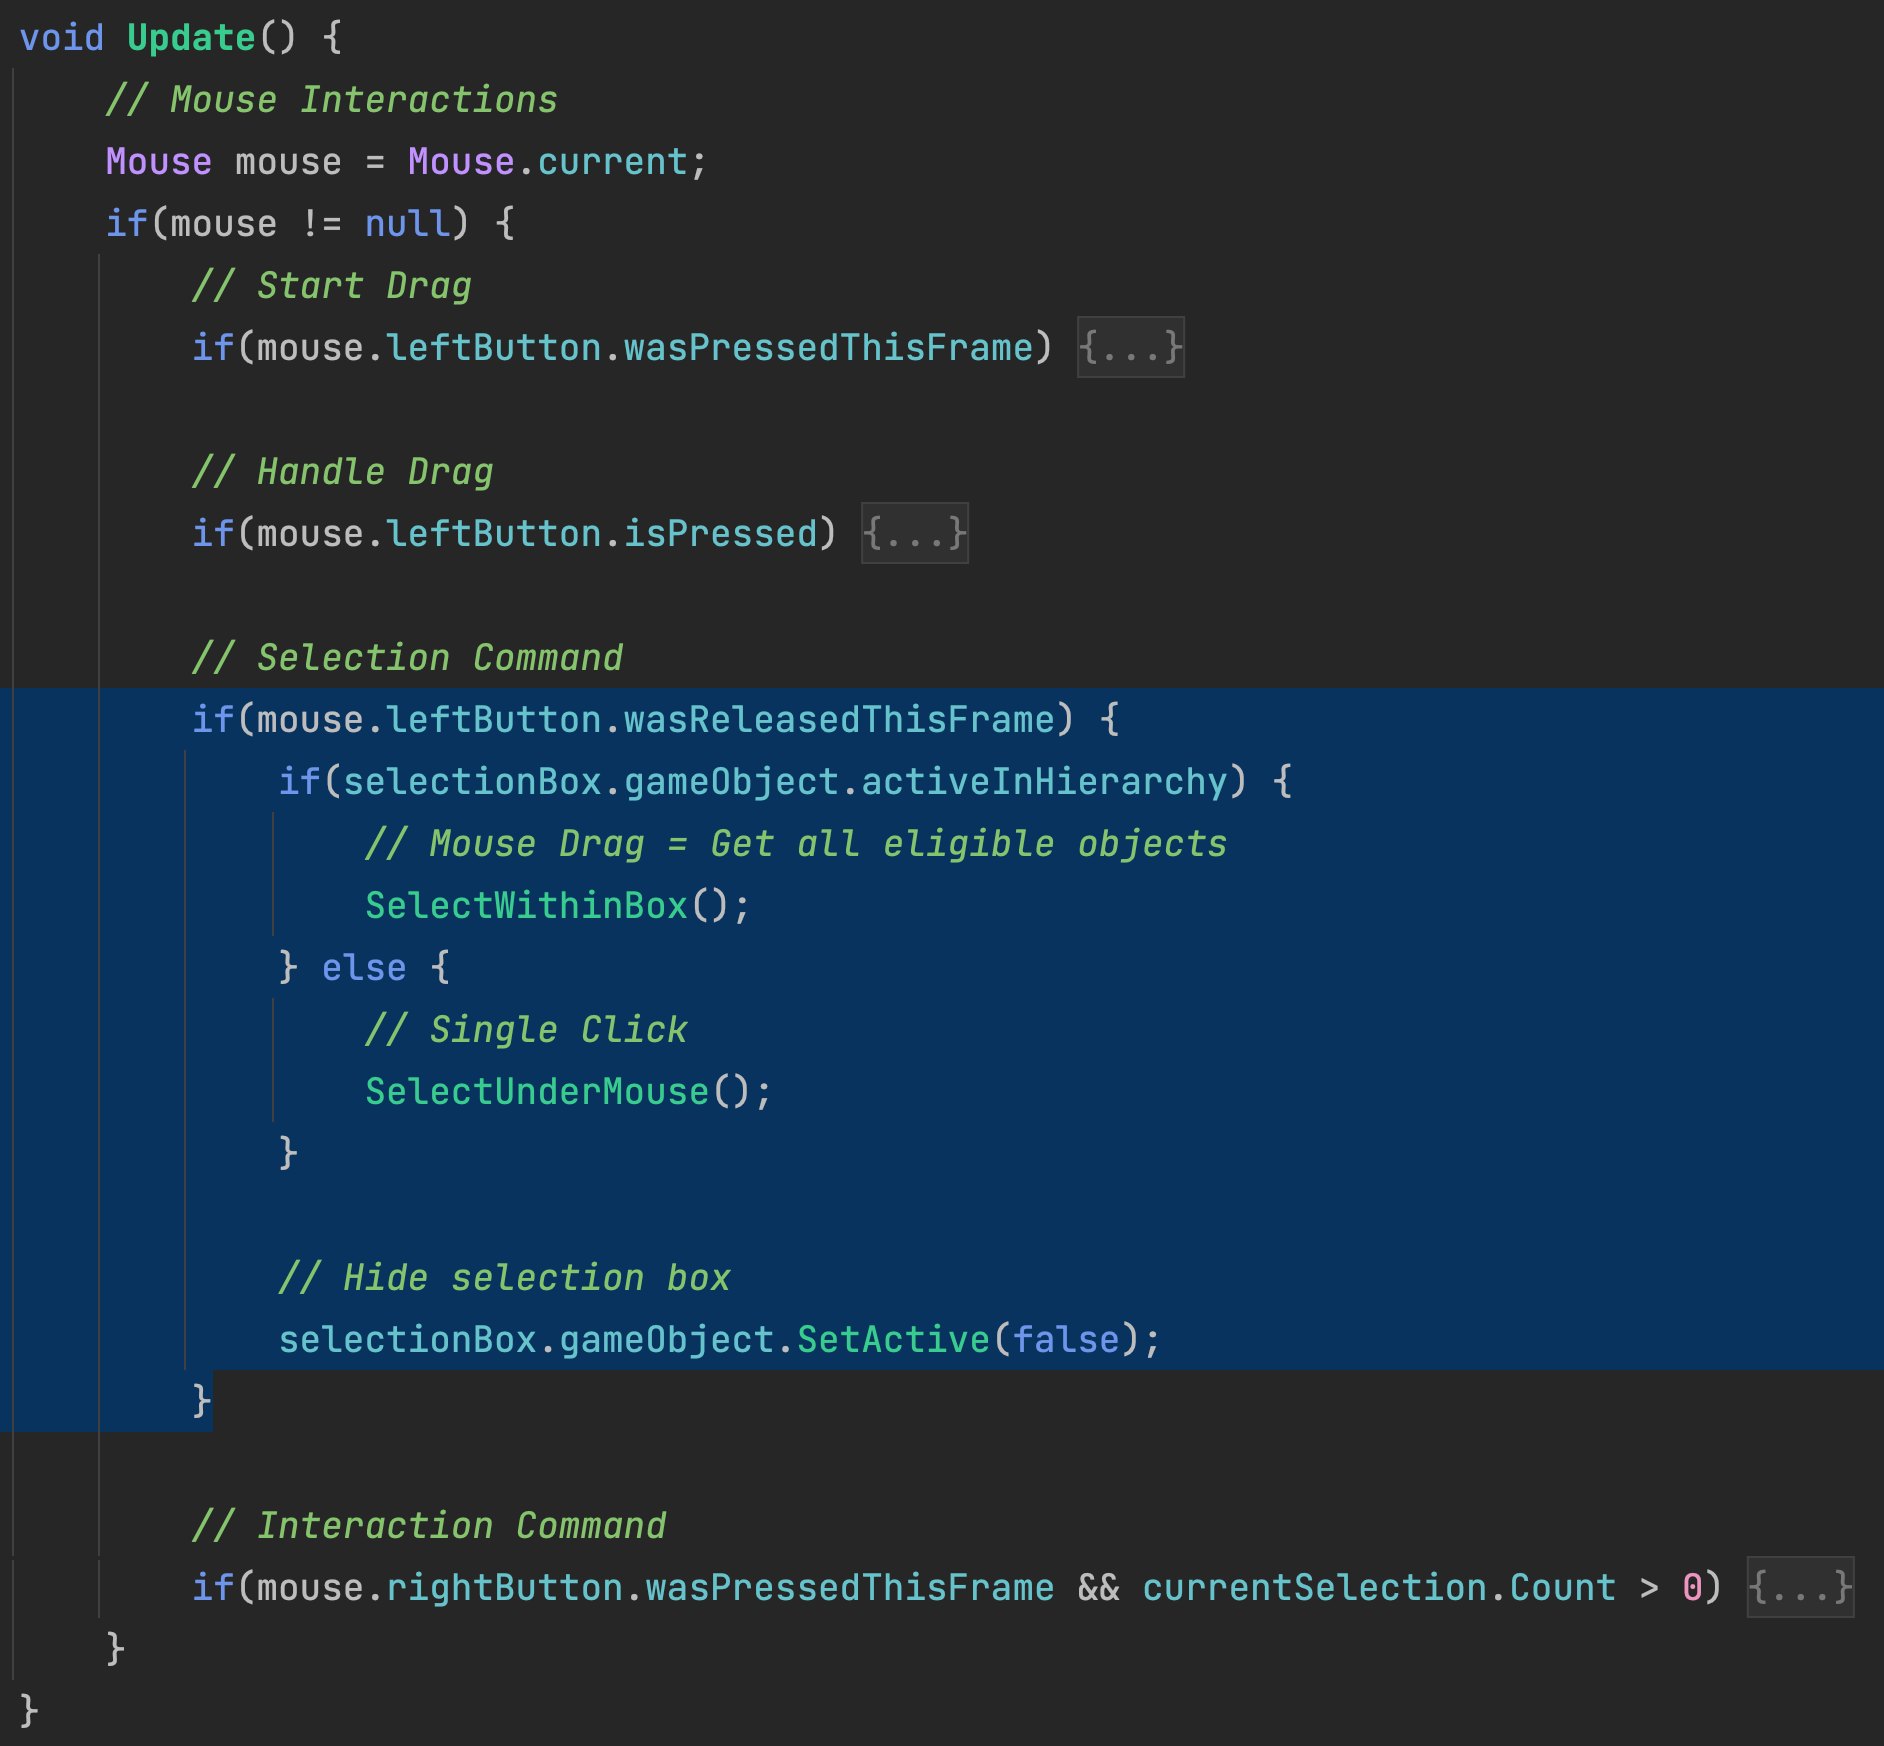
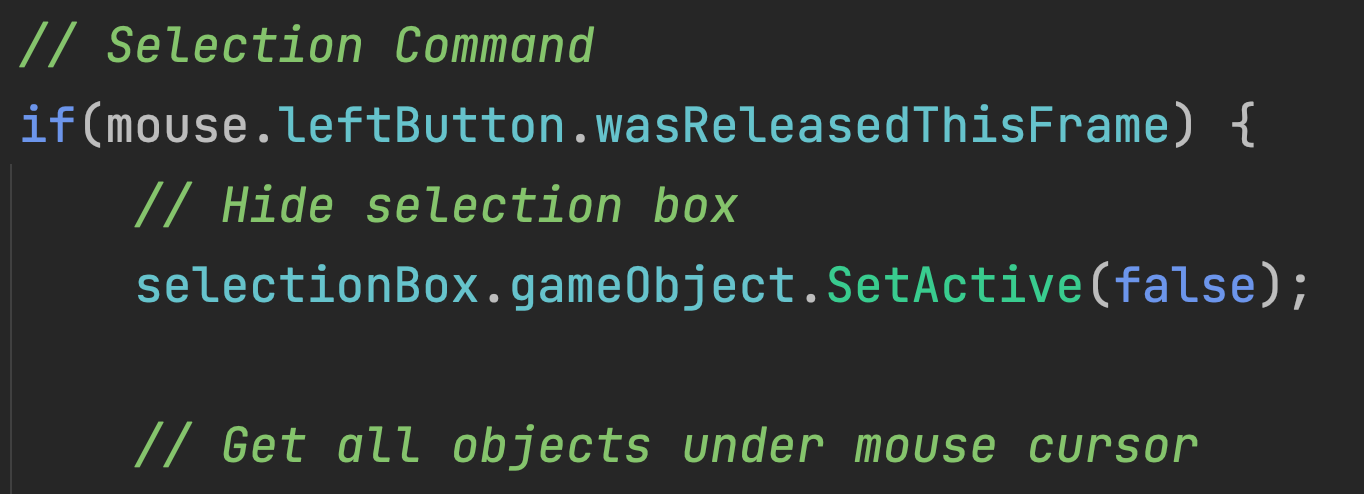
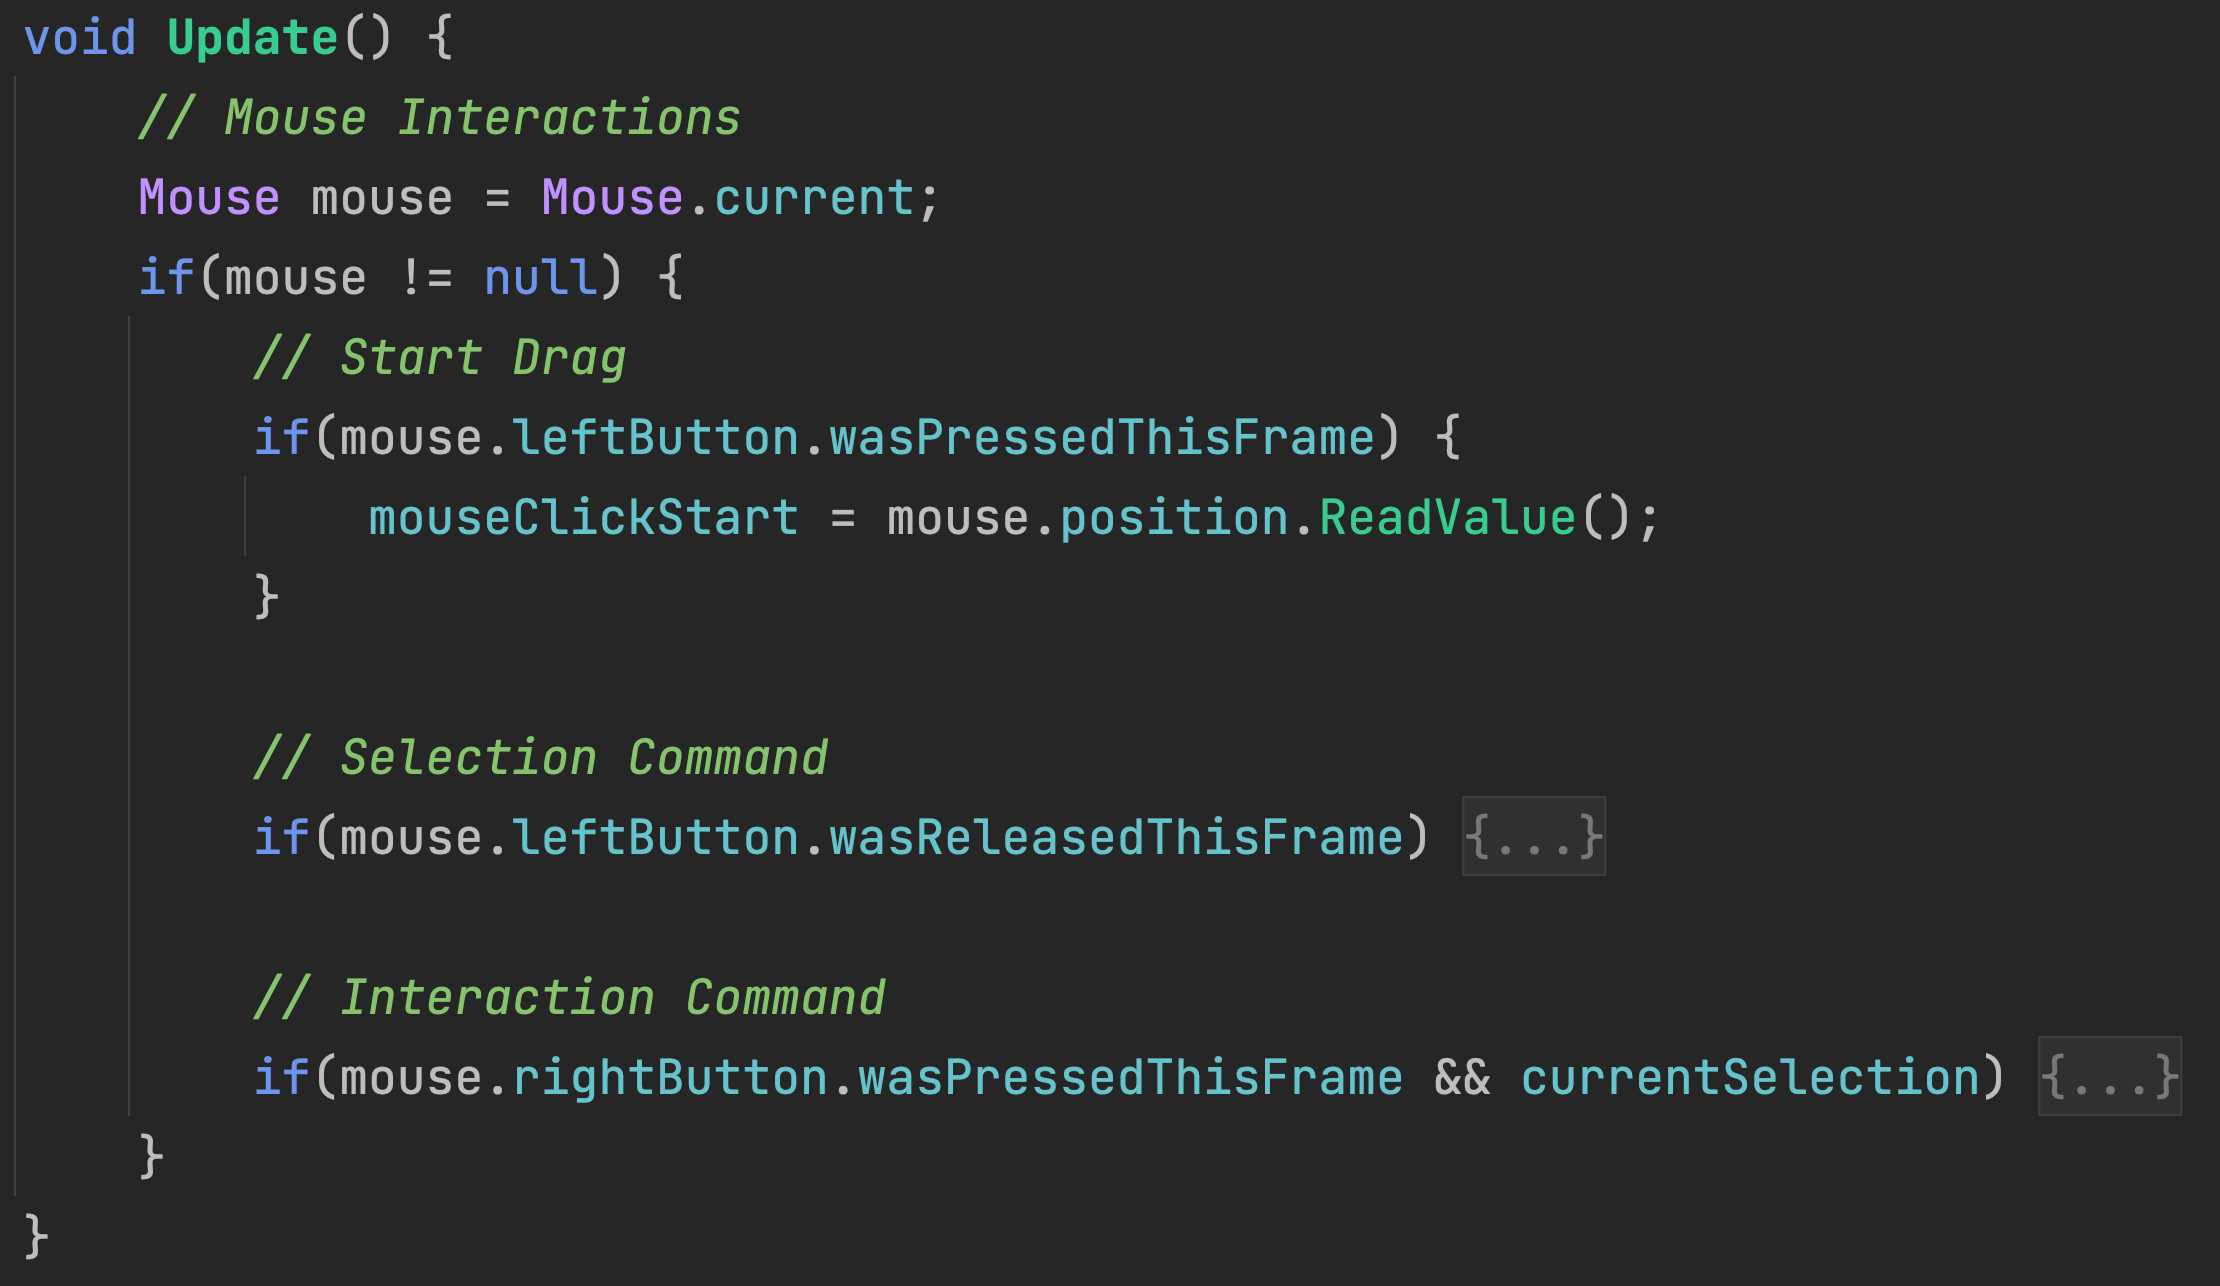
Within the Update function, we will rename the existing "mouse.leftButton.wasPressedThisFrame" condition to "mouse.leftButton.wasReleasedThisFrame" to match the revisions described above. We will also add a new line of code to turn off the UI selection box whenever the player has completed a gesture by releasing the mouse. All existing code should still stay the same for now.

The anatomy of a drag gesture is as follows:

Left Mouse Button Pressed (Drag Start) > Left Mouse Button Held (Drag Movement, if it exceeds move threshold) > Left Mouse Button Released (Drag End)

A threshold is necessary because some players have a natural amount of hand motion (even if they mean to keep still) that we must avoid classifying as a drag.

Inside the Update function, create a new conditional for left mouse button to replace the "wasPressedThisFrame" event that we just renamed. We will now use this event to keep track of where the drag started as described in the sequence above.

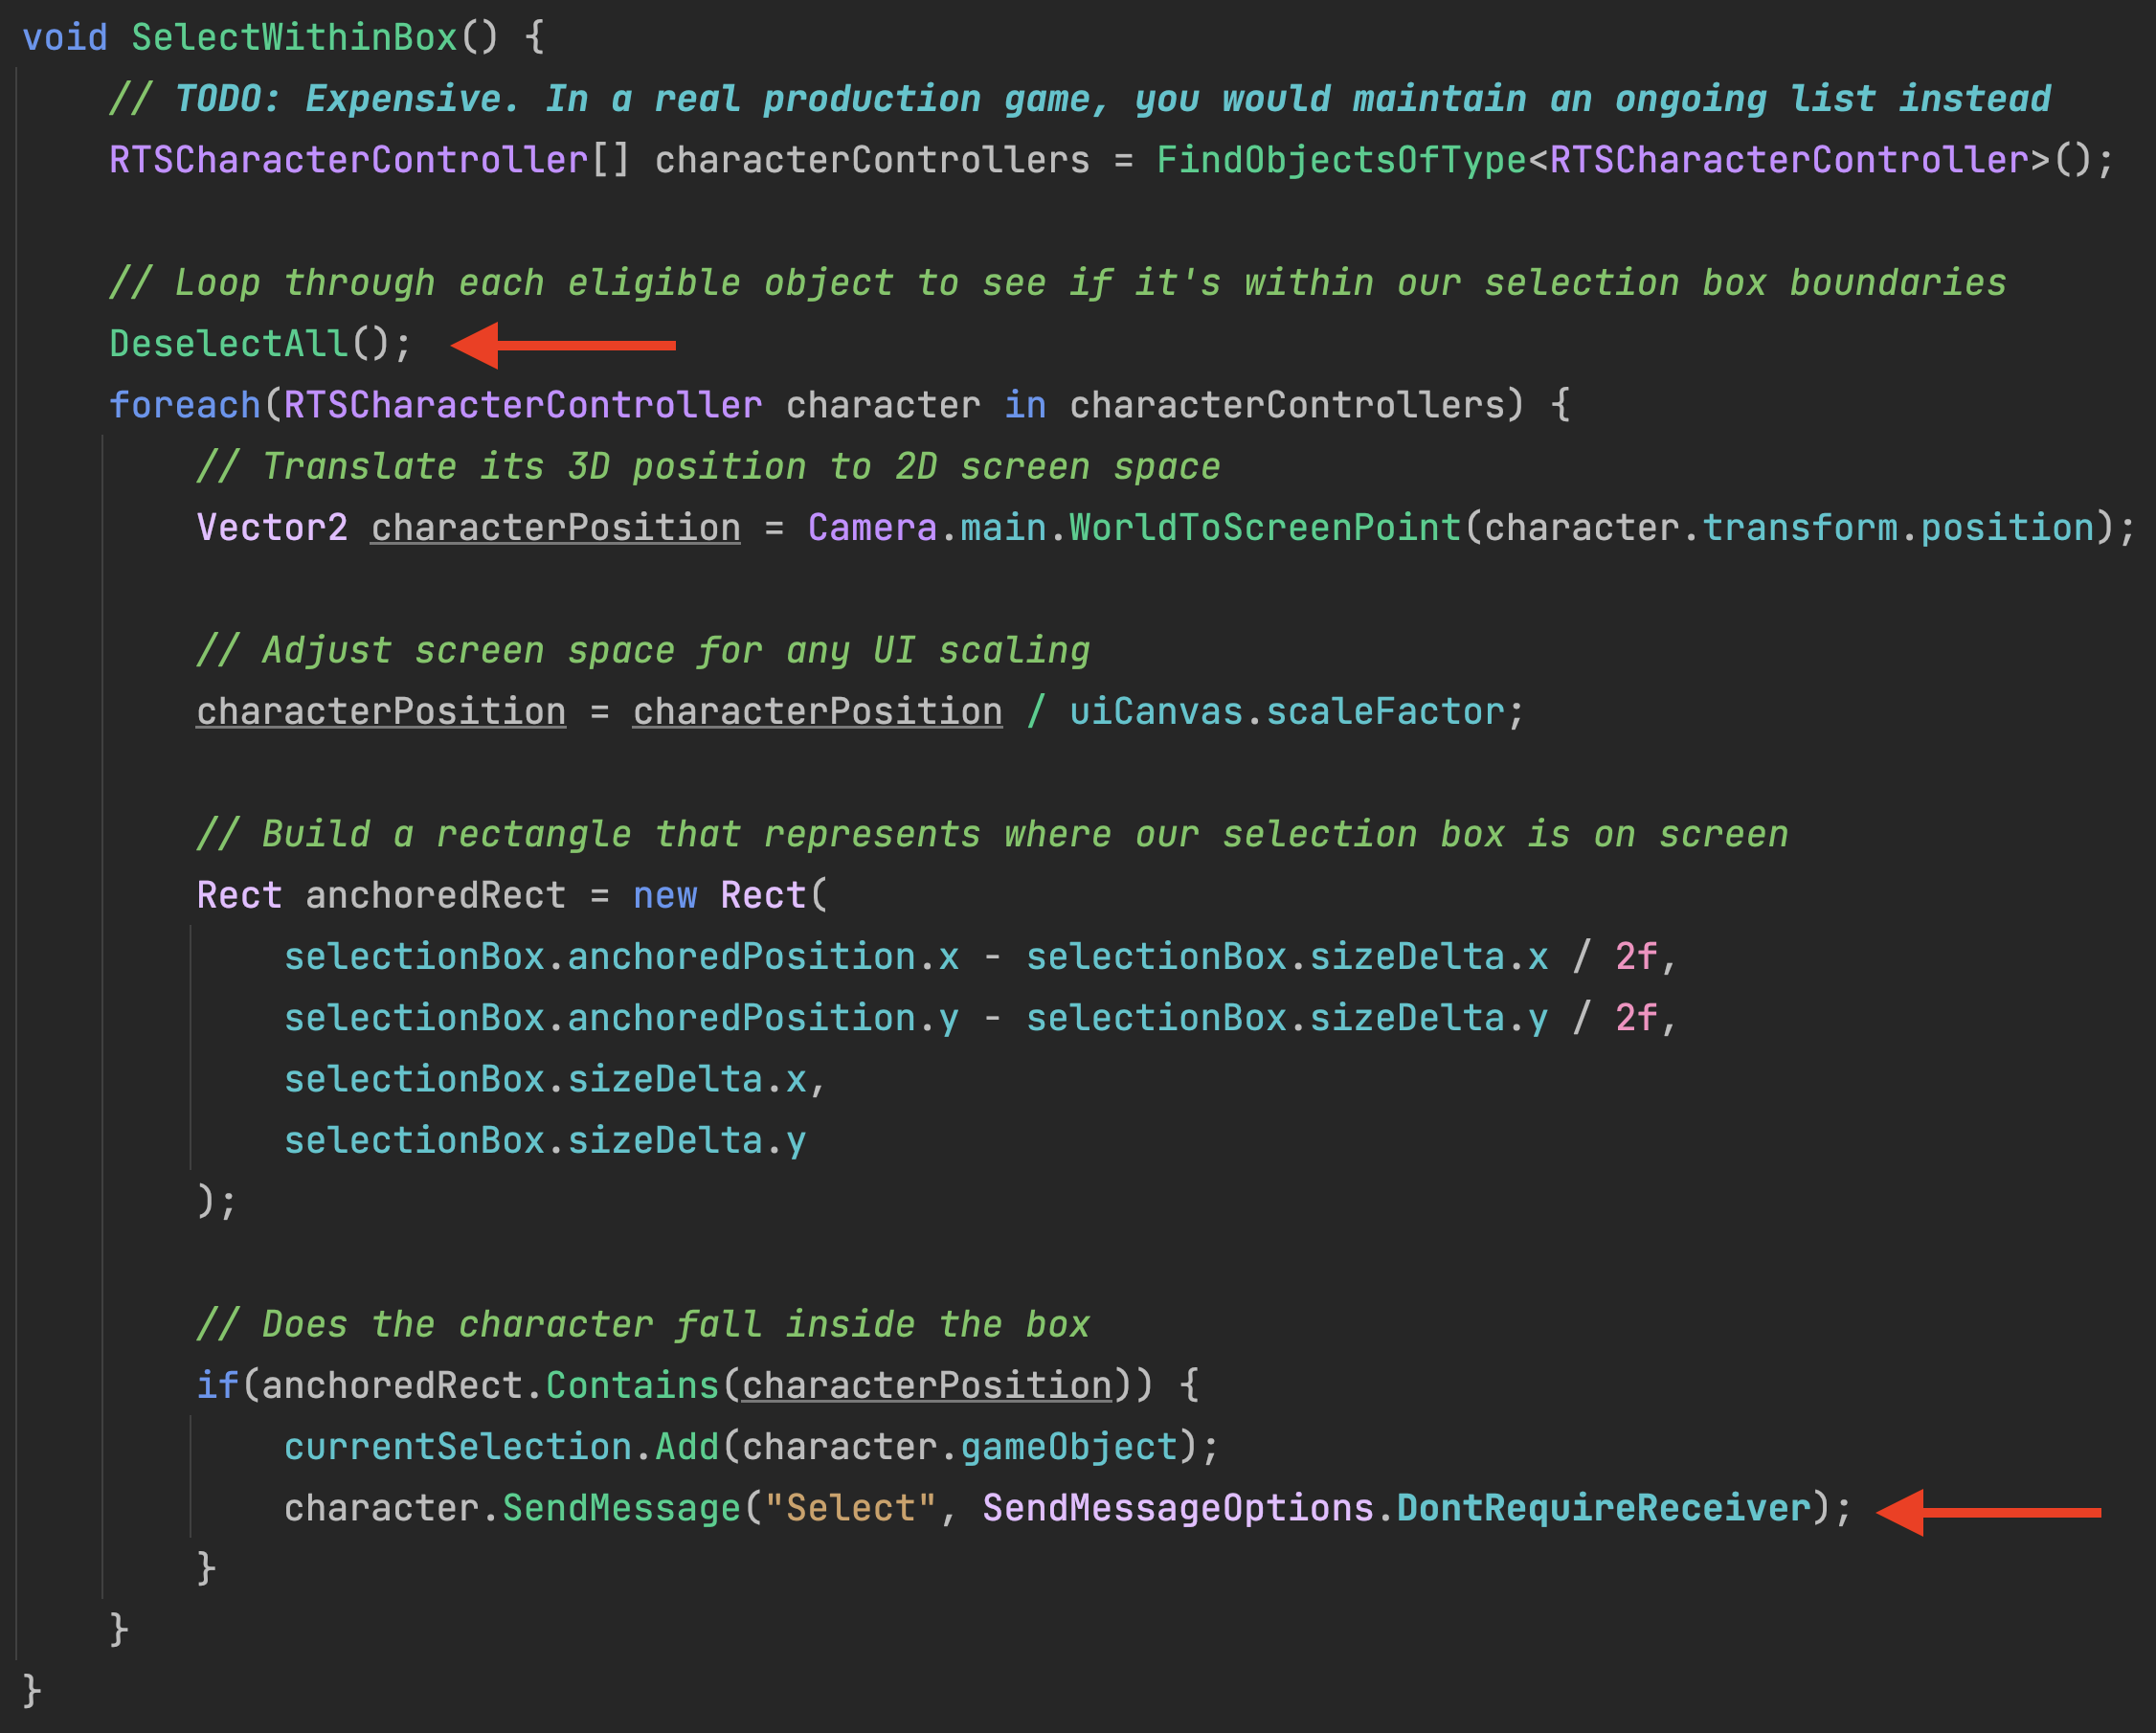
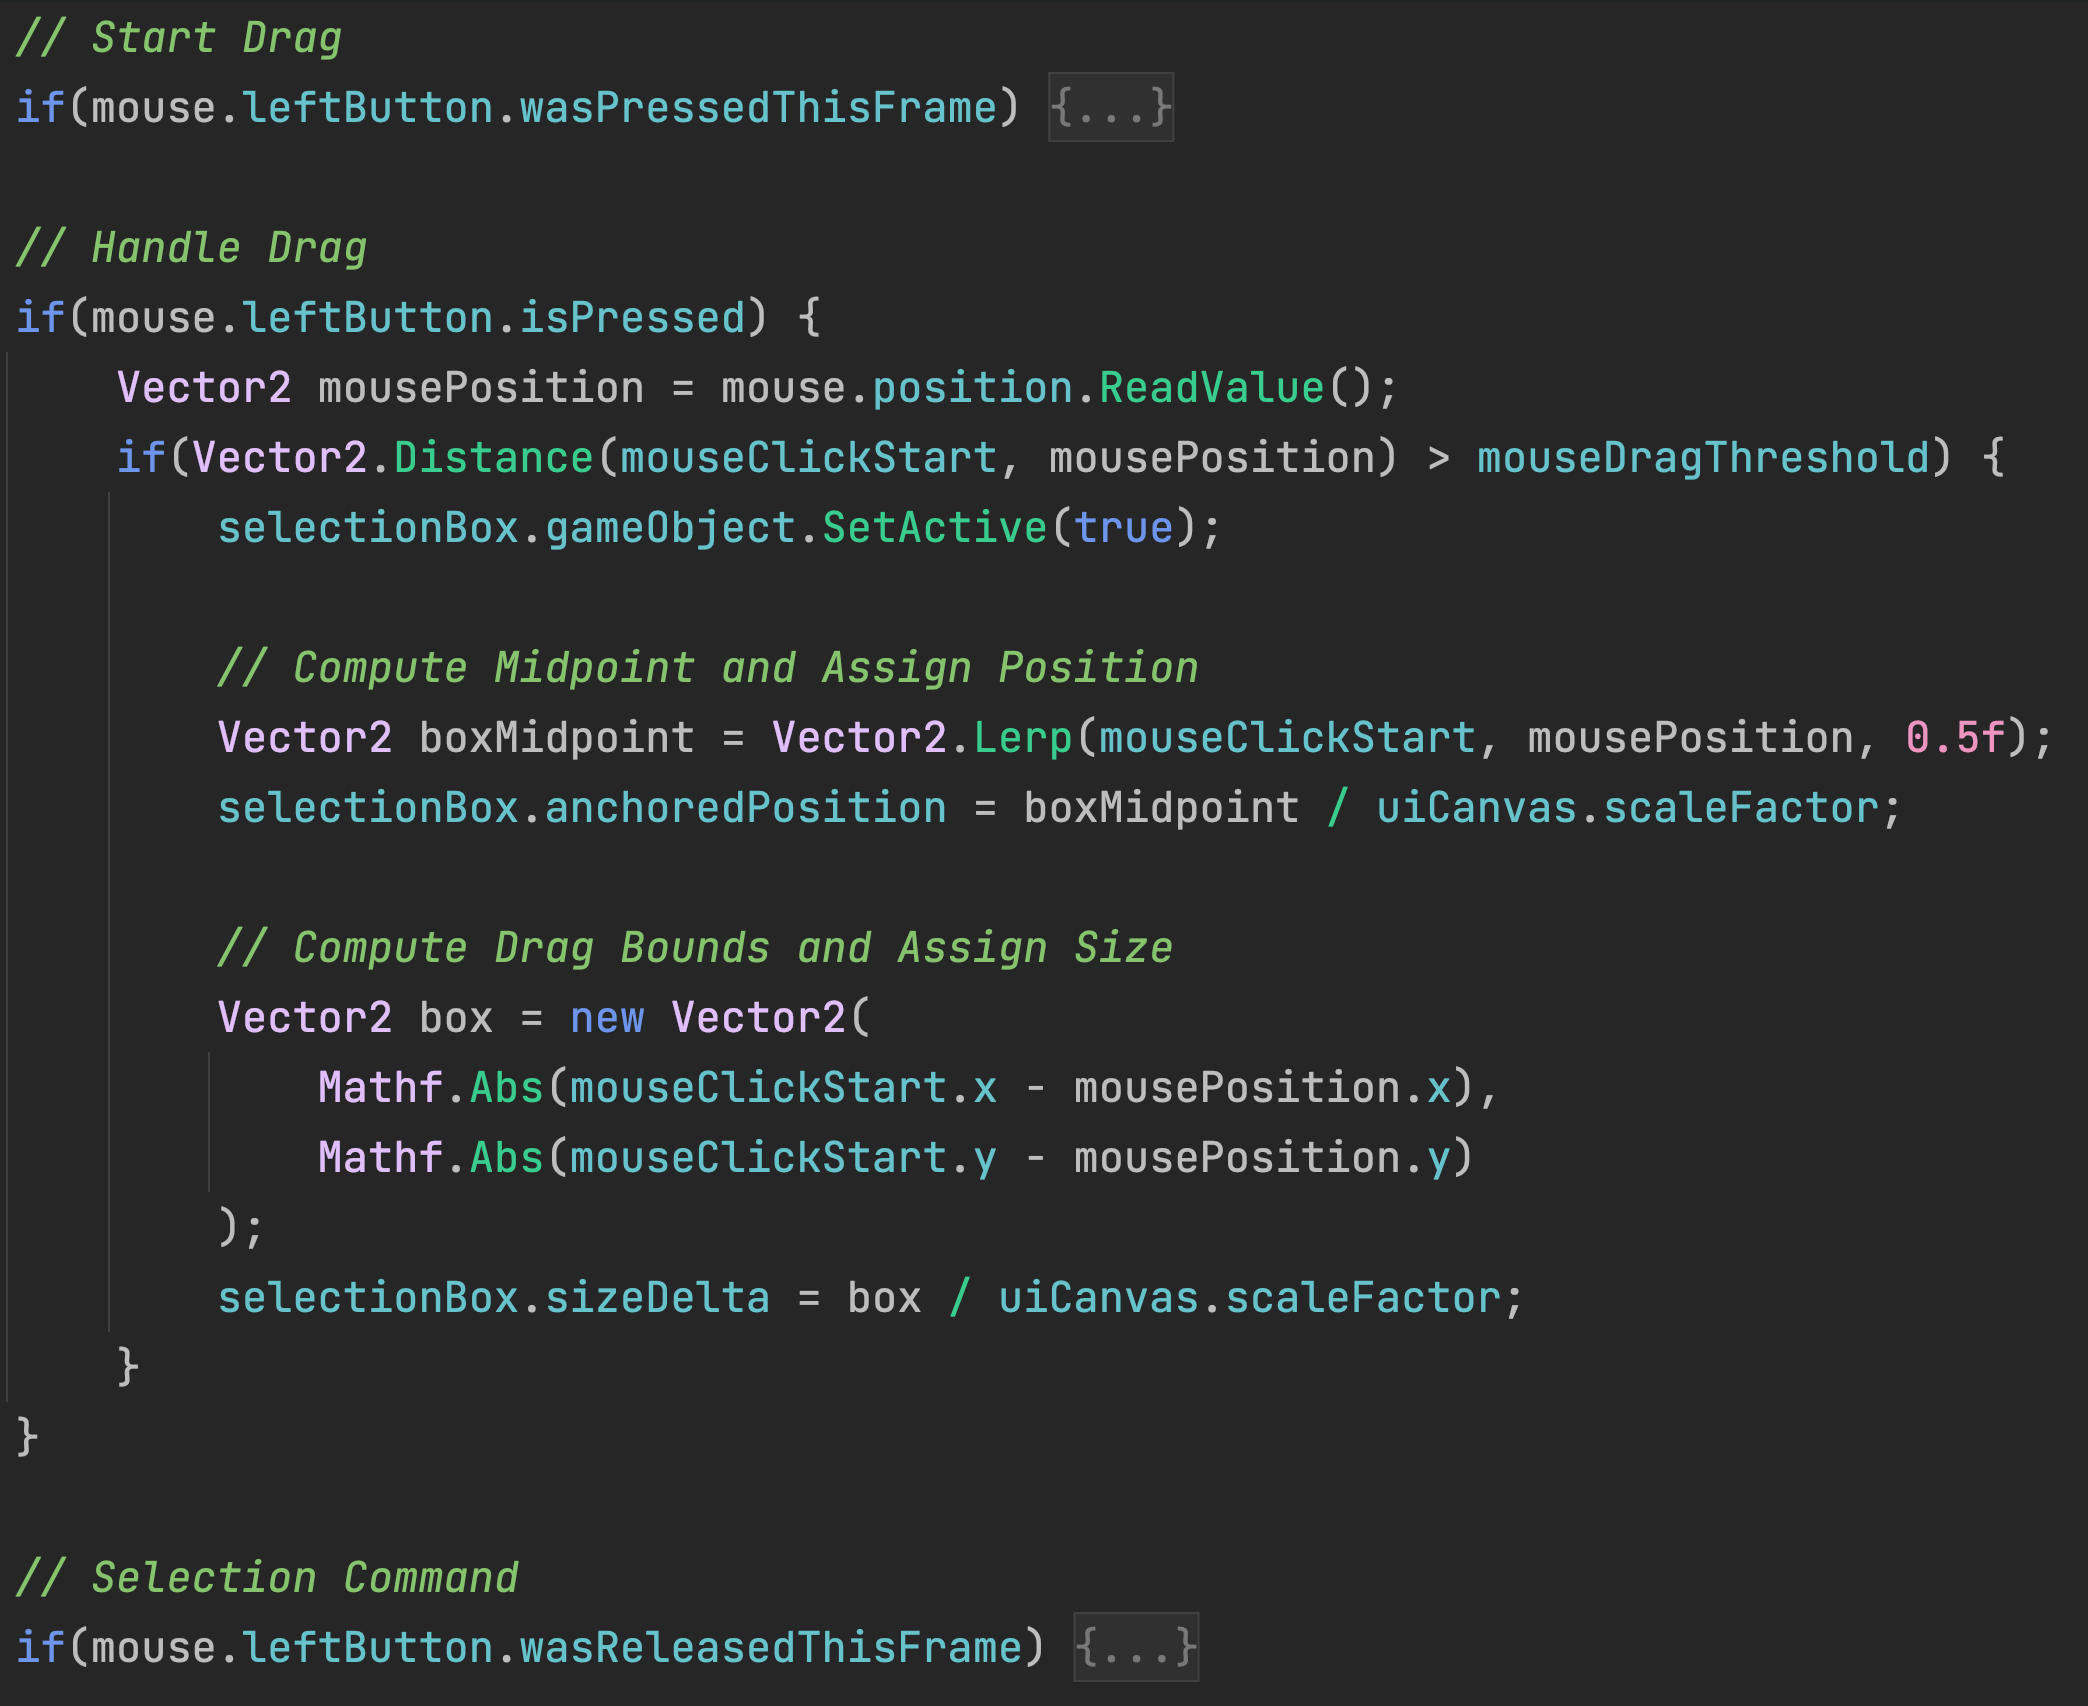
When the left mouse button is held and dragged beyond the required threshold, we can use this movement to compute the position and size of a selection rectangle.

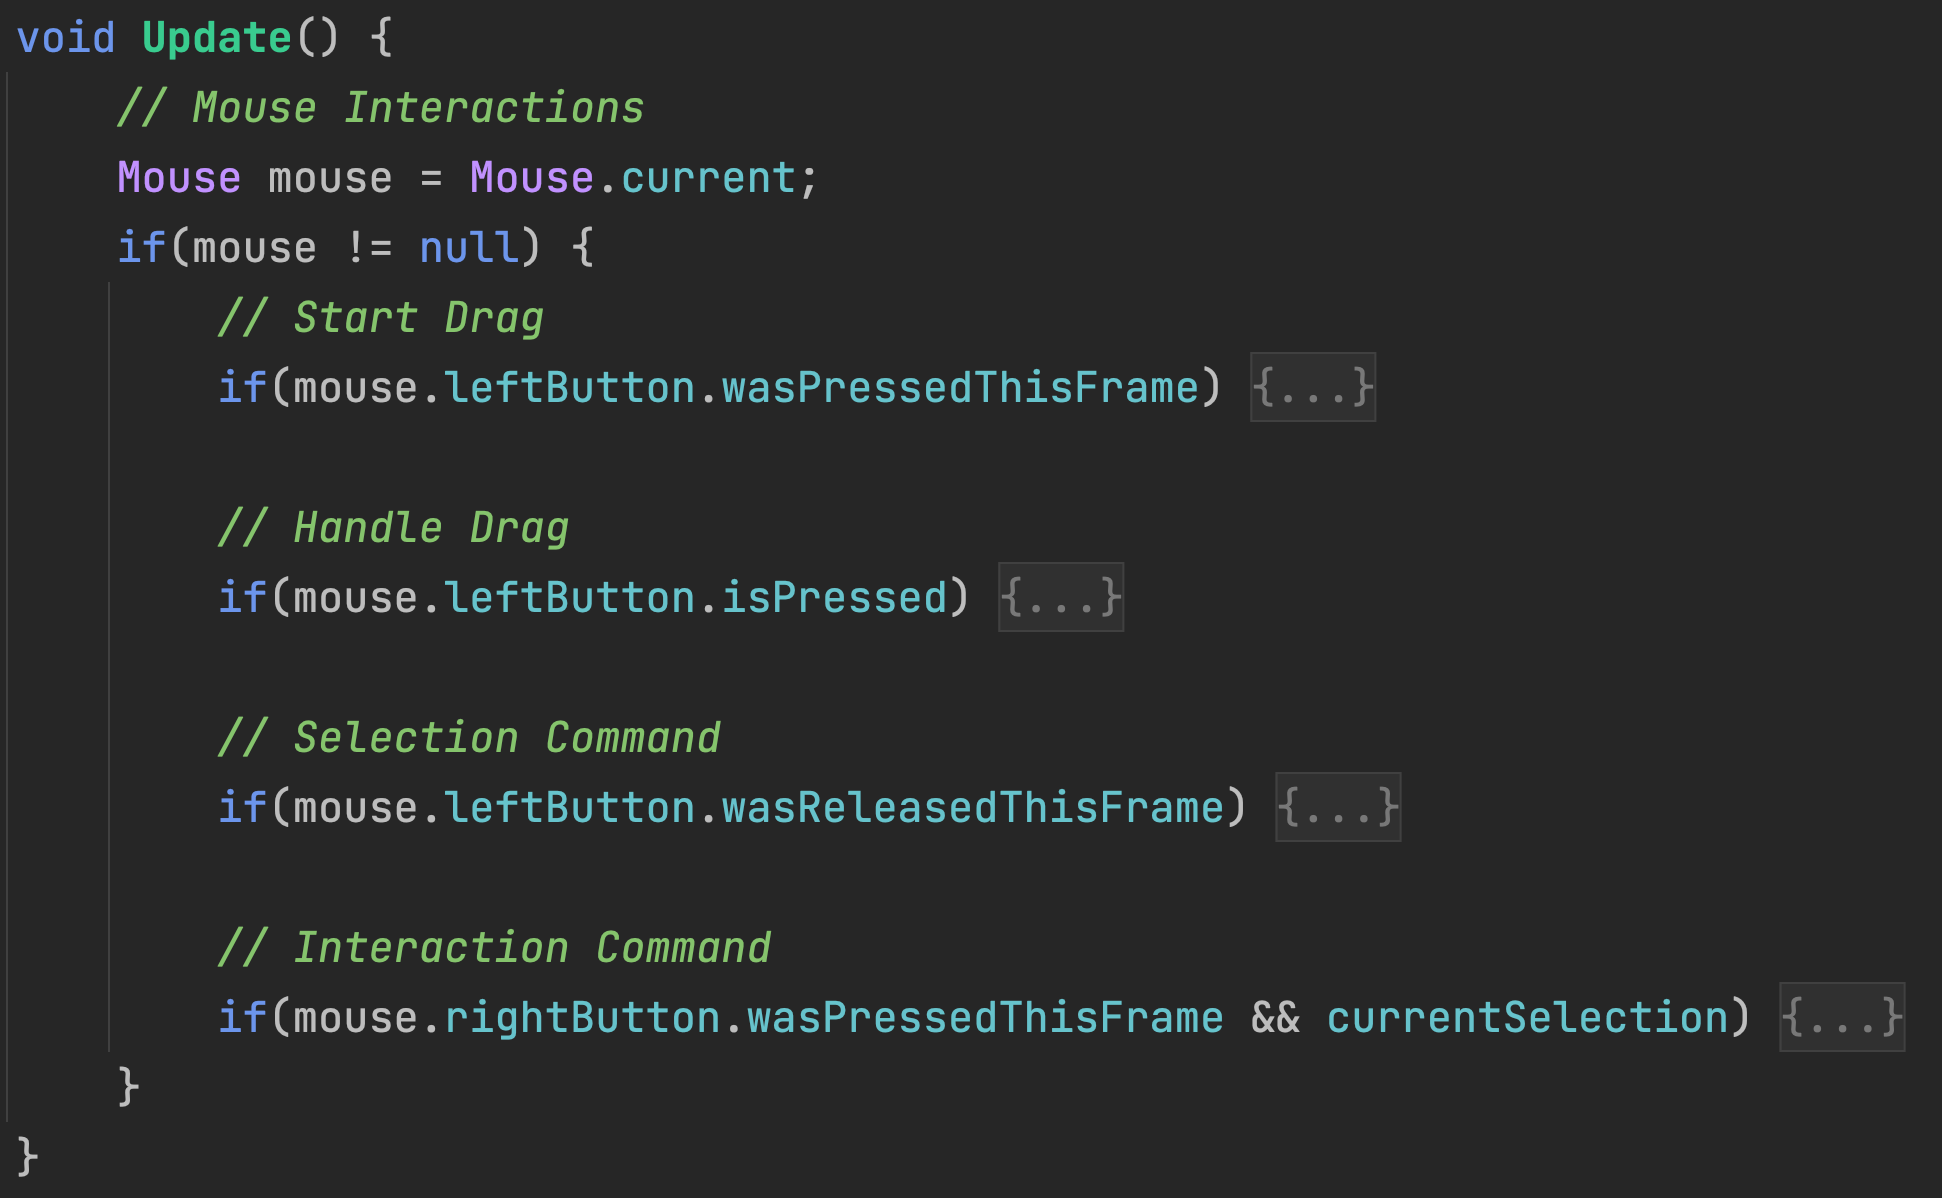
With these changes in place, notice how the sequence of mouse event conditions matches the gesture sequence we described previously.

Although you cannot yet select characters from within the box, you should playtest the game at this step to ensure a selection box is appropriately shown, resized, and hidden when dragging and releasing the left-click. The box should be aligned with the drag start and current mouse position at all times during the gesture.

Multi-Unit Selection

The old character selection code needs to be refactored to work with lists instead of single game objects.

On left mouse release, we raycast and any compatible objects found are added to the list. Otherwise, the list is emptied.

On right-click, the code is almost exactly the same as before, except we perform an interaction for every selected item in the list.

Playtest your game and double-check all of the previous non-drag interactivity (single character selection and movement) still functions properly.

Enabling multi-unit selection means splitting our character selection mechanic into two modes: 1) Selecting under the mouse if the player simply clicks with no drag, and 2) Selecting characters within the box when the player drags.

First, let's reorganize the character selection code to reflect these two versions of the mechanic because adding more to the Update function at this point is becoming bloated and unwieldy. The SelectUnderMouse function encompasses our existing code for selecting a single character with a left-click.

Similarly, the SelectWithinBox function encompasses the code for selecting all eligible objects within the selection box.

Currently, releasing the left-click performs a raycast at the point occupied by the mouse position. To do multi-unit selection, we will take a different perspective. Instead of casting to see if an object is hit, selectable objects will convert their world space positions to screen positions, and we will see if those screen positions are within the selection box.

Finally, we revise our left mouse button release event condition within the Update loop to use these functions.

Playtest selecting multiple characters in a variety of formations to ensure the selection area is actually working.

Selection Indicators

You may have noticed that it is difficult to control the characters when it is not obvious which ones are selected. It is a common experience in RTS games that active characters be highlighted in some way such as via a selection circle (such as in the screenshot of StarCraft below).

We will achieve this effect using a combination of Projectors and Cookie masks. Projectors are a component that projects a material onto objects within its view. The material must use a special kind of Shader effect that is configured for this purpose. Cookies are masks that you apply to light to create shadows of a specific shape (like a cookie cutter shaping cookie dough). By using all of these together, our characters will project a circular indicator onto whatever ground they are walking on.

"ProjectorAdditiveTint.shader" and "SelectionCircleAlpha.png" should be available in your course files. Import these into respective "Shaders" and "Textures" folders. The projector shader is a special effect for rendering graphics on top of other surfaces, while the image is simply a graphic of a selection circle.

For this projector effect to work and because the imported graphic is actually black-and-white with no transparency, it is very important that your image import settings use the Cookie texture type, Spotlight light type, Gray Scale alpha source, and Clamp wrap mode.

Additionally, create a Material to use the imported Shader and Texture.

Add an Indicator child game object to your RTSCharacterPrefab. Remember to apply your edits to all prefabs, so all your characters will have these updates. On the Indicator object add a Projector component configured with the Selection material you made in the prior step. It is very important that the Projector ignores everything except the "Ground" layer, otherwise, it will be able to project selection circles onto other characters.

In RTSCharacterController, set up and outlet for controlling the selection indicator game object and two functions for turning it on and off.

Within the prefab, fill in the outlet reference for the selection indicator. Deactivate the Indicator game object by default. Your characters do NOT start in a selected state.

Back in RTSGameController, create a DeselectAll function to handle both clearing the character list and deactivating the selection indicators.

In the SelectUnderMouse function, revise how characters are deslected and send the Select message when an object is clicked and selected. Notice that instead of a strongly-typed function call, we are sending a generic message. While it is preferred that you maintain an awareness of your object types and use function calls accordingly, sending generic messages can provide flexibility when a variety of different object types may be selected at the same time.

In the SelectWithinBox function, revise how characters are deselected and send the Select message when objects are added to the selection list.

Active charactrs are now highlighted with a selection circle.

Player Attacks

For the attack functionality, RTSCharacterController needs a variable for defining attack timing and outlets for its target and projectile prefab.

Be sure to update the settings on the template prefab. Re-use the same Bullet prefab from the FPS assignment.

The SetTarget function will allow the game controller to pass targets to the character when the player right-clicks.

Within Update of RTSCharacterController, the attack timer will increment until it is time to attack. First, we check if there is even a target for this character.

If there is a target, we tell the character to move forward toward its target and create another conditional to check if we are in attack range.

Finally, if we are in attack range, we check if enough time has elapsed for us to perform an attack. If so, we reset the timer and create a physics projectile to send towards the target.

Triggering Attacks

In RTSGameController, we will update the right-click functionality to include triggering attacks. The move command will still work if no target has been clicked.

Environment Targets

You should have several physics-enabled boxes from a prior assignment.

Players can chase and attack any object with a collider.

Save and Test

Playtest to ensure all interactions work as expected and that the addition of any new features hasn’t broken any earlier interactions.

Submit Assignment

SAVE any open files or scenes.

Submit your assignment for grading following the instructions supplied for your particular classroom.