Complete Part 1
You must complete all of part 1 before following these steps. Continue with the SpaceShooter scene.
Supporting files for VG1 quests are part of a single archive that you can download here.
You must complete all of part 1 before following these steps. Continue with the SpaceShooter scene.
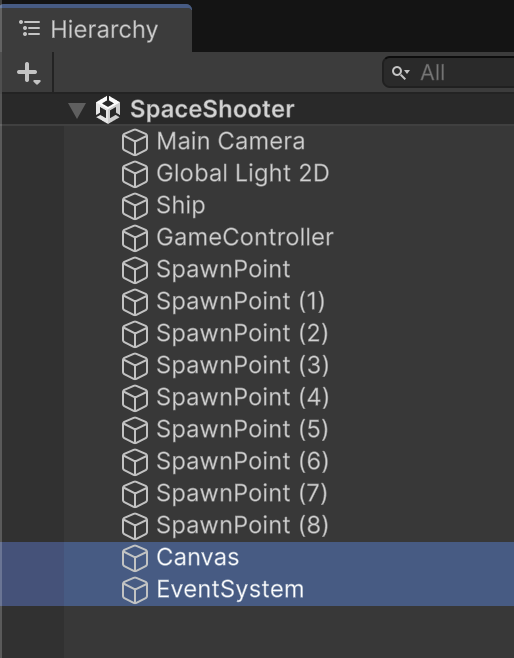
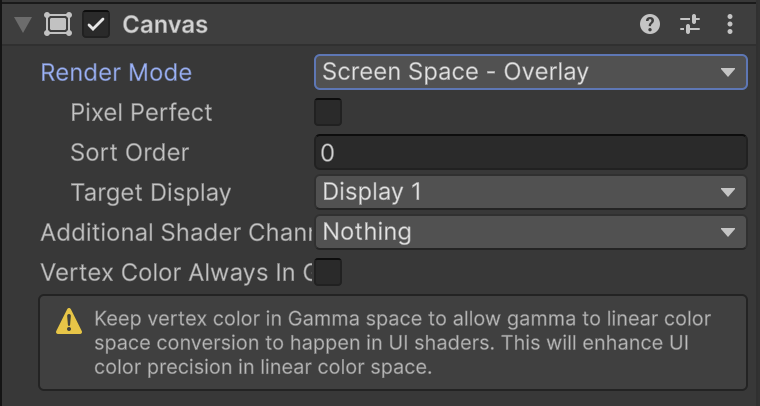
Add a UI Canvas to your scene. All of your UI scene objects must be nested within a Canvas to be rendered.
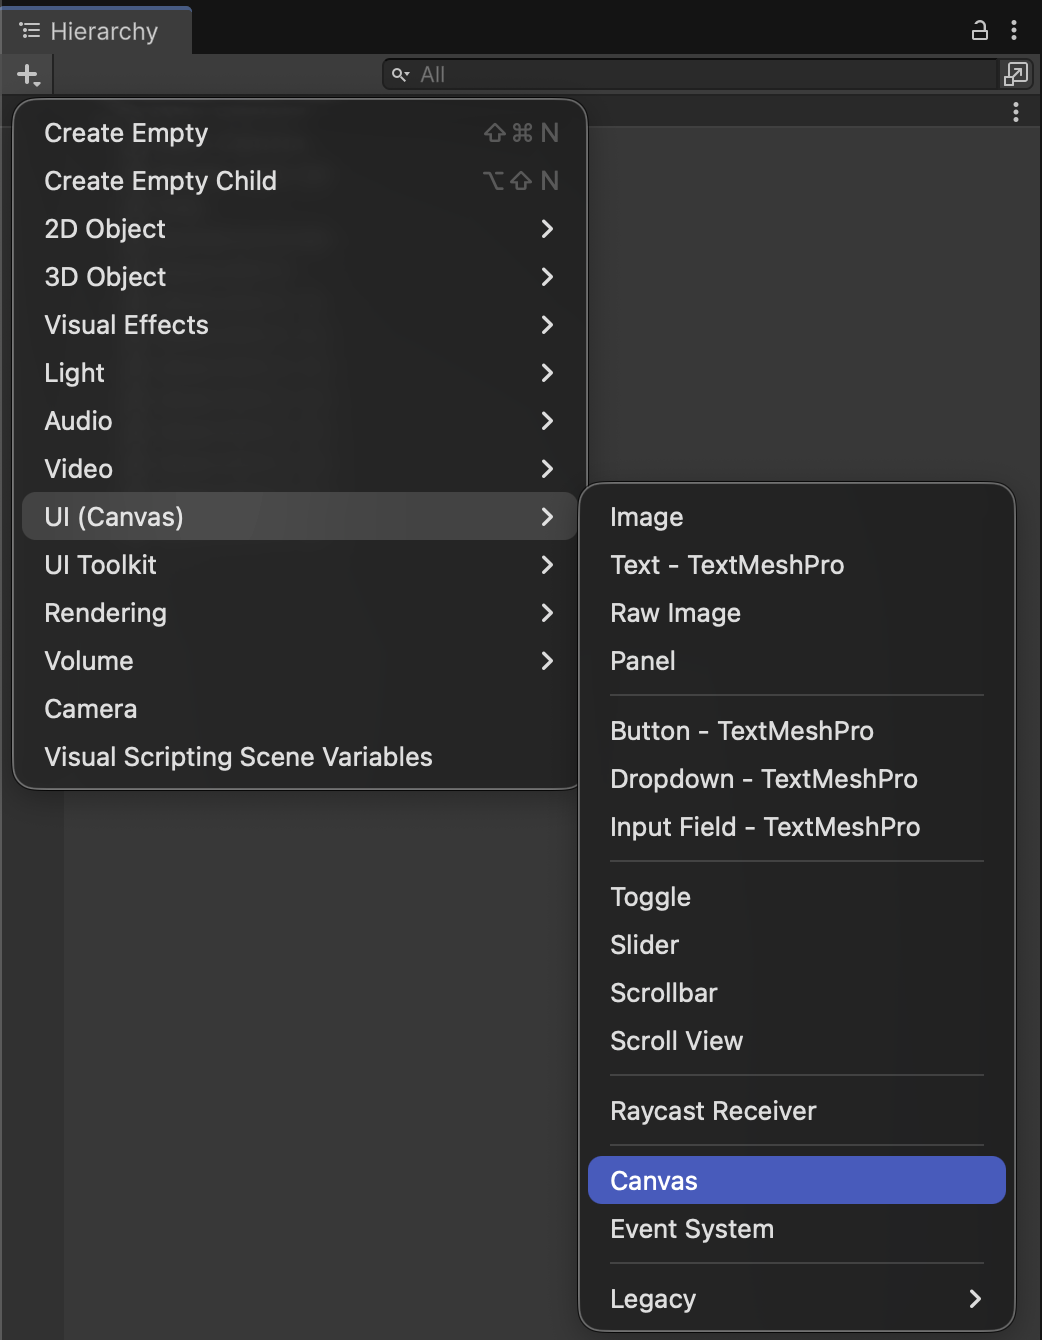
Creating a Canvas also spawns an EventSystem which allows UI to respond to input.
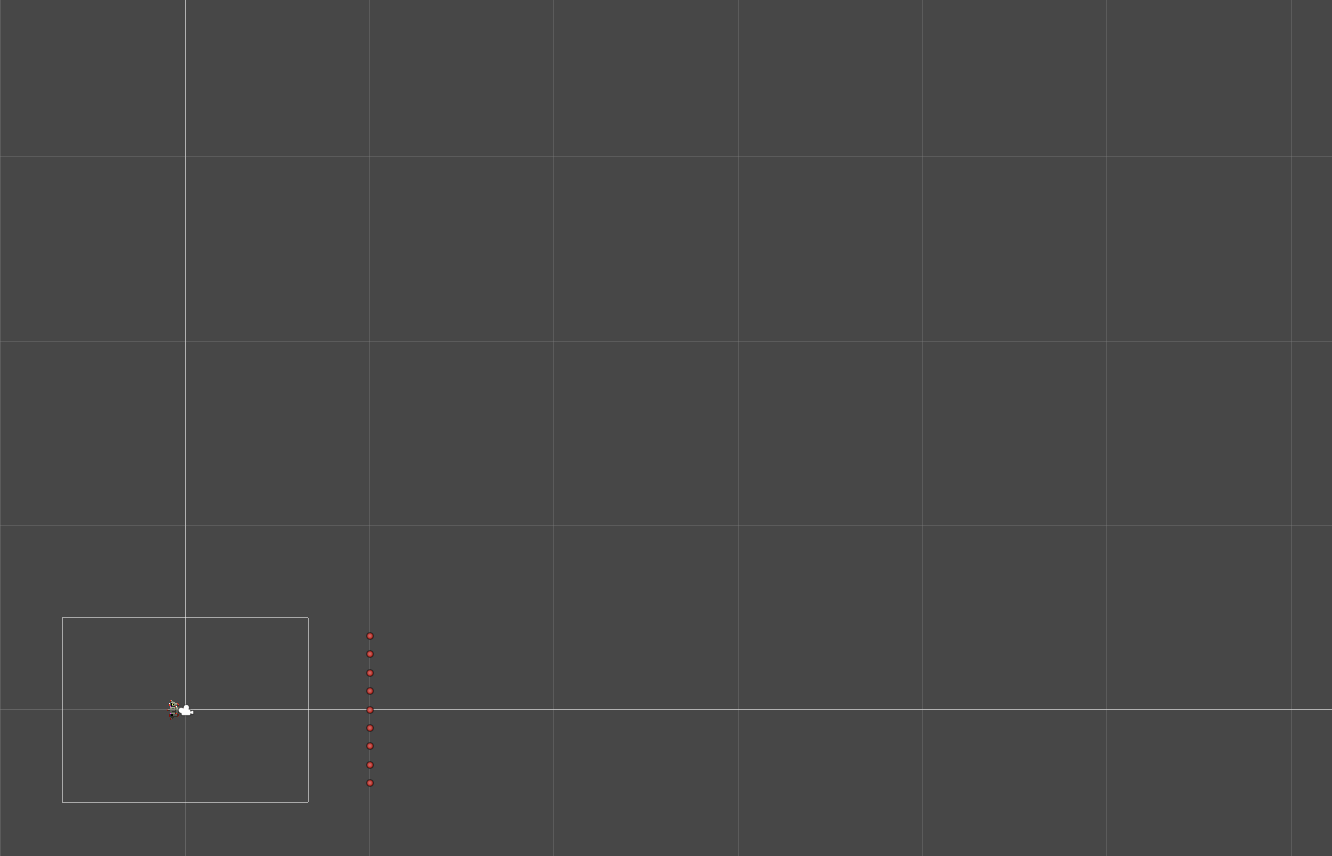
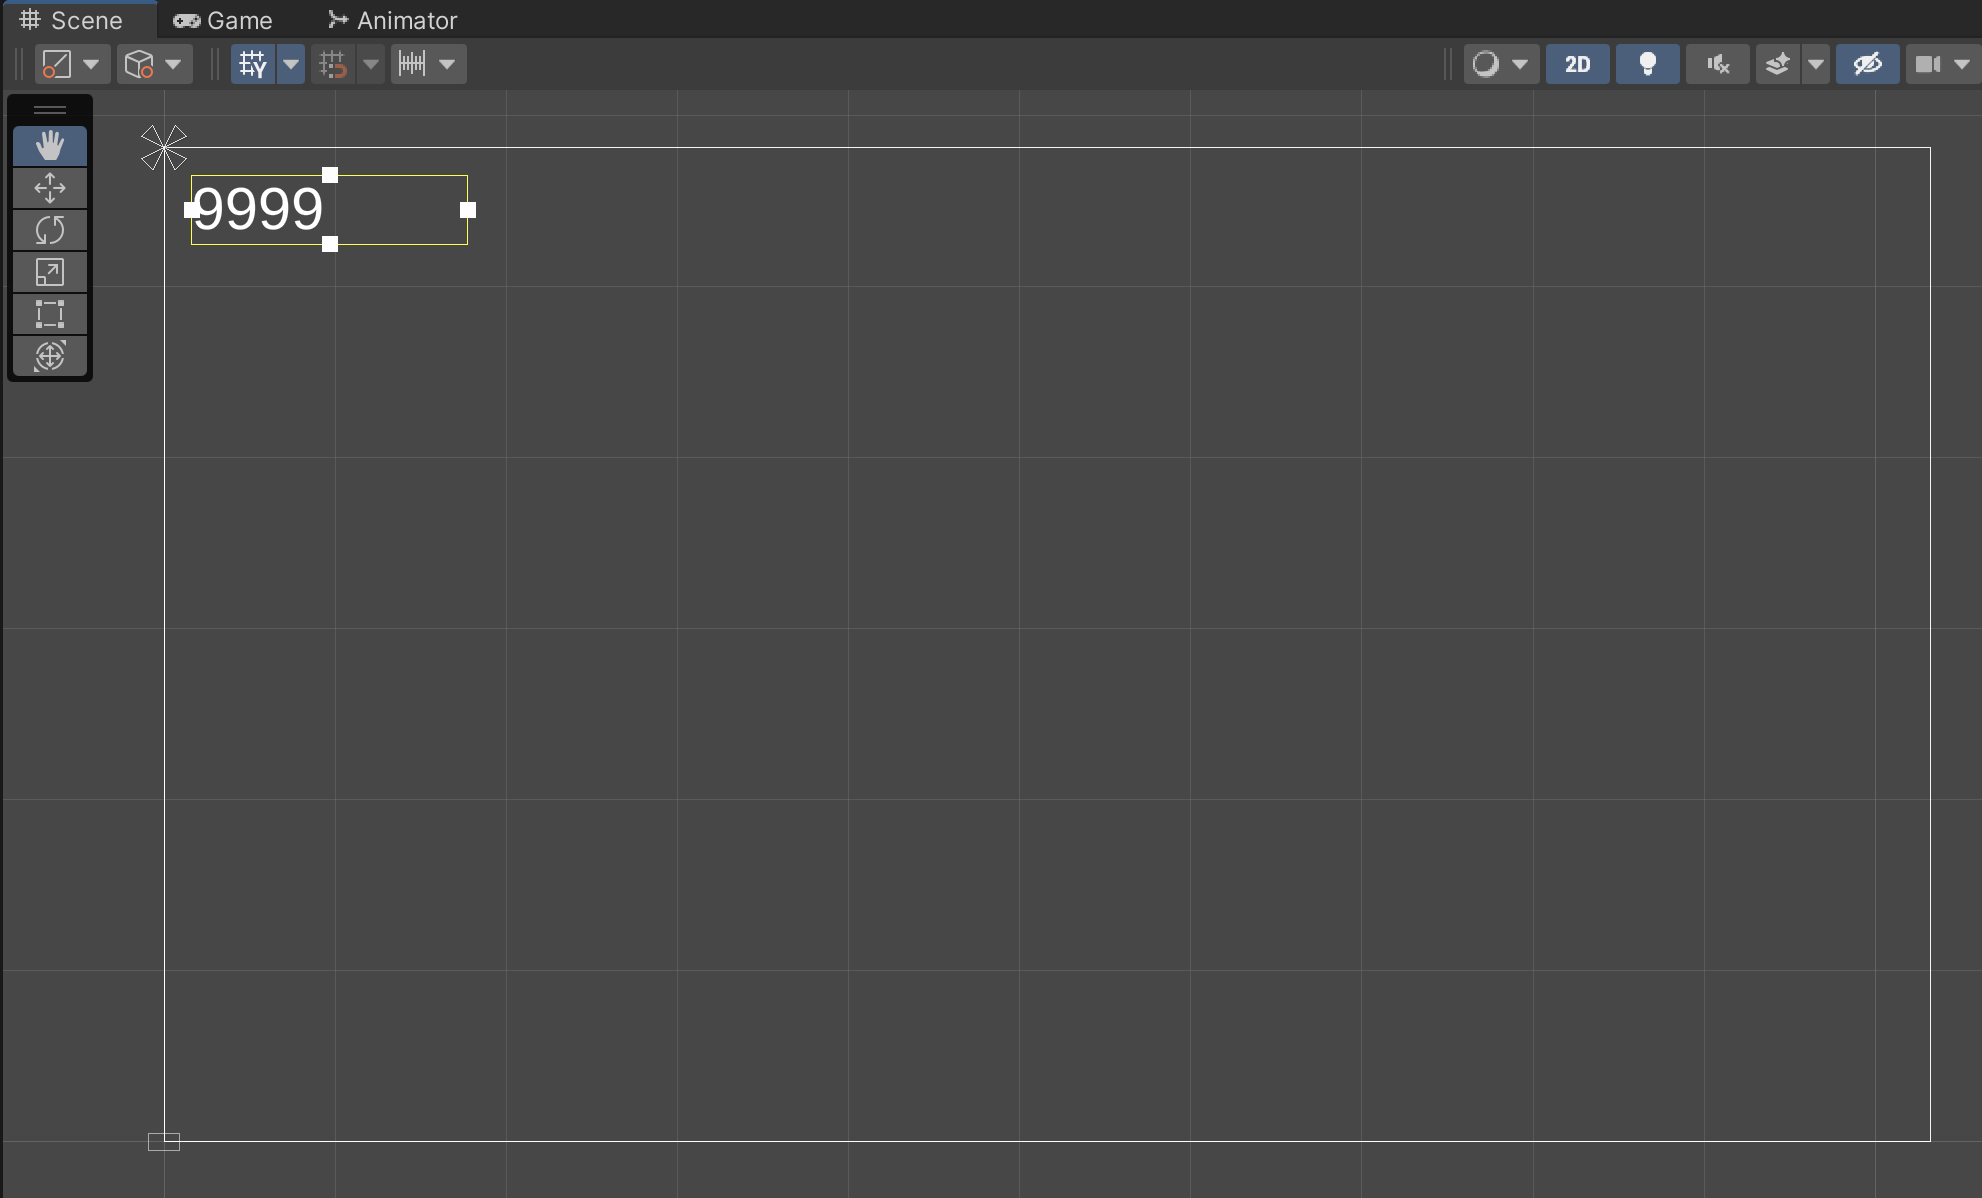
When you create a Canvas, it adds a much more massive rectangular outline to the Scene view. Double-clicking the Canvas in the Hierarchy should zoom the Scene out to show it. Circled in the corner is how small the Camera view is compared to the Canvas. You can double-click the Camera in the Hierarchy any time you want to return to your other scene objects.
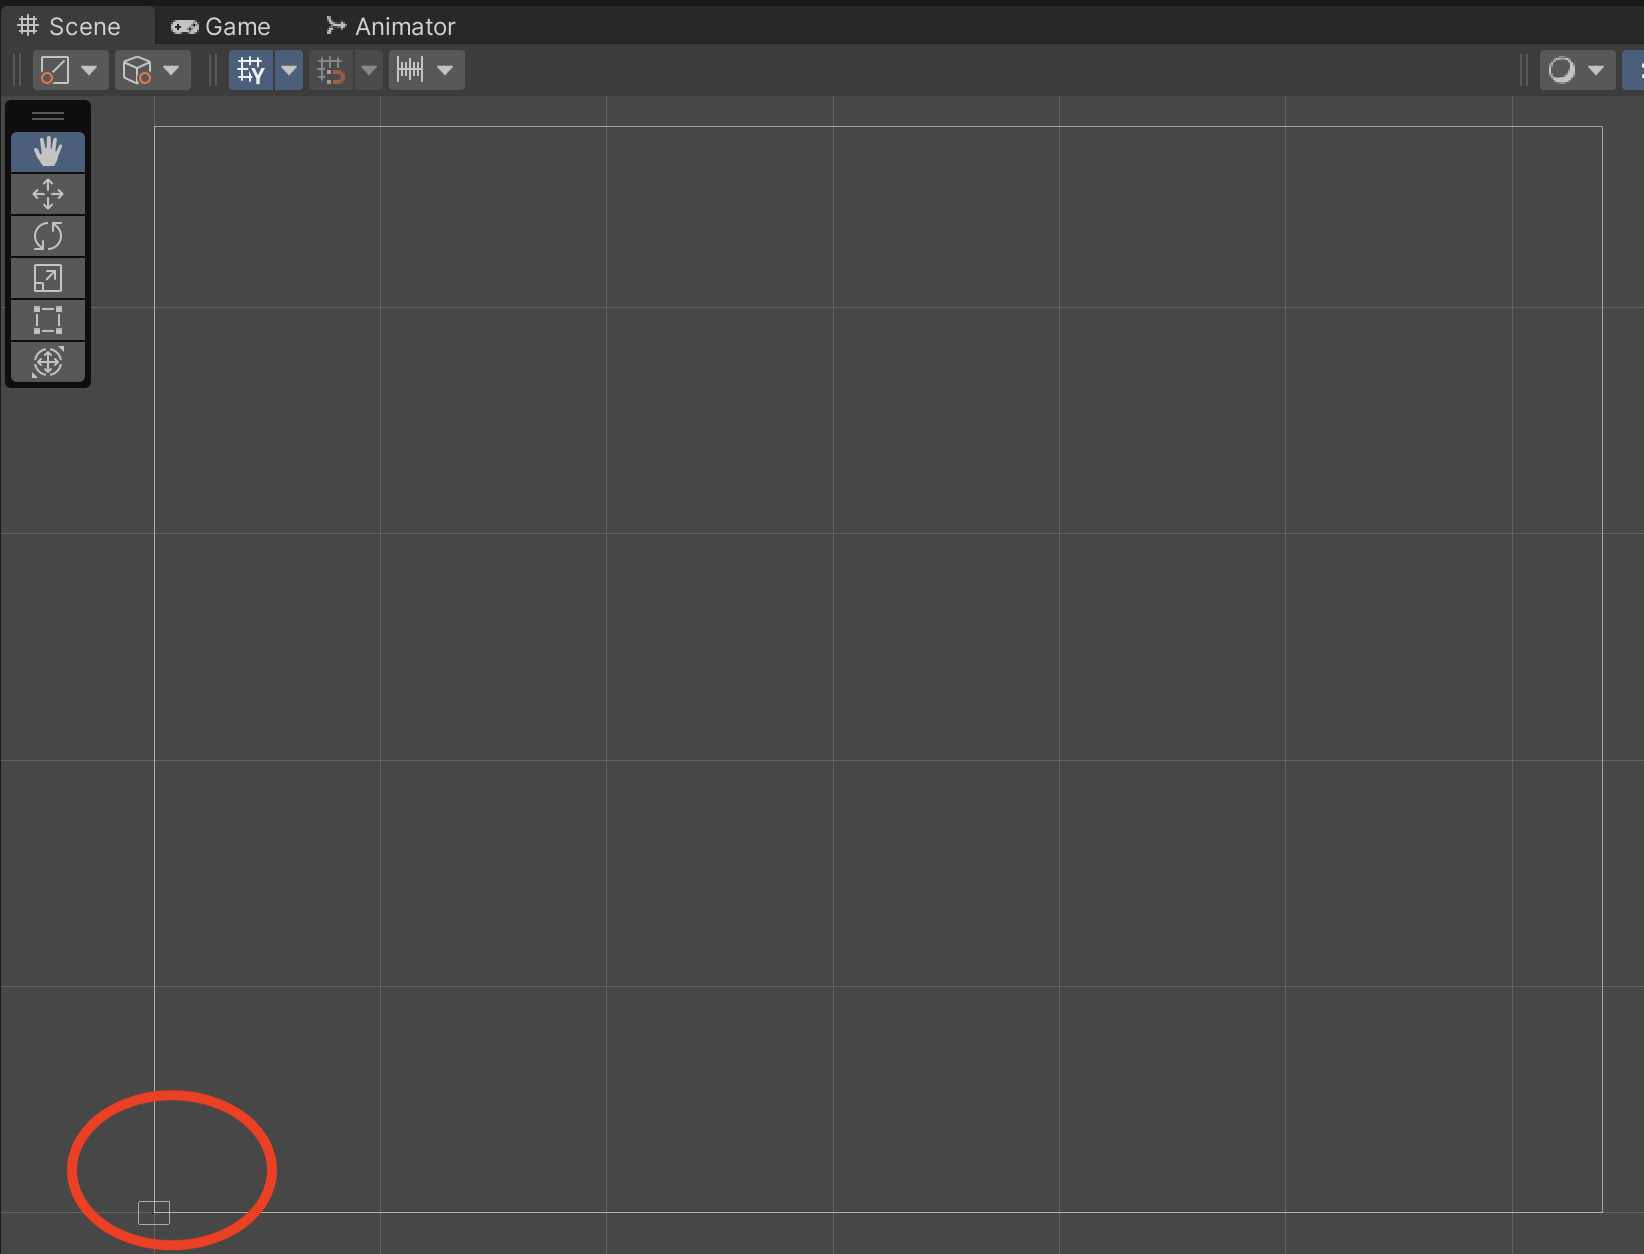
The Camera boundaries are much smaller than the Canvas view. This is because grid units for the Camera view are metric (meters), while units for the canvas are pixels. It is normal for a screen resolution to be in the thousands of pixels while a camera will only frame a few meters of width and height. Despite the size differences, having the UI system share the same Scene space as other gameplay objects enables advanced techniques for having UI exist in a 3D world. For now, we'll stick to introducing simpler Overlay UI in this assignment, which layers UI only on top of the Camera view.
Typically, the Camera only shows certain Renderer components such as SpriteRenderer or MeshRenderer, while the Canvas only renders its own UI objects. Having these distinct rendering divisions is helpful and allows us to separately address the unique challenges of camera framing and responsive UI design. There are advanced settings for merging the rendering of Cameras and UI, but we will not be using them at this time. Do not use the Camera rectangle to position your UI in this assignment. Focus on the Canvas rectangle when working with UI.
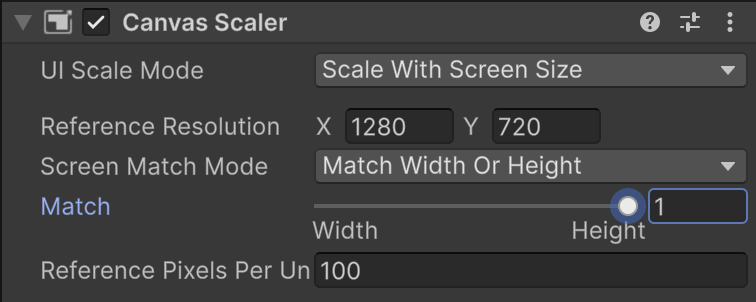
These settings configure your Canvas to use a common standard of 720p HD widescreen resolution, which is popular on such platforms as the Nintendo Switch. This lets us build our UI for a consistent baseline target regardless of what players' actual hardware might be.
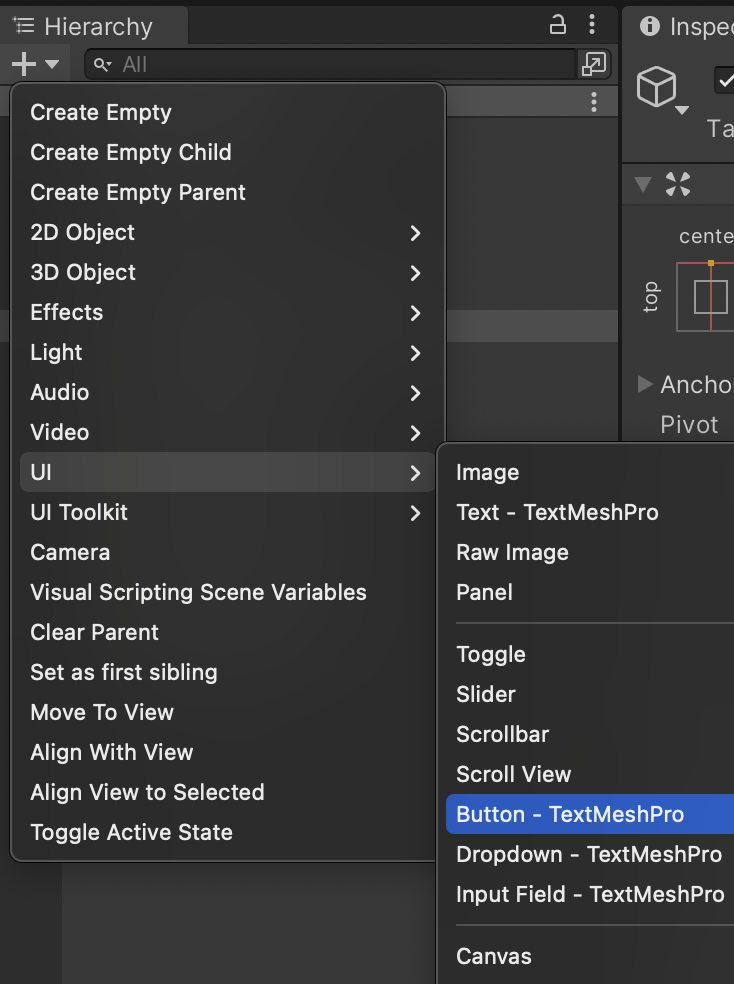
Add a UI Text (TextMeshPro) object to your Hierarchy.
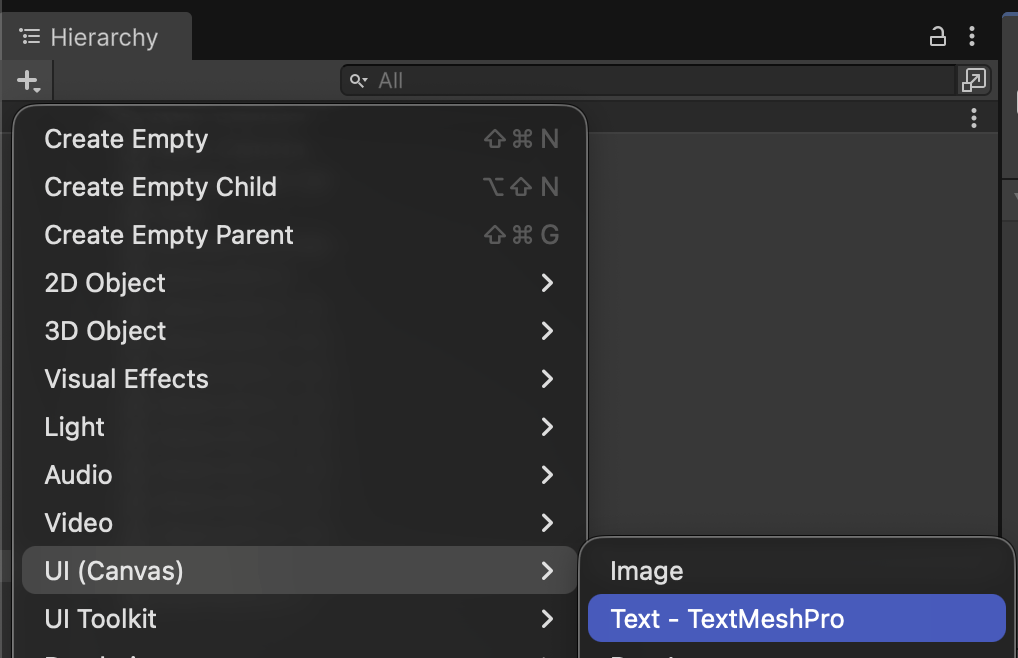
The first time you use TextMeshPro, you will be asked to set it up. Click Import TMP Essentials. You DO NOT need to install any examples or extras. Just close this window when it's done.

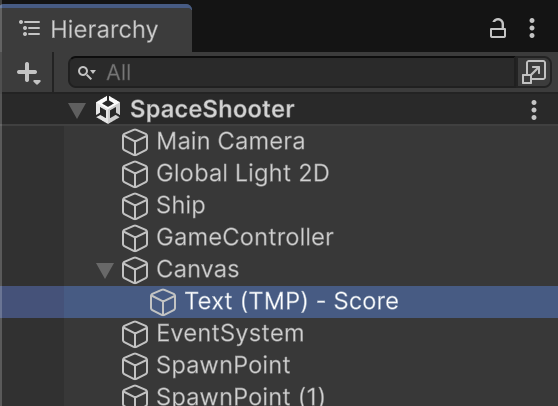
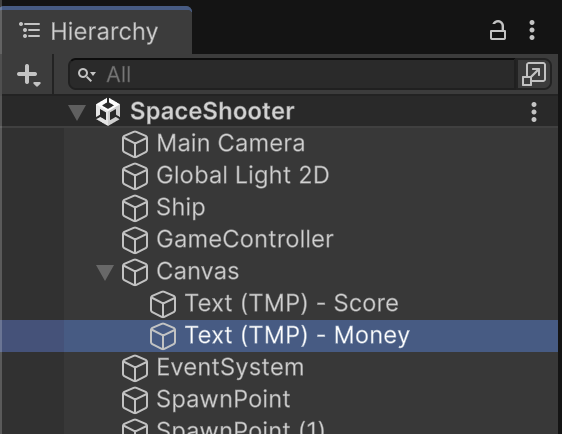
New UI objects including this Text should automatically be created within the Canvas. We will use this new UI Text object to portray gameplay score.
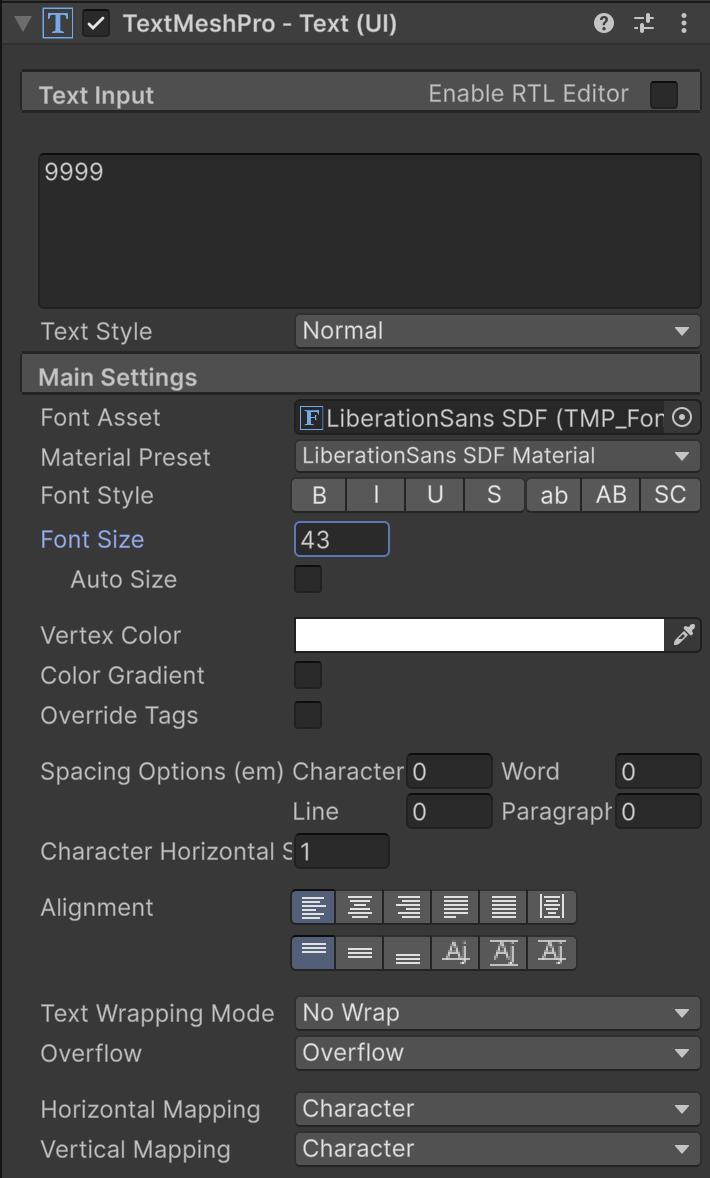
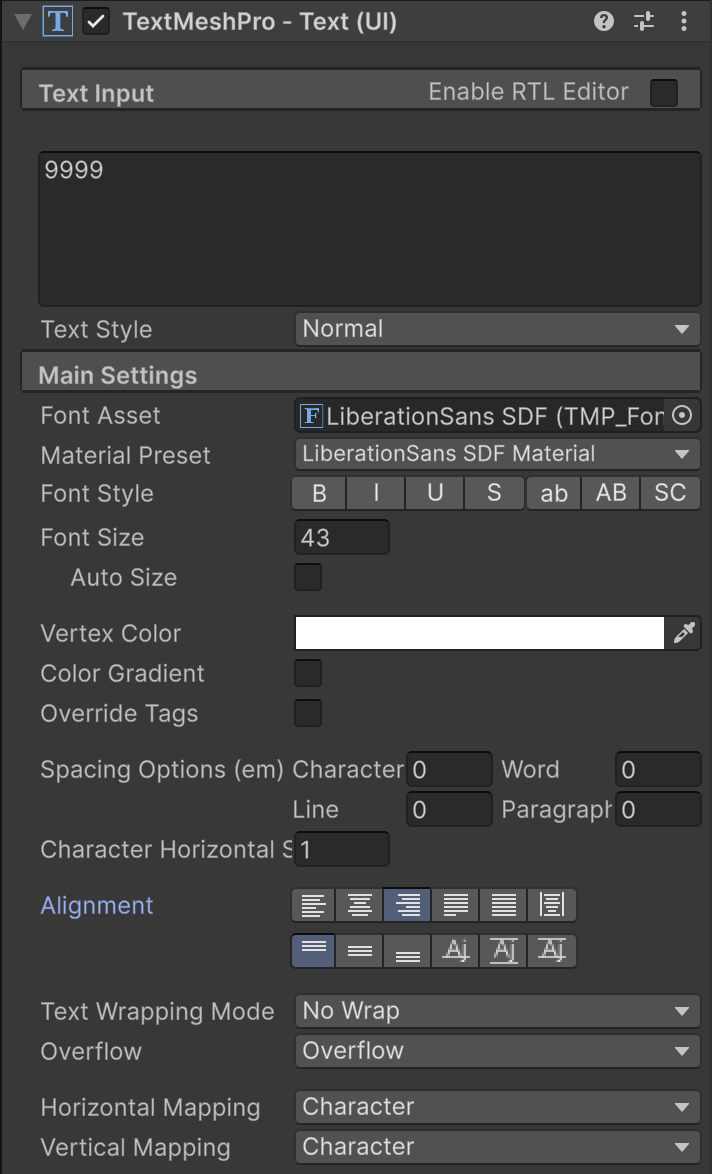
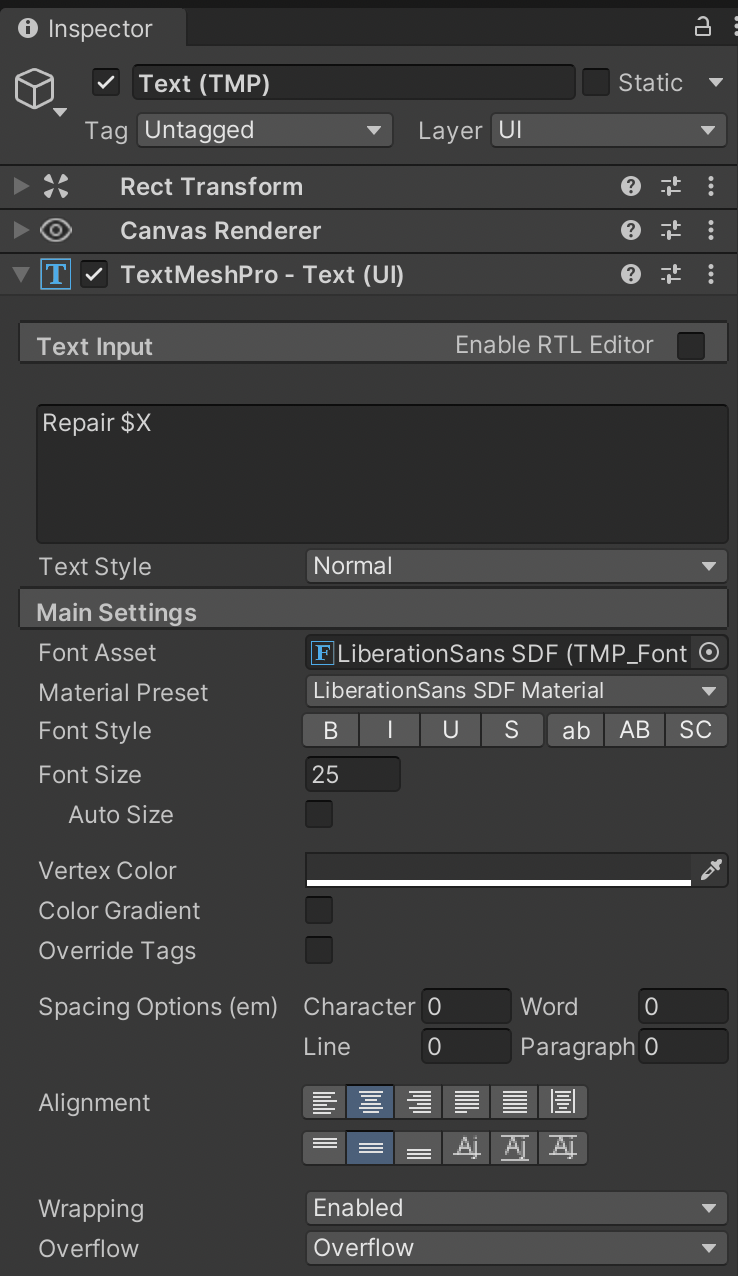
A lot of UI development focuses on anticipating how dynamic content will change. As players score more, the text widens with more characters. Use the following configuration. Many of these settings should be familiar to anyone who has written in a word processor. Pay special attention to all the details of sizing and alignment. We use Wrapping and Overflow settings to prevent truncating the score text as it grows.
UI objects have a RectTransform instead of a Transform. RectTransform subclasses Transform and adds extra settings for size, anchoring, and alignment.
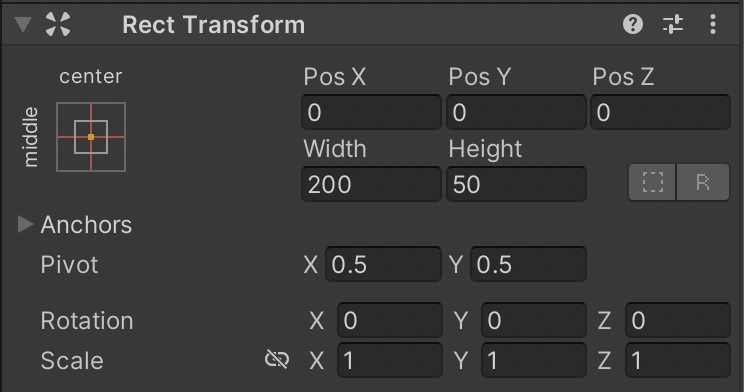
Click the crosshairs-looking icon to view the Anchor Presets for positioning the score UI. Anchor your score text to the Upper-Left of the Canvas by first setting the Anchor, then the Pivot, then the rest of the position numbers.
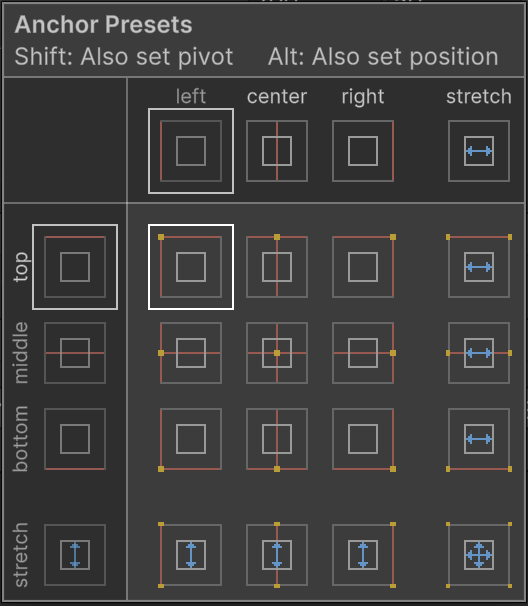
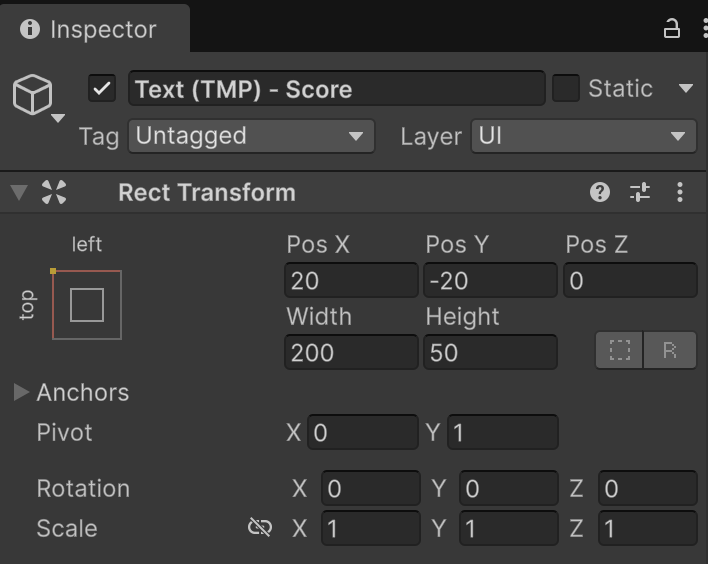
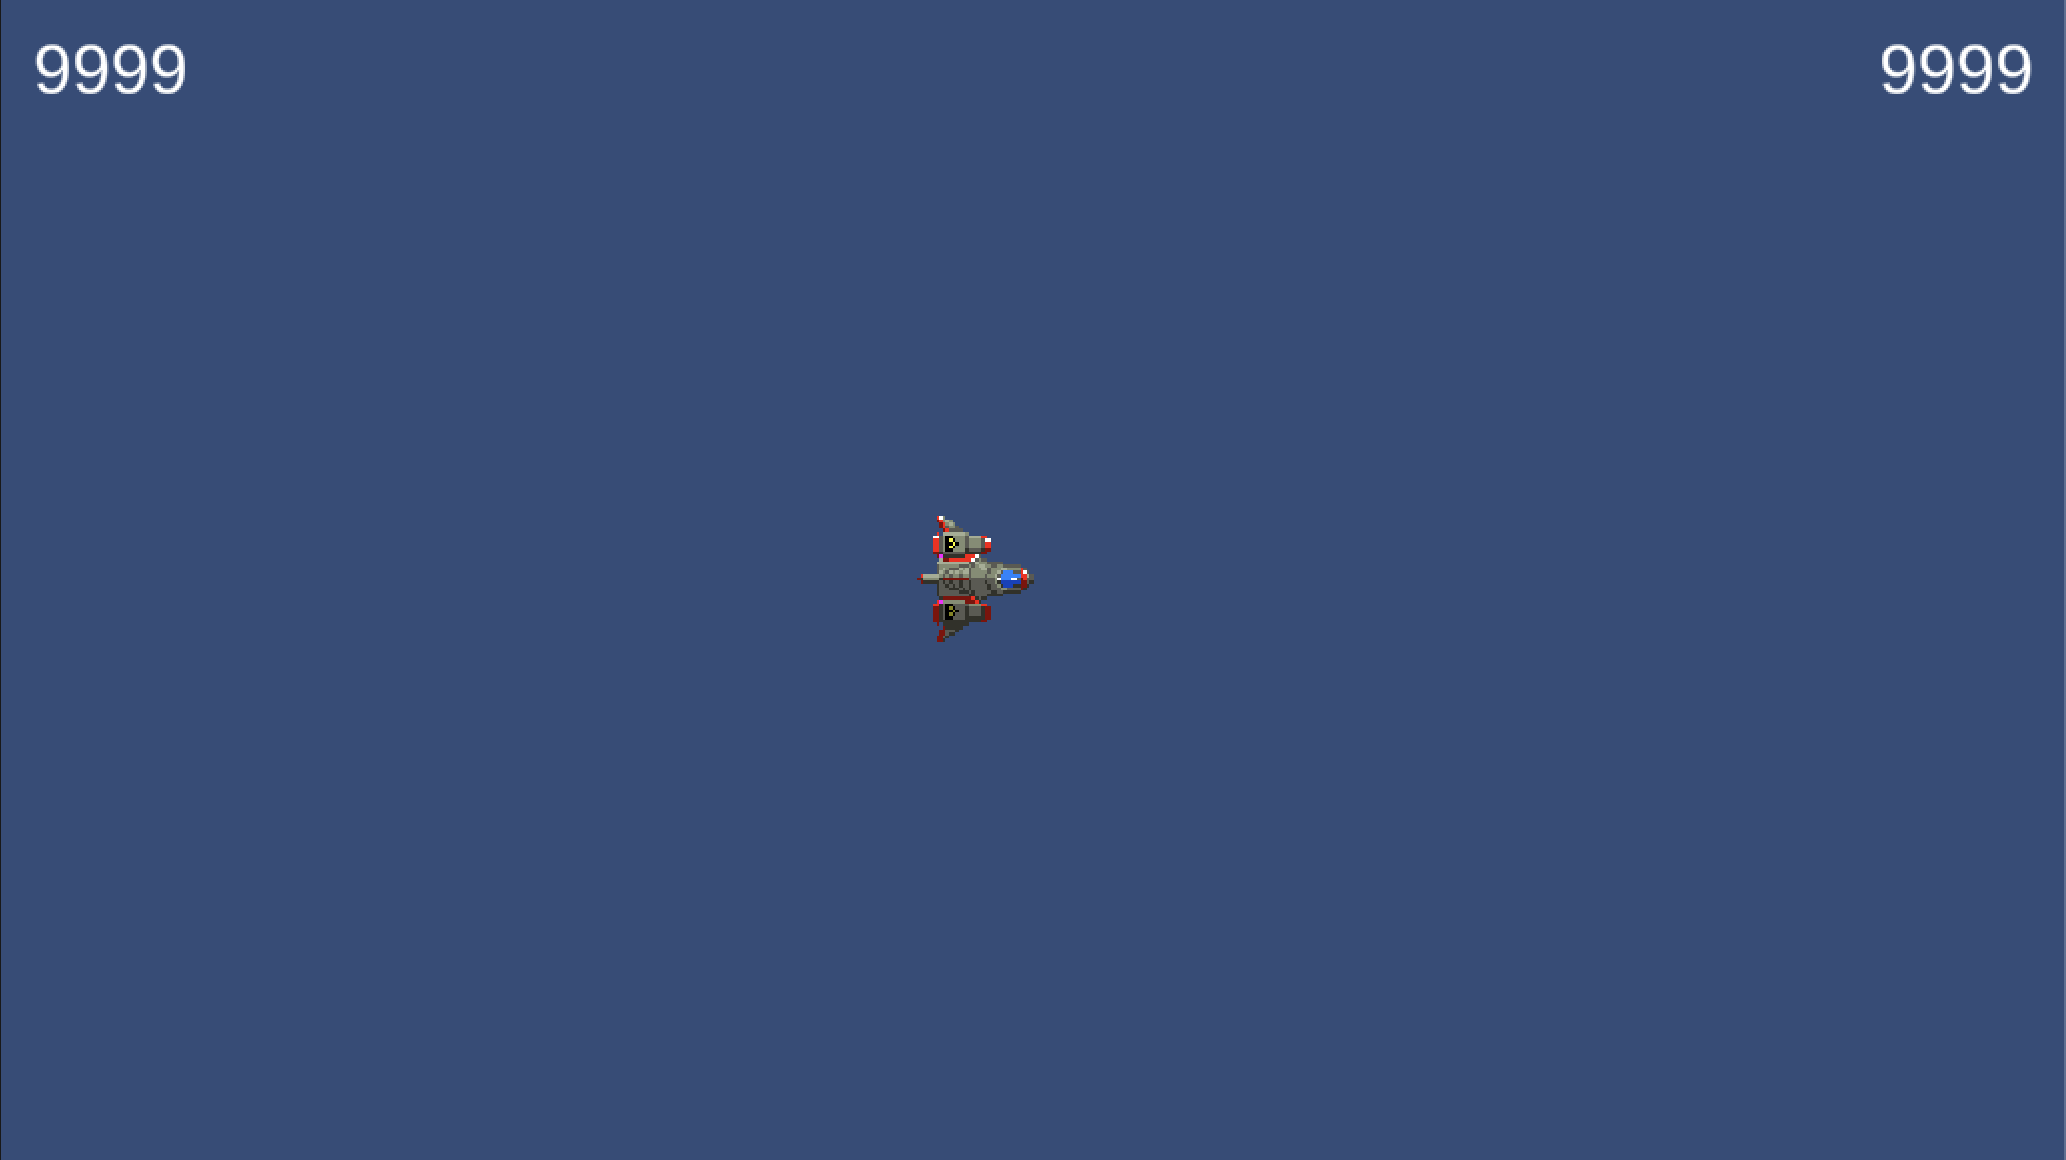
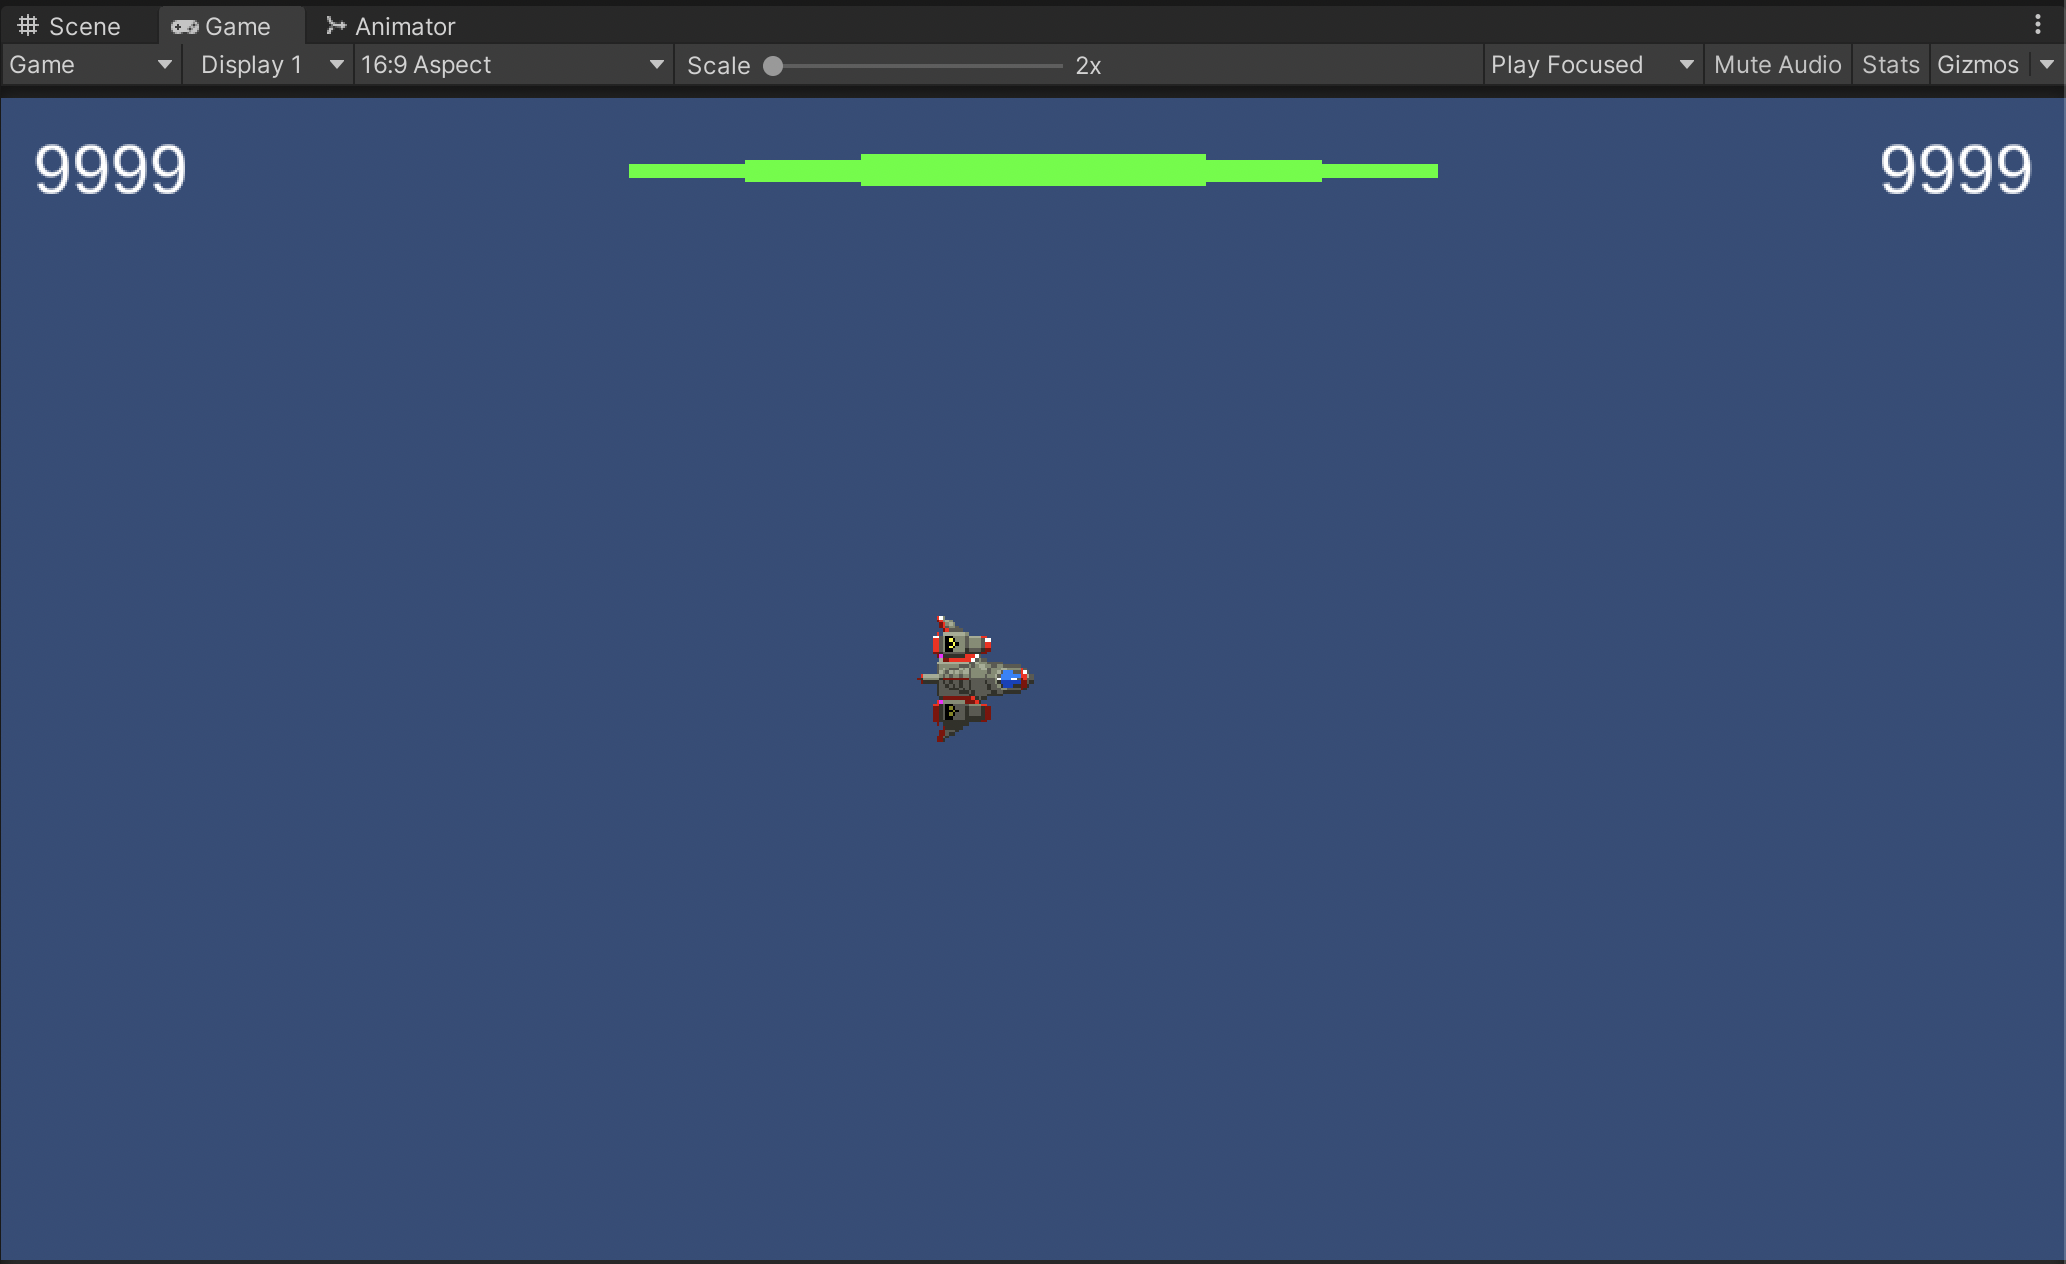
Your Score Text should be anchored Upper-Left of the Canvas. Even if a player had a monitor with a different aspect ratio, the score UI would still pin to that particular corner.
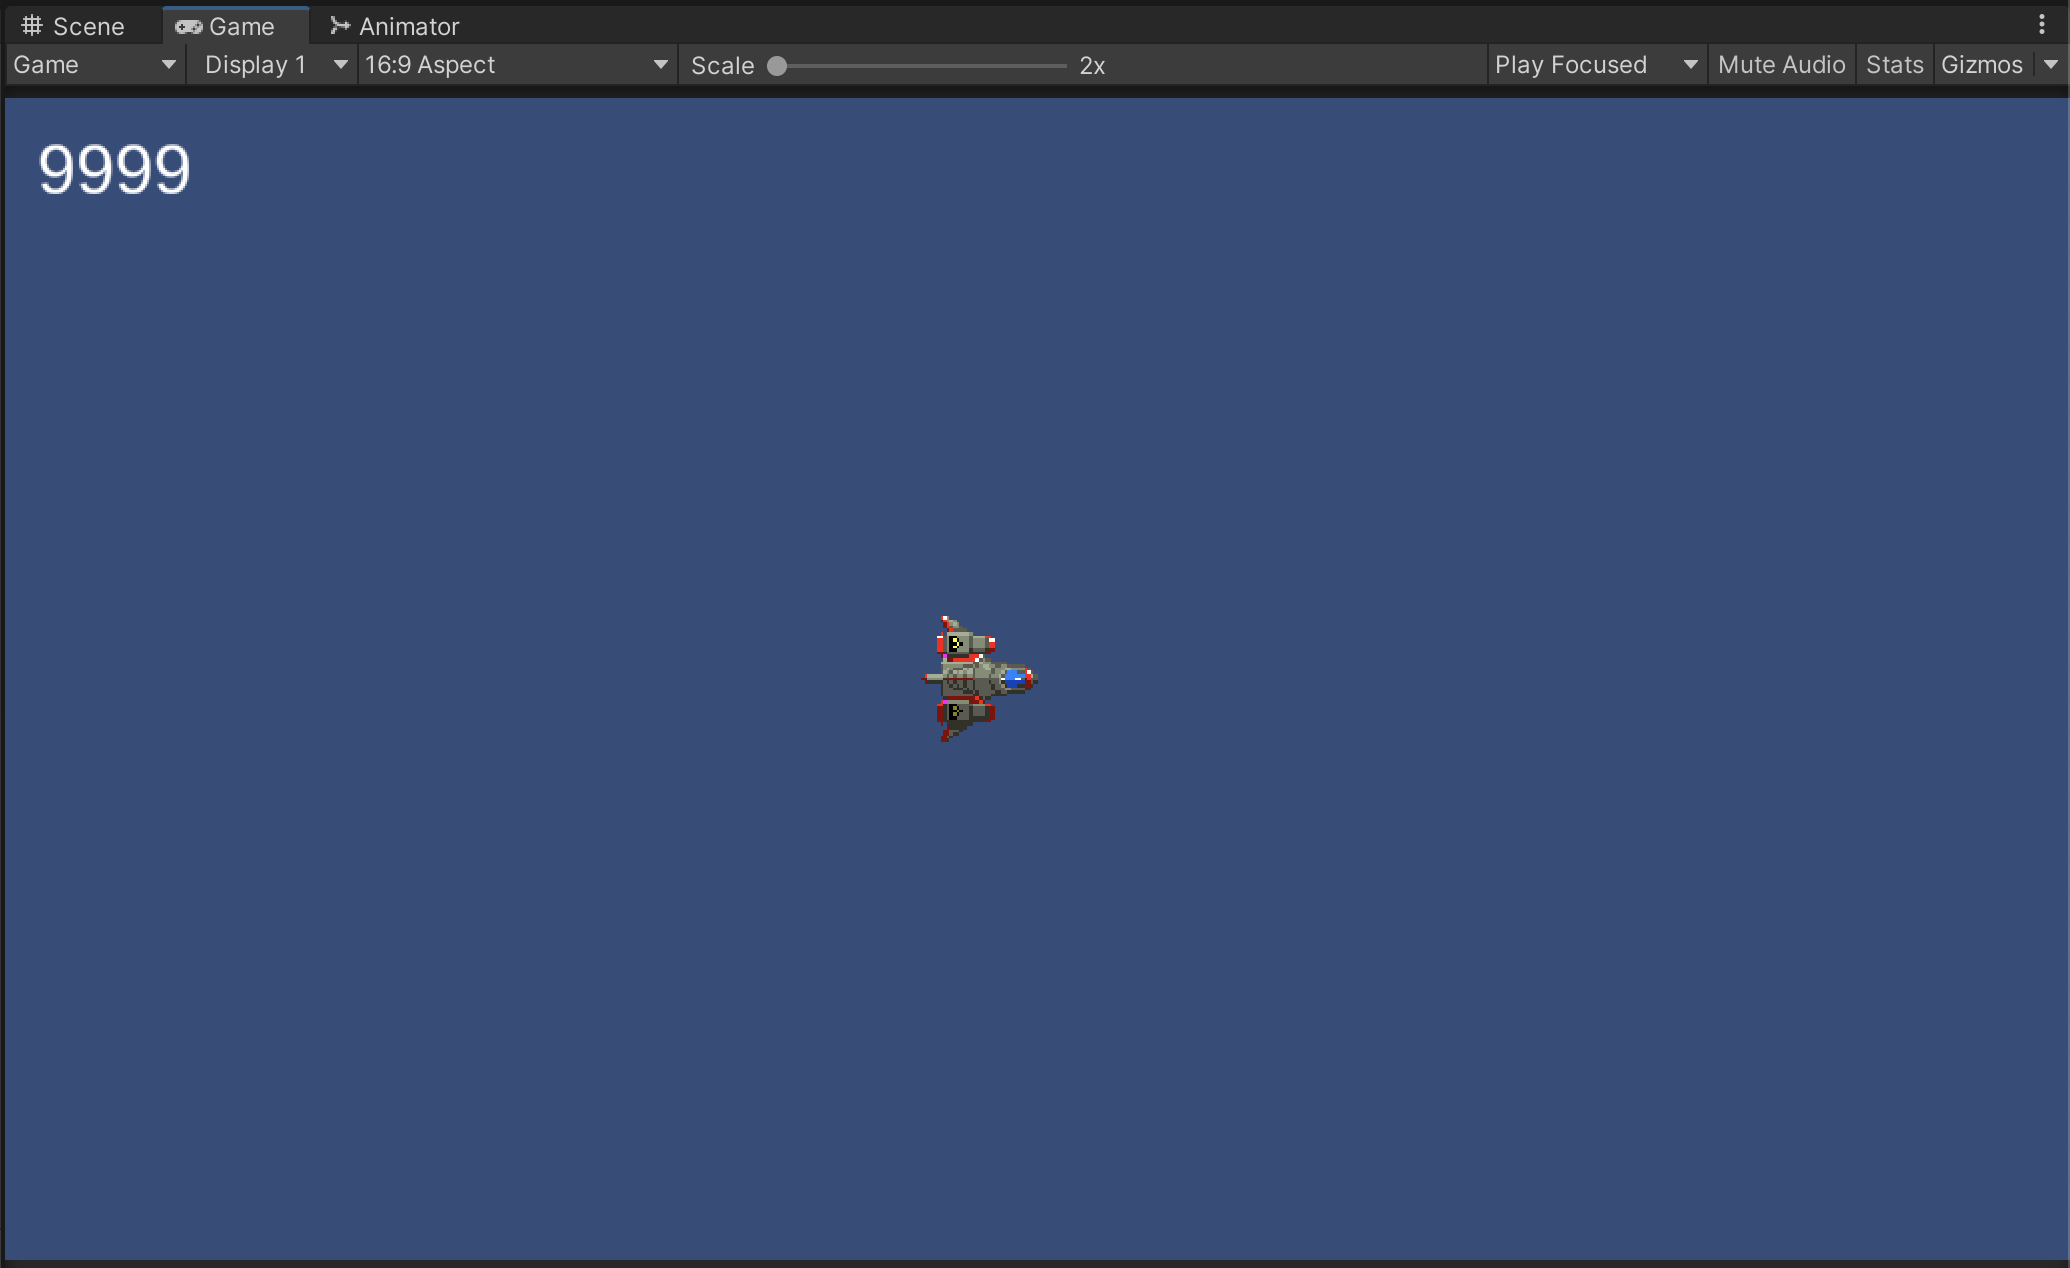
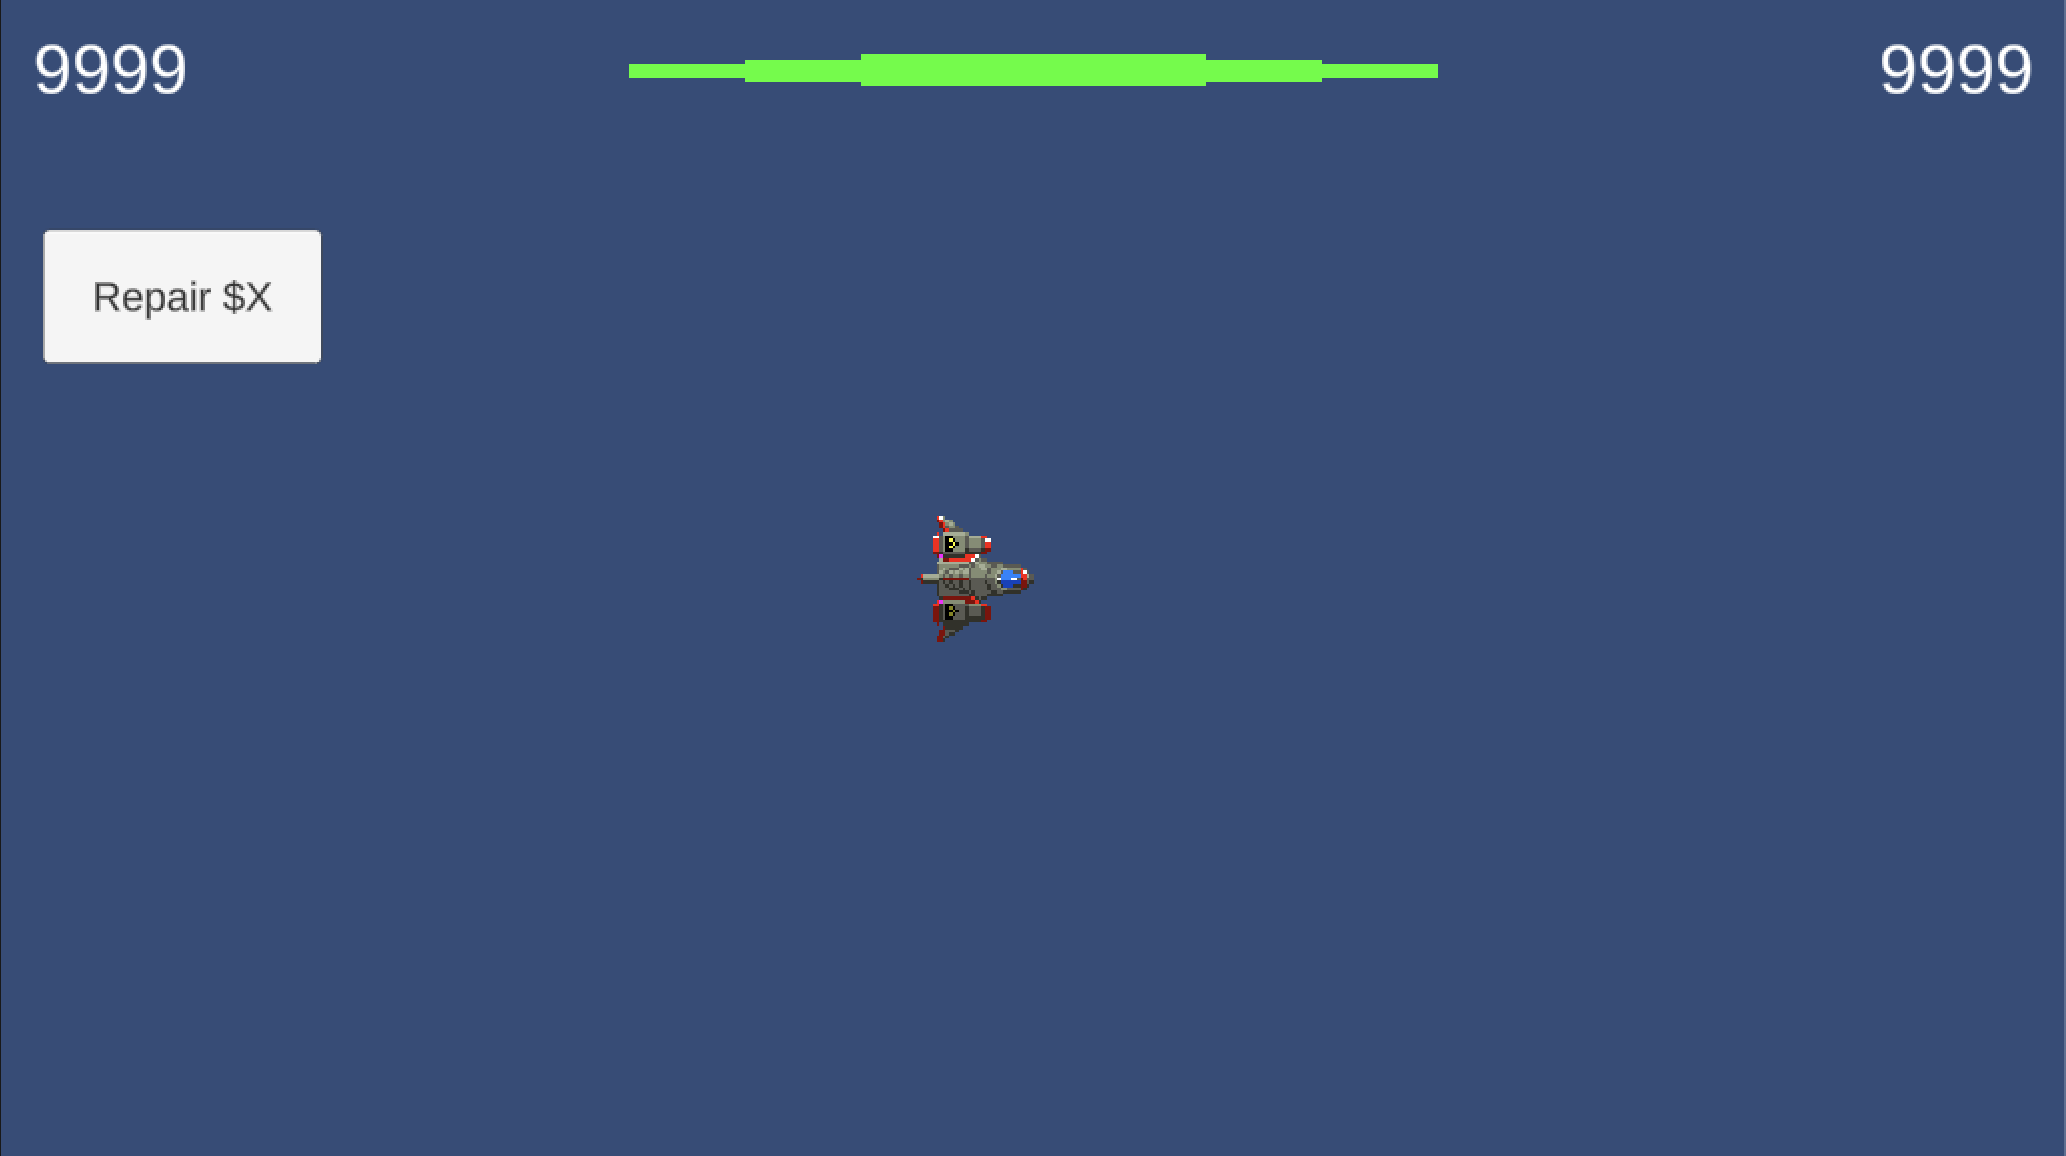
You can see how the Overlay Canvas layers on top of the Camera view by previewing the Game tab.
We can Duplicate and Rename our “Text - Score” as “Text - Money” to save some time with Text settings.
Because we want our Money to be anchored and aligned Upper-Right, we will Align our Text to the Right.
Similarly, we will use an Upper-Right Anchor, Upper-Right Pivot measurements, and different Position values in our Money's RectTransform.
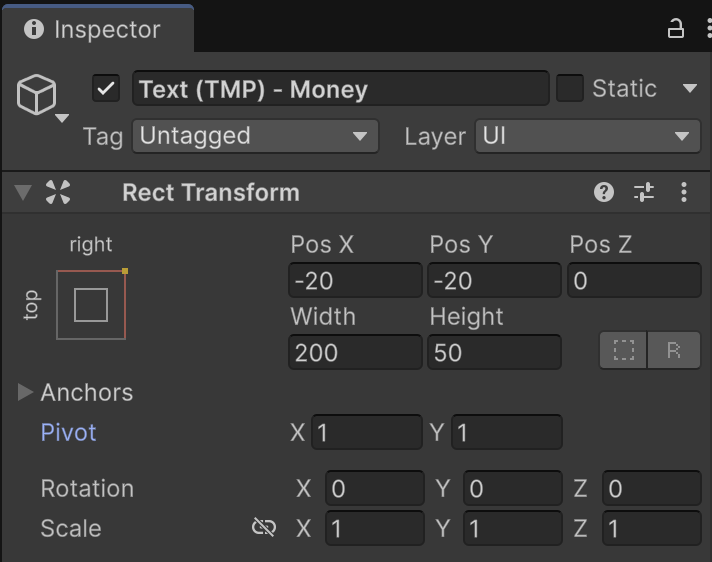
Score is Anchored Upper-Left. Money is Anchored Upper-Right.
We can create Images the same way we create Text objects.
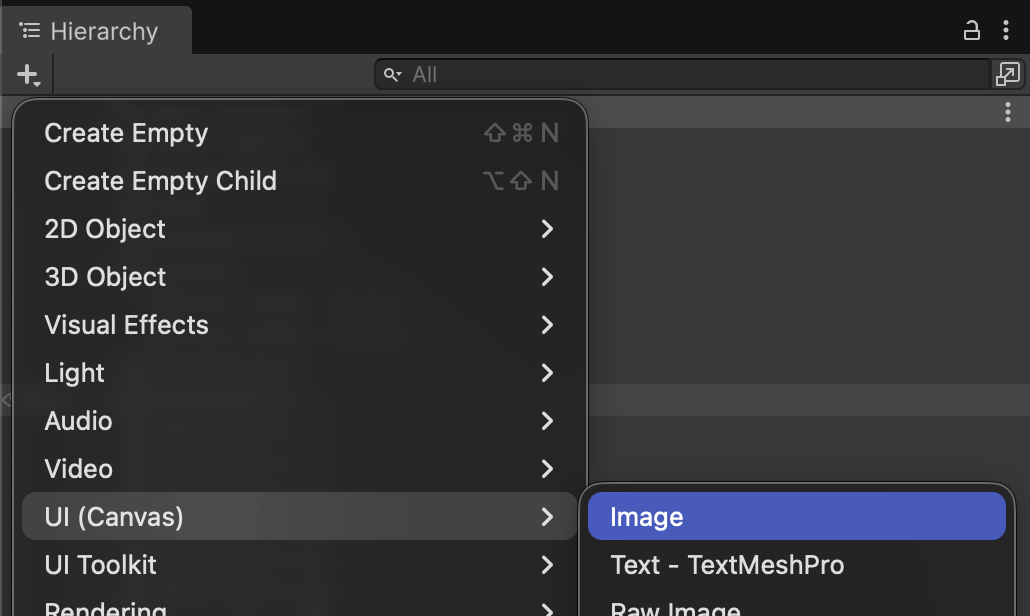
Rename the Image to communicate its purpose more clearly.
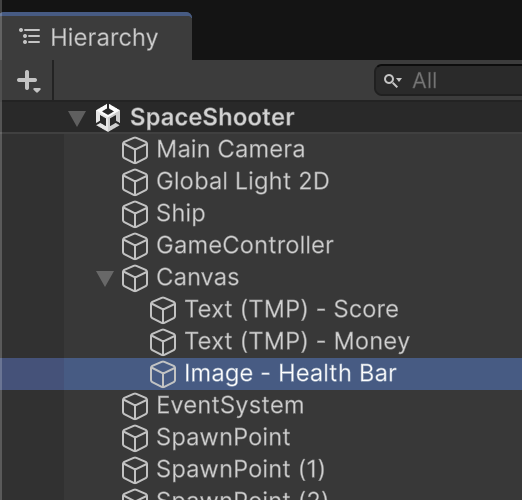
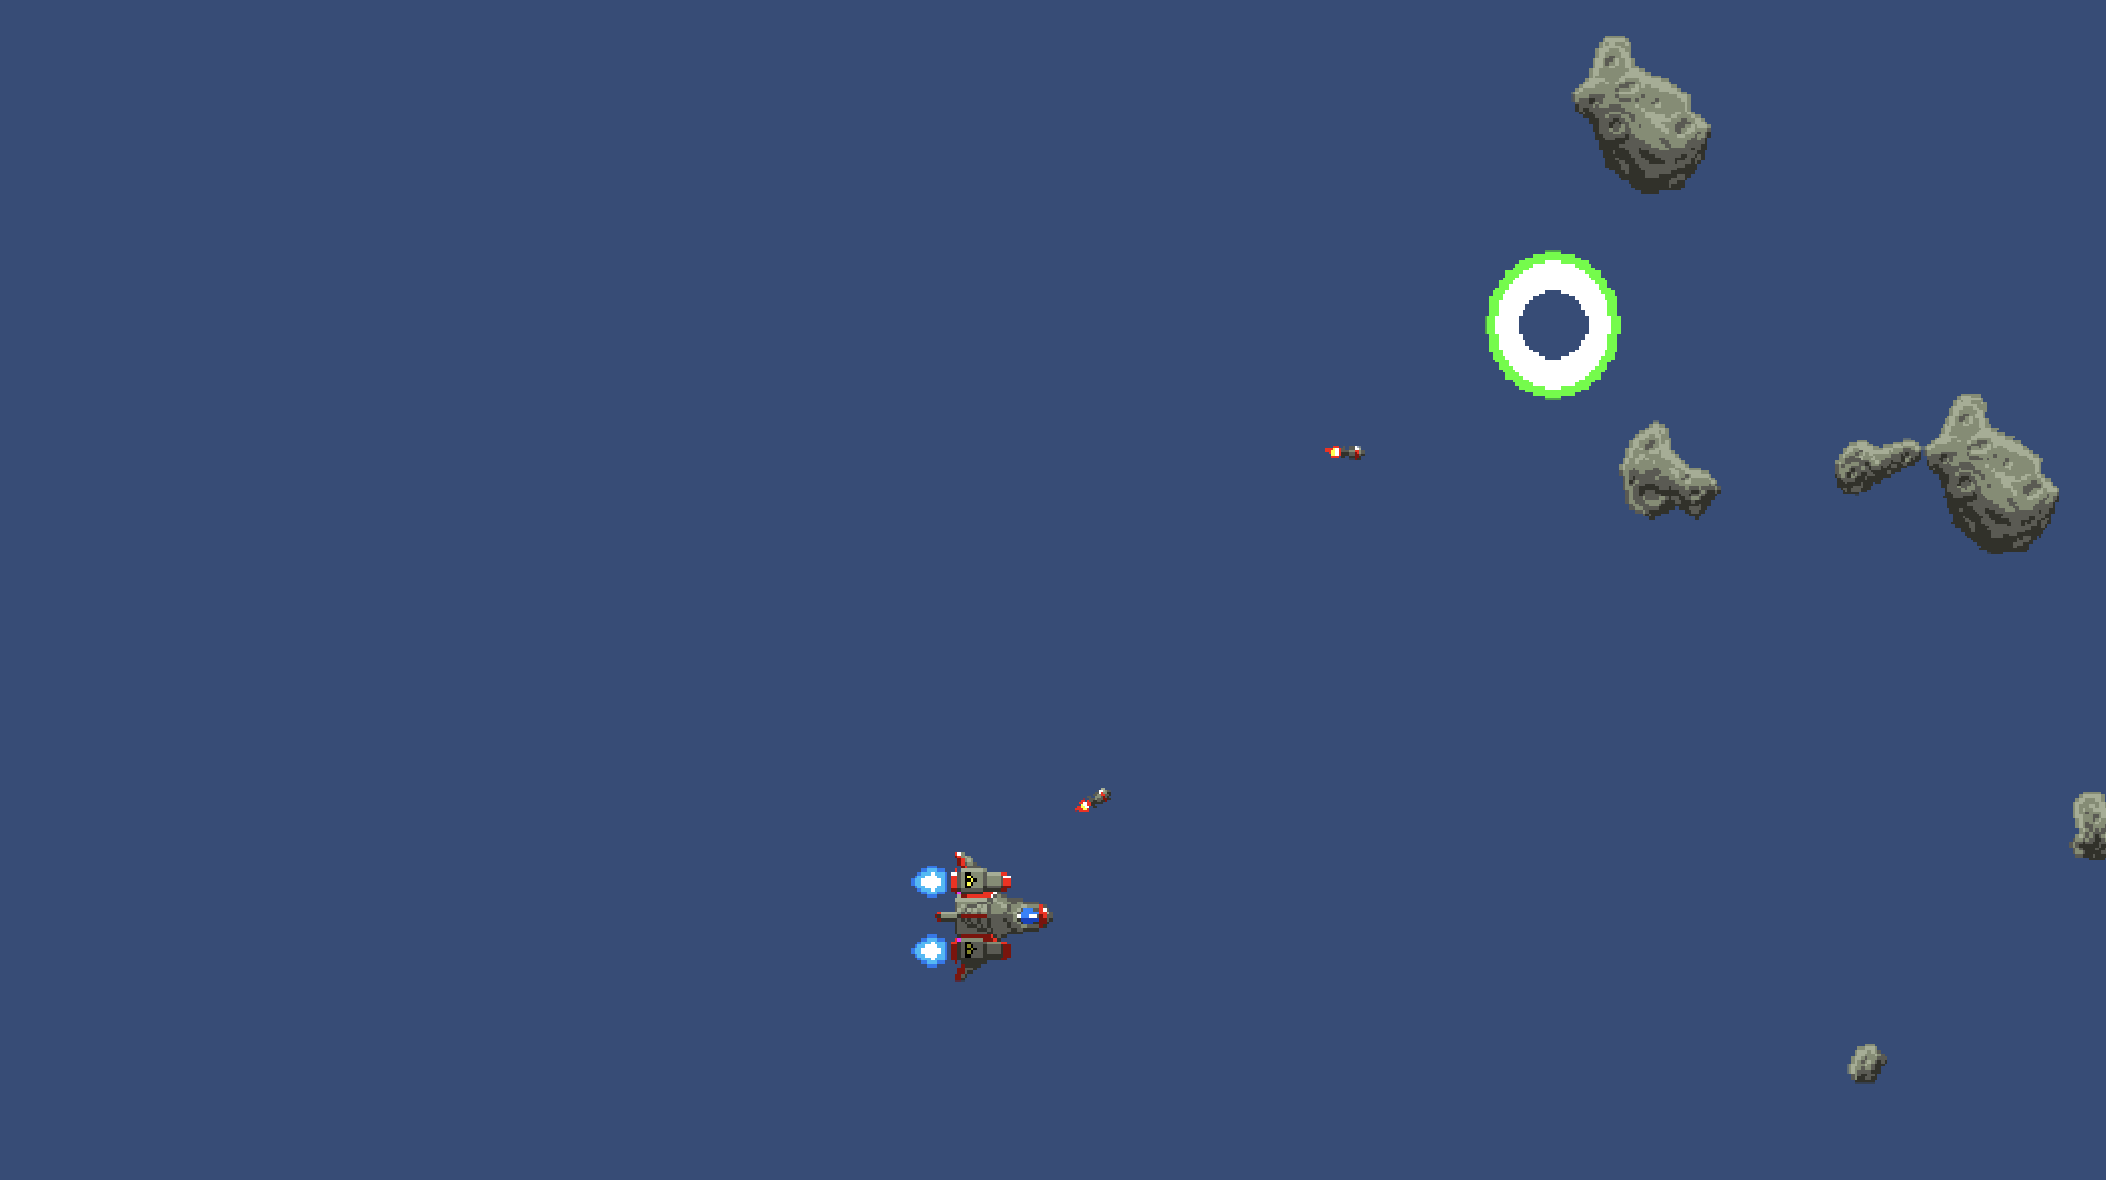
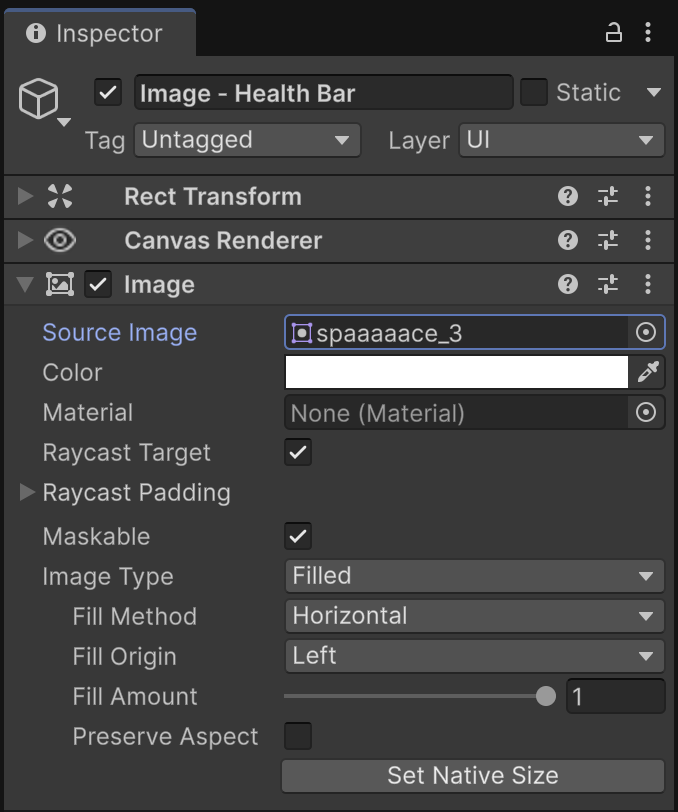
Repurpose the green dot of the explosion from the SpaceShooter's textures as a health bar. Filled image types allow us to partially show portions of an image based on its fill amount. This is great for a dynamic health bar.
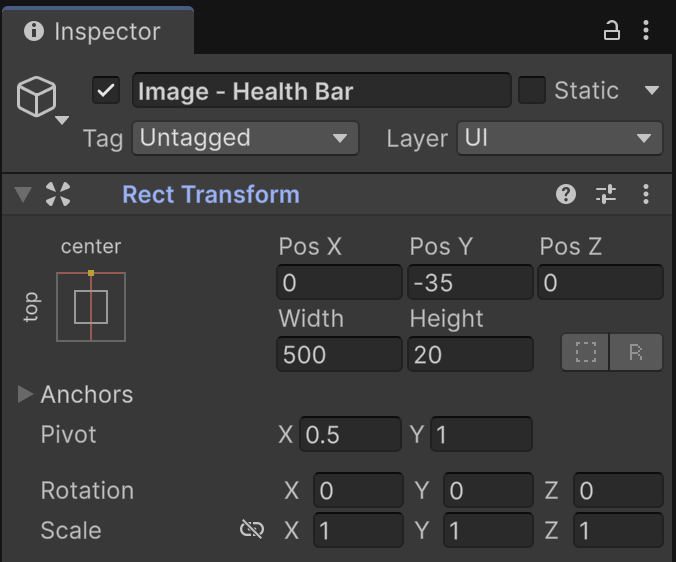
We will Anchor and Pivot our health bar Top-Center.
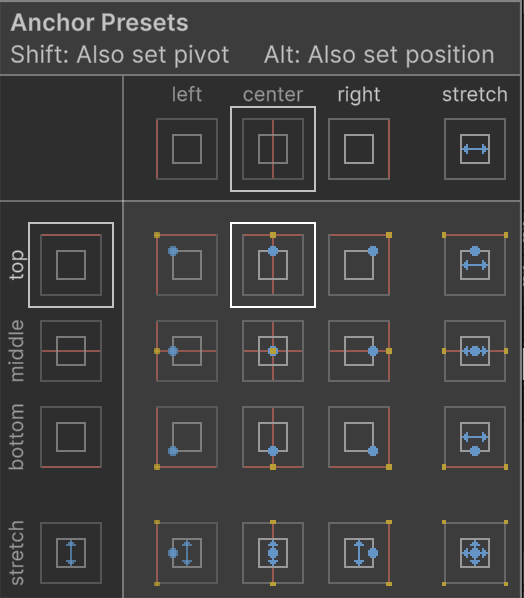
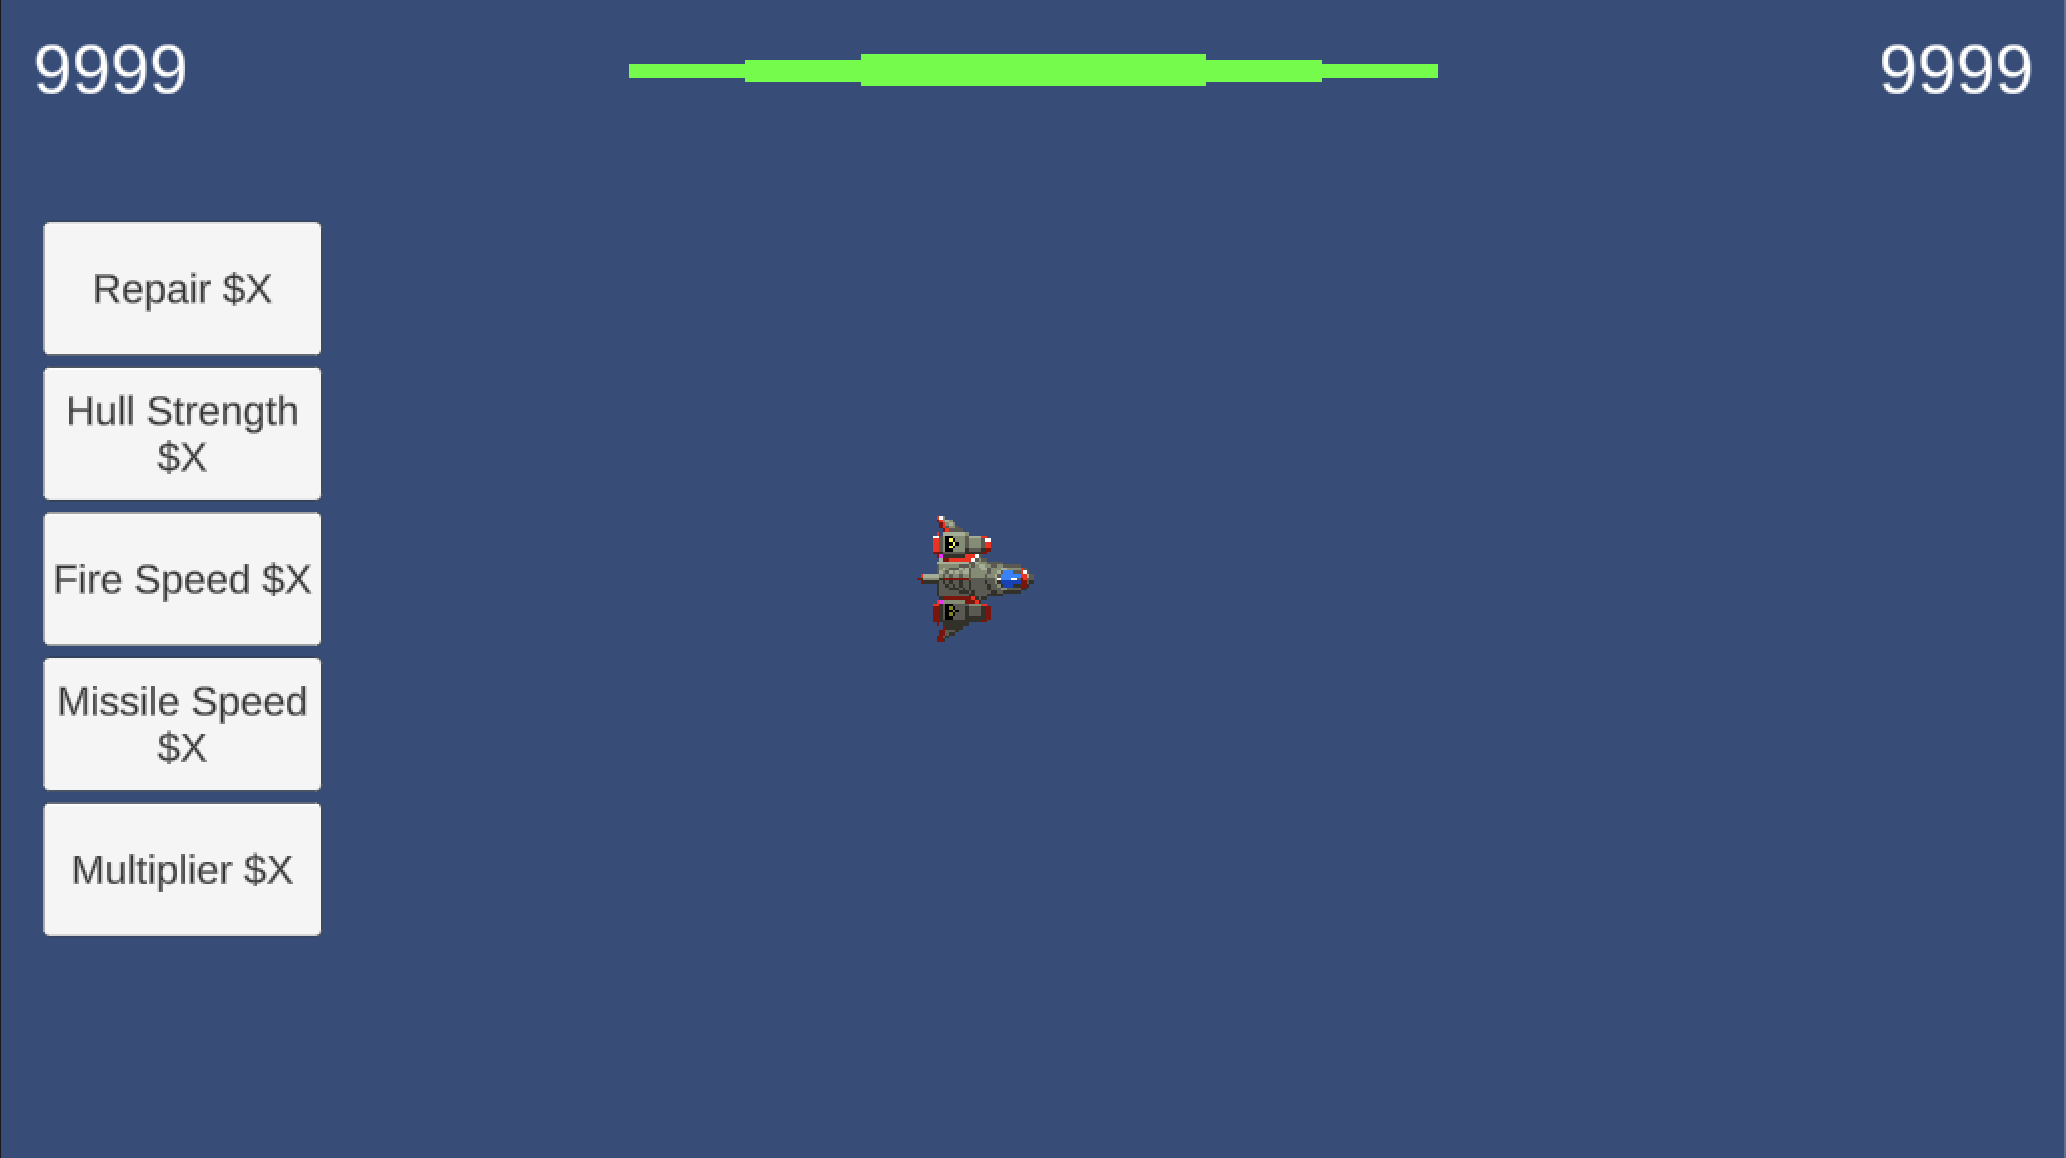
Position the heatlh bar top-center in the canvas.
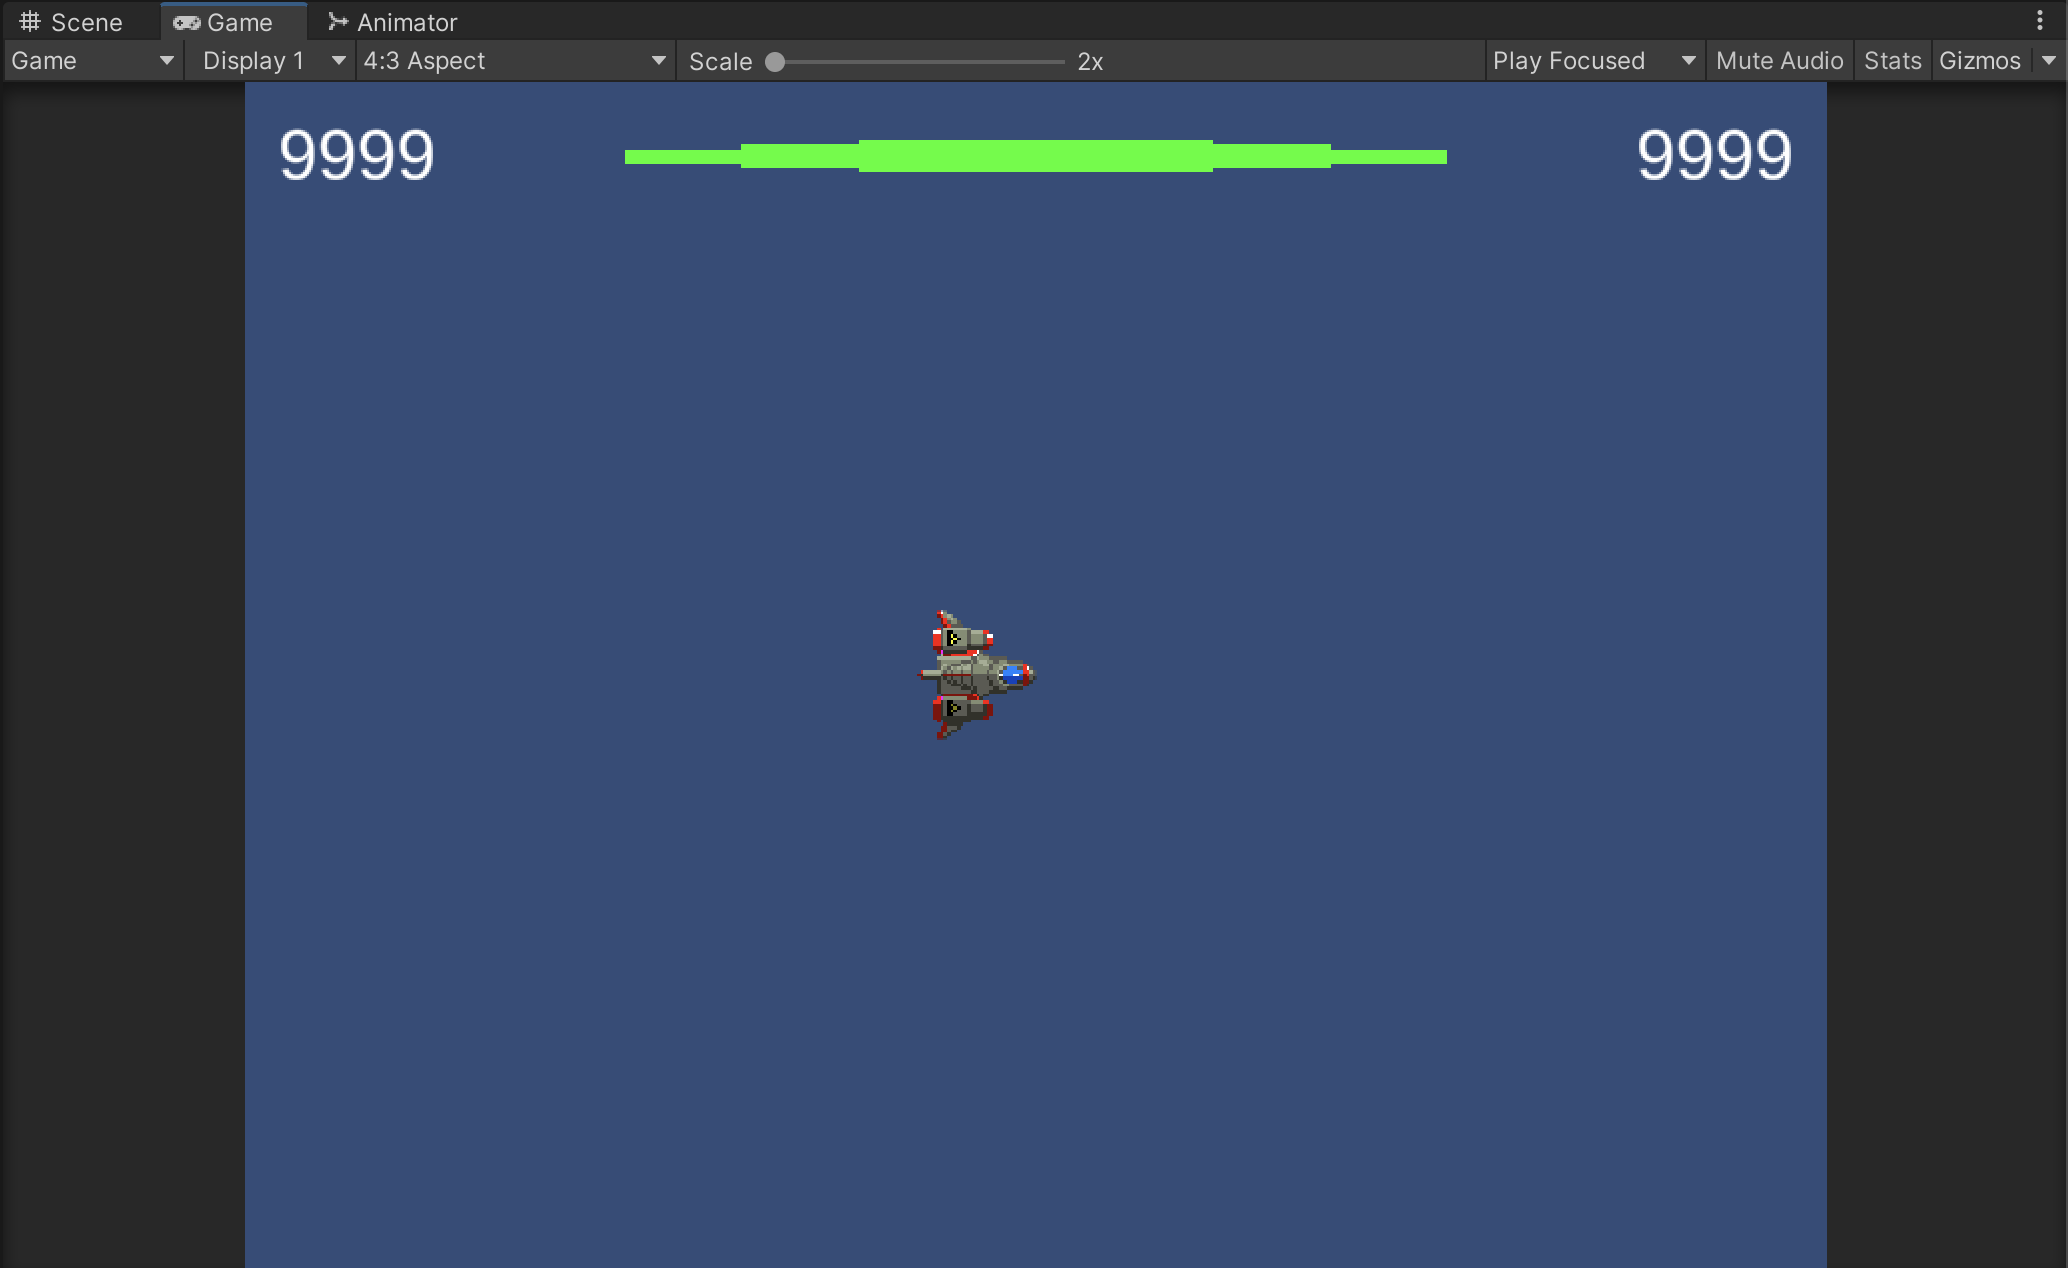
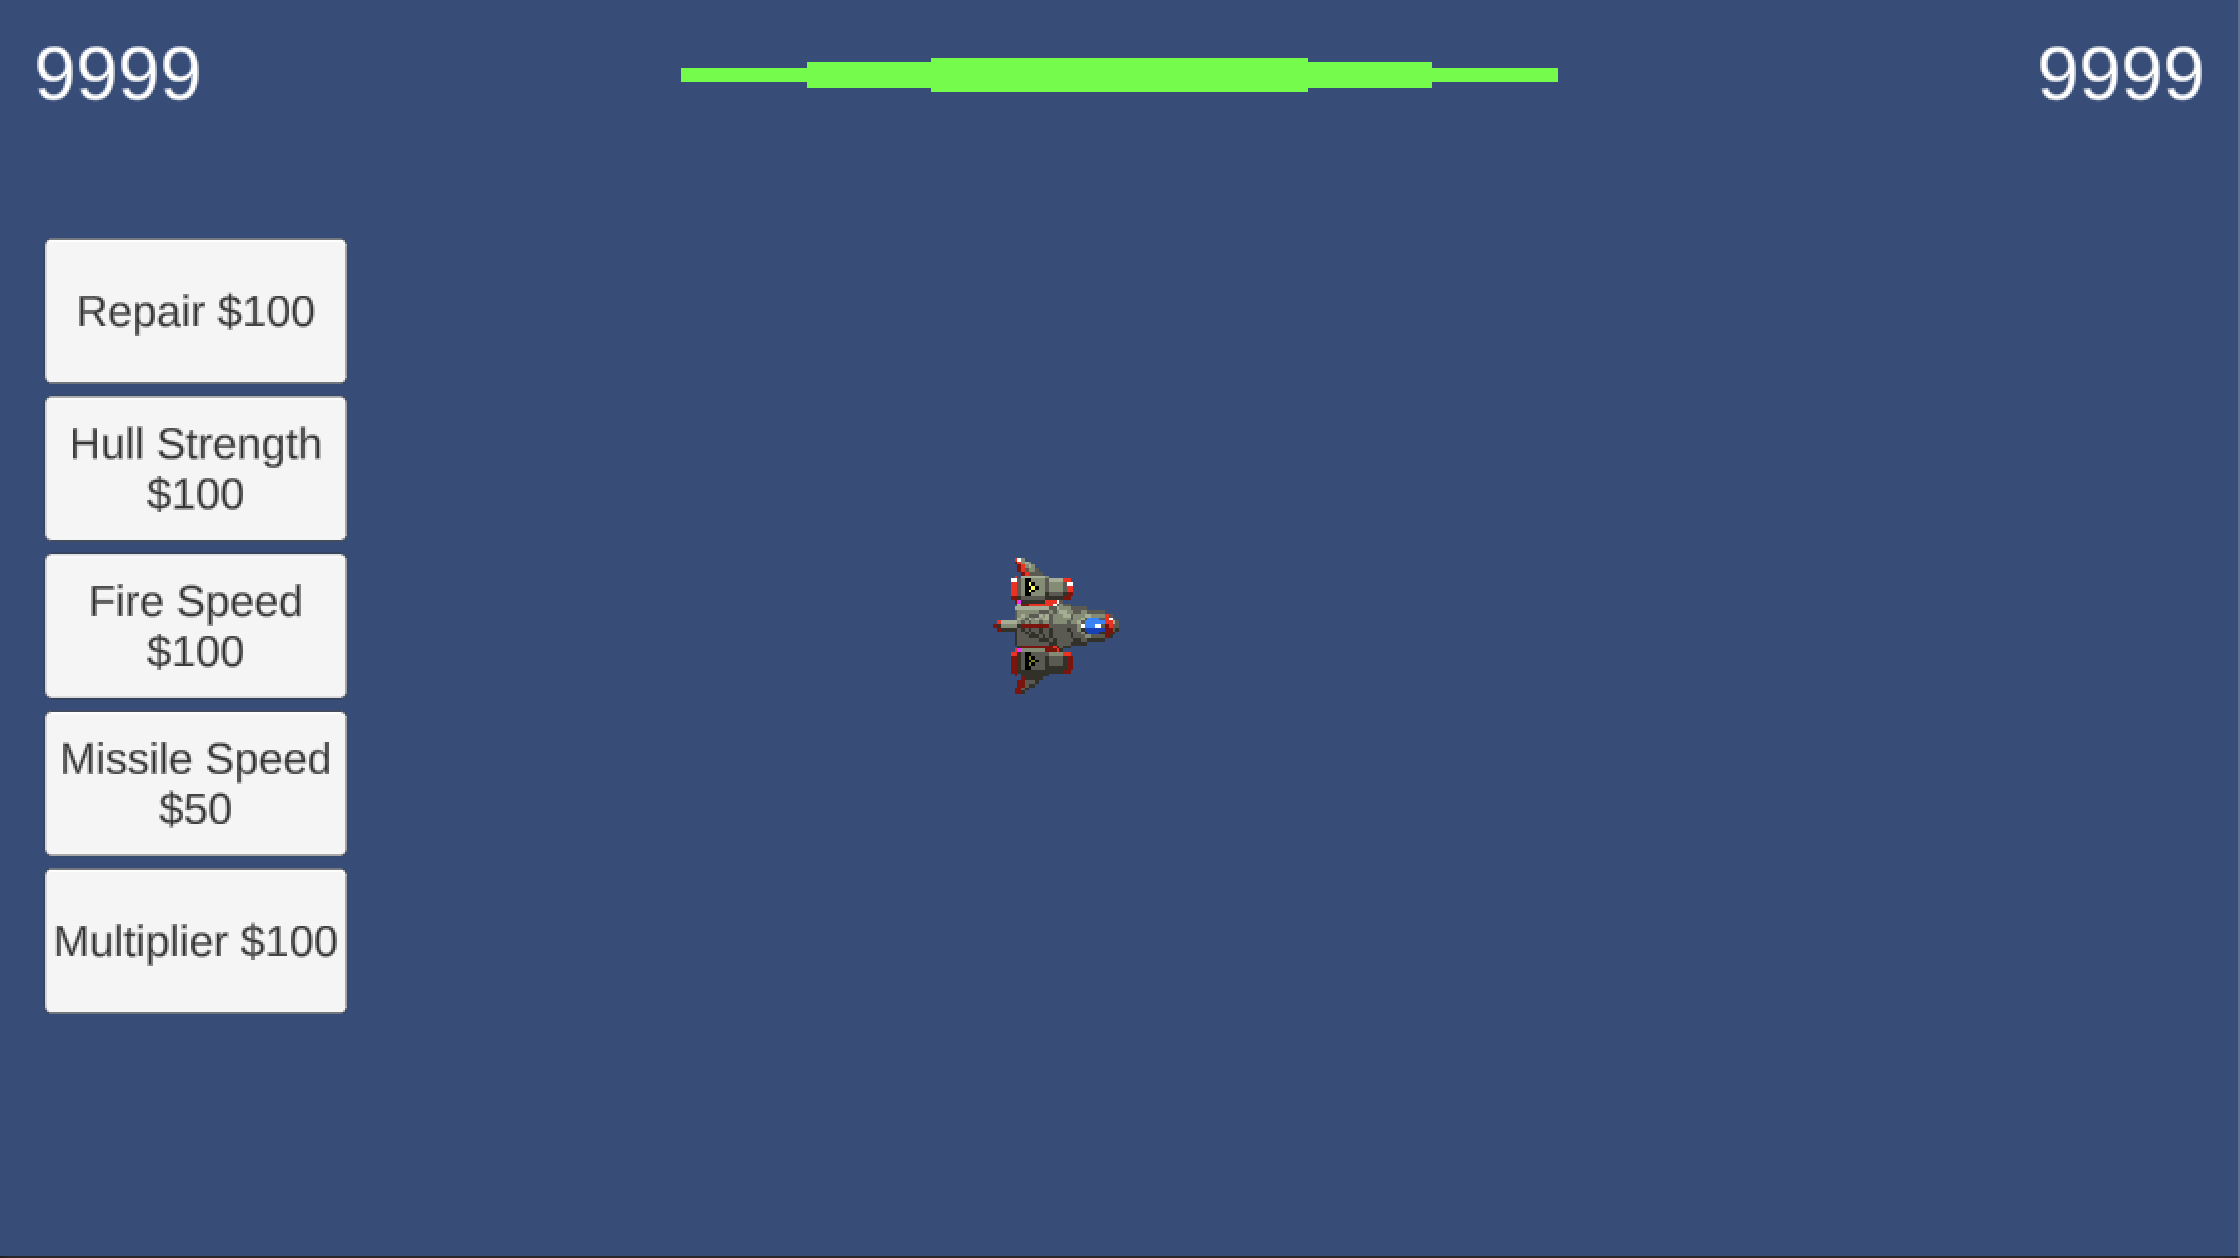
Notice how the three UI elements (Score, Money, and Health Bar) stay anchored to the Top-Left, Top-Right, and Top-Center no matter what Aspect Ratio is chosen.
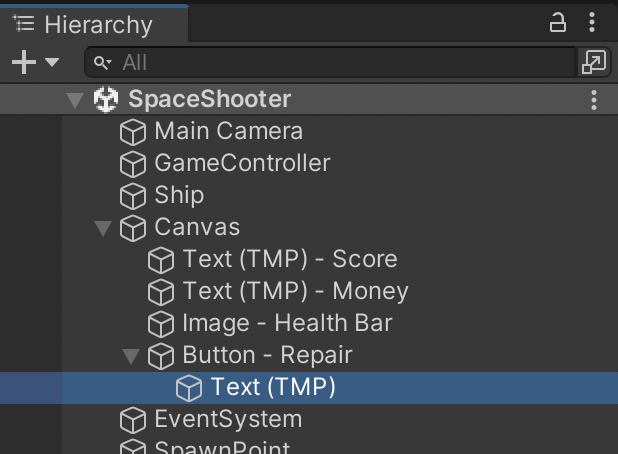
Creating Buttons works similarly to adding other UI elements. Button GameObjects contain a Button Component and Image Component on the parent along with a Text Component in a child object. All of these play a part in customizing a Button.
We setup our button’s Text Component with placeholder text and formatting.
Inspect the parent Button scene object and position it in the top position for an equally-spaced button layout.
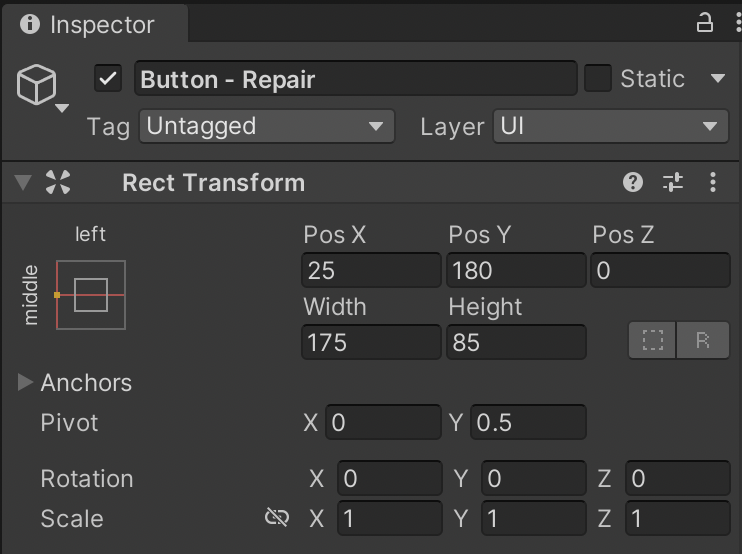
We will be using a Left-Center anchoring for all of our UI buttons.
Duplicate this process for four more buttons.
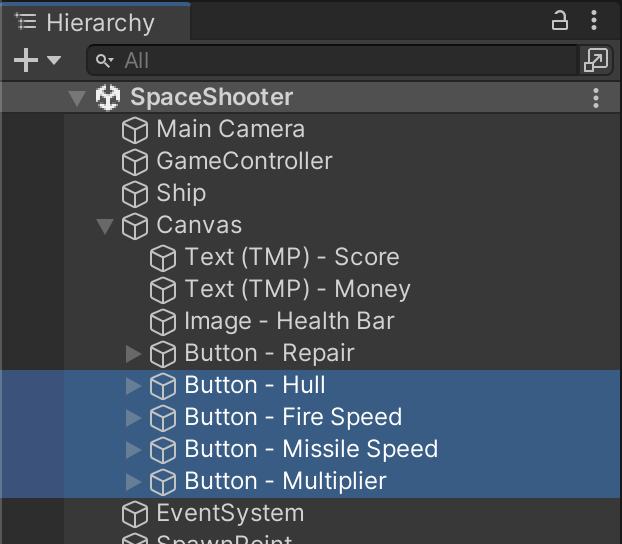
Position the buttons as shown with each one being 100 units lower on the y-axis. All of buttons should be anchored Left-Center.
The text in these buttons are placeholder values. The prices must be updated to reflect the true cost of upgrades once those have been programmed.
This completes the UI layout of our quest. The remaining steps will add dynamic text and interactivity.
The UnityEngine.UI using statement makes it easier to work with UI classes.
Ship.cs
using System.Collections;
using UnityEngine;
using UnityEngine.UI;

namespace SpaceShooter {
	public class Ship : MonoBehaviour
	{
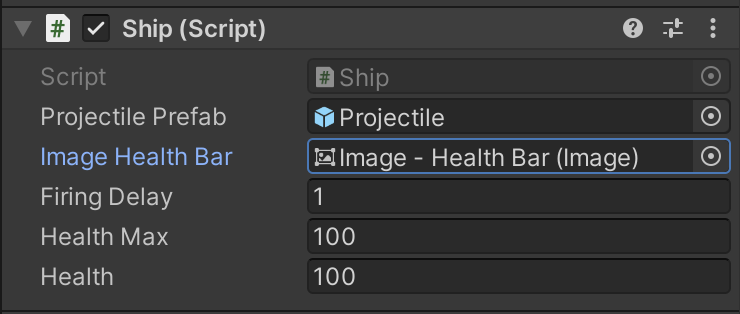
We need an outlet to control the Health Bar UI Image from the Ship. We also add properties for keeping track of health and maximum health.
Ship.cs
namespace SpaceShooter {
	public class Ship : MonoBehaviour
	{
		// Outlets
		Rigidbody2D _rigidbody2D;
		public GameObject projectilePrefab;
		public Image imageHealthBar;

		// State Tracking
		public float firingDelay = 1f;
		public float healthMax = 100f;
		public float health = 100f;
Fill in the Image Health Bar property.
We modify our existing FixedUpdate event with a conditional that requires the player to have health in order to move.
Ship.cs
		void FixedUpdate() {
			if(health > 0) {
				float yPosition = Mathf.Sin(GameController.instance.timeElapsed) * 3f;
				_rigidbody2D.MovePosition(new Vector2(0, yPosition));
			}
		}
A die function will let us cleanup and transition to a dead spaceship state.
Ship.cs
		void Die() {
			StopCoroutine("FiringTimer");
			Rigidbody2D rb = GetComponent<Rigidbody2D>();
			rb.gravityScale = 0;
			rb.bodyType = RigidbodyType2D.Dynamic;
		}
A TakeDamage function will handle updating health. We need to check for less-than-or-equal-to zero health because the player can take so much damage at once that health is never exactly zero. Health can actually go straight into the negative. Fill amount for an image is on a scale of 0 to 1, which makes it really easy to calculate a health ratio using float numbers.
Ship.cs
		void TakeDamage(float damageAmount) {
			health -= damageAmount;
			if(health <= 0f) {
				Die();
			}

			imageHealthBar.fillAmount = health / healthMax;
		}
On collision we will take damage which could lead to death.
Ship.cs
		void OnCollisionEnter2D(Collision2D collision) {
			if(collision.gameObject.GetComponent<Asteroid>()) {
				TakeDamage(10f);
			}
		}
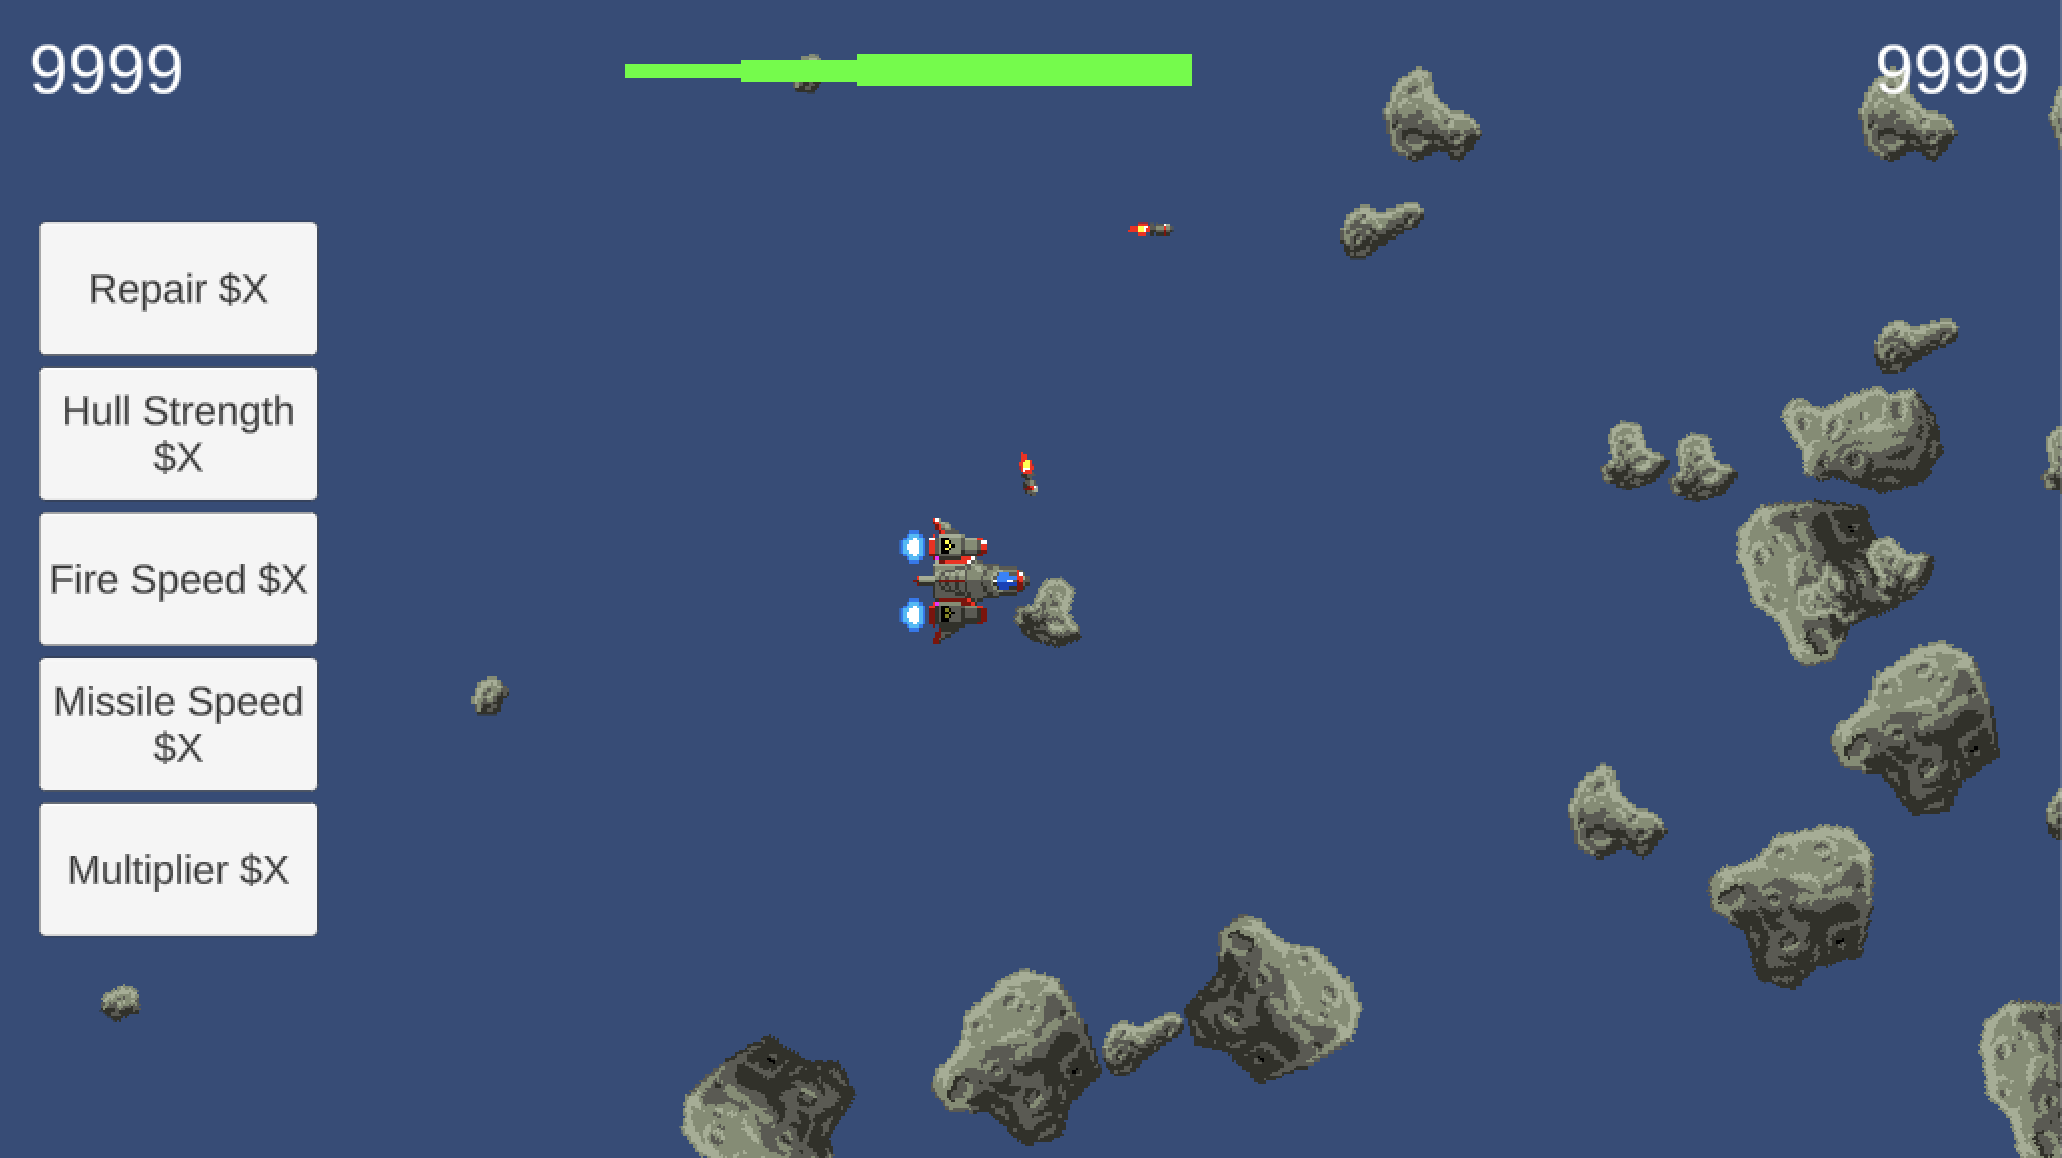
Notice how the health bar is only partially rendered based on our health ratio.
Working with TextMeshPro actually uses the TMPro namespace. Add a public UI Text outlet and a property for tracking score.
GameController.cs
using System.Collections;
using UnityEngine;
using TMPro;
namespace SpaceShooter {
public class GameController : MonoBehaviour
{
public static GameController instance;
// Outlets
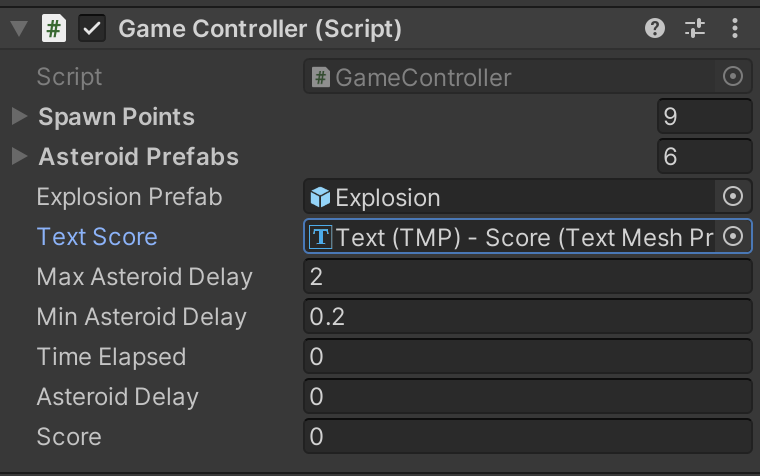
public Transform[] spawnPoints;
public GameObject[] asteroidPrefabs;
public GameObject explosionPrefab;
public TMP_Text textScore;
// Configuration
public float maxAsteroidDelay = 2f;
public float minAsteroidDelay = 0.2f;
// State Tracking
public float timeElapsed;
public float asteroidDelay;
public int score;
Any time you make a public outlet variable, you must remember to fill in the property.
A dedicated UpdateDisplay function will let us organize UI logic and help keep the Update event from becoming too bloated. We will call our UpdateDisplay function every frame so it stays up to date.
The ToString function has many helpful formatting templates. In this example, the N signifies the template that formats our number with commas, while the 0 (zero) signifies showing zero decimal places. It is not the letter O.
GameController.cs
		void Update() {
			// Increment the passage of time for each frame of the game
			timeElapsed += Time.deltaTime;

			// Compute Asteroid Delay
			asteroidDelay = maxAsteroidDelay - (maxAsteroidDelay - minAsteroidDelay) / 30f * timeElapsed;
			asteroidDelay = Mathf.Clamp(asteroidDelay, minAsteroidDelay, maxAsteroidDelay);

			UpdateDisplay();
		}

		void UpdateDisplay() {
			textScore.text = score.ToString("N0");
		}
An EarnPoints function will allow us to centralize point calculations and more easily add bonuses in the future.
GameController.cs
		public void EarnPoints(int pointAmount) {
			score += pointAmount;
		}
Reset the Score to 0 to zero at the start.
GameController.cs
		void Start() {
			StartCoroutine("AsteroidSpawnTimer");

			score = 0;
		}
In the SpaceShooter's Projectile C# script, the player earns points when Asteroids are destroyed.
Projectile.cs
		void OnCollisionEnter2D(Collision2D collision) {
			// Only explode on Asteroids
			if(collision.gameObject.GetComponent<Asteroid>()) {
				Destroy(collision.gameObject);
				Destroy(gameObject);

				// Create an explosion and destroy it soon after
				GameObject explosion = Instantiate(
					GameController.instance.explosionPrefab,
					transform.position,
					Quaternion.identity
				);
				Destroy(explosion, 0.25f);

				GameController.instance.EarnPoints(10);
			}
		}
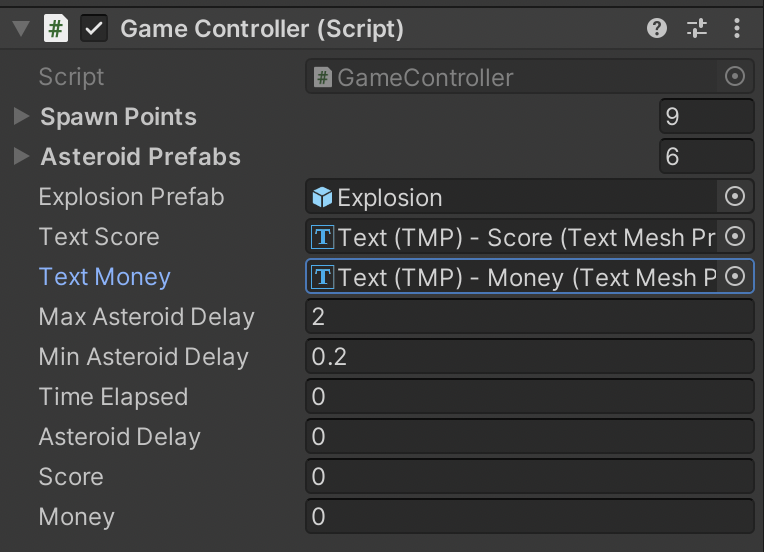
Money works almost identically to Score. It requires the same kind of Outlet and Integer Property.
GameController.cs
namespace SpaceShooter {
	public class GameController : MonoBehaviour
	{
		public static GameController instance;

		// Outlets
		public Transform[] spawnPoints;
		public GameObject[] asteroidPrefabs;
		public GameObject explosionPrefab;
		public TMP_Text textScore;
		public TMP_Text textMoney;

		// Configuration
		public float maxAsteroidDelay = 2f;
		public float minAsteroidDelay = 0.2f;

		// State Tracking
		public float timeElapsed;
		public float asteroidDelay;
		public int score;
		public int money;
Fill in the outlet for Money.
Money also resets with score.
GameController.cs
		void Start() {
			StartCoroutine("AsteroidSpawnTimer");

			score = 0;
			money = 0;
		}
We must also update the UI for money the same way we do for score.
GameController.cs
		void UpdateDisplay() {
			textScore.text = score.ToString("N0");
			textMoney.text = money.ToString("N0");
		}
You earn money when you earn score.
GameController.cs
		public void EarnPoints(int pointAmount) {
			score += pointAmount;
			money += pointAmount;
		}
Buttons can utilize public functions on any scene object as their click event. When the player clicks the Repair Button, it will trigger a function on the Ship object.
Ship.cs
		public void RepairHull() {
			int cost = 100;
			if(GameController.instance.money >= cost && health < healthMax && health > 0) {
				GameController.instance.money -= cost;

				health = healthMax;
				imageHealthBar.fillAmount = health / healthMax;
			}
		}
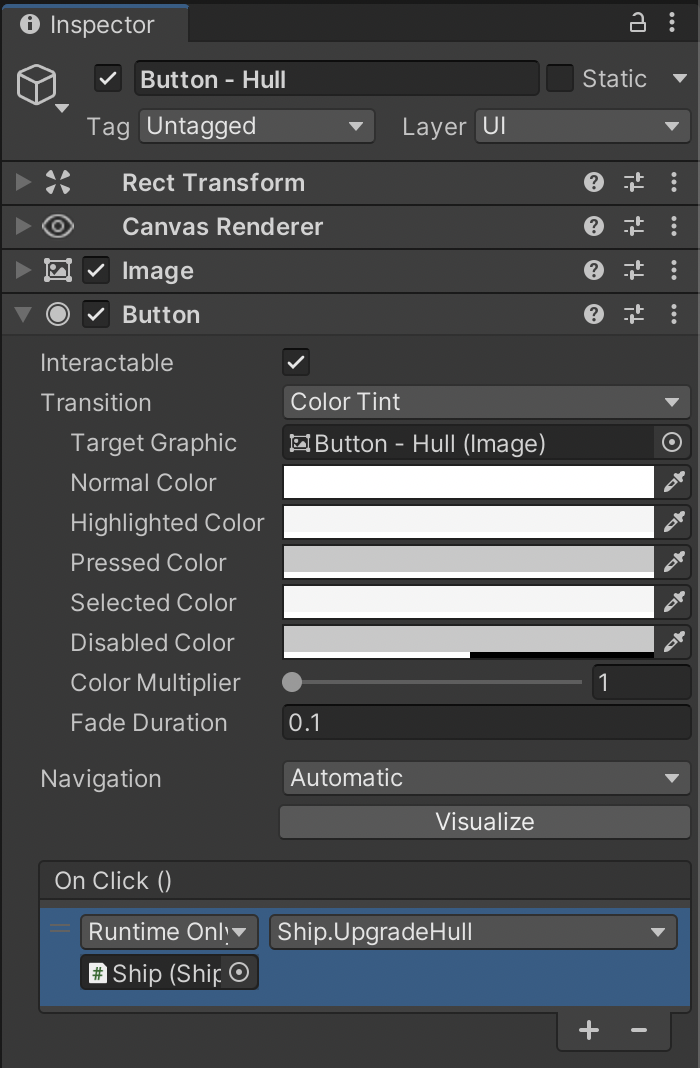
Buttons have a lot of settings for aesthetics along with a section for setting up click interactivity.
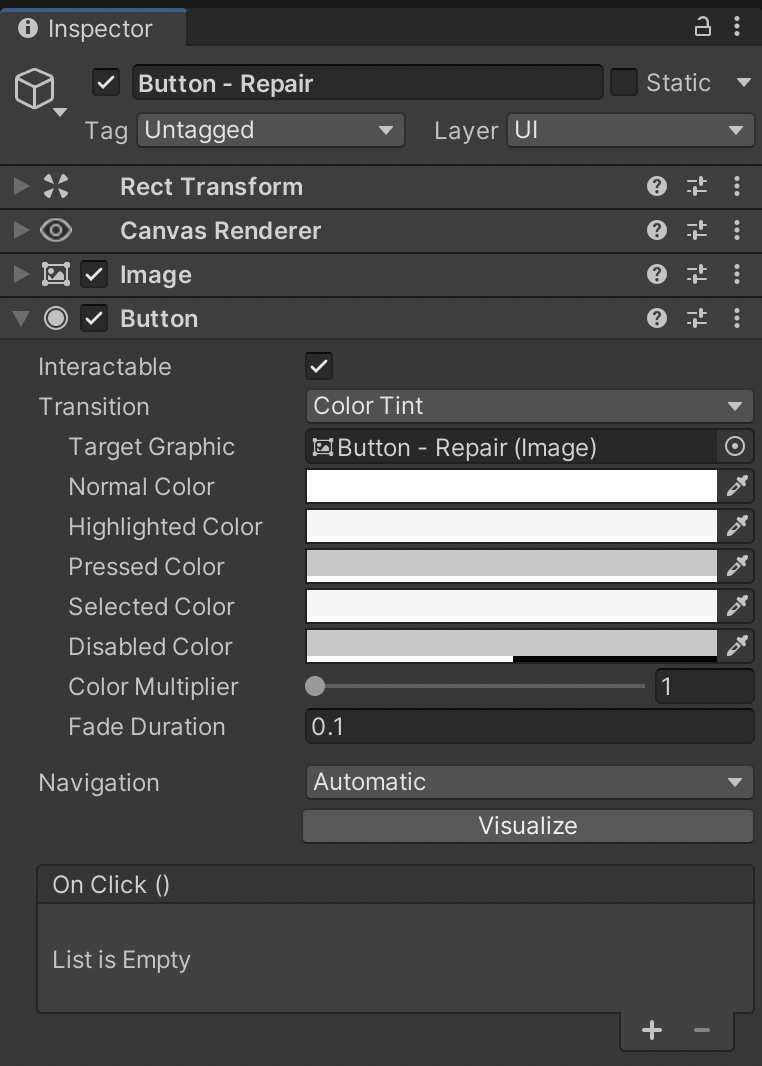
In the OnClick section, use the + to add a Click Event. Drag the Ship object into the first blank on the left to access the Ship's components.
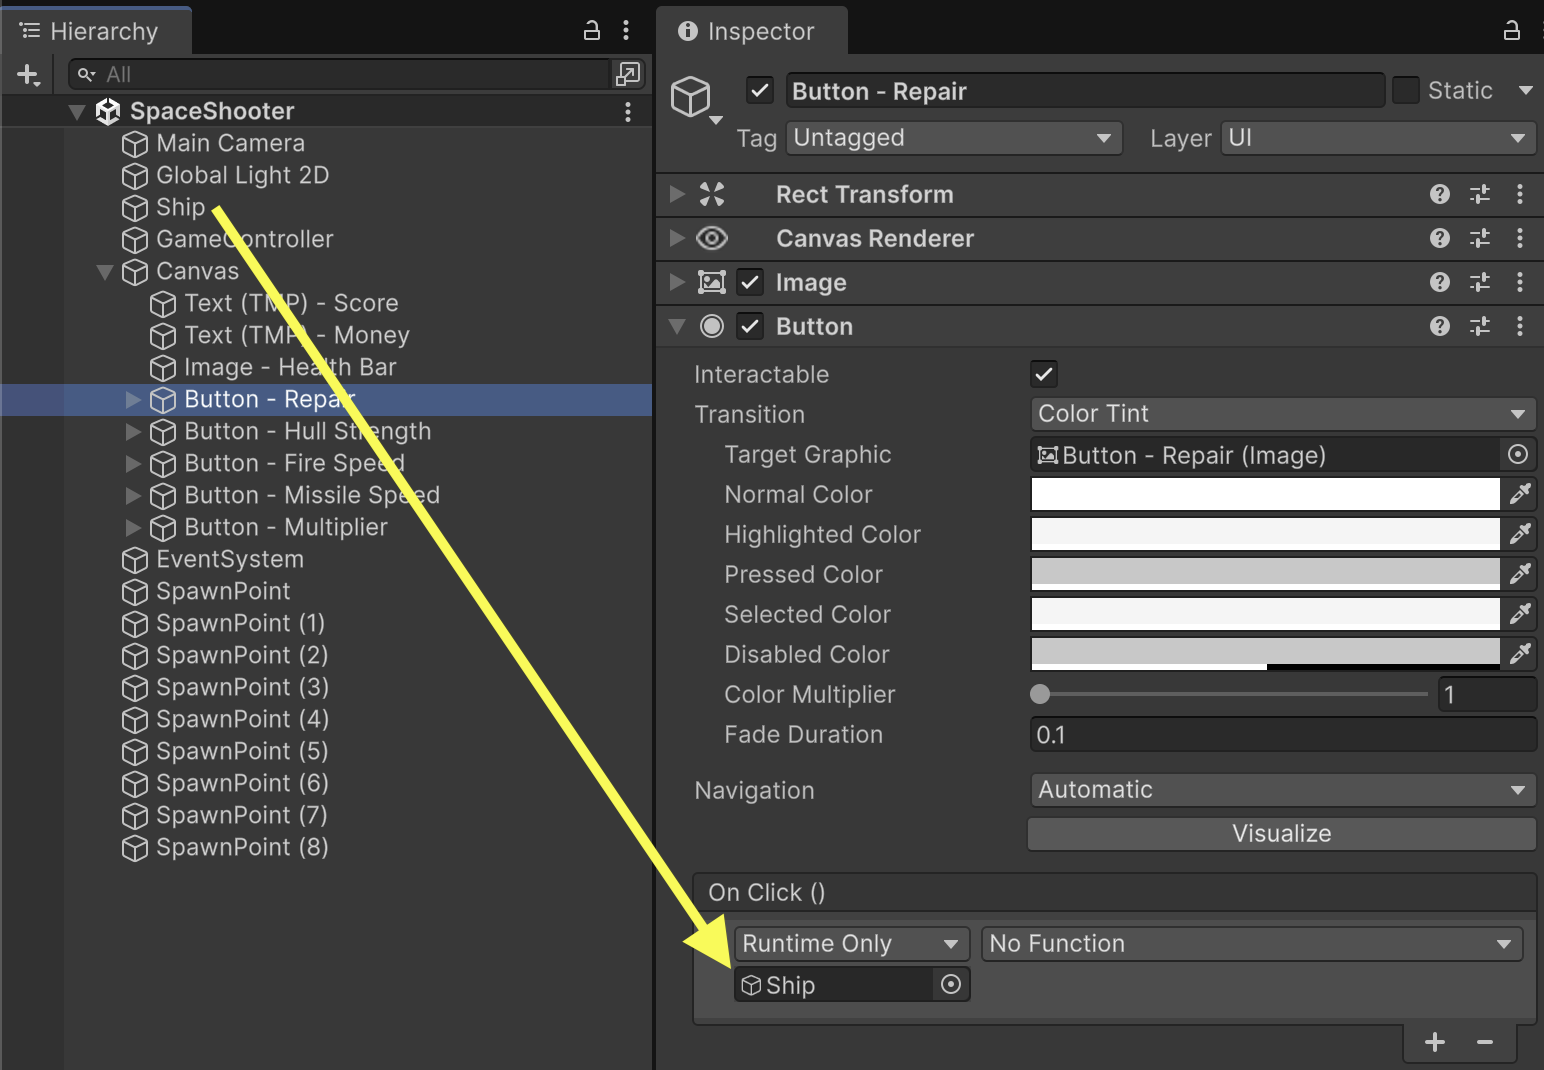
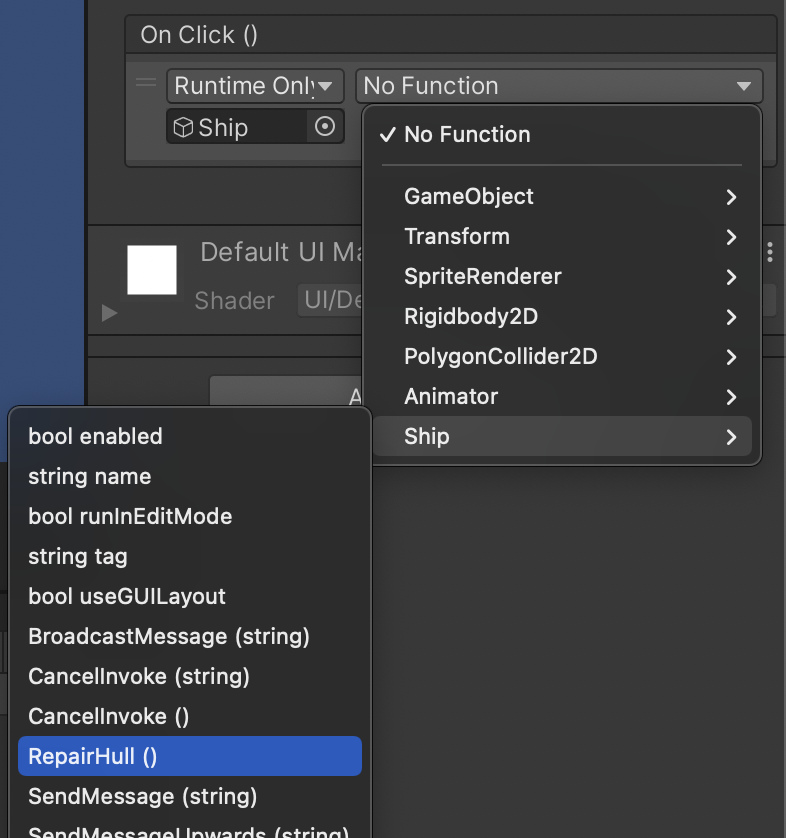
From the drop-down, select the Ship component and finally the RepairHull function that the button will trigger on click.
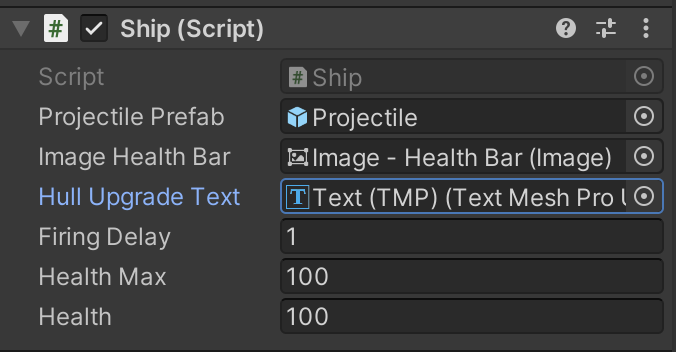
The Hull Strength Upgrade button text changes every time we buy the upgrade. Improving the ship's hull becomes more expensive with each use and the UI must reflect those changing costs. To alter the button's text, we create an outlet property to reference it in code.
Ship.cs
using System.Collections;
using UnityEngine;
using UnityEngine.UI;
using TMPro;

namespace SpaceShooter {
	public class Ship : MonoBehaviour
	{
		// Outlets
		Rigidbody2D _rigidbody2D;
		public GameObject projectilePrefab;
		public Image imageHealthBar;
		public TMP_Text hullUpgradeText;
The UpgradeHull function shares a lot of similarities with the RepairHull function. Both calculate a cost, check if enough money is available, verify whether it is appropriate to upgrade the ship, subtract the money from our wallet, and grant the player some special stat.
UpgradeHull also requires that we update the Button Text to reflect the cost of purchasing the next upgrade.
Ship.cs
		public void UpgradeHull() {
			int cost = Mathf.RoundToInt(healthMax);

			if(GameController.instance.money >= cost && health > 0) {
				GameController.instance.money -= cost;

				health += 50;
				healthMax += 50;
				imageHealthBar.fillAmount = health / healthMax;

				hullUpgradeText.text = "Hull Strength $" + Mathf.RoundToInt(healthMax);
			}
		}
To update the Button Text we need to fill in the UI Outlet for the Text we are updating. Be sure to drag the correct Button Text into the blank.
We also need to hook up the button's OnClick event the same way we did for the previous button.
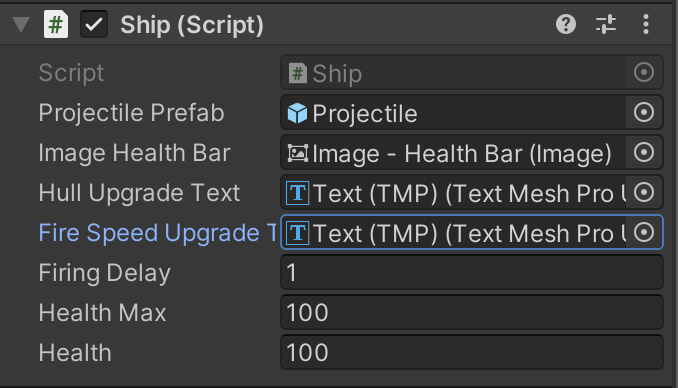
Just as before, create a public text outlet for showing dynamic prices.
Ship.cs
namespace SpaceShooter {
	public class Ship : MonoBehaviour
	{
		// Outlets
		Rigidbody2D _rigidbody2D;
		public GameObject projectilePrefab;
		public Image imageHealthBar;
		public TMP_Text hullUpgradeText;
		public TMP_Text fireSpeedUpgradeText;
Fill in the outlet.
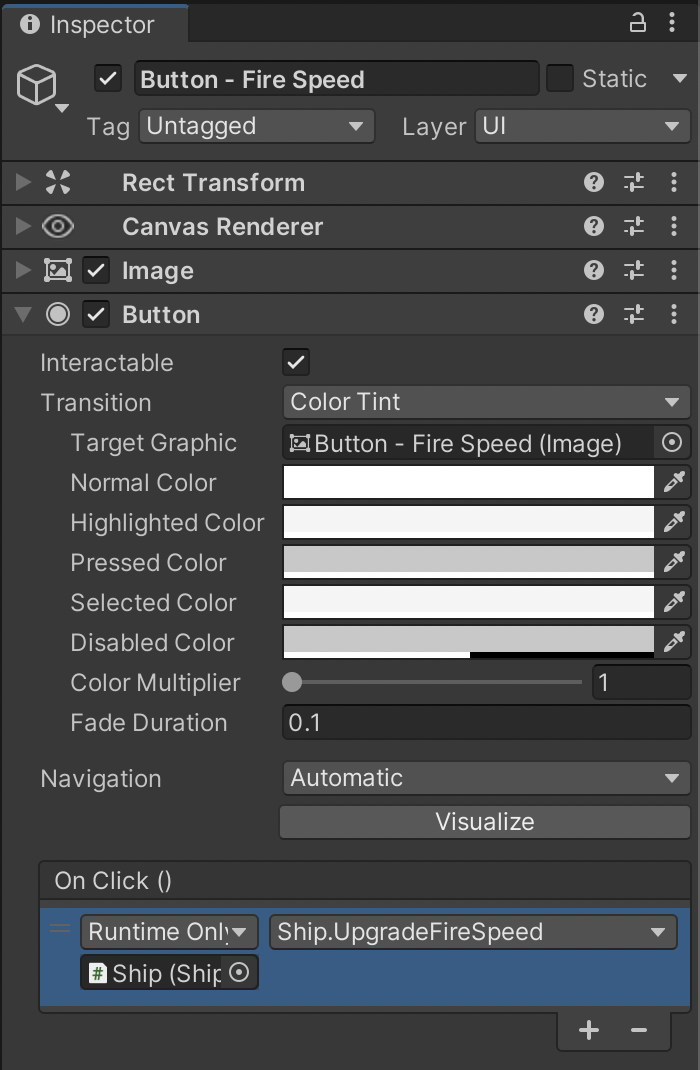
Create the upgrade function.
Ship.cs
		public void UpgradeFireSpeed() {
			int cost = 100 + Mathf.RoundToInt((1f - firingDelay) * 100f);

			if(GameController.instance.money >= cost) {
				GameController.instance.money -= cost;

				firingDelay -= 0.05f;

				int newCost = 100 + Mathf.RoundToInt((1f - firingDelay) * 100f);
				fireSpeedUpgradeText.text = "Fire Speed $" + newCost;
			}
		}
Set up the button event.
The next two upgrades work similarly, but their code resides in a different class. We should not put these in the Ship code because these do not upgrade the spaceship. The missile speed is an aspect of the projectile, but putting this code in the Projectile class is also problematic. You cannot drag a scene object such as our button text onto the projectile prefab's outlet because that scene object won't exist if the game uses the prefab in a different scene.
We will put the next two upgrades in the GameController class because the GameController is more easily accessible for hooking up the connections between our objects.
Missile speed becomes more expensive with each purchase. A speed property will increase as we upgrade it.
GameController.cs
namespace SpaceShooter {
	public class GameController : MonoBehaviour
	{
		public static GameController instance;

		// Outlets
		public Transform[] spawnPoints;
		public GameObject[] asteroidPrefabs;
		public GameObject explosionPrefab;
		public TMP_Text textScore;
		public TMP_Text textMoney;
		public TMP_Text missileSpeedUpgradeText;

		// Configuration
		public float maxAsteroidDelay = 2f;
		public float minAsteroidDelay = 0.2f;

		// State Tracking
		public float timeElapsed;
		public float asteroidDelay;
		public int score;
		public int money;
		public float missileSpeed = 2f;
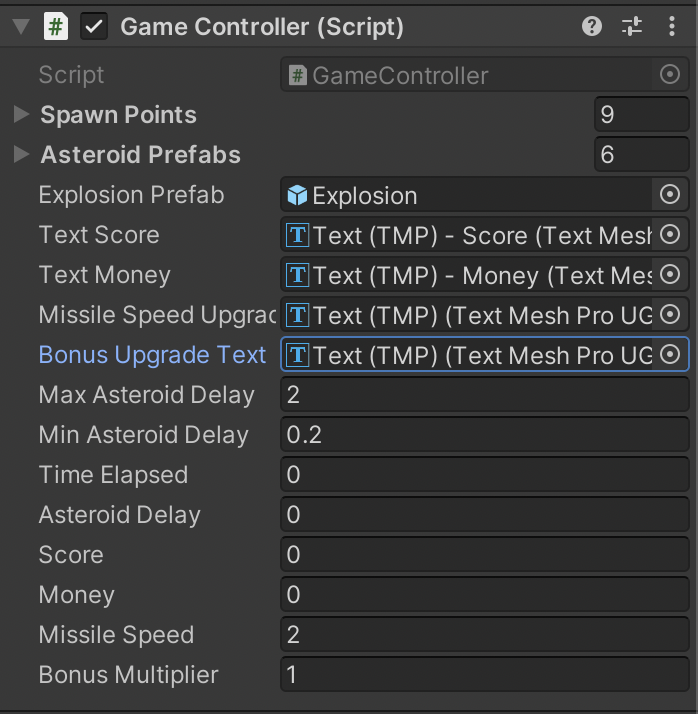
Ensure Missile Speed is 2 by default and fill in the text outlet.

In the SpaceShooter Projectile code, we previously hardcoded values that can now be dynamic using the new GameController property.
Projectile.cs
		void FixedUpdate() {
			// These are now dynamic using the GameController
			float acceleration = GameController.instance.missileSpeed / 2f;
			float maxSpeed = GameController.instance.missileSpeed;
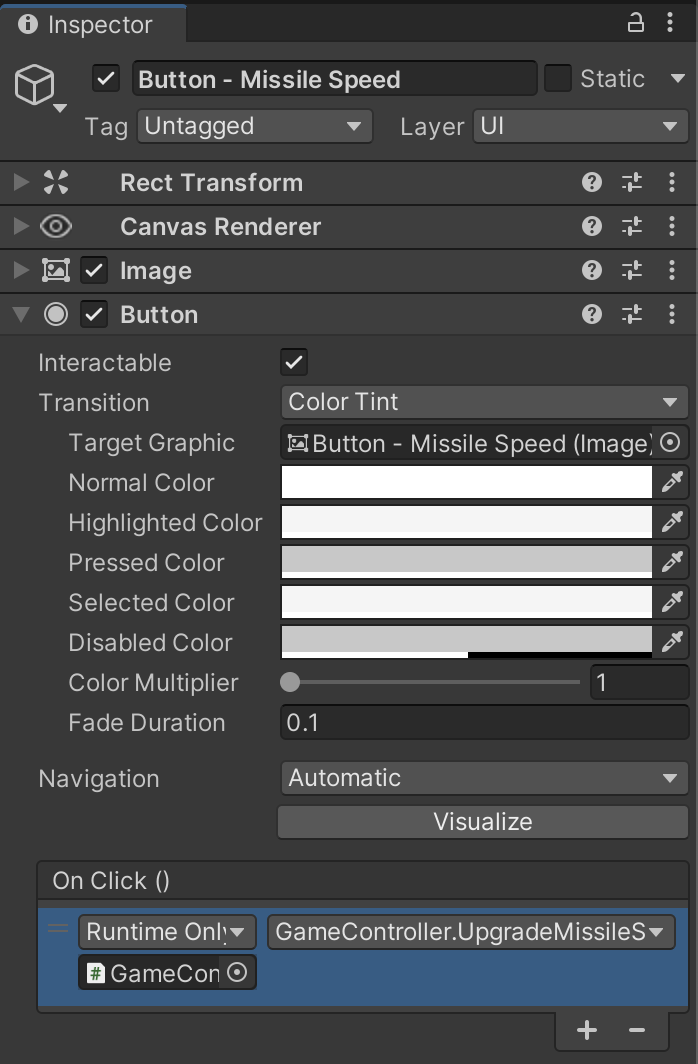
Back in GameController, we create an UpgradeMissileSpeed function similar to all of our other upgrade functions.
GameController.cs
		public void UpgradeMissileSpeed() {
			int cost = Mathf.RoundToInt(25 * missileSpeed);
			if(money >= cost) {
				money -= cost;

				missileSpeed += 1f;

				missileSpeedUpgradeText.text = "Missile Speed $" + Mathf.RoundToInt(25 * missileSpeed);
			}
		}
Set up the button's click event. We are referencing the GameController object this time instead of Ship.
At this point, it is possible to have a lot of extremely fast missiles that will never find a target. To avoid having too many missiles eating up our game's performance, destroy any missiles that travel out of view of the camera.
Projectile.cs
		void OnBecameInvisible() {
			Destroy(gameObject);
		}
Similar to before, we create a text outlet to show dynamic pricing and a number property to keep track of the upgrade stat.
GameController.cs
namespace SpaceShooter {
	public class GameController : MonoBehaviour
	{
		public static GameController instance;

		// Outlets
		public Transform[] spawnPoints;
		public GameObject[] asteroidPrefabs;
		public GameObject explosionPrefab;
		public TMP_Text textScore;
		public TMP_Text textMoney;
		public TMP_Text missileSpeedUpgradeText;
		public TMP_Text bonusUpgradeText;

		// Configuration
		public float maxAsteroidDelay = 2f;
		public float minAsteroidDelay = 0.2f;

		// State Tracking
		public float timeElapsed;
		public float asteroidDelay;
		public int score;
		public int money;
		public float missileSpeed = 2f;
		public float bonusMultiplier = 1f;
Fill in the text outlet.
Modify the EarnPoints function to make use of the Bonus Multiplier stat. Now the player earns more points with each upgrade.
GameController.cs
		public void EarnPoints(int pointAmount) {
			score += Mathf.RoundToInt(pointAmount * bonusMultiplier);
			money += Mathf.RoundToInt(pointAmount * bonusMultiplier);
		}
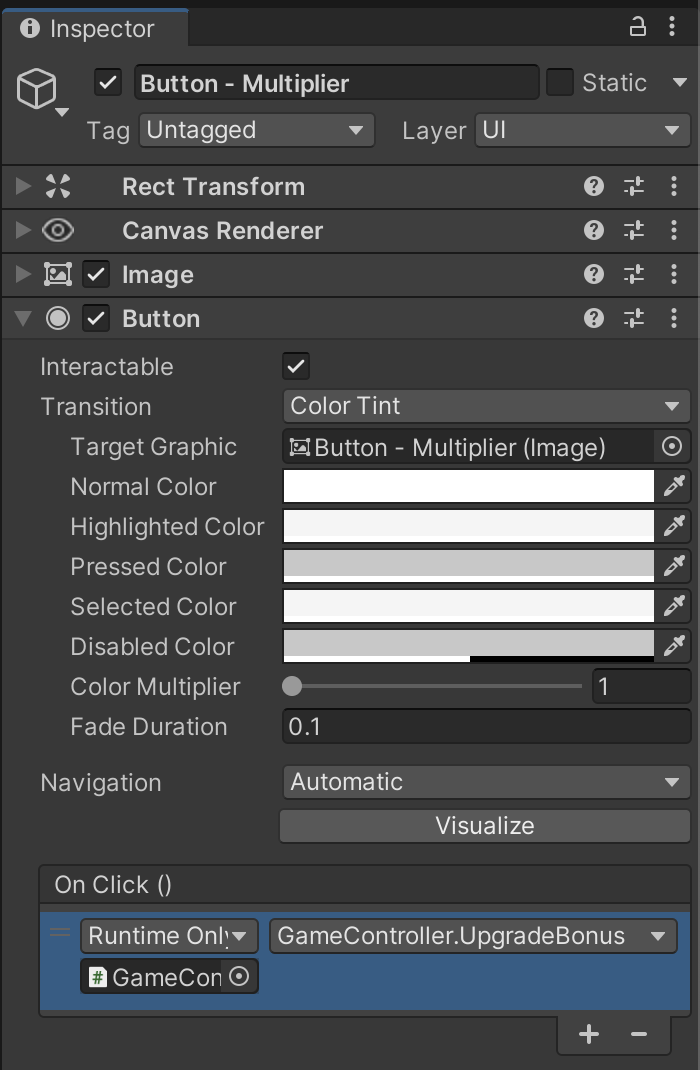
An UpgradeBonus function mirrors the other upgrade functions.
GameController.cs
		public void UpgradeBonus() {
			int cost = Mathf.RoundToInt(100 * bonusMultiplier);
			if(money >= cost) {
				money -= cost;

				bonusMultiplier += 1f;

				bonusUpgradeText.text = "Multiplier $" + Mathf.RoundToInt(100 * bonusMultiplier);
			}
		}
Finally, setup the button's click event.
When we first design UI, we often use placeholder text because we don’t always know the final values. Now that all the programming is complete, ensure that all the button texts match the actual costs of each upgrade. Do NOT leave them at their incorrect placeholder values.
Playtest to ensure all interactions work as expected and that the addition of any new features hasn’t broken any earlier interactions.
SAVE any open files or scenes.
Submit your assignment for grading following the instructions supplied for your particular classroom.