Create Scene
Using the File > New Scene menu, create another scene using the Lit 2D (URP) template. Save this scene as SpaceShooter. (We will use this scene for both Q5 and Q6.)
Supporting files for VG1 quests are part of a single archive that you can download here.
Using the File > New Scene menu, create another scene using the Lit 2D (URP) template. Save this scene as SpaceShooter. (We will use this scene for both Q5 and Q6.)
Import Q5 course files.
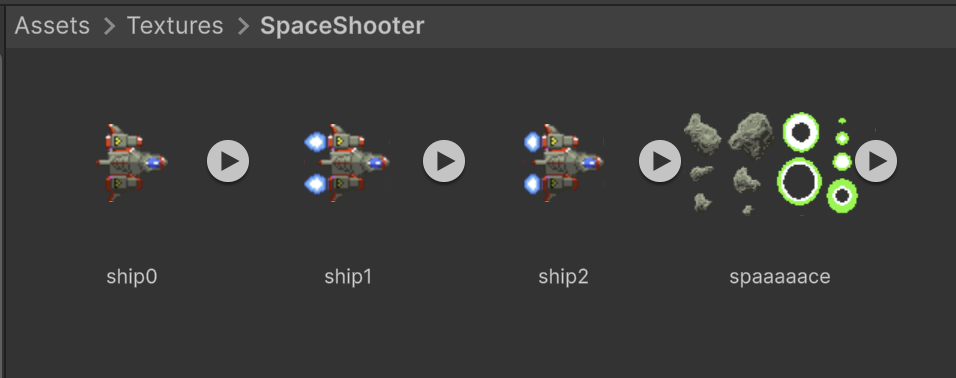
For all 4 graphics, set:
For ship[0-2], set Sprite Mode to Single and set Pivot to Right.
For spaaaaace, set Sprite Mode to Multiple and use the Sprite Editor to Slice with Type as Automatic. Within the Sprite Editor, set the Pivot point for the two Missile sprites to "Right Center".
Click Apply as prompted.
Create a Ship scene object with the following components and settings:
Setting a Rigidbody to Kinematic allows it to participate in the physics simulation while still restricting its movement to our programmatic control. With this setting, the spaceship will not respond to gravity or physics forces. In this assignment, we use this configuration to move the spaceship programmatically while still being able to shove asteroids around.

Create a Projectile scene object with the following components and settings. Prefab it and remove it from the scene.
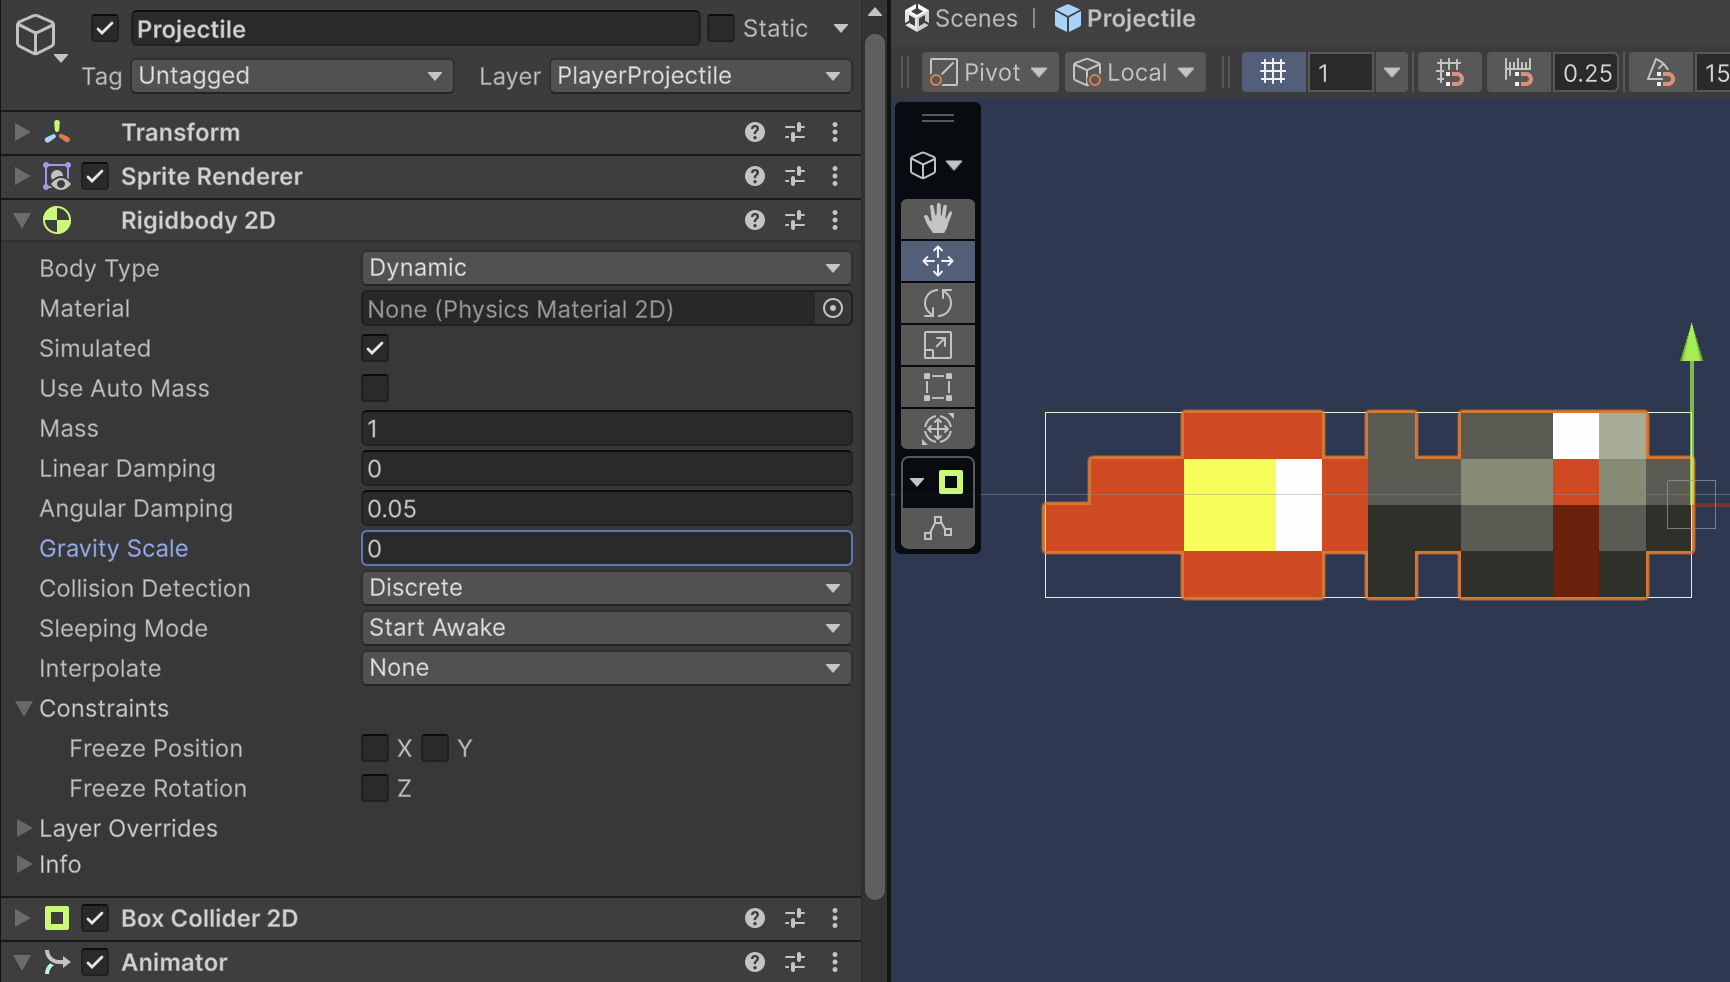
From Edit > Project Settings > Physics 2D > Layer Collision Matrix, make sure the Player and PlayerProjectile intersection is unchecked, so that Players cannot collide with their own PlayerProjectiles. We also do not want PlayerProjectiles to hit themselves.

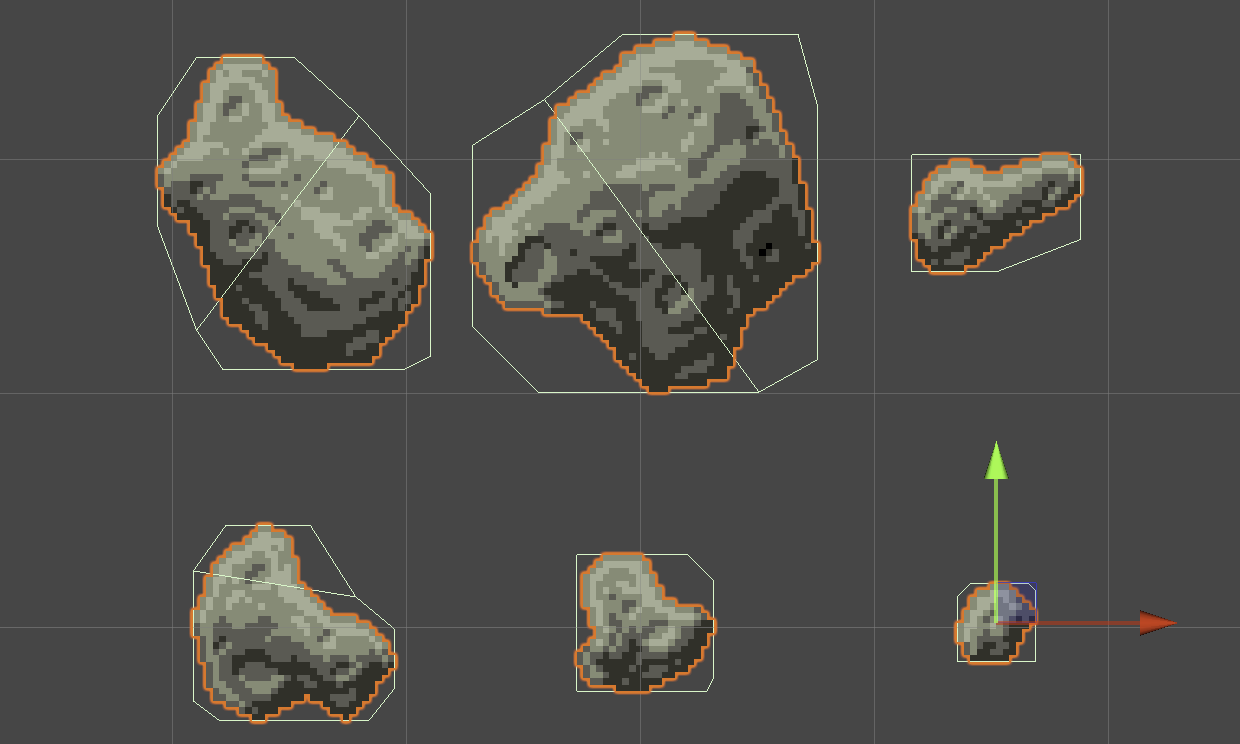
Create 6 Asteroid scene objects with the following components and settings. Prefab each of them separately and remove them from the scene.
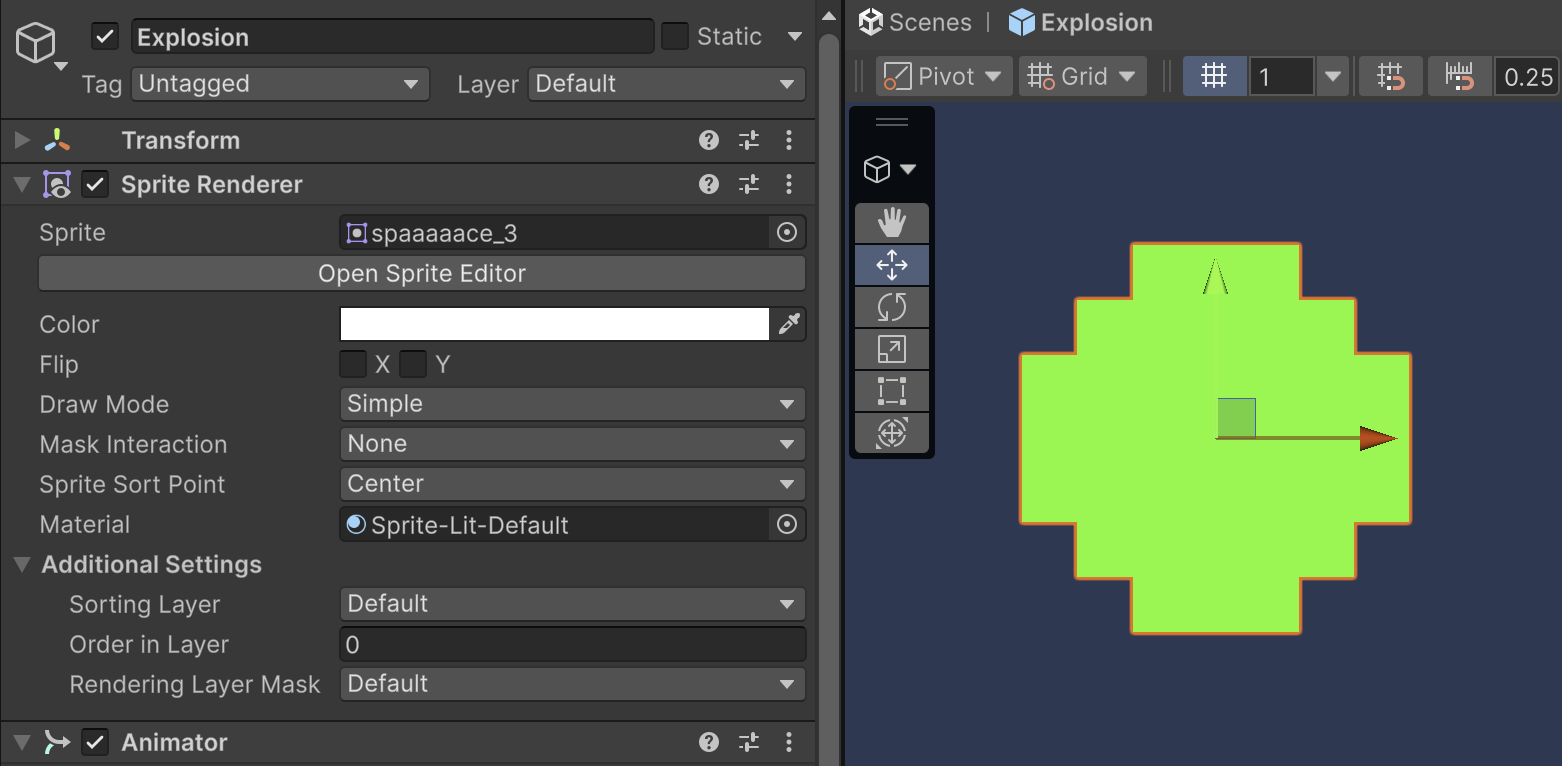
Create an Explosion scene object with the following components and settings. Prefab it and remove it from the scene.
Create a folder Assets/Animations/Ship/
Open Window > Animation > Animation.
Select the Ship scene object.
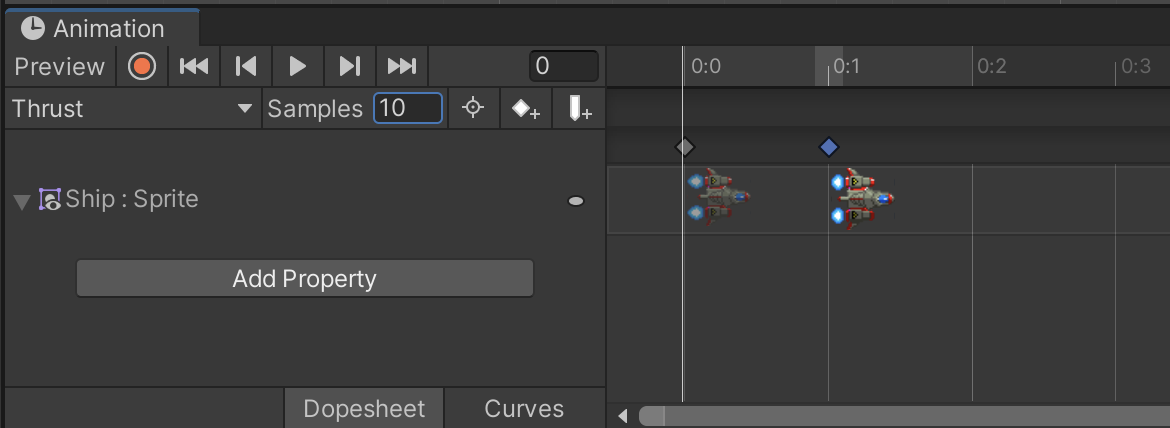
Click Create in the Animation window and save the file as Animations/Ship/Thrust.anim
Change Sample Rate to 10 frames per second.
Click Add Property > Sprite Renderer > Sprite.
Delete any excess keyframes.
Drag the two alternating Ship Thrust Q5 textures from your Project onto frames 0 and 1 of the Animation timeline.
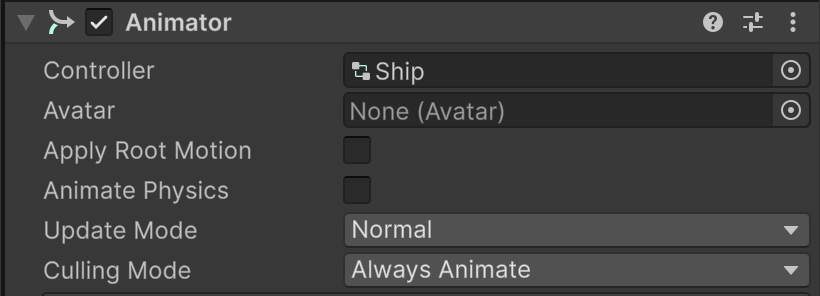
The Ship scene object should have an Animator Controller assigned.
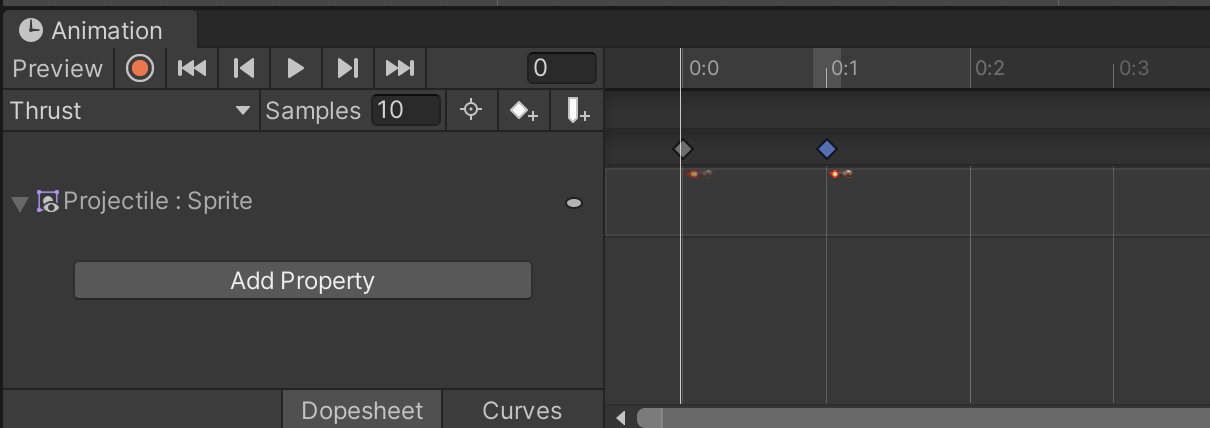
Open the Projectile prefab object.
Create a Projectile Thrust animation and save it as Assets/Animations/Projectile/Thrust.anim. Use the two alternating Missile Thrust Q5 graphics with the configuration shown below:
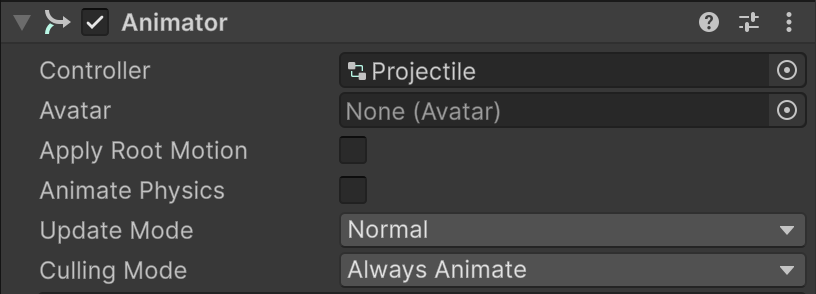
The Projectile prefab object should have an Animator Controller assigned.
Open the Explosion prefab object.
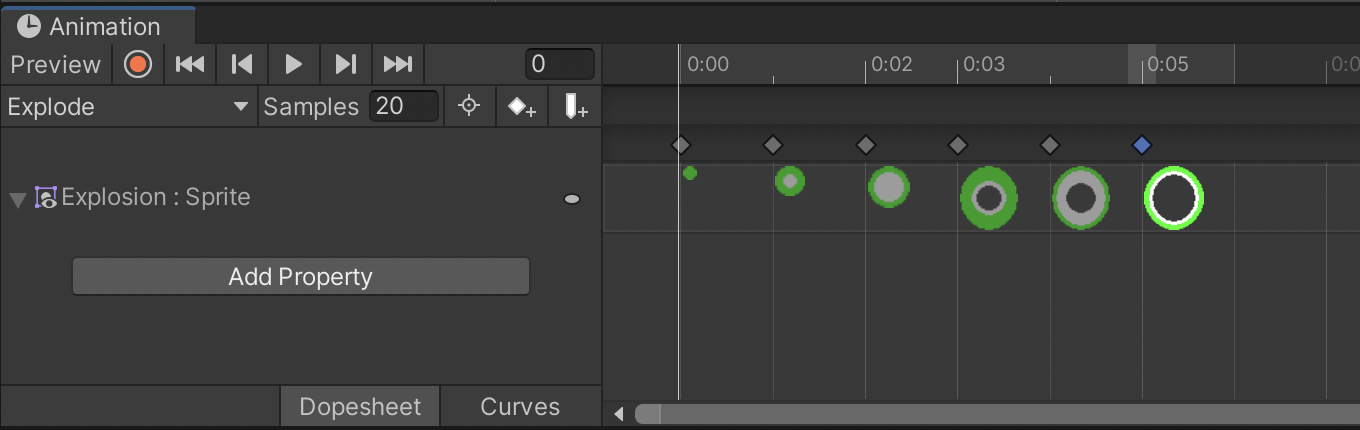
Create an Explosion animation and save it as Assets/Animations/Explosion/Explode.anim. Follow the settings shown below using Q5's spaaaaace graphics #3, #4, #7, #13, #2, and #6.
If you preview the animation, you should see the explosion steadily radiate outward. The preview tool always loops, but we don't want the explosion to repeat during gameplay. We will configure looping later in this step.
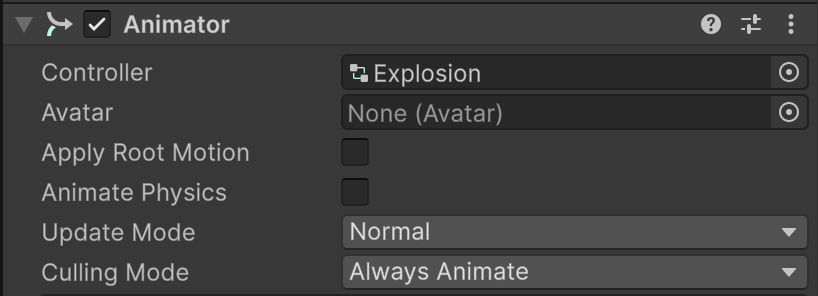
The Explosion prefab object should have an Animator Controller assigned.
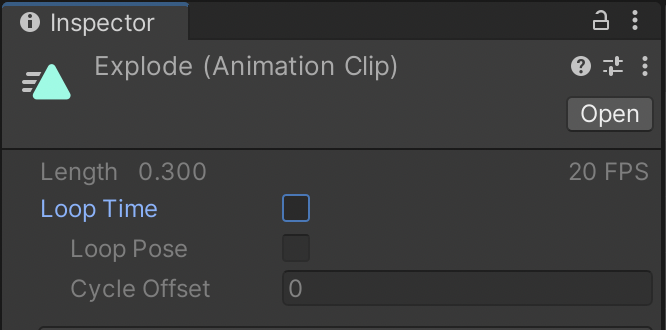
Inspect your Explode animation by selecting it in your Project Assets/Animations/Explosion/ folder.
Uncheck "Loop Time".
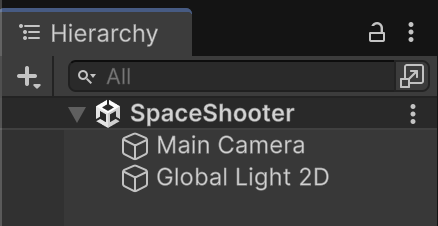
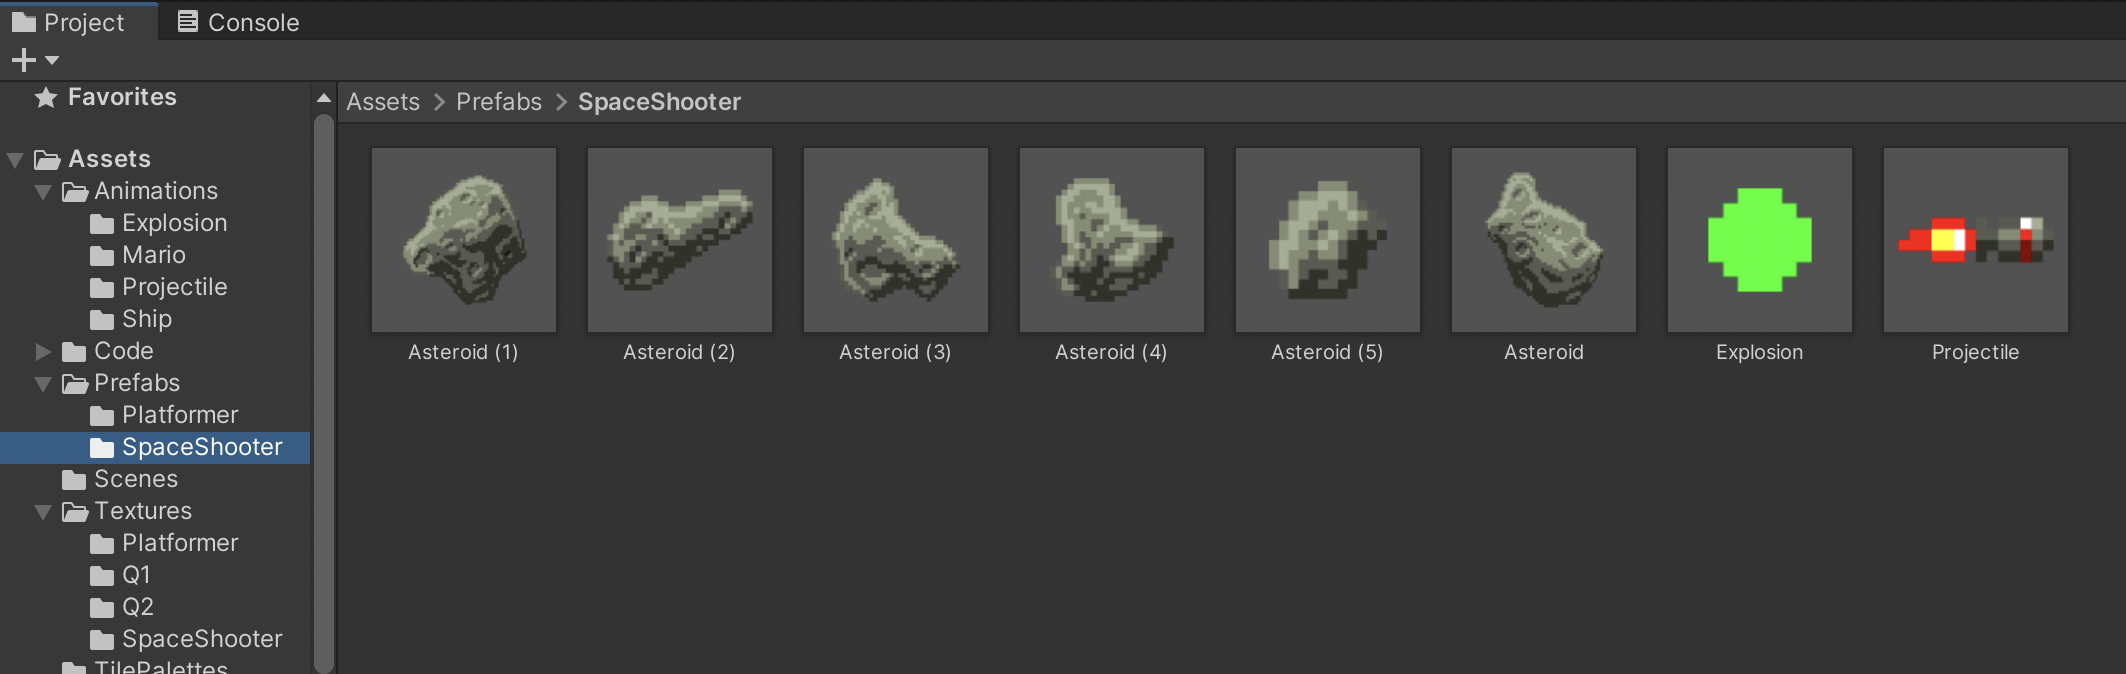
If you haven't already done so, finalize any updates to your prefabs and REMOVE ALL prefabs from the scene including the 6 asteroids, projectile, and explosion. (The ship should NOT be a prefab.) These are the prefabs you should see in the Assets/Prefabs/SpaceShooter/ folder:
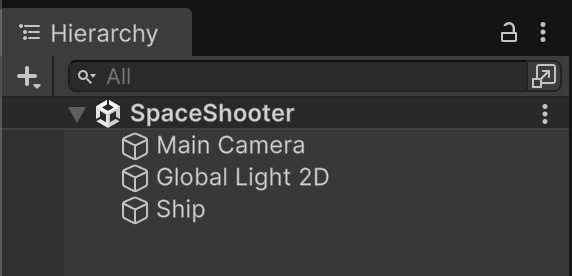
Your Scene Hierarchy should only contain the default scene objects and your non-prefab Ship.
Create an empty scene object and name it GameController. We will program this object to oversee general gameplay.
Create a GameController C# script within /Assets/Scripts/SpaceShooter/ and attach it to the GameController scene object.
We will use a technique known as Static Instance Referencing to more conveniently access our GameController. This technique is similar to the Singleton design pattern. We will discuss the caveats of this approach in class and will address the shortcomings and benefits over multiple assignments.
GameController.cs
using UnityEngine;

namespace SpaceShooter {
	public class GameController : MonoBehaviour
	{
		public static GameController instance;

		// Methods
		void Awake() {
			instance = this;
		}
	}
}
This approach allows us to reference GameController purely through code without having to configure properties on other objects. Static Instance Referencing ONLY works if there is exactly one of an object. By design, there will always be only one GameController in this scene.
You will see how this makes GameController easier to access in the next step.
We will create a stopwatch-style timer within GameController using a public property named timeElapsed.
Time.deltaTime accurately represents the passage of time between game frames even if your game lags. Accumulating it in a variable measures the passage of time.
GameController.cs
namespace SpaceShooter {
	public class GameController : MonoBehaviour
	{
		public static GameController instance;

		// State Tracking
		public float timeElapsed;

		// Methods
		void Awake() {
			instance = this;
		}

		void Update() {
			// Increment the passage of time for each frame of the game
			timeElapsed += Time.deltaTime;
		}
	}
}
Create a Ship C# script and attach to the Ship scene object.
We would like multiple game mechanics to share the same gameplay timer, which is why timeElapsed is within GameController as opposed to giving each component their own separate timers.
Using our Static Reference to GameController, we are able to read GameController's timeElapsed from the Ship without setting up any new outlet variables.
We will input the passage of time into a sine wave to get an endless back-and-forth motion for our ship. We do this within FixedUpdate to better synchronize with the physics simulation.
Ship.cs
using UnityEngine;

namespace SpaceShooter {
	public class Ship : MonoBehaviour
	{
		// Outlets
		Rigidbody2D _rigidbody2D;

		// Methods
		void Start() {
			_rigidbody2D = GetComponent<Rigidbody2D>();
		}

		void FixedUpdate() {
			float yPosition = Mathf.Sin(GameController.instance.timeElapsed) * 3f;
			_rigidbody2D.MovePosition(new Vector2(0, yPosition));
		}
	}
}
Create an Asteroid C# script and attach to your Asteroid prefabs.
The Random.Range() function allows us to generate random numbers to make gameplay more unpredictable and fun. (Later we will see that generating integers leaves out the max number, while generating floats includes the max number.)
While we often can't change the value of individual axes in some of our Vector2 and Vector3 properties, rigidbody allows us to influence one dimension at a time, such as through linearVelocityX. We use the FixedUpdate event to better synchronize with the physics simulation. Although it's not realistic, it's preferable to have our asteroids constantly move left and out of the way to avoid building up a traffic jam of asteroids, which would not be fun for the player.
In the last assignment, it was possible to flood the scene with a bunch of objects that never disappear and continuously eat up memory and processing. OnBecameInvisible causes an object to disappear once it leaves the visible camera view. This allows us to generate a seemingly endless asteroid field without running out of memory because old asteroids would continuously be removed from the scene. The OnBecameInvisible event does not occur unless that object is already visible, and seeing an object in the Scene view counts toward visibility in addition to the Camera seeing it in the Game view.
Asteroid.cs
using UnityEngine;

namespace SpaceShooter {
	public class Asteroid : MonoBehaviour
	{
		// Outlets
		Rigidbody2D _rb;

		// State Tracking
		float randomSpeed;

		// Methods
		void Start() {
			_rb = GetComponent<Rigidbody2D>();
			randomSpeed = Random.Range(0.5f, 3f);
		}

		void FixedUpdate() {
			_rb.linearVelocityX = -randomSpeed;
		}

		void OnBecameInvisible() {
			Destroy(gameObject);
		}
	}
}
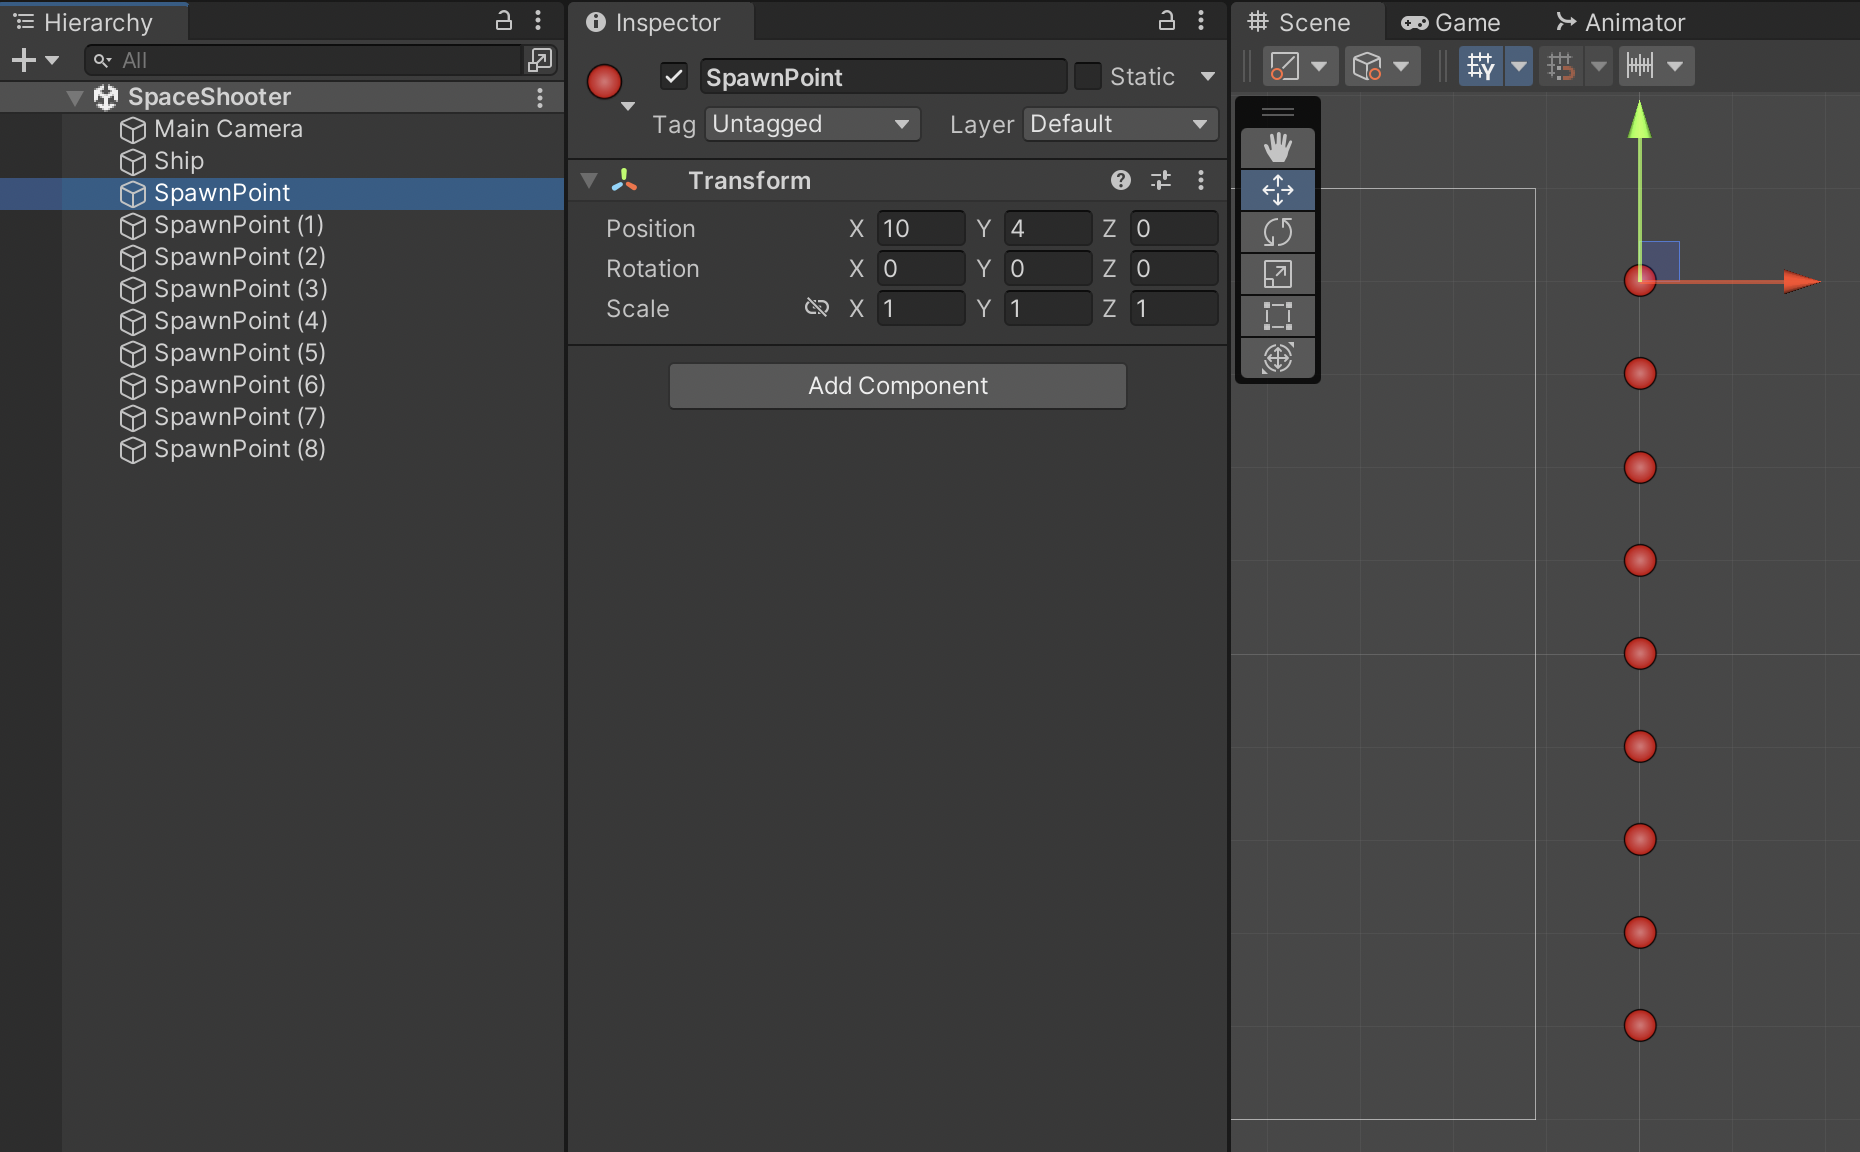
Create 9 SpawnPoint scene objects. Change the icon in the upper-left of the Inspector to help visualize these objects for debugging.
Position the SpawnPoints just off the right side of the screen spread vertically with the highest point at {10, 4, 0} and each next point being one y-position lower: {10, 3, 0}, {10, 2, 0}, {10, 1, 0} ... {10, -4, 0}.
SpawnPoints are where we will generate our random asteroids. Because they are slightly off camera, it will create the illusion that the infinite asteroid field was always present but just out of view. (This effect depends on the 16:9 screen aspect ratio we use throughout our assignments.)
We will generate the asteroid field by randomly selecting from 6 possible asteroid prefabs and instantiating at 1 of 9 randomly selected spawn points. Gameplay variety is enhanced because each asteroid also calculates its own random movement speed. For GameController to generate the asteroid field, we need to hook up the possible asteroid prefabs and spawn points with timer logic.
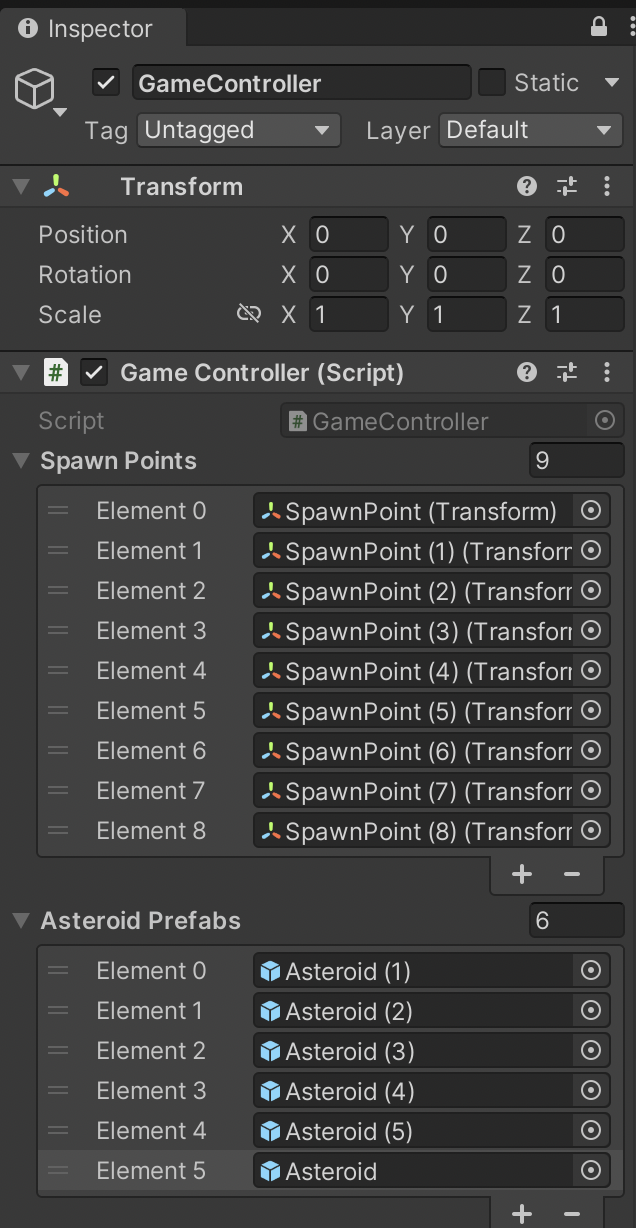
Create public properties for referencing the Asteroid prefabs and where they can spawn. We use the Transform type for the spawn points because we only need their location, while we use GameObject for the prefabs because we want to instantiate copies of the entire object.
GameController.cs
namespace SpaceShooter {
	public class GameController : MonoBehaviour
	{
		public static GameController instance;

		// Outlets
		public Transform[] spawnPoints;
		public GameObject[] asteroidPrefabs;

		// State Tracking
		public float timeElapsed;
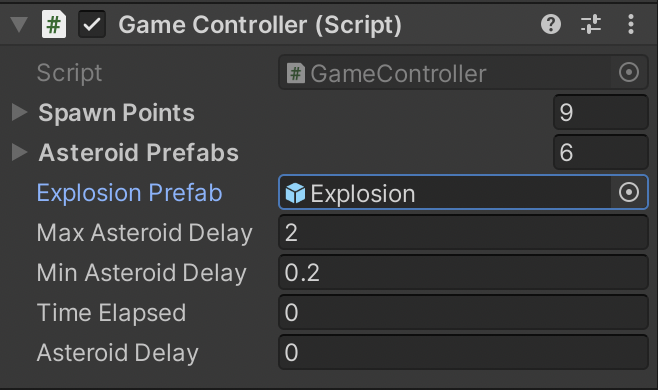
The Spawn Points inspector field should use the SpawnPoint objects in the scene. Meanwhile, the Asteroid Prefabs inspector field should use the prefab objects found in the Project tab.
Create a function for spawning a random Asteroid Prefab at a random Spawn Point.
GameController.cs
		void SpawnAsteroid() {
			// Pick random spawn points and random asteroid prefabs
			int randomSpawnIndex = Random.Range(0, spawnPoints.Length);
			Transform randomSpawnPoint = spawnPoints[randomSpawnIndex];
			int randomAsteroidIndex = Random.Range(0, asteroidPrefabs.Length);
			GameObject randomAsteroid = asteroidPrefabs[randomAsteroidIndex];

			// Spawn
			Instantiate(randomAsteroid, randomSpawnPoint.position, Quaternion.identity);
		}
Using a timer, we will generate asteroids at an increasing rate to create an escalating difficulty curve. We will calculate a variable to keep track of the delay between asteroid spawnings. Configuring minimum and maximum spawn delays will constrain difficulty to a reasonable range.
GameController.cs
// Outlets
public Transform[] spawnPoints;
public GameObject[] asteroidPrefabs;
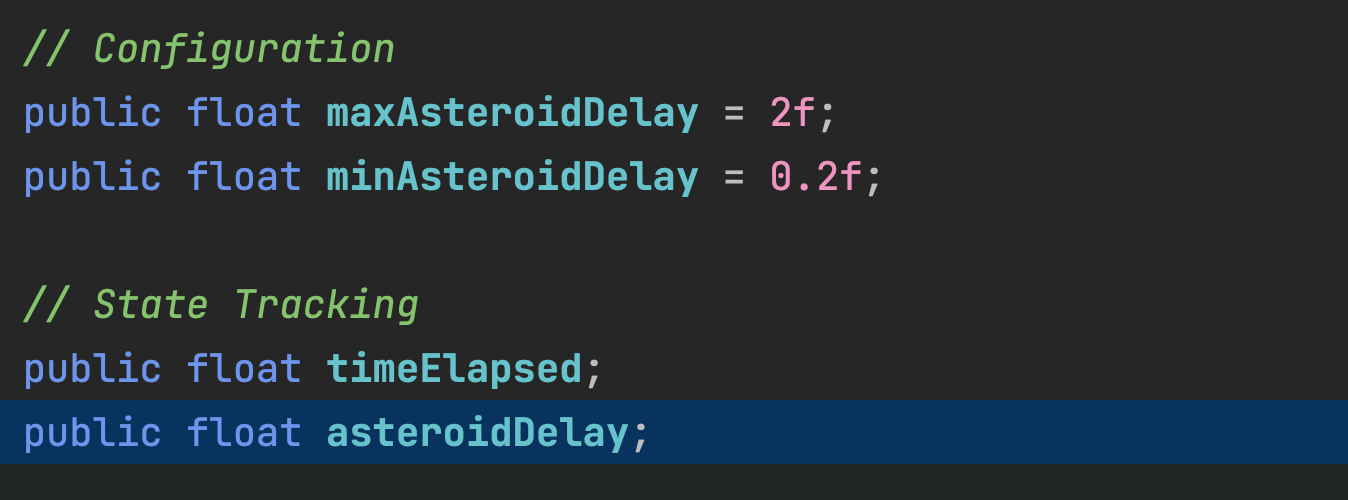
// Configuration
public float maxAsteroidDelay = 2f;
public float minAsteroidDelay = 0.2f;
// State Tracking
public float timeElapsed;
public float asteroidDelay;
// Methods
void Awake() {
Specifying initialization values for the variables makes those the default values seen in the inspector.
We will dynamically decrease this delay from the maximum to the minimum as gameplay time progresses as tracked by timeElapsed, which will cause the spawn rate to increase. There is no universal equation for this kind of computation. Other games would use their own difficulty curves for an intended game feel. Be wary of edge cases in your gameplay equations. Clamping the values ensures they stay in a reasonable range.
GameController.cs
		void Update() {
			// Increment the passage of time for each frame of the game
			timeElapsed += Time.deltaTime;

			// Compute Asteroid Delay
			asteroidDelay = maxAsteroidDelay - (maxAsteroidDelay - minAsteroidDelay) / 30f * timeElapsed;
			asteroidDelay = Mathf.Clamp(asteroidDelay, minAsteroidDelay, maxAsteroidDelay);
		}
We will create a Coroutine function using an IEnumerator to act as a delay timer between asteroid spawns. IEnumerator is part of System.Collections. Coroutine functions can pause their execution and resume at a later frame in the game. Coroutines ARE NOT multi-threading or background threads. While timeElapsed is analogous to a stopwatch timer, a Coroutine can be compared to a kitchen countdown timer. Using Coroutines, we specify a time in the future when we want code to execute.
This Coroutine calls itself at the end of its own execution, creating a repeating timer. Coroutines MUST have a yield statement. Normally, writing an infinite loop would freeze or crash a program, but because coroutines yield execution, other code can stil take their turn processing. This prevents the game from freezing, while allowing us to write endlessly looping logic.
GameController.cs
using System.Collections;
using UnityEngine;
GameController.cs
		IEnumerator AsteroidSpawnTimer() {
			// Wait
			yield return new WaitForSeconds(asteroidDelay);

			// Spawn
			SpawnAsteroid();

			// Repeat
			StartCoroutine("AsteroidSpawnTimer");
		}
Although our Coroutine repeats itself, we must start it in the first place. We want to start spawning asteroids at the Start of the game.
GameController.cs
		void Start() {
			StartCoroutine("AsteroidSpawnTimer");
		}
Our ship firing logic is very similar to the asteroid spawning because both are automated.
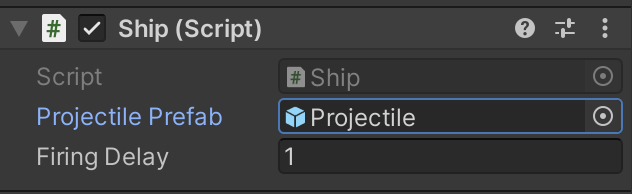
We start by creating a Public Outlet for the projectile prefab we want to shoot and a firingDelay property so we can dynamically change the frequency of our shooting.
Ship.cs
namespace SpaceShooter {
	public class Ship : MonoBehaviour
	{
		// Outlets
		Rigidbody2D _rigidbody2D;
		public GameObject projectilePrefab;

		// State Tracking
		public float firingDelay = 1f;
Use the SpaceShooter Projectile prefab from the Project tab.
We create a FireProjectile function to call whenever we want our ship to shoot.
Ship.cs
		void FireProjectile() {
			Instantiate(projectilePrefab, transform.position, Quaternion.identity);
		}
A Coroutine yields for the appropriate delay time, fires a projectile, and then starts the timer all over again.
Ship.cs
using System.Collections;
using UnityEngine;
Ship.cs
		IEnumerator FiringTimer() {
			yield return new WaitForSeconds(firingDelay);

			FireProjectile();

			StartCoroutine("FiringTimer");
		}
The Timer still has to be started in the first place.
Ship.cs
		void Start() {
			_rigidbody2D = GetComponent<Rigidbody2D>();
			StartCoroutine("FiringTimer");
		}
We want to use Explosions throughout our game, so we will keep a reference to our Explosion prefab in the GameController where it can be easily referenced anywhere else in the game.
GameController.cs
namespace SpaceShooter {
	public class GameController : MonoBehaviour
	{
		public static GameController instance;

		// Outlets
		public Transform[] spawnPoints;
		public GameObject[] asteroidPrefabs;
		public GameObject explosionPrefab;

		// Configuration
Fill in the Explosion Prefab property using the SpaceShooter prefab.
Create a C# script named Projectile and attach it to the SpaceShooter Projectile prefab. Make sure you do not accidentally attach the Platformer Projectile instead.
We will start off with a Rigidbody2D Reference Outlet. We will also create a target property for keeping track of our projectile’s target.
Projectile.cs
using UnityEngine;

namespace SpaceShooter {
	public class Projectile : MonoBehaviour
	{
		// Outlets
		Rigidbody2D _rb;

		// State Tracking
		Transform target;

		// Methods
		void Start() {
			_rb = GetComponent<Rigidbody2D>();
		}
	}
}
A ChooseNearestTarget function will look at every asteroid in the scene and choose a target that meets the following criteria:
Projectile.cs
		void ChooseNearestTarget() {
			// High default means first asteroid will be sort as closer
			float closestDistance = float.MaxValue;

			// Expensive. Better approach would be Object Pooling
			Asteroid[] asteroids = FindObjectsByType<Asteroid>();

			// Check each asteroid to see if it's the closest
			for(int i = 0; i < asteroids.Length; i++) {
				Asteroid asteroid = asteroids[i];

				// Asteroid must be to our right
				if(asteroid.transform.position.x > transform.position.x) {
					Vector2 targetDirection = asteroid.transform.position - transform.position;
					float targetDistance = targetDirection.sqrMagnitude;

					// Filter for the closest target we've seen so far
					if(targetDistance < closestDistance) {
						// Update closest distance for the future comparisons
						closestDistance = targetDistance;

						// Track this asteroid as the current closest target
						target = asteroid.transform;
					}
				}
			}
		}
With the help of the ChooseNearestTarget function, the FixedUpdate event will control the missile's movement and aiming.
Two variables configure acceleration and maxSpeed. We will make these dynamic in a future step.
If it has a target, the projectile will continually rotate toward that target.
The projectile will continually thrust forward (which happens to be towards the right based on how the sprite was drawn) clamped by the maxSpeed.
Projectile.cs
		void FixedUpdate() {
			// TODO: Make these dynamic
			float acceleration = 1f;
			float maxSpeed = 2f;

			// Home in on target
			ChooseNearestTarget();
			if(target) {
				// Rotate towards target
				Vector2 targetDirection = target.position - transform.position;
				float angle = Mathf.Atan2(targetDirection.y, targetDirection.x) * Mathf.Rad2Deg;

				_rb.MoveRotation(angle);
			}

			// Accelerate Forward
			_rb.AddForce(acceleration * Time.fixedDeltaTime * 50f * transform.right, ForceMode2D.Impulse);

			// Cap max speed
			_rb.linearVelocity = Vector2.ClampMagnitude(_rb.linearVelocity, maxSpeed);
		}
Last, on collision, we check if we have impacted an asteroid. Our projectile will destroy the asteroid, destroy itself, and create an explosion where the asteroid was. That explosion game object will also destroy itself soon after.
Projectile.cs
		void OnCollisionEnter2D(Collision2D collision) {
			// Only explode on Asteroids
			if(collision.gameObject.GetComponent<Asteroid>()) {
				Destroy(collision.gameObject);
				Destroy(gameObject);

				// Create an explosion and destroy it soon after
				GameObject explosion = Instantiate(
					GameController.instance.explosionPrefab,
					transform.position,
					Quaternion.identity
				);
				Destroy(explosion, 0.25f);
			}
		}
We will program the actual interactivity of our game in the next assignment. The version of the game you've created up to this point can still be "played." You should see that the ship automatically flies through an increasingly dense asteroid belt. It regularly fires missiles which chase the asteroids and create explosions on impact.
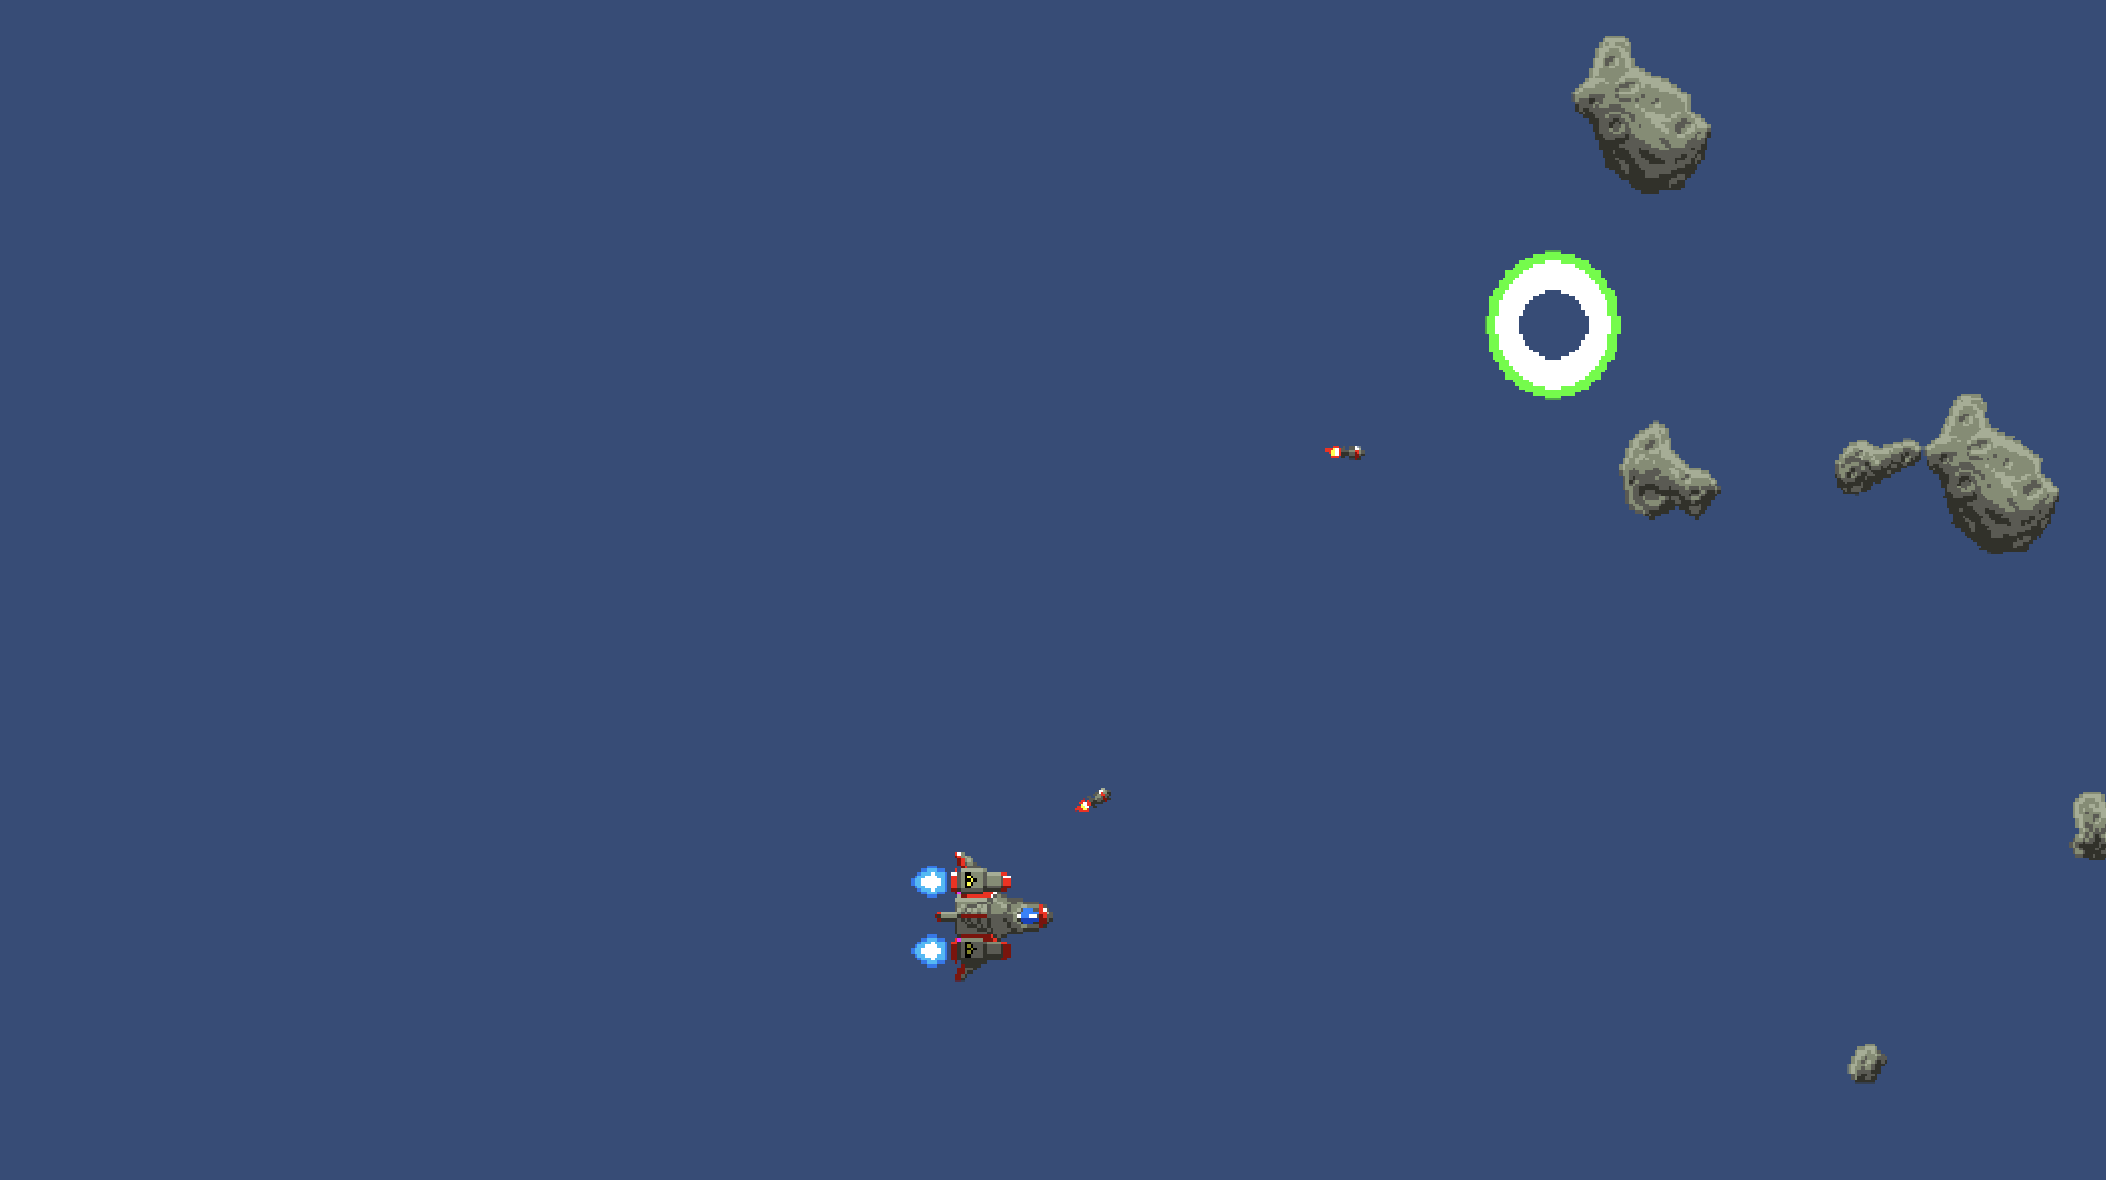
Playtest to ensure all interactions work as expected and that the addition of any new features hasn’t broken any earlier interactions.
SAVE any open files or scenes.
Submit your assignment for grading following the instructions supplied for your particular classroom.