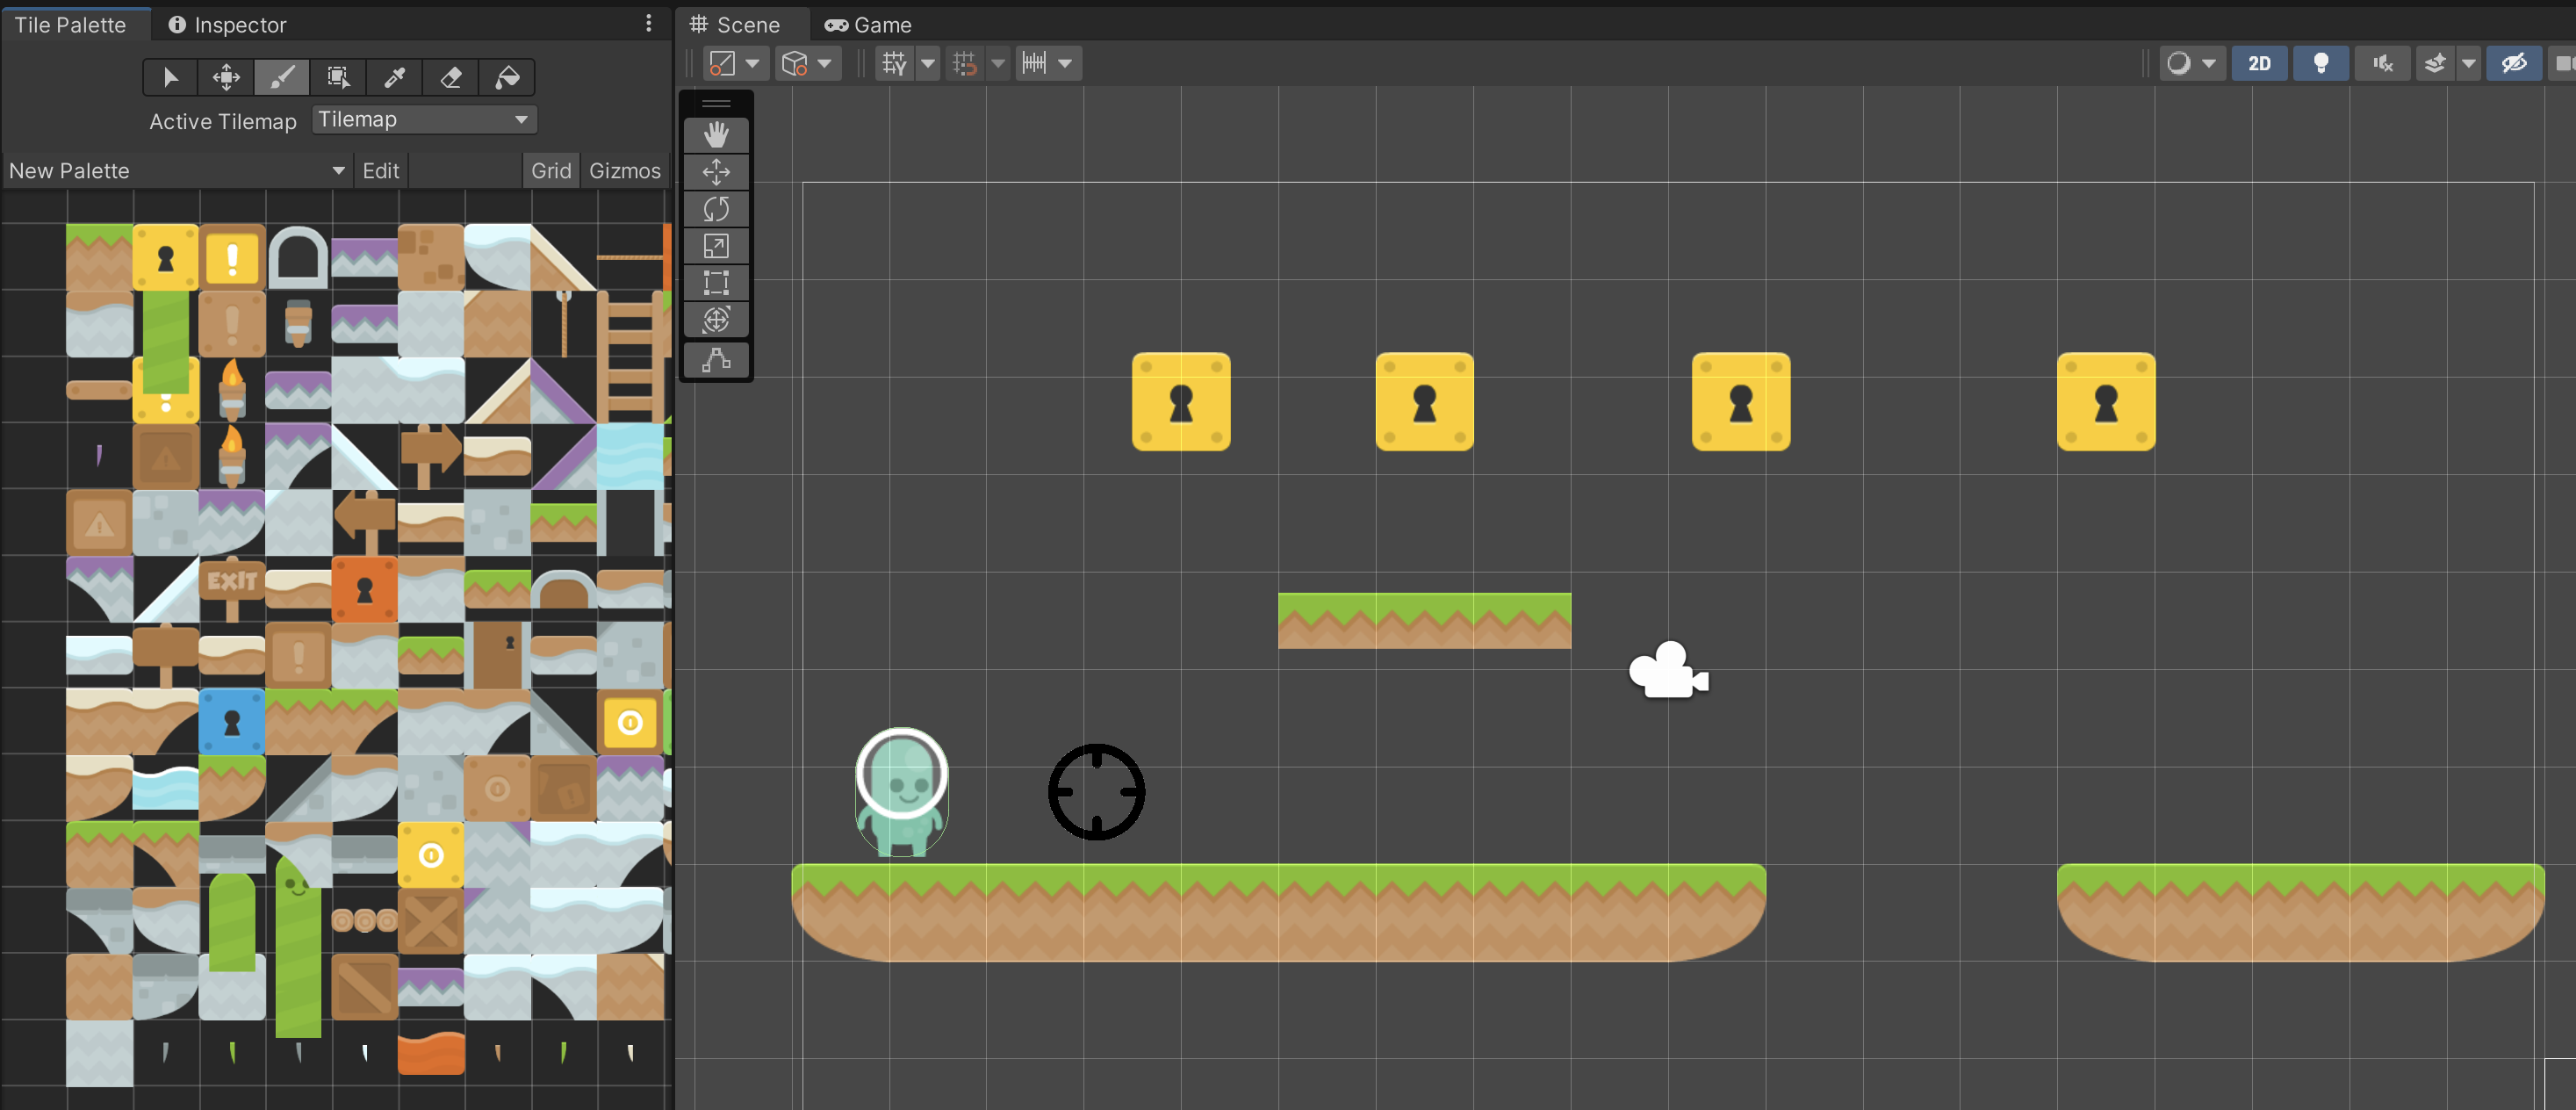
Animator Transitions
Objects are capable of showing a series of animations. An Animator controls which animation is active. You are already familiar with the Animation window. You will use the Animator window to coordinate transitions between animations.
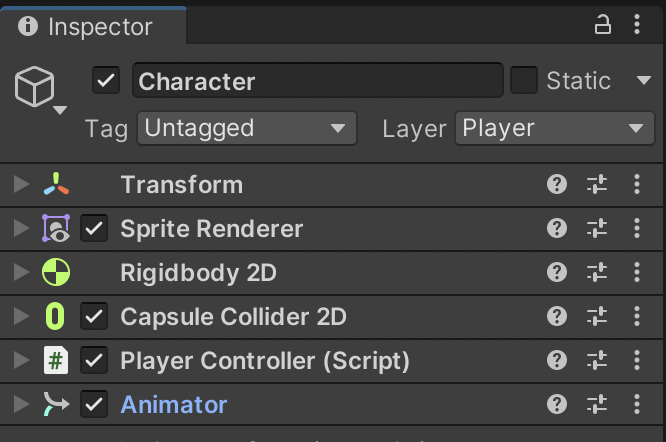
Open the Animator screen from Window > Animation > Animator. Like the Inspector, the Animator window is contextual. Select your Character to see its Animator details.
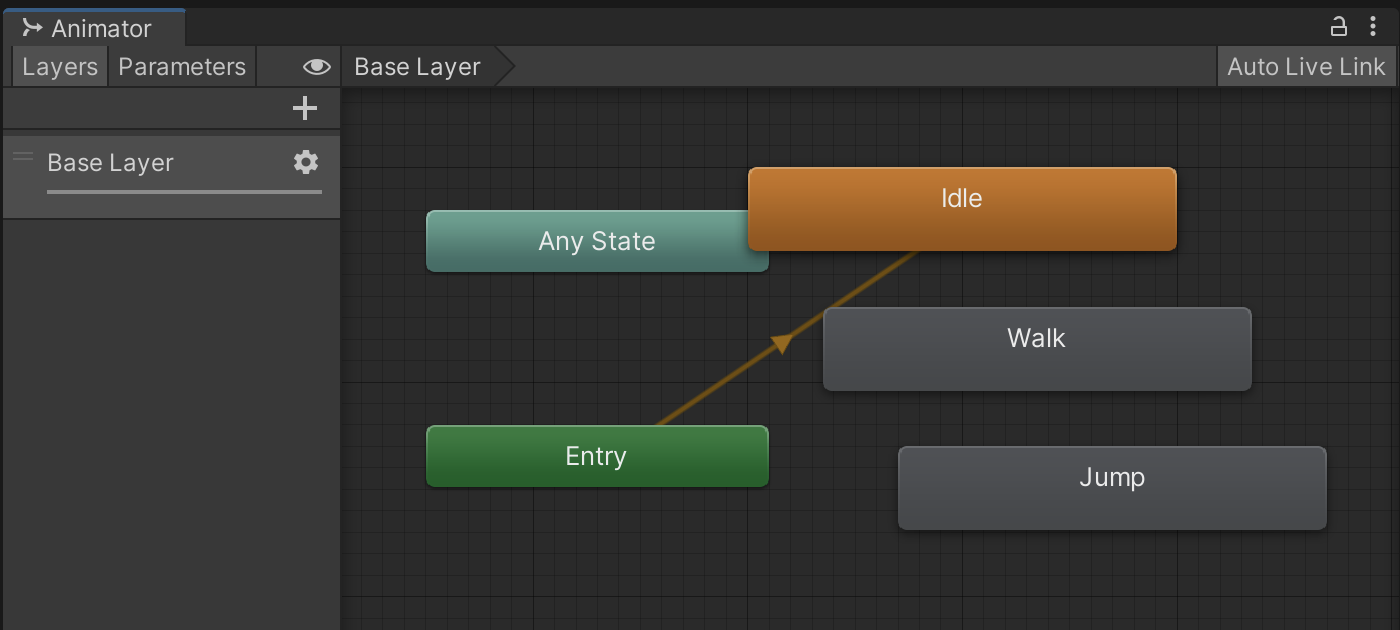
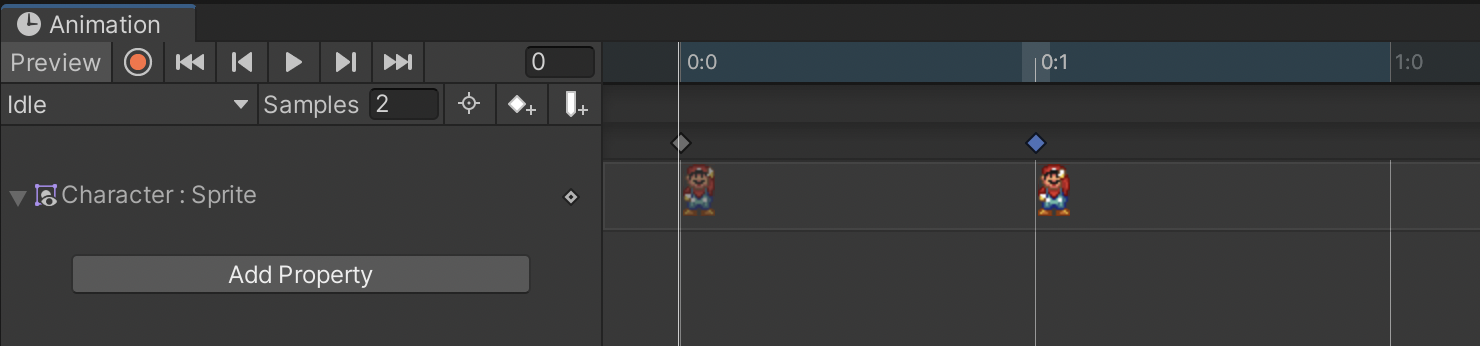
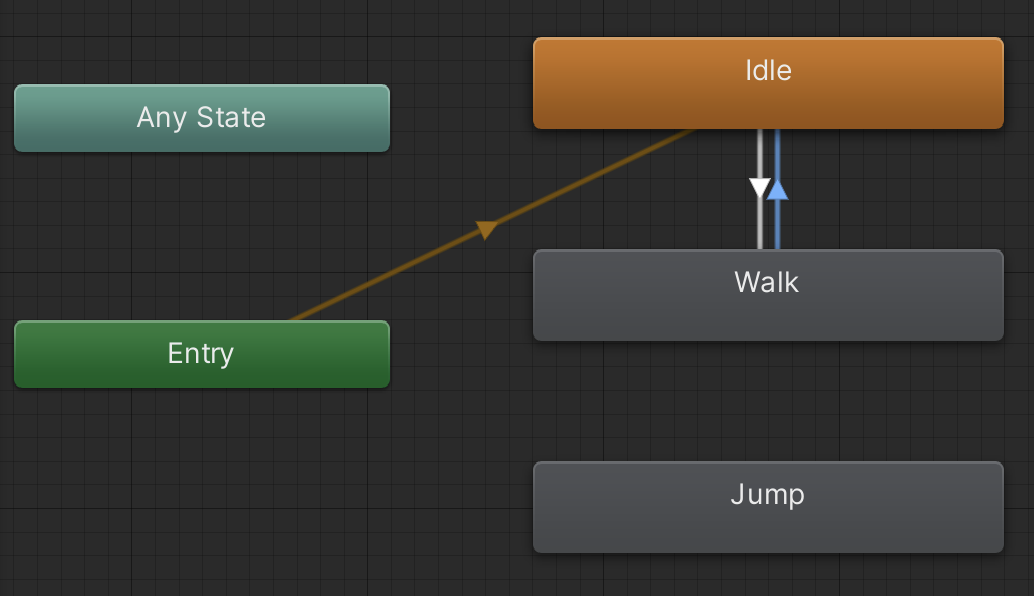
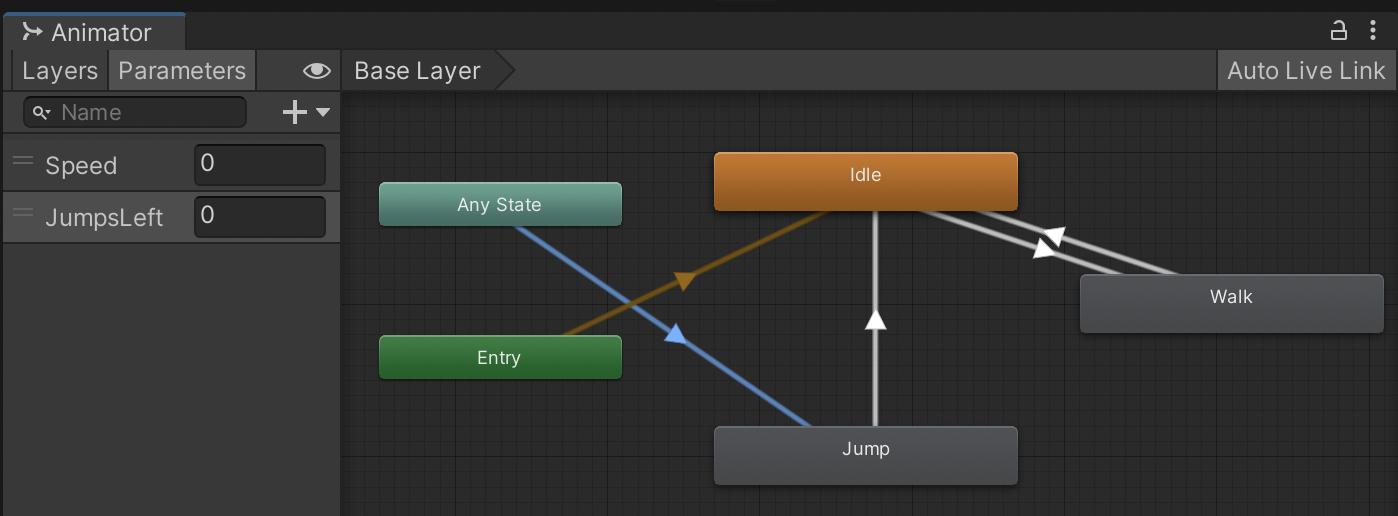
Our Idle animation is highlighted in orange to represent that it is our default animation. The Animator window shows all Animations created for the selected object and allows us to create contextual transitions between our animations.
Animations can transition between each other. "Any State" is a shortcut for saying that all animations can be a valid source for a transition.
To create a transition, right-click the Source animation, click Make Transition, then click the Destination animation. Create a Transition from Idle to Walk.
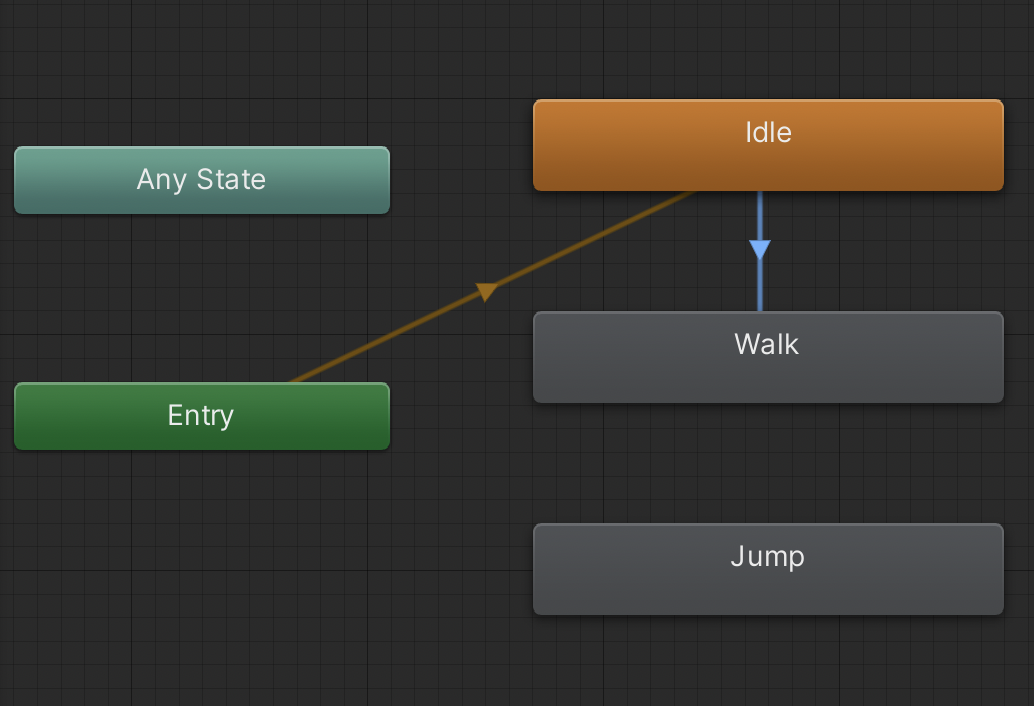
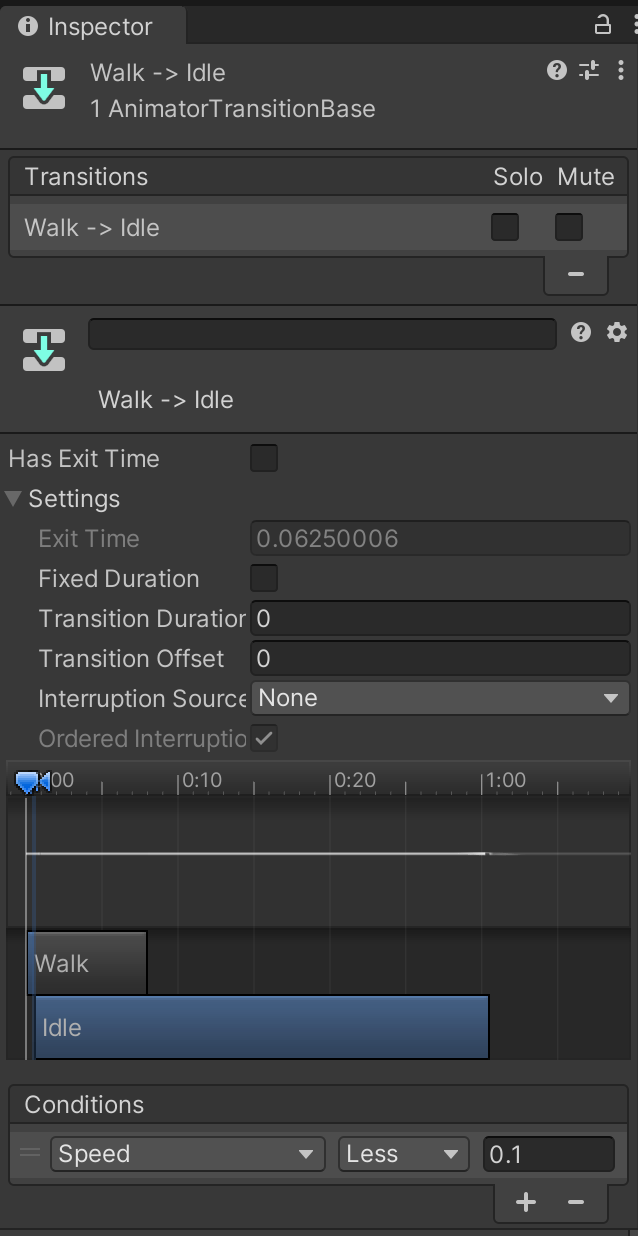
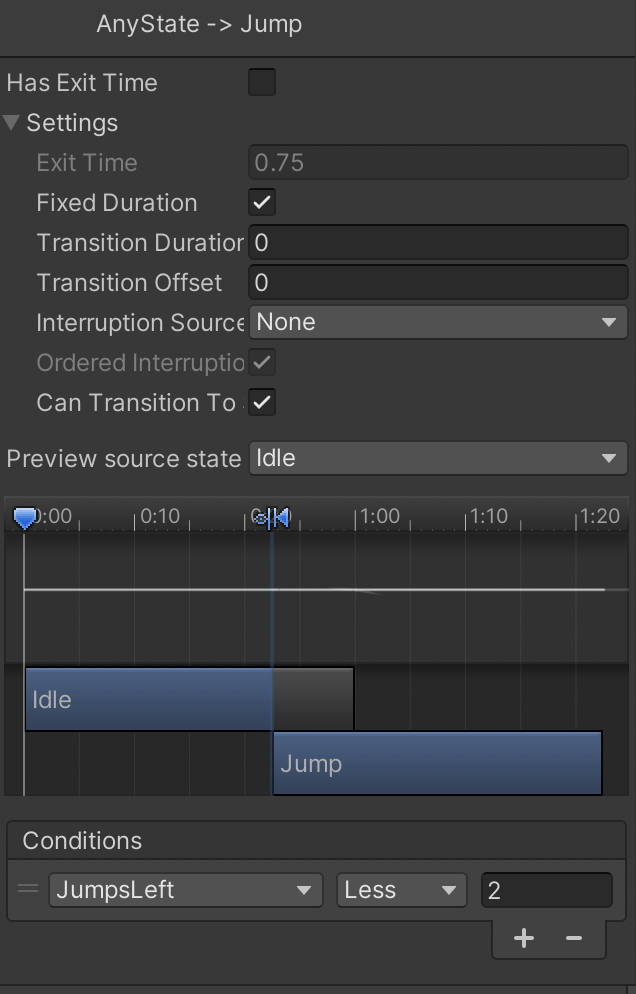
Click the Transition Arrow to view its configuration in the Inspector. These animation tools are also used for 3D animations, so there are a lot of extra options for blending that we don't need for our 2D game. We will uncheck "Has Exit Time," expand Settings and set Transition Duration to 0.
You’ll see the transition preview (visualized as a bar diagram) show a solid cut-off transition rather than the prior blended transition that wouldn't work for 2D sprite art.

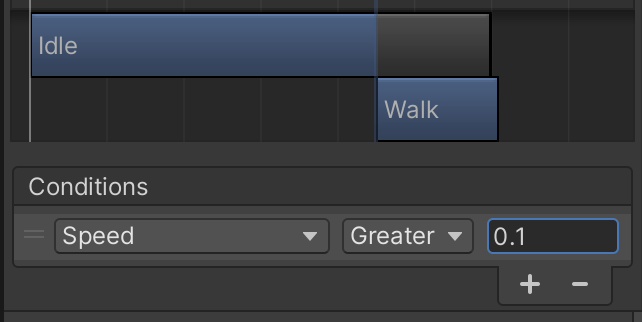
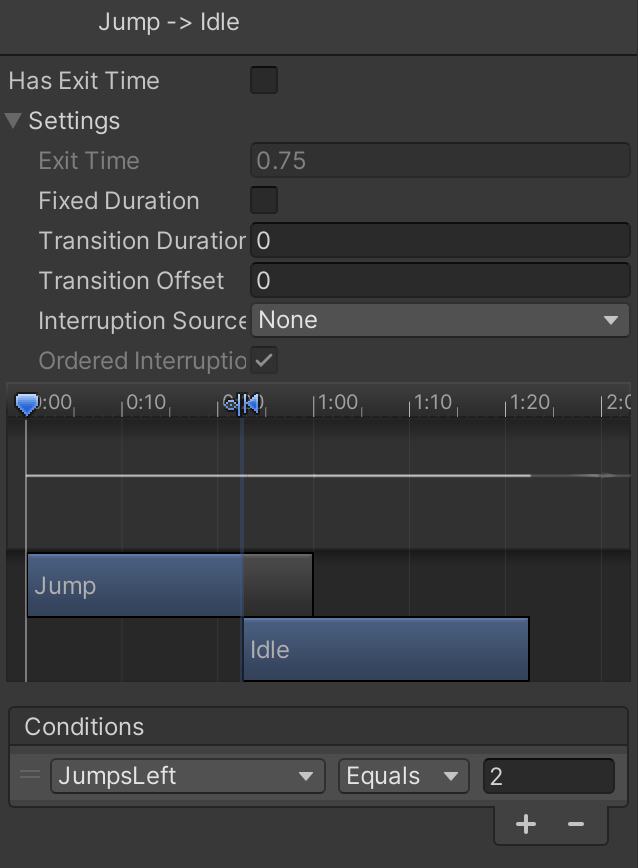
Notice the empty Conditions box at the bottom. Conditions define the scenarios when a Transition will occur. Filling out the conditions is like programming an if-statement. Two requirements must overlap: 1) The currently active animation must be the source animation configured at the base of the transition arrow, and 2) All Conditions must be met for the transition arrow to execute.
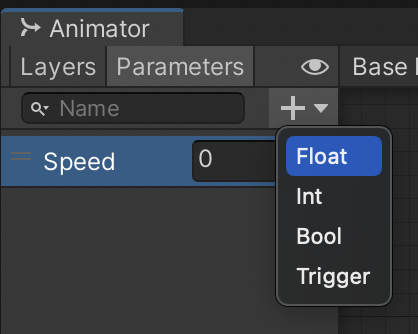
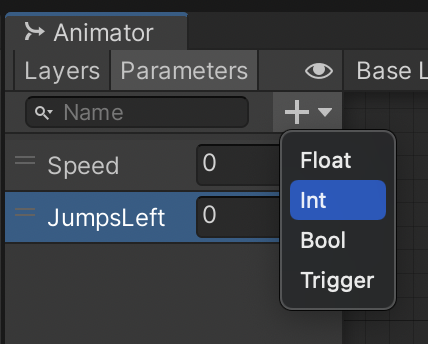
When writing an if-statement in code, we often compare against variables. To use the Conditions in an Animation Transition, we need to configure Parameters, which behave like variables.