Create Scene
Using the File > New Scene menu, create another scene using the Lit 2D (URP) template. Save this scene as Platformer. (We will use this scene for multiple assignments in the platformer genre throughout the semester.)
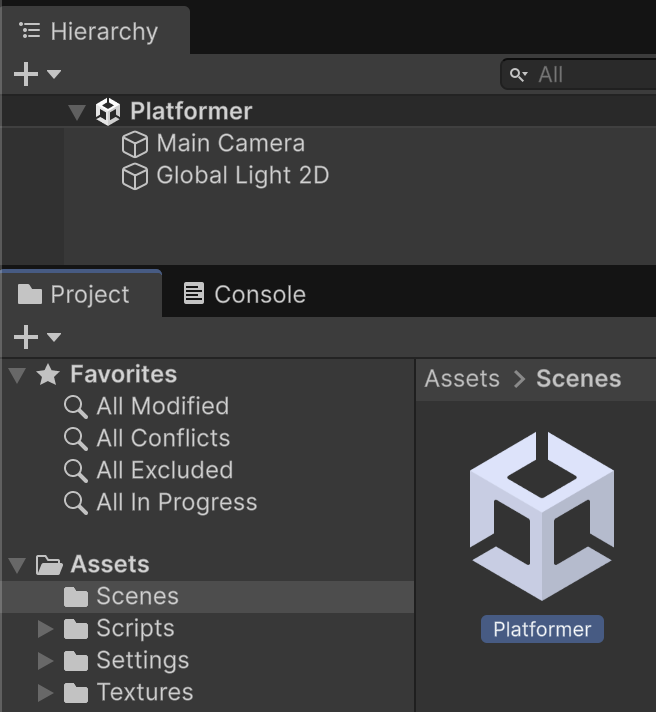
Supporting files for VG1 quests are part of a single archive that you can download here.
Using the File > New Scene menu, create another scene using the Lit 2D (URP) template. Save this scene as Platformer. (We will use this scene for multiple assignments in the platformer genre throughout the semester.)
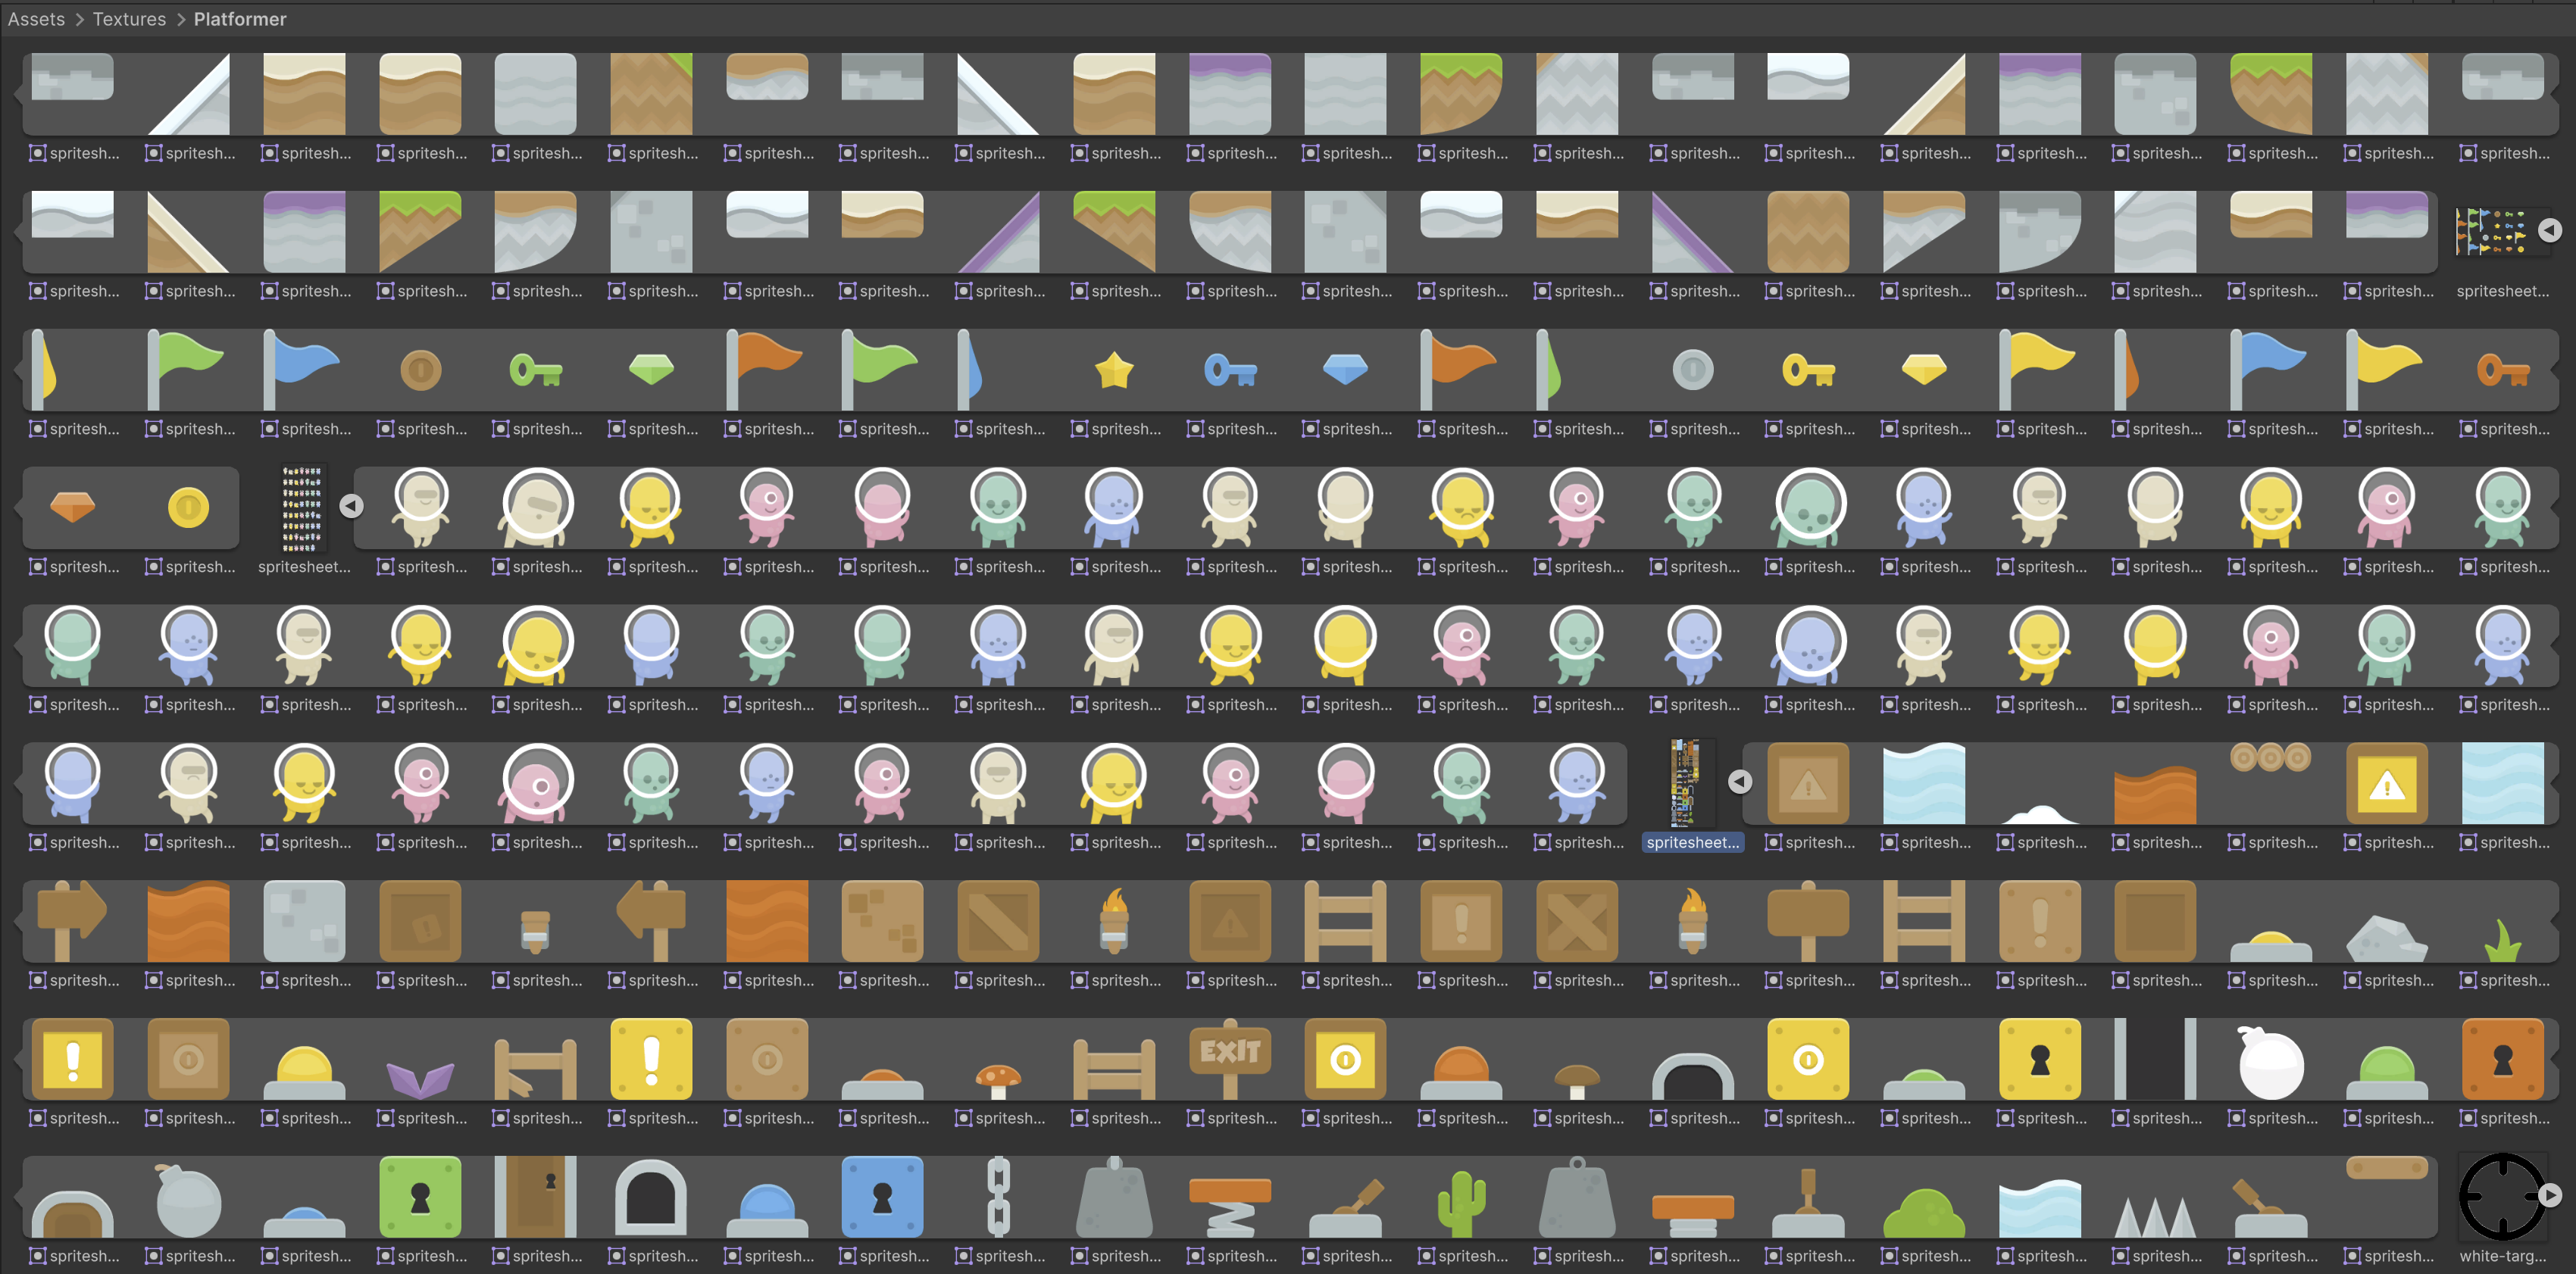
Import this quest’s asset files into /Textures/Platformer/
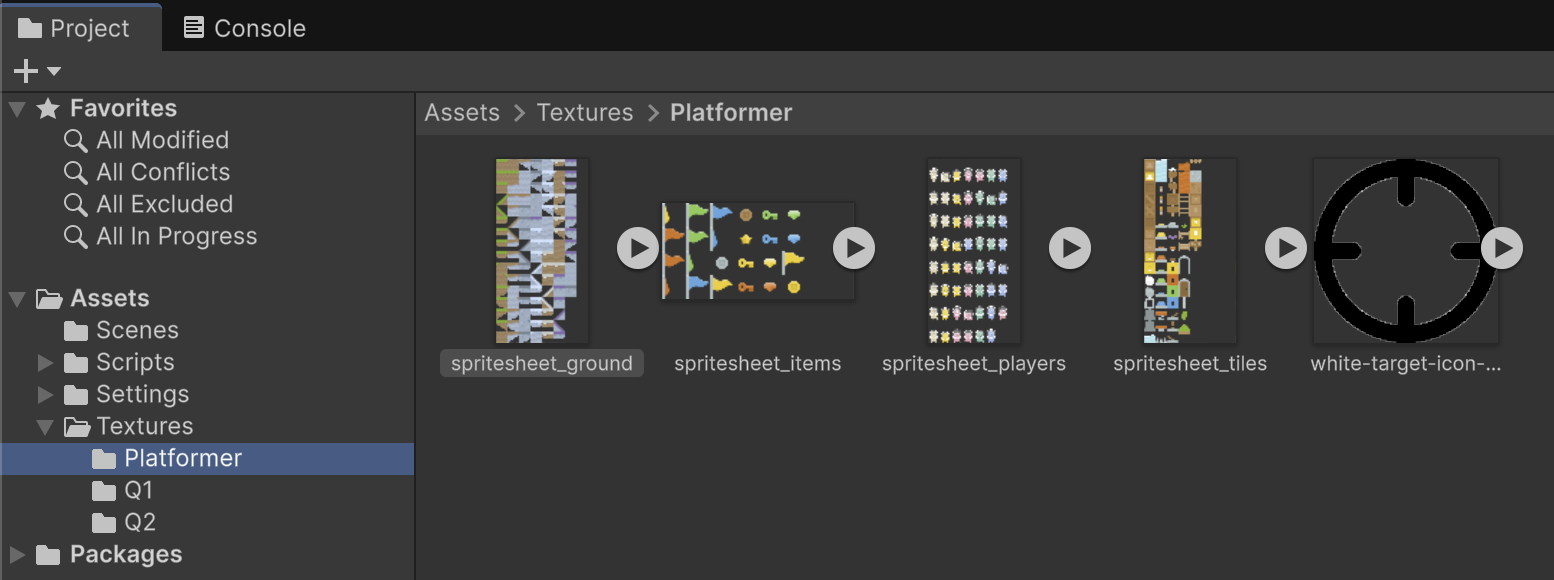
You are able to use the Inspector on multiple items at once. Select the spritesheet_ground, spritesheet_items, spritesheet_players, and spritesheet_tiles assets at the same time by shift-clicking on the files.
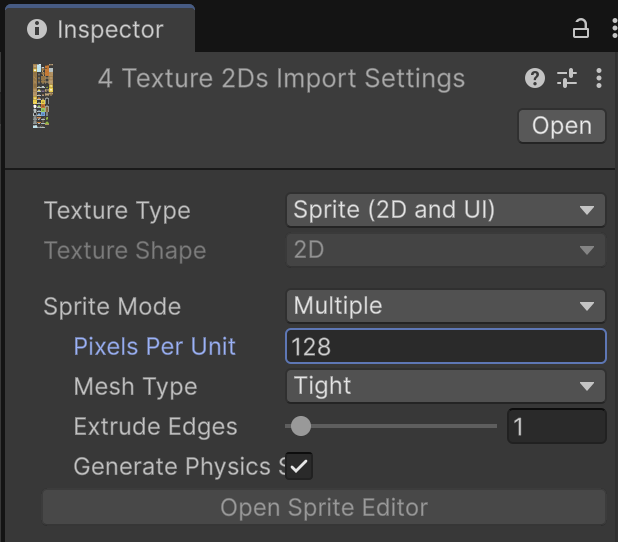
Configure the Sprite Mode to Multiple, use a Pixels Per Unit of 128. Click the Apply button.
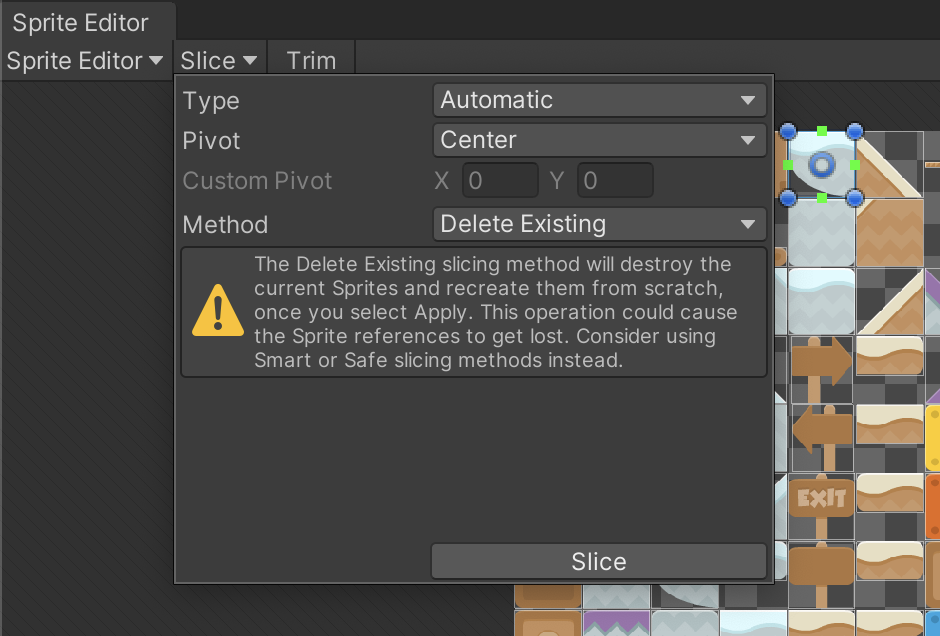
With the exception of spritesheet_players, our other spritesheets lack transparent spacing. Because of this, Unity is unable to automatically slice these graphics into individual sprites. We will have to configure our own slicing. Some operations have to be performed on files individually. Start by inspecting only spritesheet_ground. Click the Open Sprite Editor button. In Sprite Editor, click the Slice dropdown, set Type to Grid by Cell Size, configure a Pixel Size of 128 by 128, click the Slice button, and finally click Apply.
You can see how each of these environmental graphics has been separated into its own sprite.
Repeat this slicing process on spritesheet_items and spritesheet_tiles. If you expand the asset previews for all of the "spritesheet_" files, you should see all of the individual sprites.
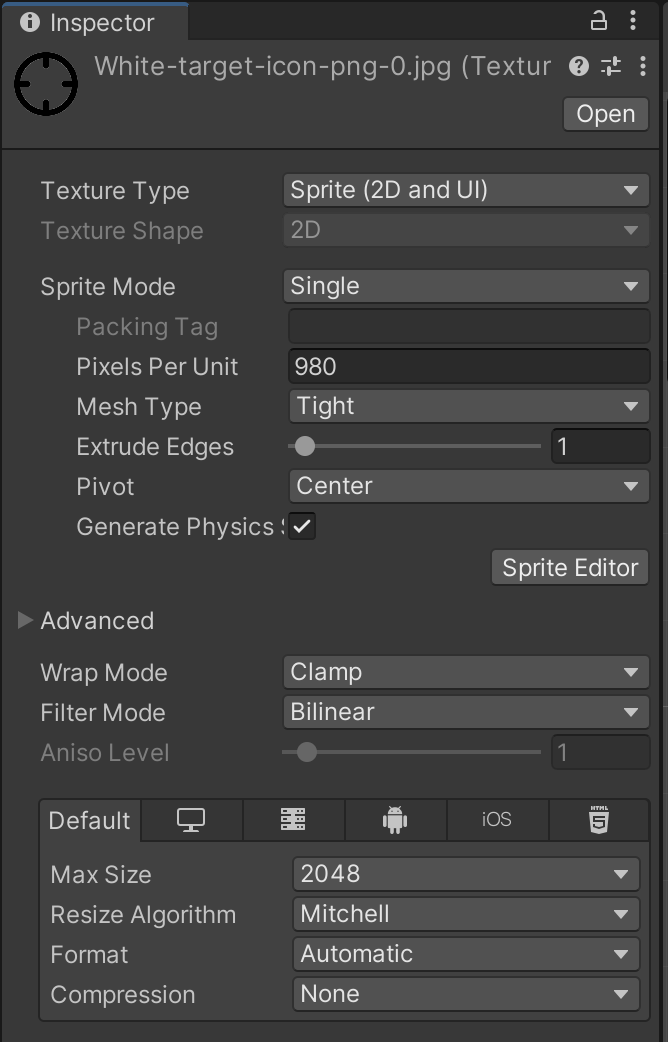
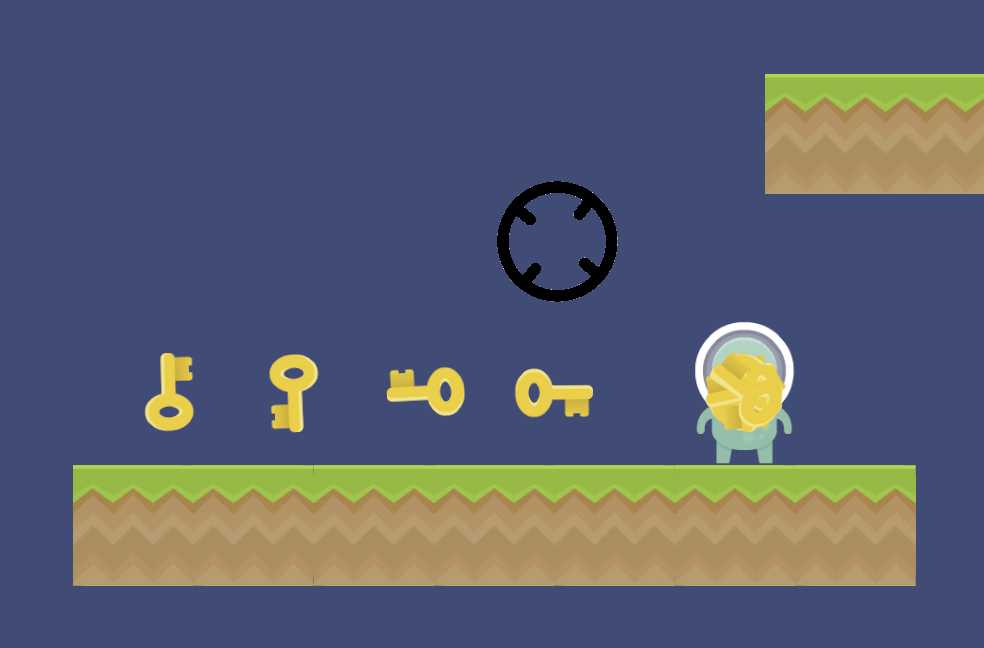
The target-icon file will use 980 Pixels Per Unit because it is such a large image.
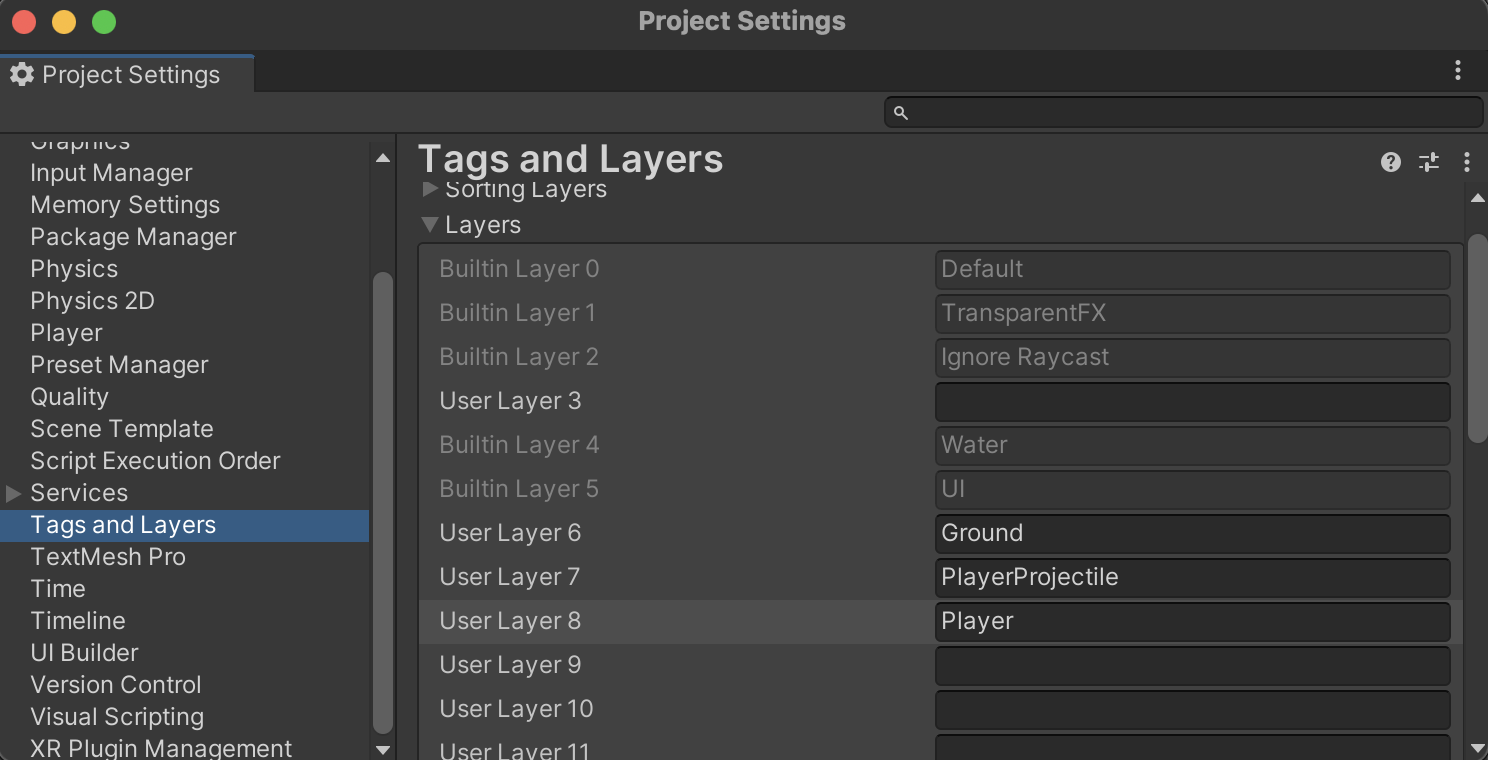
We need to prepare Object Layers, so we can control what kinds of objects can collide with each other.
From Edit > Project Settings > Tags and Layers, add Layers for "Ground", "PlayerProjectile", and "Player".
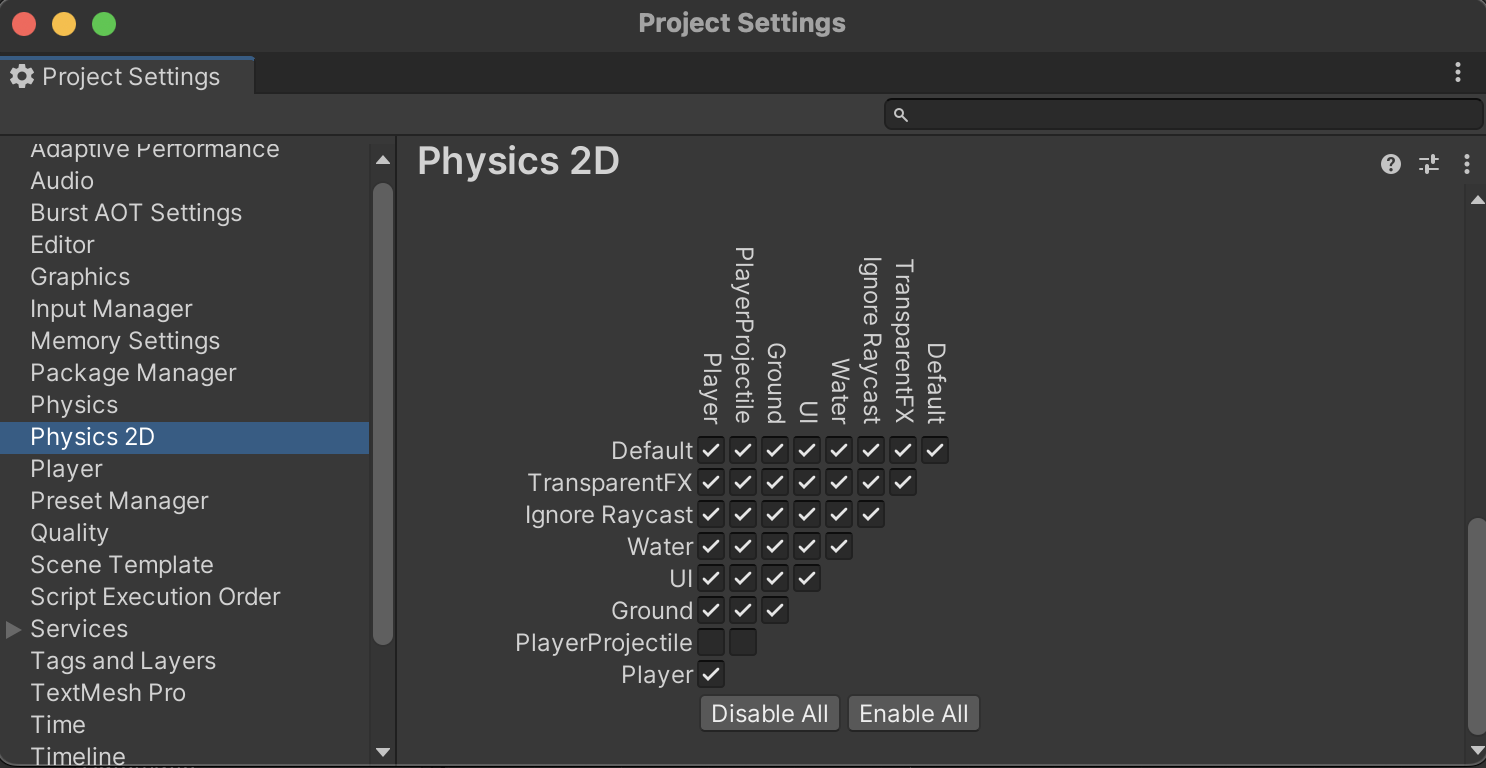
From Edit > Project Settings > Physics 2D > Layer Collision Matrix, alter the diagram so that Players cannot collide with their own PlayerProjectiles. We also do not want PlayerProjectiles to hit themselves.
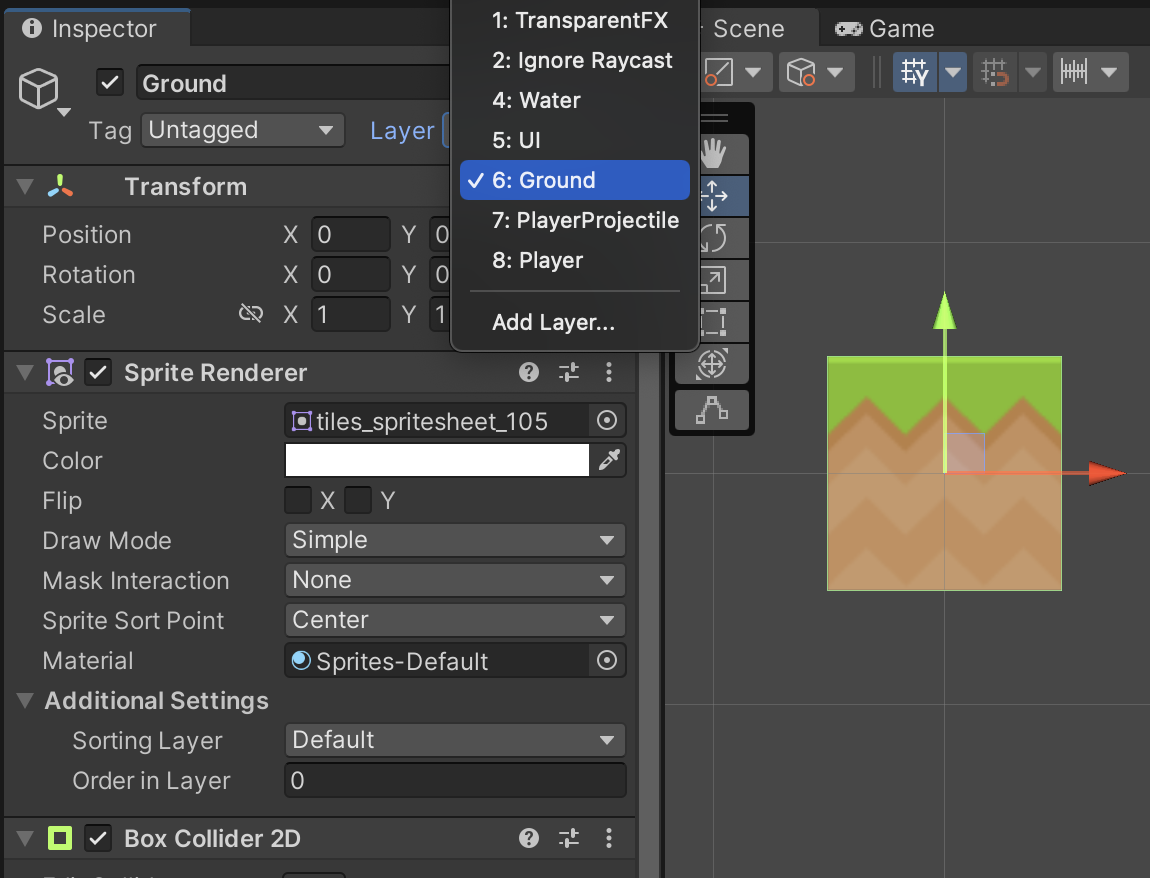
In the Scene hierarchy, create an Empty Object named Ground and add a Sprite Renderer component. Assign a desired Ground Sprite. Add a BoxCollider2D component. Make sure the Box Collider has a size of 1 by 1.
Assign a Layer of Ground.
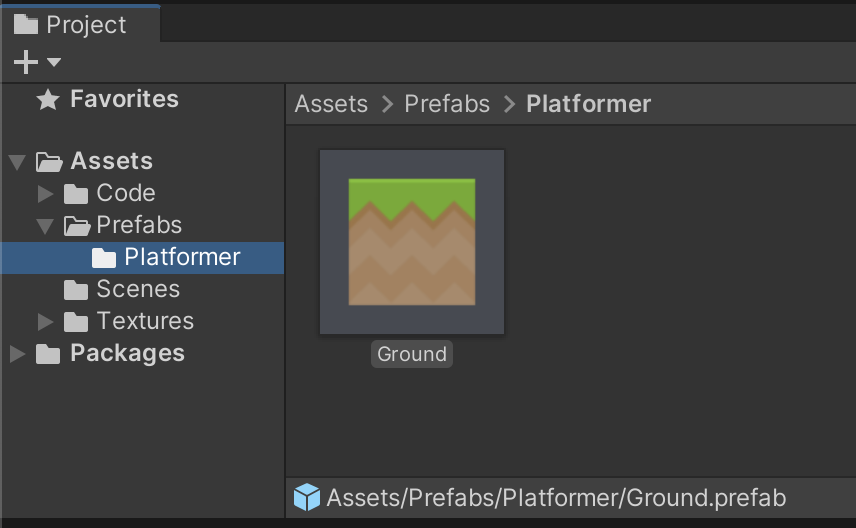
Making Prefabs is a way to prepare a template of an object that will be re-used multiple times throughout a project. You only need to change the template, and all its copies will update with those changes. Because we have a lot of ground blocks, it is a good candidate for a prefab.
Create a /Prefabs/Platformer/ folder to hold prefabs for this exercise. Drag the Ground game object from the Hierarchy list to the Project library to create a reusable ground Prefab.
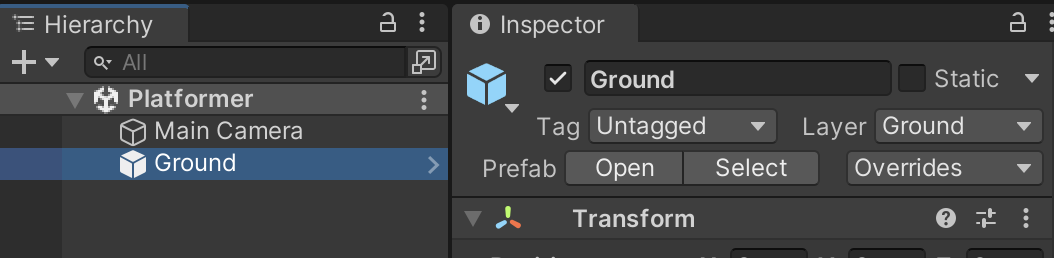
After you create the prefab, notice how prefab scene objects have a different icon in the Hierarchy and a new row of Prefab tools in the Inspector.
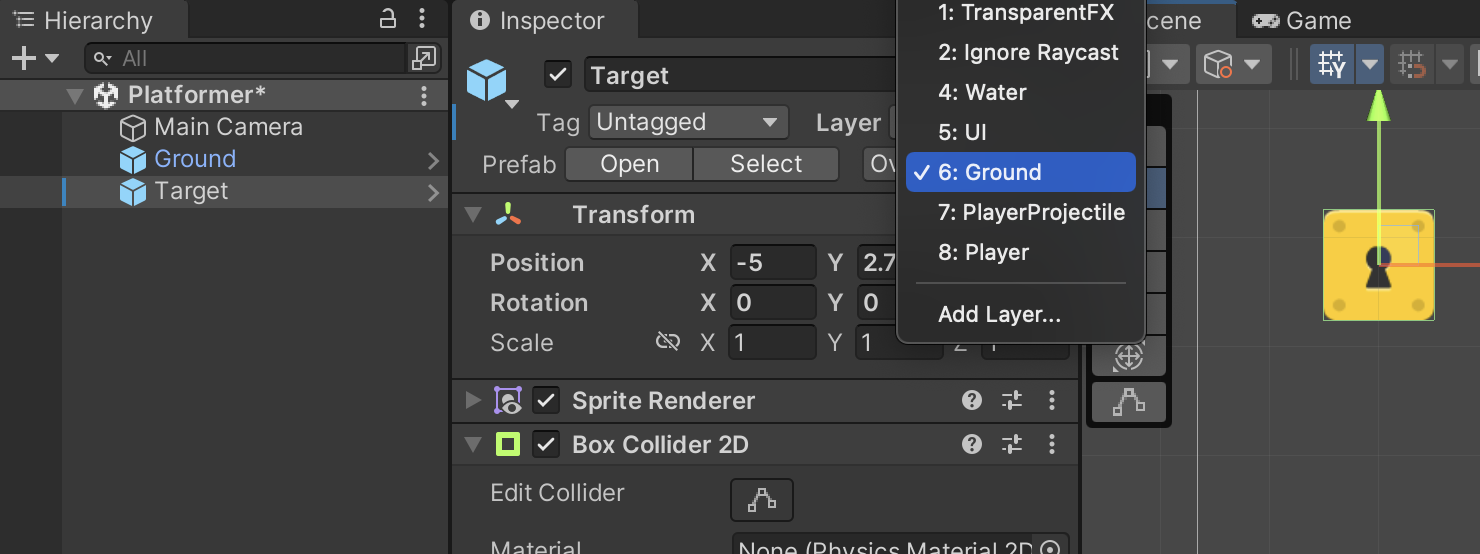
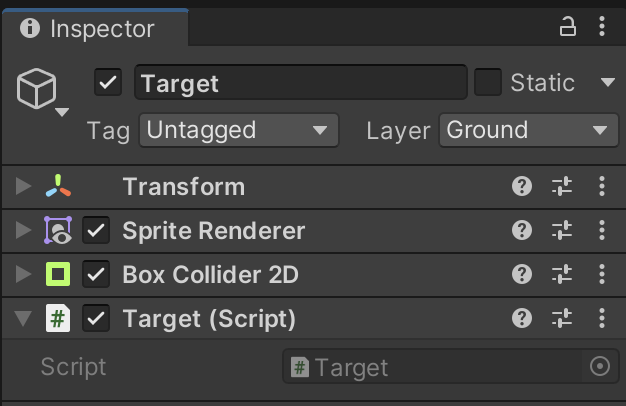
Add a Sprite Renderer to a new empty object named Target. Assign a desired Target Key graphic. Add a BoxCollider2D component with a size of 1 by 1.
Assign a Layer of Ground.
Drag the Target scene object from the Hierarchy list to the Project library to create a reusable target Prefab.
Add a Sprite Renderer to a new empty object named Character. Assign spritesheet_players_5 as the graphic.
Assign a Layer of Player.
Add a CapsuleCollider2D component. We use a Collider2D that has a rounded bottom to prevent the character from getting snagged on terrain. You can preview the collider shape by looking at the green outline in the Scene view.
Add a Rigidbody2D component. To prevent the character from rolling, check the Constraints > Freeze Rotation Z checkbox. The Rigidbody2D should be configured with a Mass of 1, Linear Drag of 2, and Gravity Scale of 2 for better responsiveness during gameplay.
We do not prefab this Character because there will only ever be one of them.

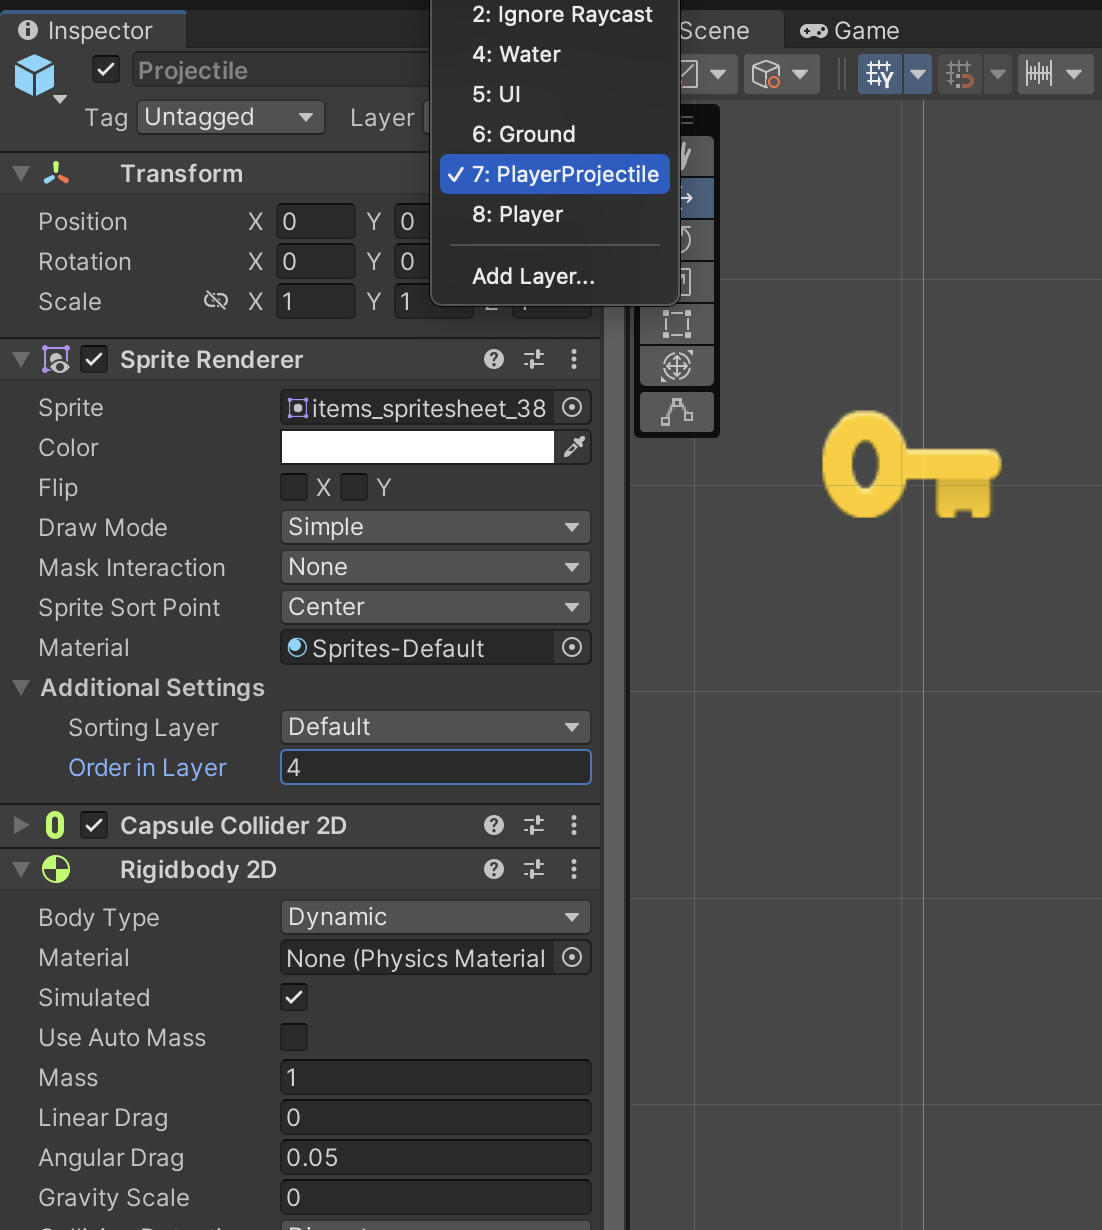
Add a Sprite Renderer component to a new empty object named Projectile. Assign a Key graphic that matches the color of your Targets. To help the Projectile remain visible even as it flies on top of other objects, configure its Sprite Renderer with an Order in Layer of 4. Higher numbers render on top of sprites with lower numbers.
Assign a Layer of PlayerProjectile.
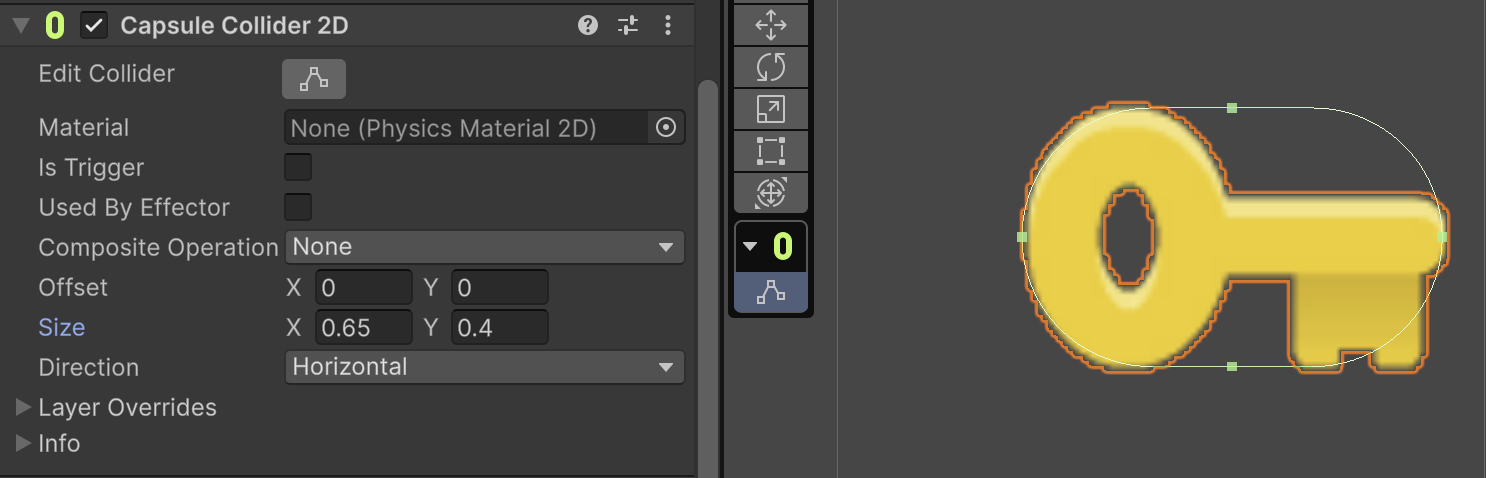
Add a CapsuleCollider2D component with a Direction of Horizontal. Configure the Capsule Collider size as pictured until it fits the curves of the graphic.
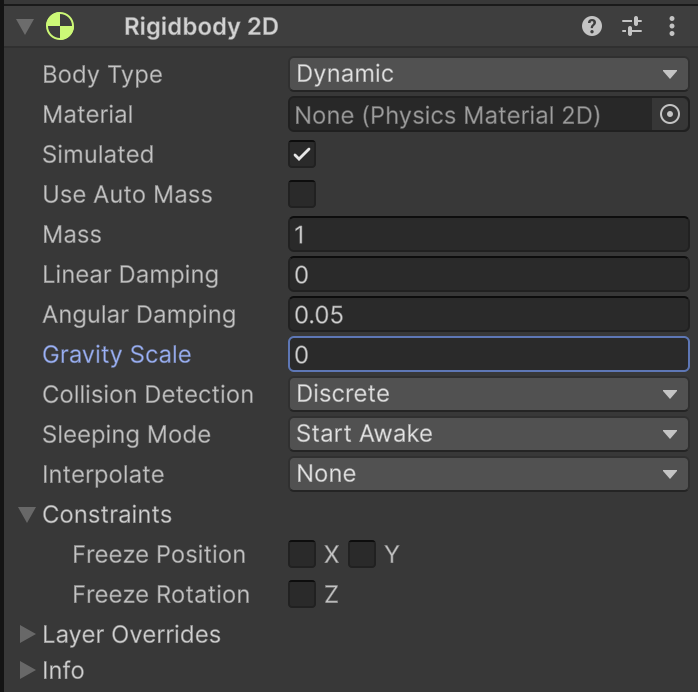
Add a Rigidbody2D component and set Gravity to 0.
Drag the Projectile scene object from the Hierarchy list to the Project library to create a reusable projectile Prefab.
Once your Projectile prefab in the Project library, DELETE the Projectile from the Scene Hierarchy. Do NOT leave an unfired Projectile in the scene.
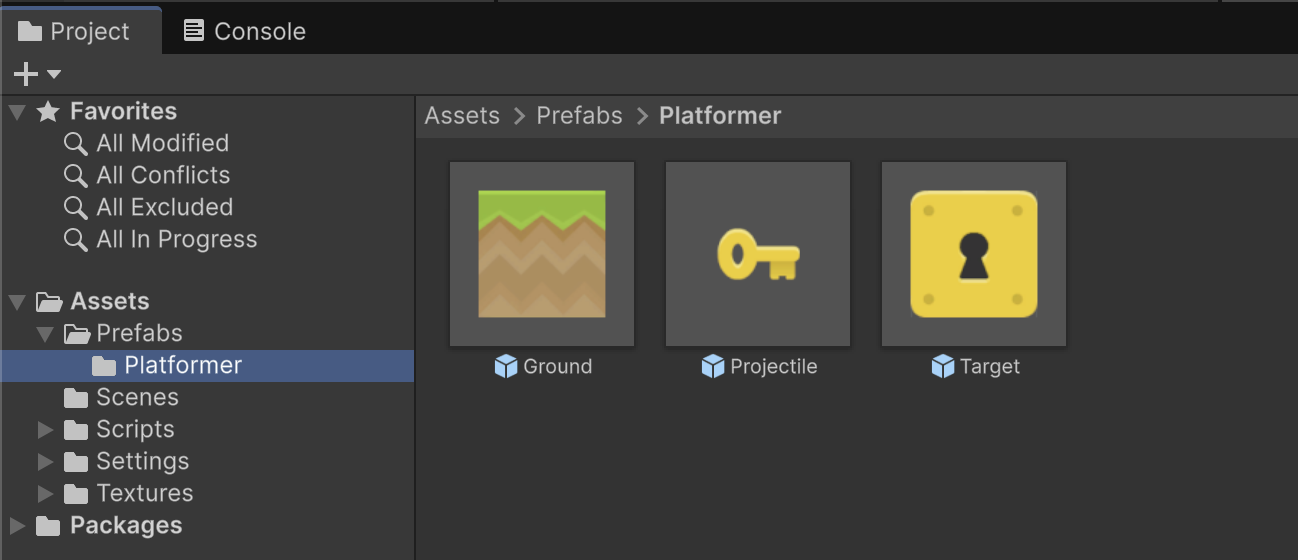
Your Platformer Prefabs folder should contain Ground, Projectile, and Target prefab files.
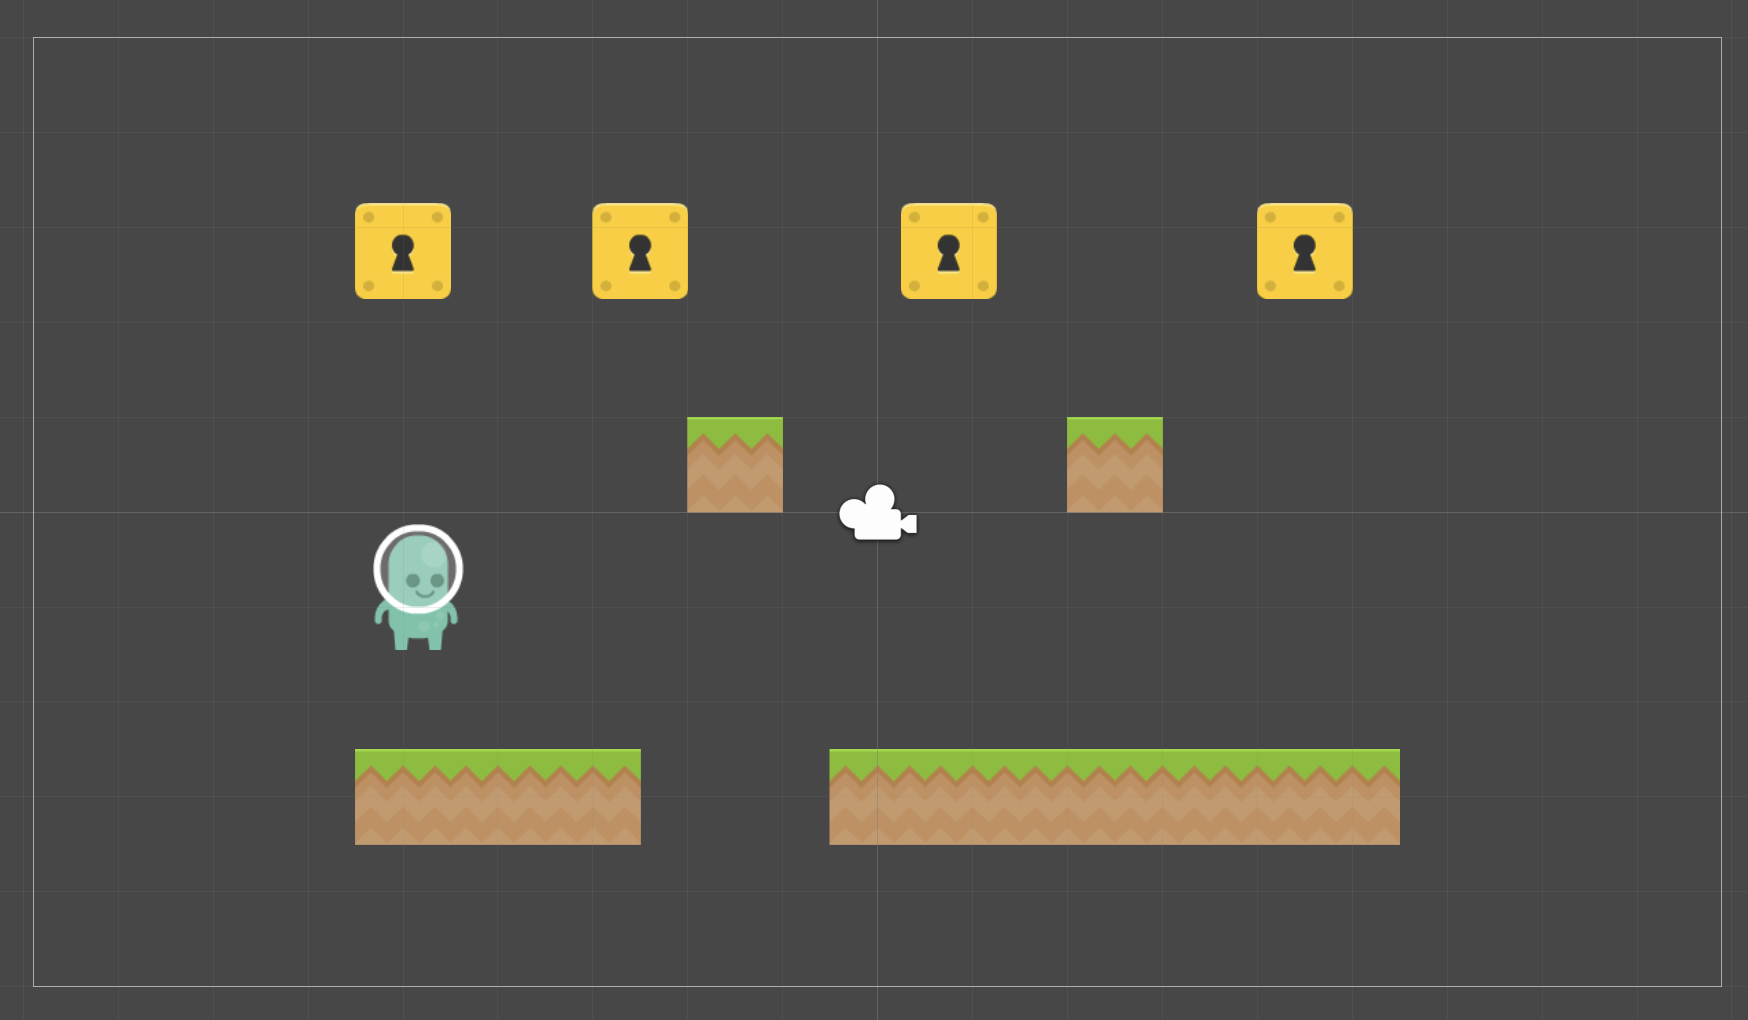
Create a Level Layout using your Character, Ground prefab, and Target prefab.
Your level design should include baseline ground that the character stands on, a hole in the ground the player might fall through, an area of elevated ground that the player can jump on, and targets that the player can shoot and jump onto.
To make more of a Prefab, copy-and-paste or drag another copy from the Project library into the Scene. If you edit a Prefab instance already in a Scene, you can update all of its other copies to match using the Prefab tools in the Inspector.
Similarly, updating the original Prefab in the Project library will also update all copies of it in the Scene.
Create a new C# Script called PlayerController in /Scripts/Platformer/ and attach it to the Character game object.
We will be using namespaces to help avoid contradicting code from different exercises. Enclose ALL classes created as part of this exercise in the Platformer namespace.
PlayerController.cs
using UnityEngine;

namespace Platformer {
	public class PlayerController : MonoBehaviour
	{

	}
}
When we access neighboring Transform components, we use the (lowercase) "transform" variable as a built-in shortcut. For other types of components, we have to track our own references. We will use a Rigidbody2D variable to reference our sibling physics component.
PlayerController.cs
using UnityEngine;

namespace Platformer {
	public class PlayerController : MonoBehaviour
	{
		// Outlets
		Rigidbody2D _rigidbody2D;

		// Methods
		void Start() {
			_rigidbody2D = GetComponent<Rigidbody2D>();
		}
	}
}
Every Frame/Update, we will check if the A or D keys are held down to move the character Left or Right using physics forces.
PlayerController.cs
using UnityEngine;
using UnityEngine.InputSystem;

namespace Platformer {
	public class PlayerController : MonoBehaviour
	{
		// Outlets
		Rigidbody2D _rigidbody2D;

		// Methods
		void Start() {
			_rigidbody2D = GetComponent<Rigidbody2D>();
		}

		void Update() {
			// Move Player Left
			if(Keyboard.current.aKey.isPressed) {
				_rigidbody2D.AddForce(18f * Time.deltaTime * Vector2.left, ForceMode2D.Impulse);
			}

			// Move Player Right
			if(Keyboard.current.dKey.isPressed) {
				_rigidbody2D.AddForce(18f * Time.deltaTime * Vector2.right, ForceMode2D.Impulse);
			}
		}
	}
}
To help access input devices such as the keyboard, we must include the InputSystem. (Line 2)
Using physics means that we will utilize functions on the Rigidbody2D instead of altering the Transform properties directly. We want the physics simulation to manage the position for us. Manipulating both Rigidbody and Transform at the same time can lead to conflicting behavior.
The appropriate amount of force depends on intended Game Feel and might be a different number outside our tutorial.
Multiplying the force by Time.deltaTime normalizes the amount applied for variations in frame rate. It essentially converts our units to force per second. This fixes the bug of faster computers having faster moving characters compared to slower computers.
Using a Force Mode of Impulse means we want the force to be applied instantly.
The numbers in this code have already been carefully balanced with the exact Rigidbody2D configuration values shown in earlier steps.
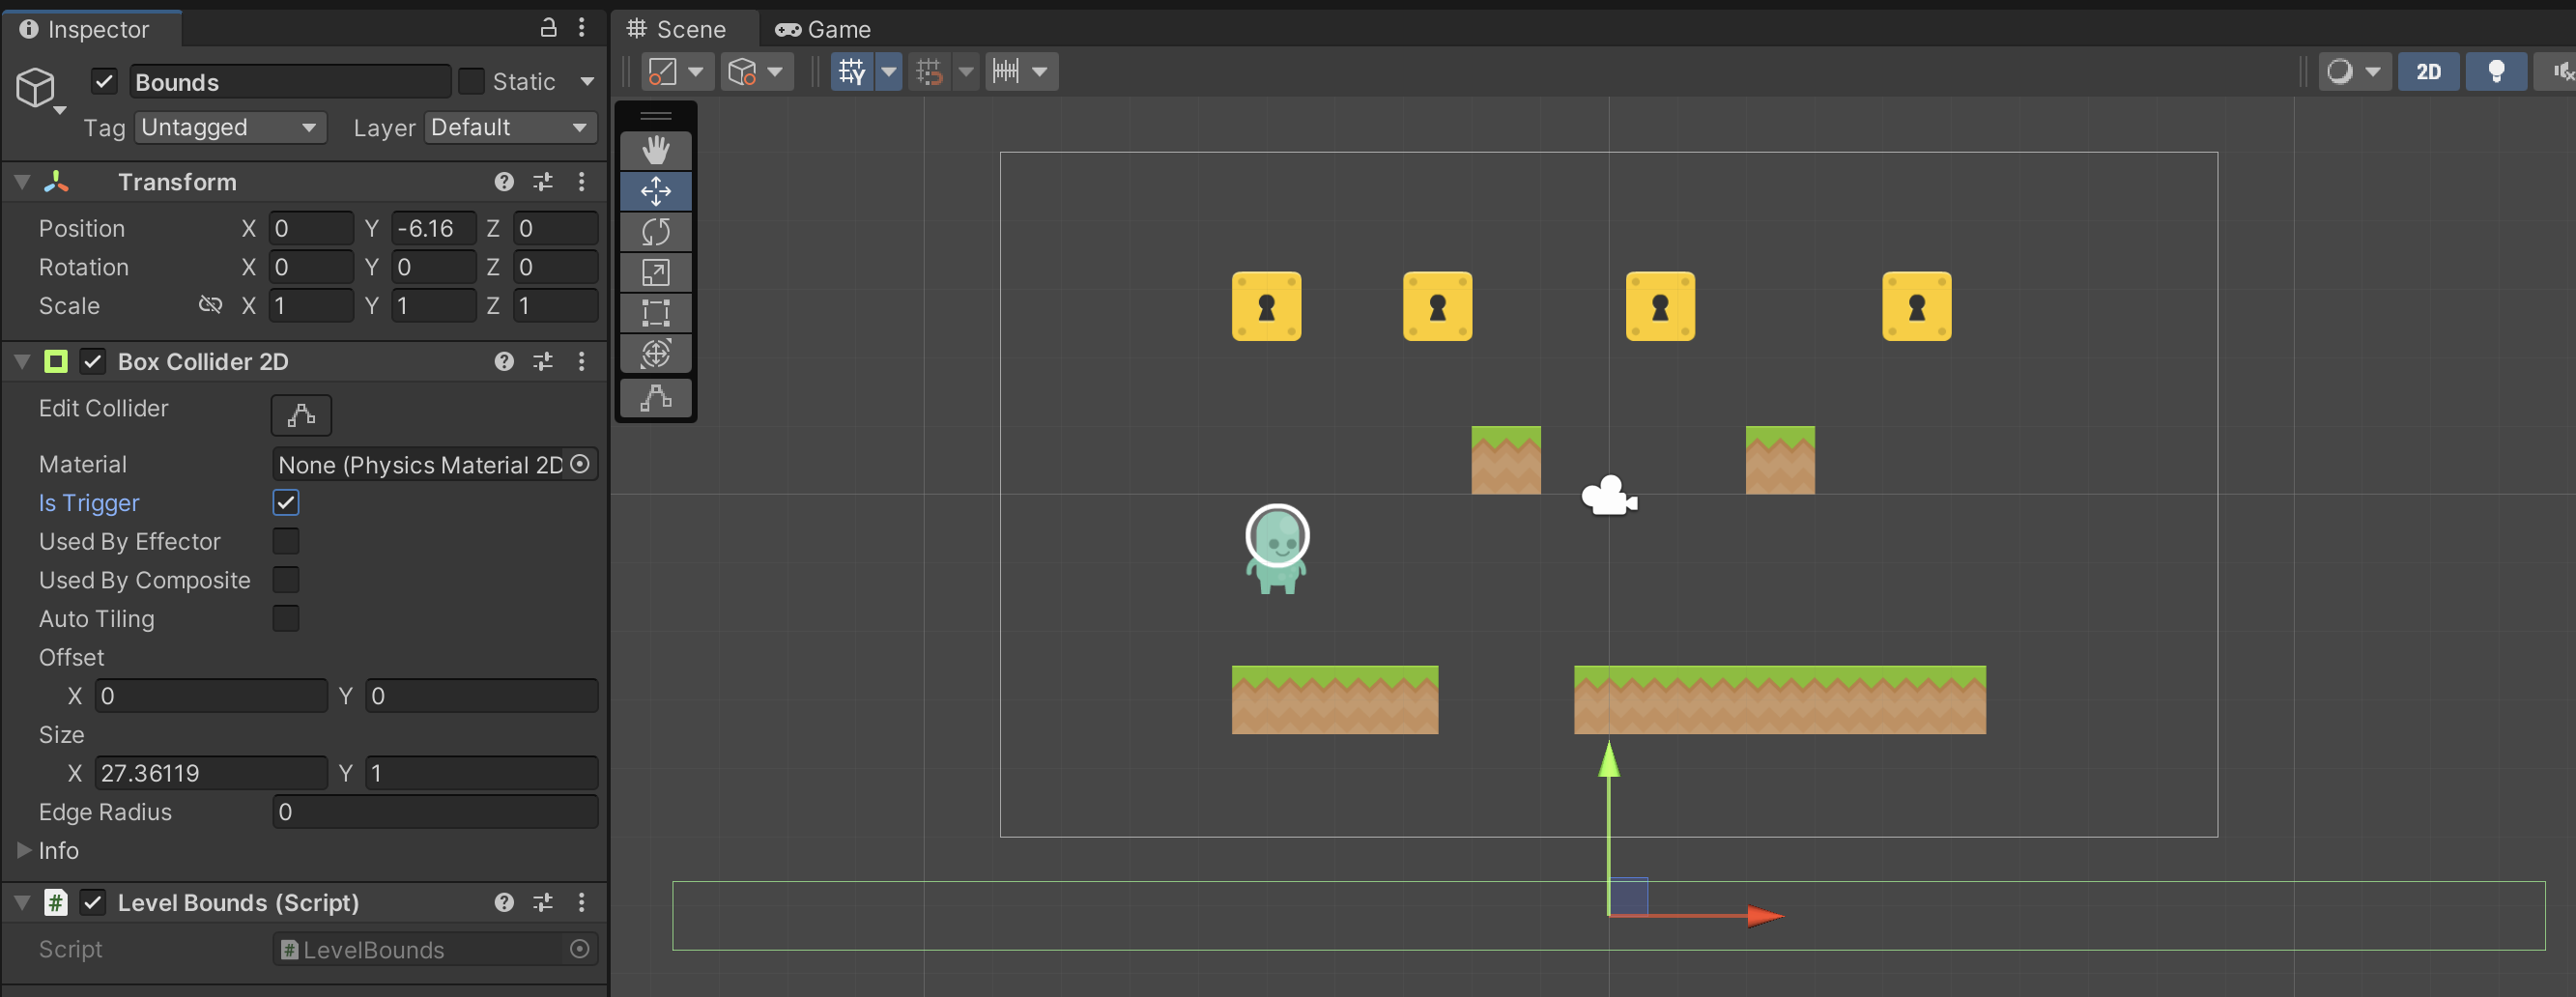
Add a BoxCollider2D to an empty object. Position the object below the Level Layout and use Edit Collider to ensure the green collider zone encompasses any area where the player might fall. (Make it wide enough to catch a player who may double jump quite a distance to any side.
Practice not using scale to size the collider. Do NOT make boundaries for the sides or top of the level.
Check the Is Trigger option. This means this detection zone is not solid.
Create a new C# Script called LevelBounds and attach it to the game object.
LevelBounds.cs
using UnityEngine;
using UnityEngine.SceneManagement;

namespace Platformer {
	public class LevelBounds : MonoBehaviour
	{
		void OnTriggerEnter2D(Collider2D other) {
			if(other.gameObject.GetComponent<PlayerController>()) {
				string currentScene = SceneManager.GetActiveScene().name;
				SceneManager.LoadScene(currentScene);
			}
		}
	}
}
The SceneManagement using statement gives us easier access to the SceneManager functions.
We will use an OnTriggerEnter2D event instead of a OnCollisionEnter2D because our green shape is a non-solid Trigger zone. Knowing how to hook up both event categories of solid collisions and trigger zones gives you much more flexibility for a variety of game mechanics. Take special note of the differences in the functions' arguments.
You must also make sure the Platformer scene is added to Unity’s File > Build Profiles > Scene List, otherwise, SceneManager may throw an error when trying to switch scenes.
Create an Empty Child GameObject nested within the Character and name it AimPivot. No additional Components are necessary. Ensure that your Move Tool is set to Pivot mode. Notice how the Pivot Point of AimPivot is centered within Character.
AimPivot is the gameObject we will rotate to aim with the mouse. (We can't rotate the character directly, otherwise, the character would appear to be rolling.
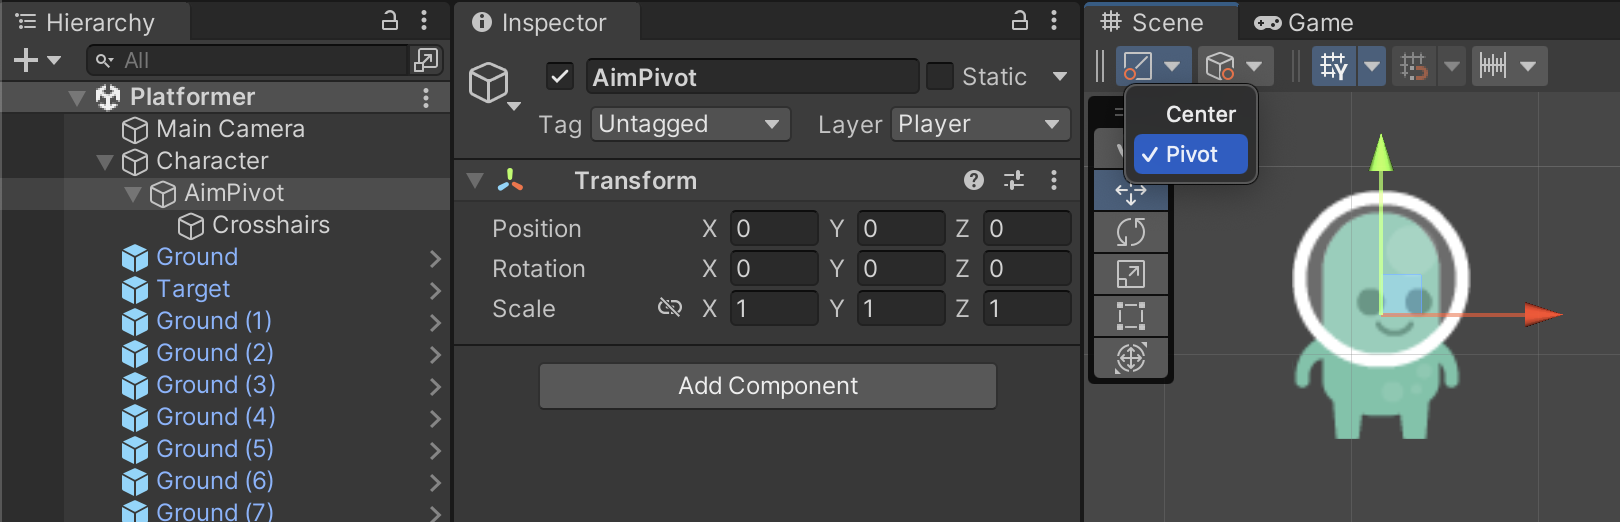
Create another Empty Child GameObject within AimPivot and name it Crosshairs. Add a SpriteRenderer component and assign the appropriate graphic. Use an Order in Layer of 5 to make sure the crosshairs render on top of everything like UI.
Notice how the Pivot Point of Reticle is positioned directly to the right of the character with a Y position of 0. Using the wrong position at this step will mess up our aiming math in an upcoming step.

In your PlayerController script, add a new Public Outlet for aimPivot, so that we can reference and rotate it towards the mouse.
PlayerController.cs
namespace Platformer {
	public class PlayerController : MonoBehaviour
	{
		// Outlets
		Rigidbody2D _rigidbody2D;
		public Transform aimPivot;
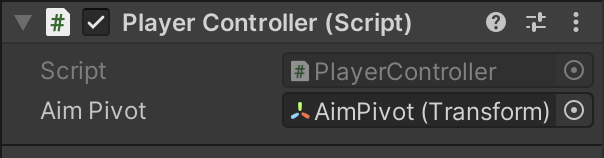
Because this is a public outlet, we will get a property field in the Inspector for our Character gameObject where we can tell Unity which Transform component we want to use as aimPivot. (We don't use the transform shortcut because we are not targetting the sibling Transform relative to PlayerController.)
Drag AimPivot to this blank.
When you encounter unfamiliar game mechanics, it helps to break them down into their fundamental patterns and math concepts. To aim our attacks, we will rotate AimPivot toward the Mouse. Practice understanding the fundamental Unity coordinates and math concepts before writing the code:
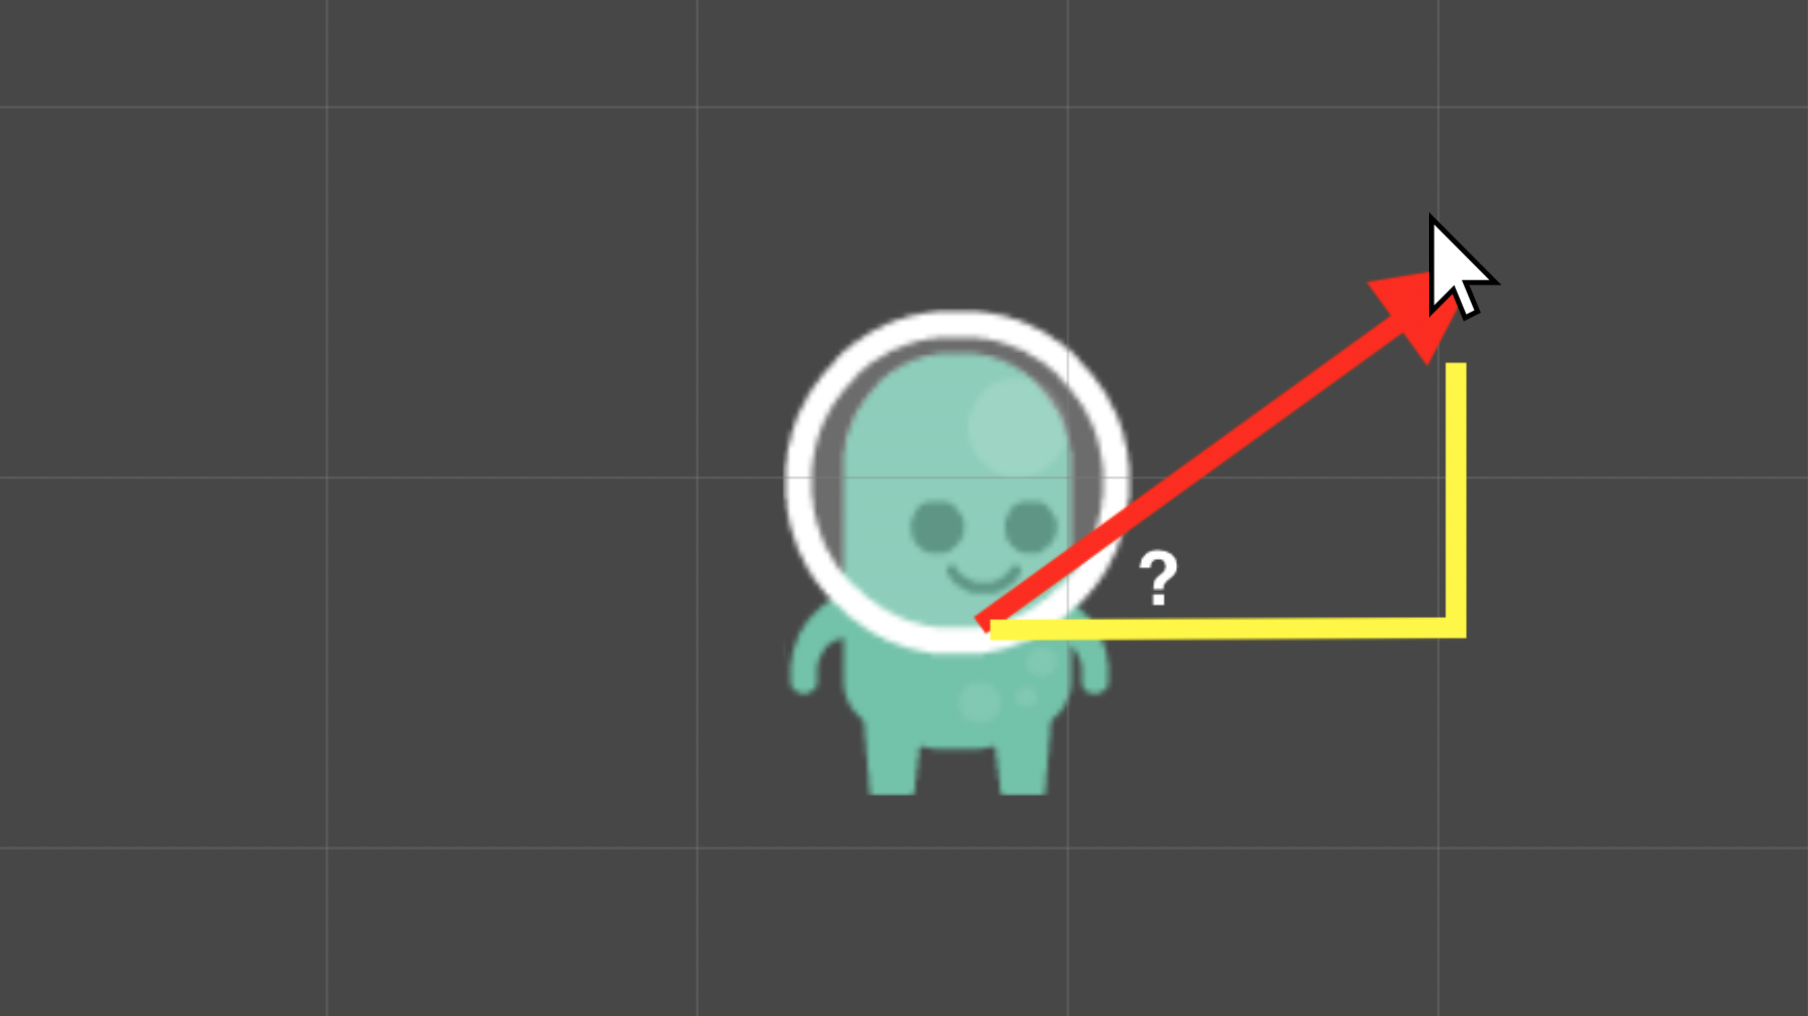 With the character as an origin (0,0) corner of a triangle, Trigonometry treats the character looking to the right as 0 degrees with values increasing in the counter-clockwise direction. For example, a position straight above the character would be 90 degrees.
PlayerController.cs
		void Update() {
			// Move Player Left
			if(Keyboard.current.aKey.isPressed) {
				_rigidbody2D.AddForce(18f * Time.deltaTime * Vector2.left, ForceMode2D.Impulse);
			}

			// Move Player Right
			if(Keyboard.current.dKey.isPressed) {
				_rigidbody2D.AddForce(18f * Time.deltaTime * Vector2.right, ForceMode2D.Impulse);
			}

			// Aim Toward Mouse
			Vector3 mousePosition = Mouse.current.position.ReadValue();
			Vector3 mouseWorldPosition = Camera.main.ScreenToWorldPoint(mousePosition);
			Vector3 hypotenuse = mouseWorldPosition - transform.position;

			float mouseRadians = Mathf.Atan2(hypotenuse.y, hypotenuse.x);
			float mouseAngle = mouseRadians * Mathf.Rad2Deg;

			aimPivot.rotation = Quaternion.Euler(0, 0, mouseAngle);
		}
Play the game and confirm that the crosshairs orbit the player and aim precisely toward the mouse. Any mistakes in the starting positions of the AimPivot and Crosshairs GameObjects can cause misalignment because you may no longer be solving a right triangle as intended by the code.
We need to add a Public Outlet for the Prefab gameObject our character will shoot as a Projectile.
PlayerController.cs
namespace Platformer {
	public class PlayerController : MonoBehaviour
	{
		// Outlets
		Rigidbody2D _rigidbody2D;
		public Transform aimPivot;
		public GameObject projectilePrefab;
This creates another property in the PlayerController's Inspector. Assign our Projectile Prefab from the Project library to this blank. There should be no Projectile objects in the scene itself. Therefore, you should also never hook up a scene Projectile as if it were a source Prefab for a projectile.

Beneath the code for our Mouse Aiming within the Update Event of our PlayerController, we will add code for shooting projectiles.
PlayerController.cs
			// Shoot
			if(Mouse.current.leftButton.wasPressedThisFrame) {
				GameObject projectile = Instantiate(projectilePrefab);
				projectile.transform.position = transform.position;
				projectile.transform.rotation = aimPivot.rotation;
			}
When the Mouse's wasPressedThisFrame event of the left-click occurs, we create a new instance of our projectile prefab, position it where our character is, and rotate it to match our aimPivot. This happens once per mouse click. We do not want to fire continuously.
Testing the game at this step reveals that the projectiles position and rotate properly, but they just float mid-air.
Create a new C# script called Projectile and attach it to your Projectile Prefab.

We will control our Projectile movement with physics, so we must create an outlet for Rigidbody2D to reference it in code.
During the Start event of our component, we will set the velocity of our projectile relative to the GameObject's right axis. (We use transform.right because it is the right-facing direction relative to the object's rotation, as opposed to Vector2.right which would be the global right direction regardless of any rotation.) The art of the key is drawn facing toward the right, and the right-facing direction also matches the aiming math used by PlayerController. Our projectile will appear to travel in whatever direction we aim.
Projectile.cs
using UnityEngine;

namespace Platformer {
	public class Projectile : MonoBehaviour
	{
		// Outlets
		Rigidbody2D _rigidbody2D;

		// Methods
		void Start() {
			_rigidbody2D = GetComponent<Rigidbody2D>();
			_rigidbody2D.linearVelocity = transform.right * 10f;
		}
	}
}
We also want our projectile to disappear any time it hits another object. We do not have to worry about the projectile hitting the player when it’s fired because we set up a collision matrix in the Physics2D settings to ignore that particular interaction.
We use an OnCollisionEnter2D event where we tell our projectile to remove itself from the game.
Projectile.cs
		void OnCollisionEnter2D(Collision2D collision) {
			Destroy(gameObject);
		}
Test the game to confirm that projetiles fly where you aim them and disappear when they impact.
Create a new C# script named Target and assign it to the Target Prefab in your Project library to ensure that all Target instances obtain the new script.
We will use another OnCollisionEnter2D event, but we will specifically check if the colliding object has a Projectile component before destroying our Target block. This ensures that Targets do not disappear if they are touched by a Player instead.
Target.cs
using UnityEngine;

namespace Platformer {
	public class Target : MonoBehaviour
	{
		void OnCollisionEnter2D(Collision2D collision) {
			if(collision.gameObject.GetComponent<Projectile>()) {
				Destroy(gameObject);
			}
		}
	}
}
Test the game and confirm that Targets disappear when hit by Projectiles.
In our PlayerController, we can make jump count configurable by creating a public property to keep track of how many jumps we have left.
PlayerController.cs
namespace Platformer {
	public class PlayerController : MonoBehaviour
	{
		// Outlets
		Rigidbody2D _rigidbody2D;
		public Transform aimPivot;
		public GameObject projectilePrefab;

		// State Tracking
		public int jumpsLeft;
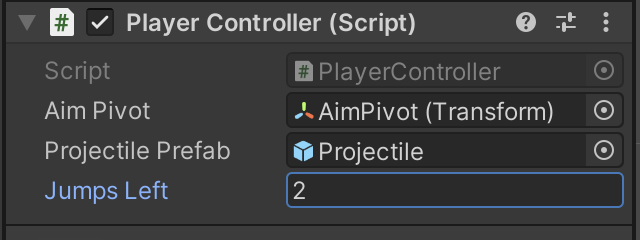
This adds a property to the Character's Inspector. For Double Jump, set the Jumps Left to 2.
Below our shooting code in PlayerController, we are going to add code for Jumping.
We check to see if the spacebar has just been pressed (not held) and if we have any jumps left in the property we are using as a counter.
When our character jumps, we reduce the number of jumps left and add an upward physics force.
We use a ForceMode2D of Impulse so that the full jump force is applied instantaneously.
PlayerController.cs
		void Update() {
			// Move Player Left
			if(Keyboard.current.aKey.isPressed) {
				_rigidbody2D.AddForce(18f * Time.deltaTime * Vector2.left, ForceMode2D.Impulse);
			}

			// Move Player Right
			if(Keyboard.current.dKey.isPressed) {
				_rigidbody2D.AddForce(18f * Time.deltaTime * Vector2.right, ForceMode2D.Impulse);
			}

			// Jump
			if(Keyboard.current.spaceKey.wasPressedThisFrame) {
				if(jumpsLeft > 0) {
					jumpsLeft--;
					_rigidbody2D.AddForce(Vector2.up * 15f, ForceMode2D.Impulse);
				}
			}
Test the game to confirm that the player will jump twice and then become stuck on the ground.
For a proper Double Jump, we must reset the jump counter when the player lands on the ground.
INCORRECT implementations involve resetting the jump counter if the player touches the side of the ground (Wall Jumping) or if the player touches their head to the ground (Ceiling Climbing).
Programming landing is deceptively complex. There are quite a few details people take for granted when casually discussing landing. We must account for many scenarios in our code:

PlayerController.cs
		void OnCollisionStay2D(Collision2D collision) {
			// Check that we collided with Ground
			if(collision.gameObject.layer == LayerMask.NameToLayer("Ground")) {
				// Check what is directly below our character's feet
				RaycastHit2D[] hits = Physics2D.RaycastAll(transform.position, Vector2.down, 0.65f);
				// Debug.DrawRay(transform.position, Vector2.down * 0.65f); // Visualize Raycast

				// We might have multiple things below our character's feet
				for(int i = 0; i < hits.Length; i++) {
					RaycastHit2D hit = hits[i];

					// Check that we collided with ground below our feet
					if(hit.collider.gameObject.layer == LayerMask.NameToLayer("Ground")) {
						// Reset jump count
						jumpsLeft = 2;
					}
				}
			}
		}
Playtest to ensure all interactions work as expected and that the addition of any new features hasn’t broken any earlier interactions.
SAVE any open files or scenes.
Submit your assignment for grading following the instructions supplied for your particular classroom.