VG3, Quest 8 - FMOD Adaptive Audio

Download Files

Supporting files for VG3 quests are part of a single archive that you can download here.

Introducing FMOD

Similar to Ink for Narrative Designers, FMOD is a specialized tool external to Unity that allows Audio Engineers to produce content that can be used across various game engines. FMOD can be thought of as an alternative audio engine to what is built-in to Unity. FMOD (and competing offerings such as Wwise) offer more advanced options thanks to their specialized focus. While there are many artistic possibilities inherent to the medium of audio, this assignment focuses on the implementation of musical logic in video games.

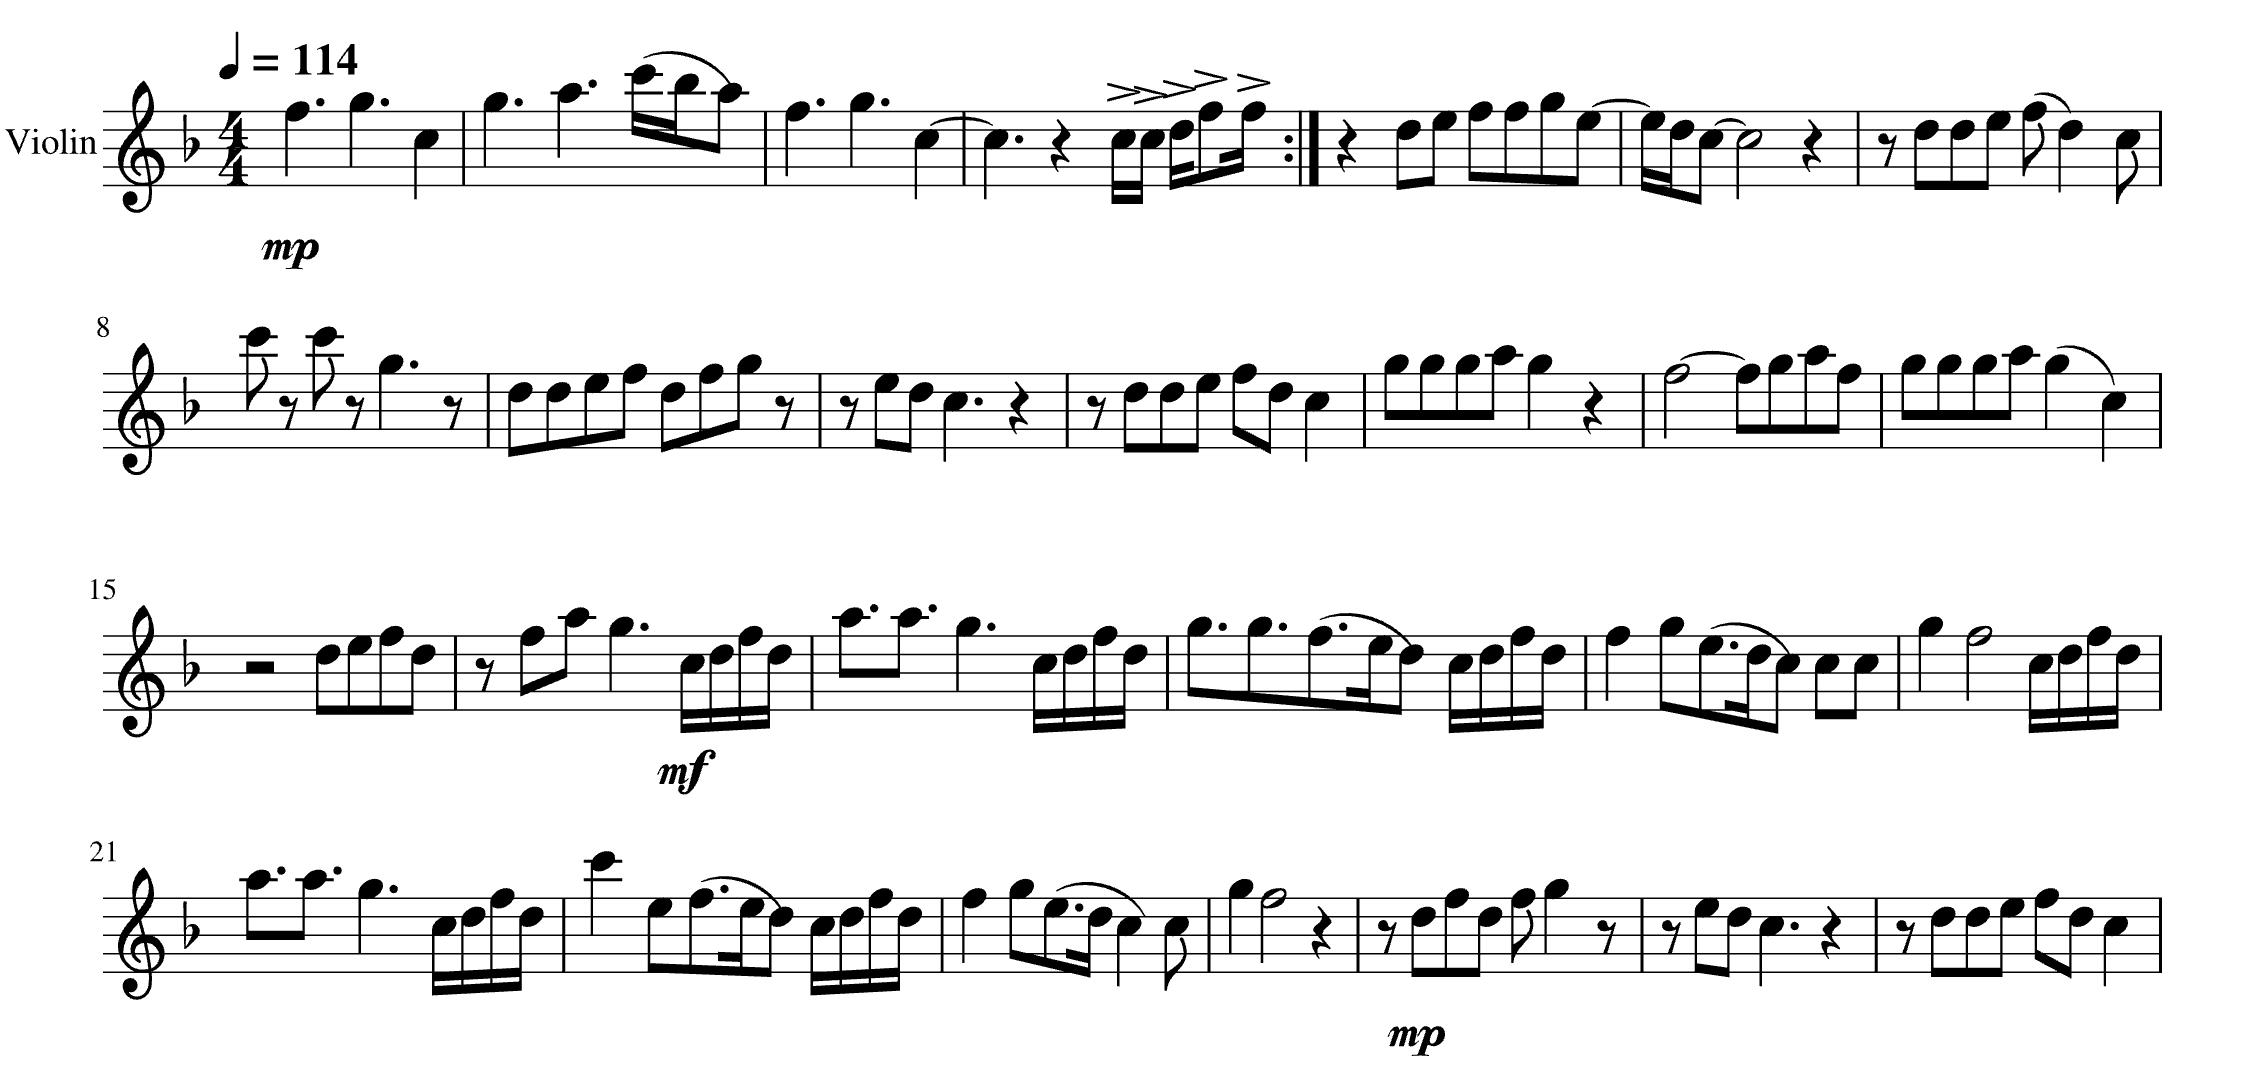
While the notation may be unfamiliar to many, music embodies many of the same logical components of programming. Sheet music, for example, conveys a sequential series of operations affected by variables (such as tempo and volume) and even includes instructions for control flow just as traditional code has its own conditional and loop statements.

Thanks to the interactive nature of video games, Adaptive Audio Design facilitates a unique collaborative relationship between sound artist and audience, in which the listener can become a participant in the acoustic performance. Such dynamics are not possible in other media in which the audience's engagement with the art is non-interactive.

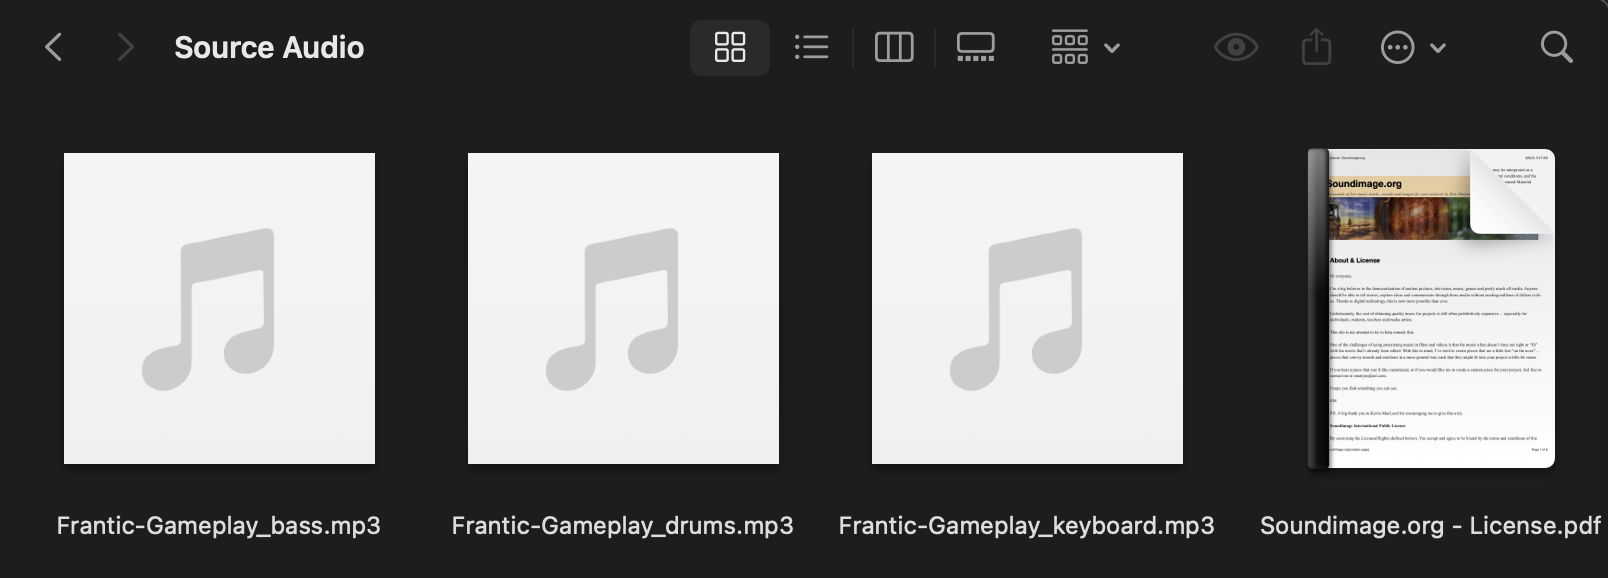
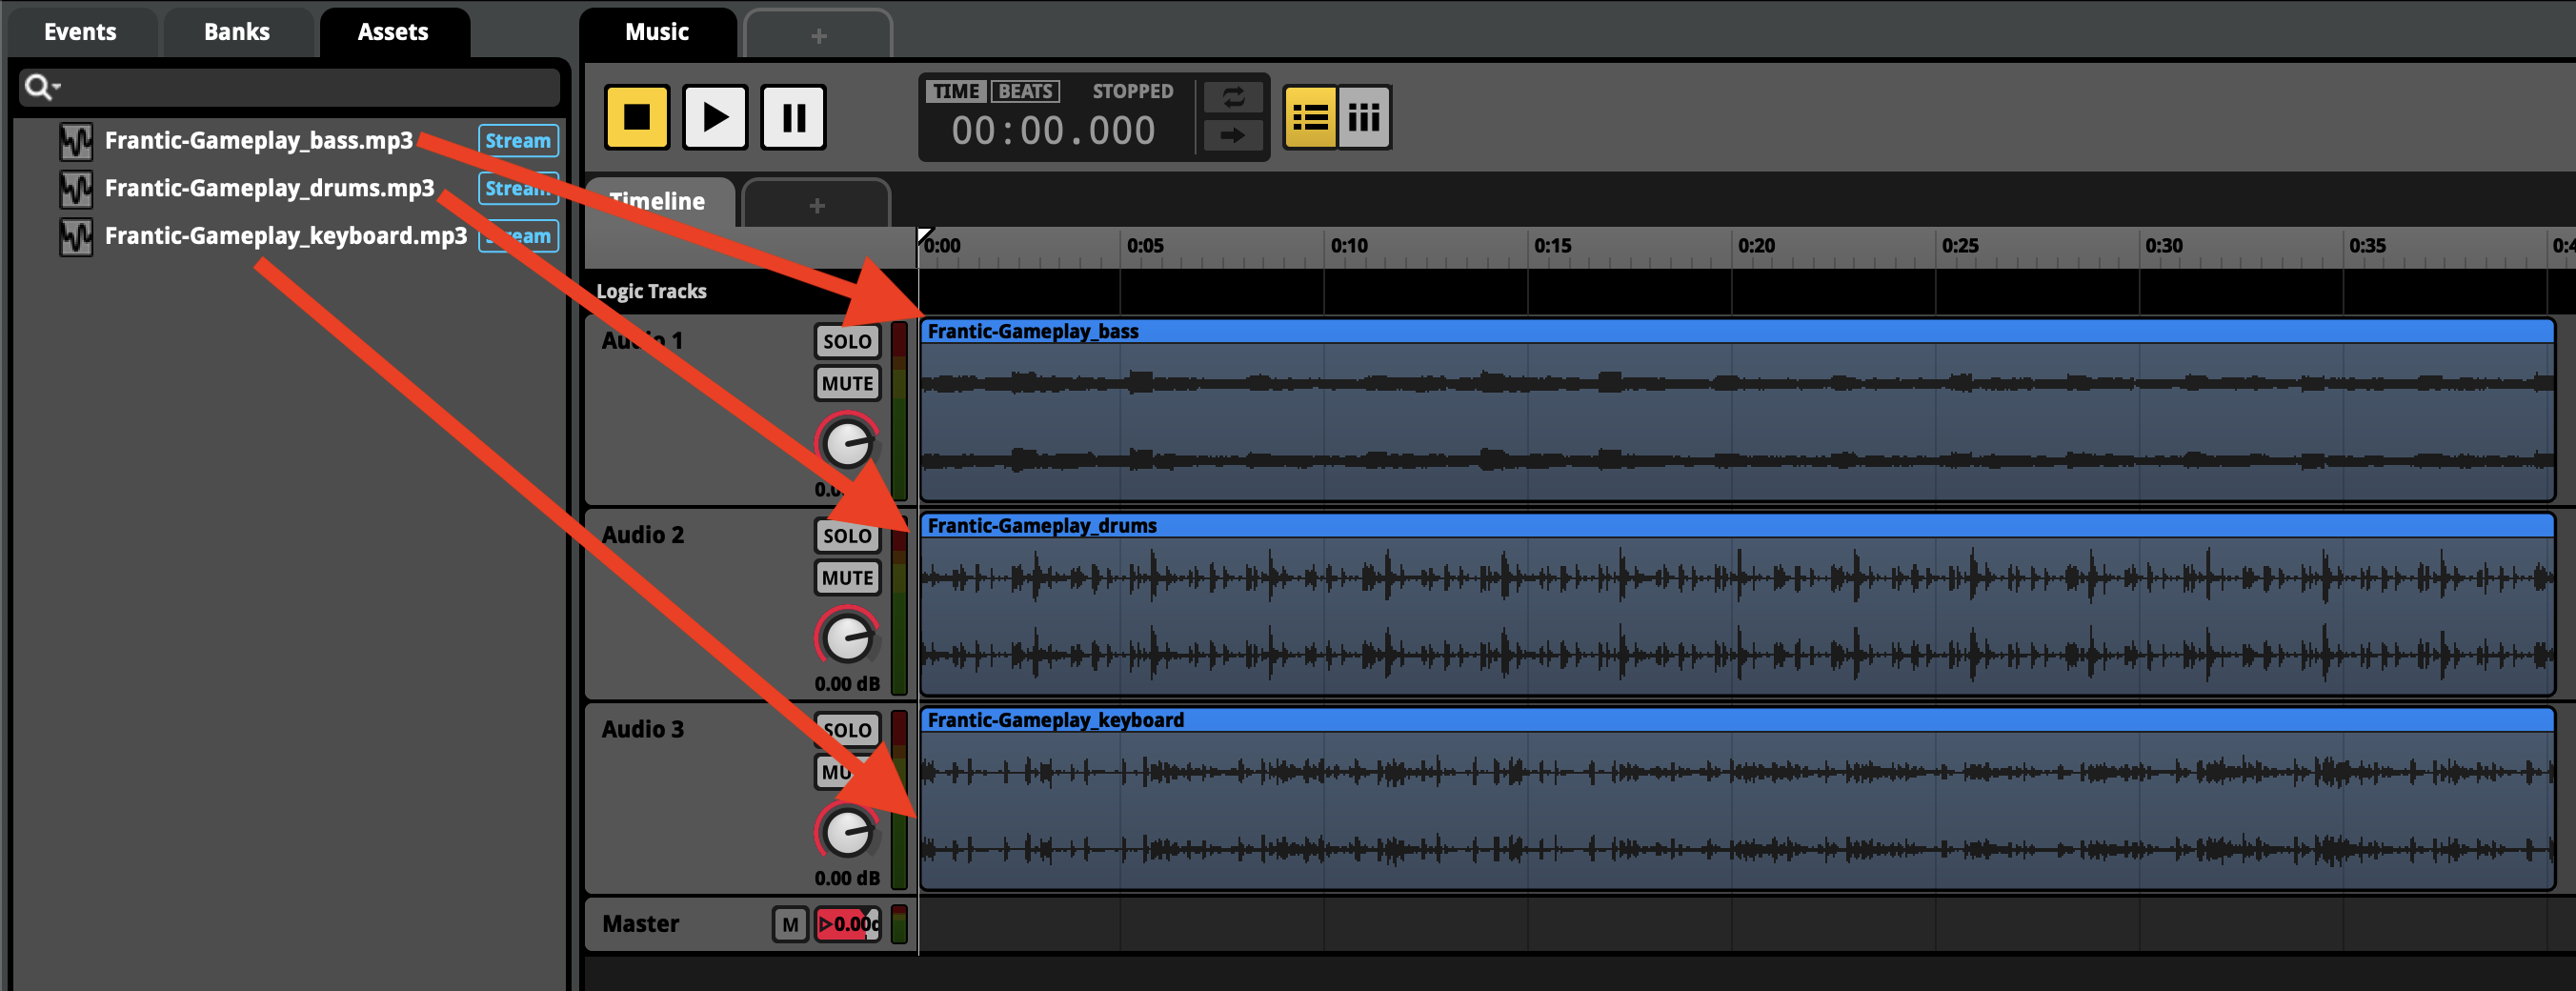
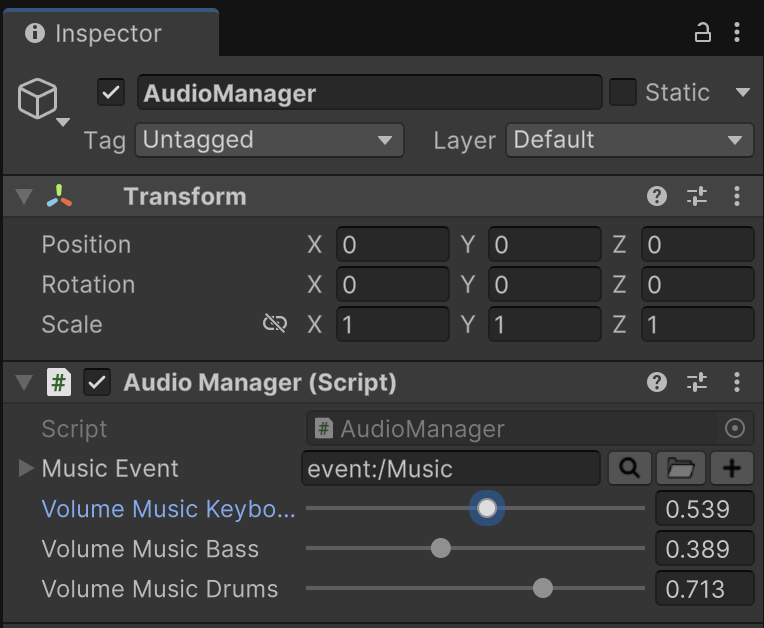
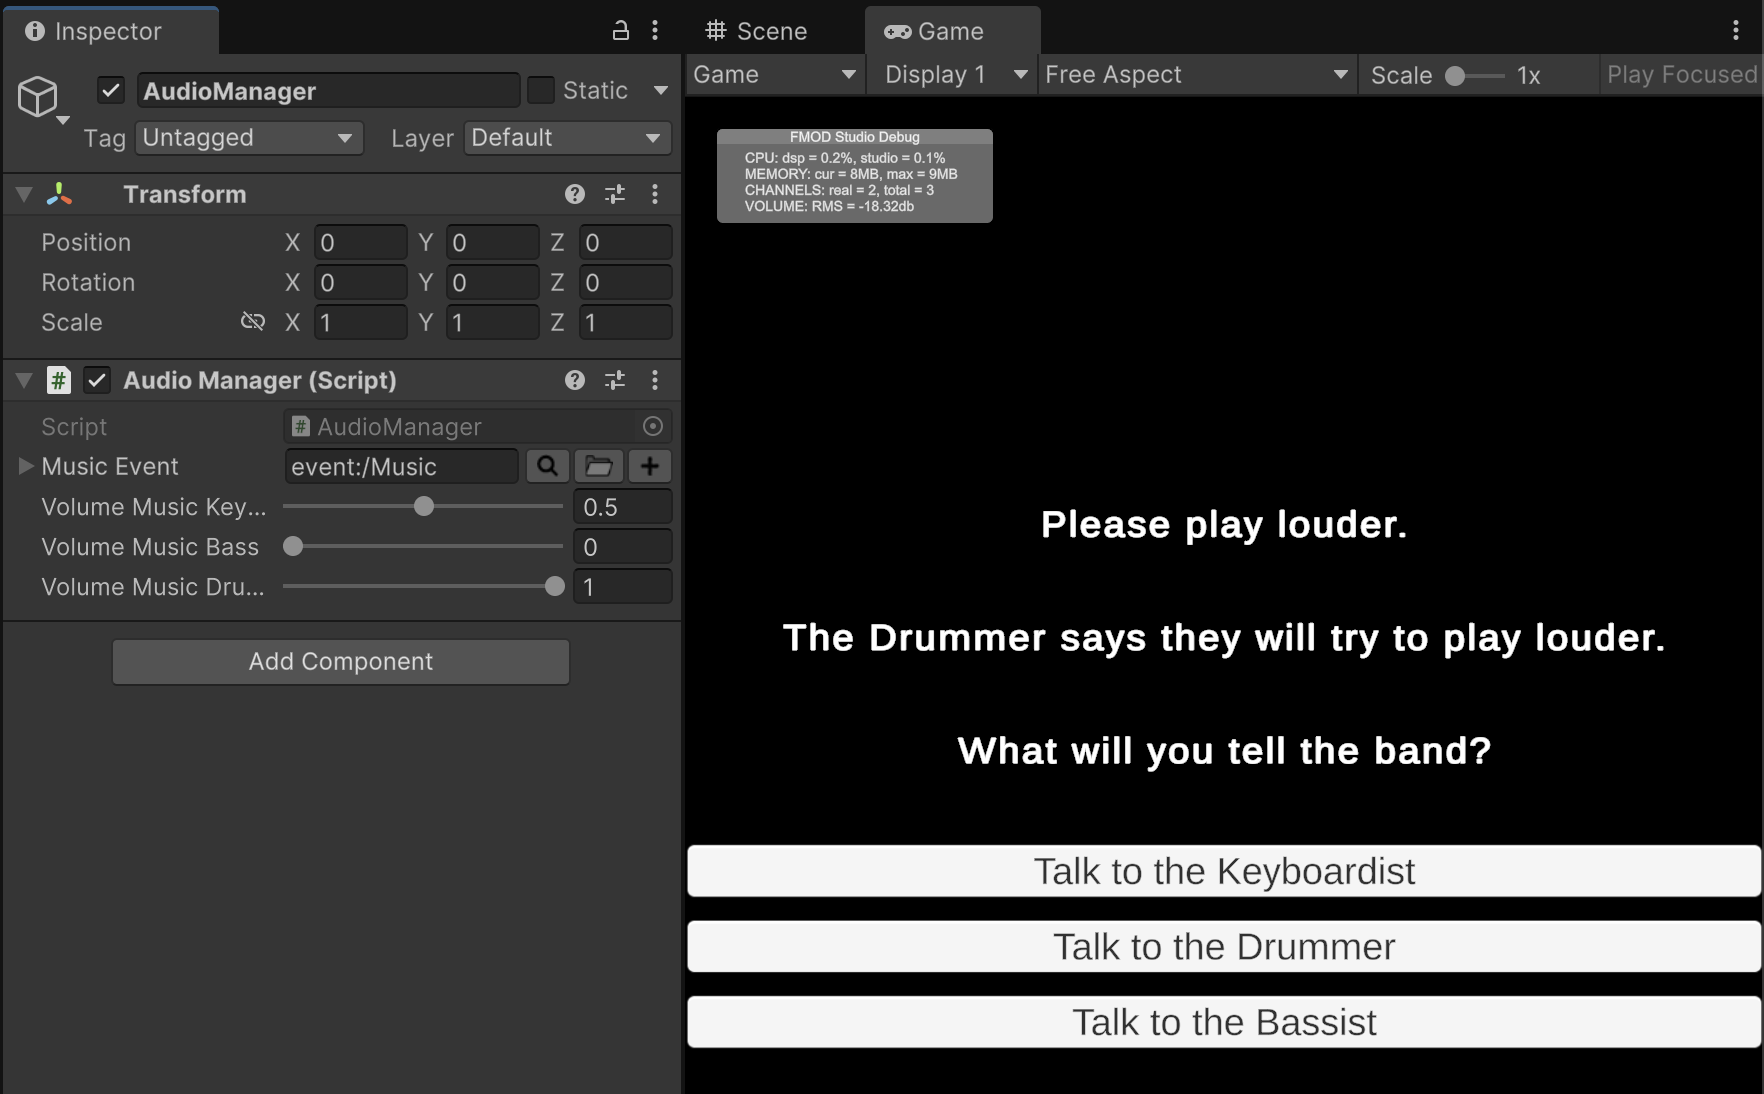
In this assignment, we will add music to the narrative gameplay of the prior exercise. This music will react with the progress of the player through the story, and the game will even perform the song differently based on the unique choices of any given player.

Installing FMOD

FMOD is an industry-standard commercial product but is free for educational, non-commercial, and indie developer use given certain revenue and project budget constraints. A free FMOD account must be created in order to complete this assignment.

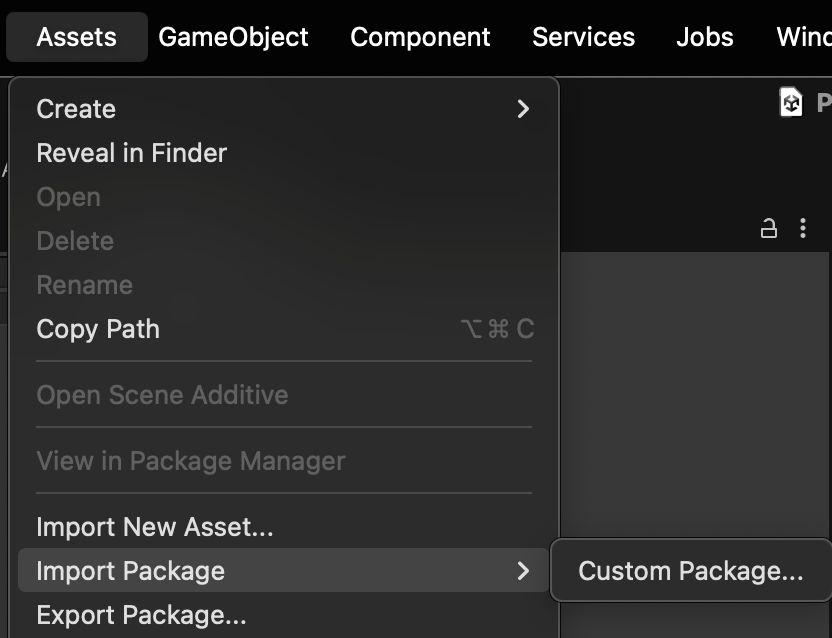
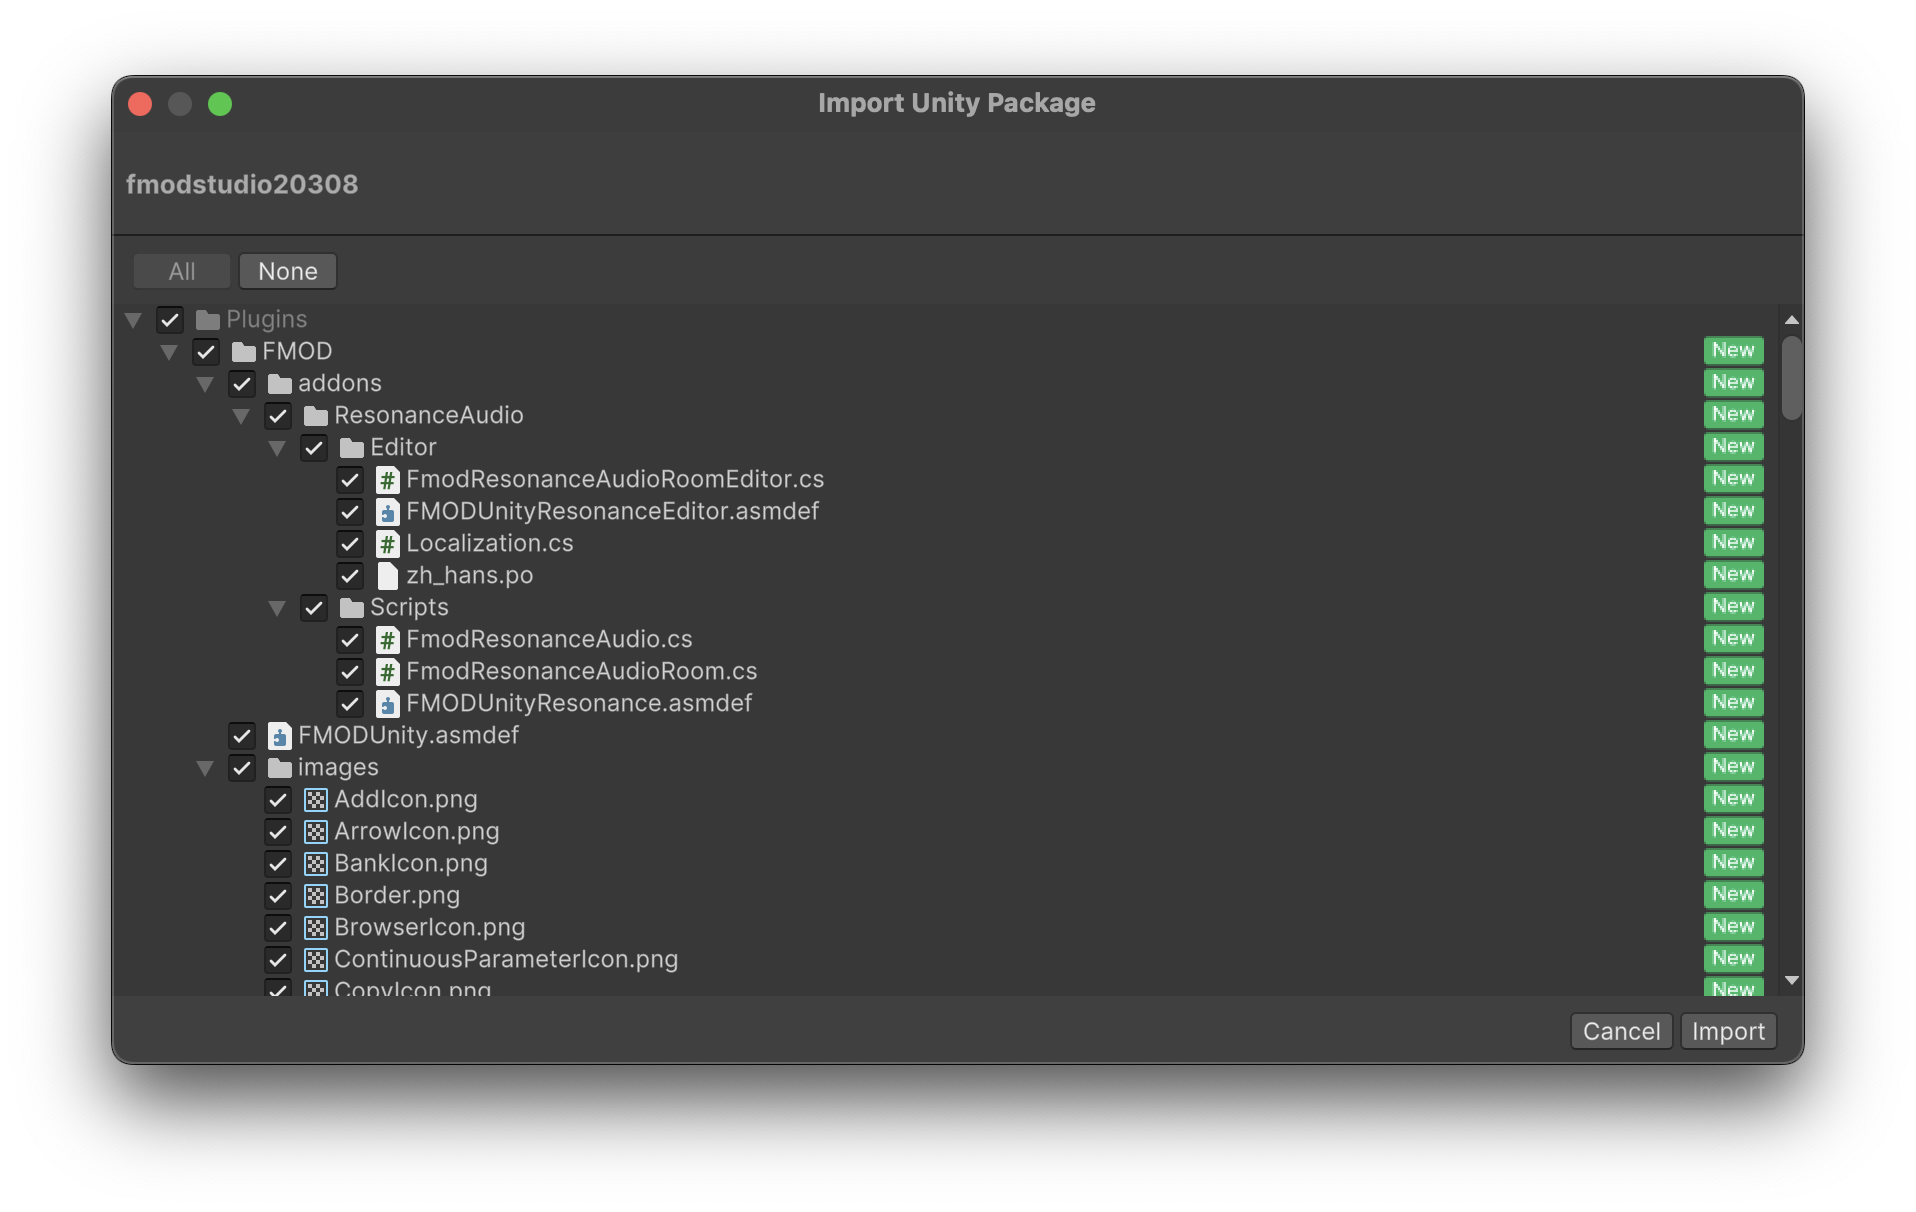
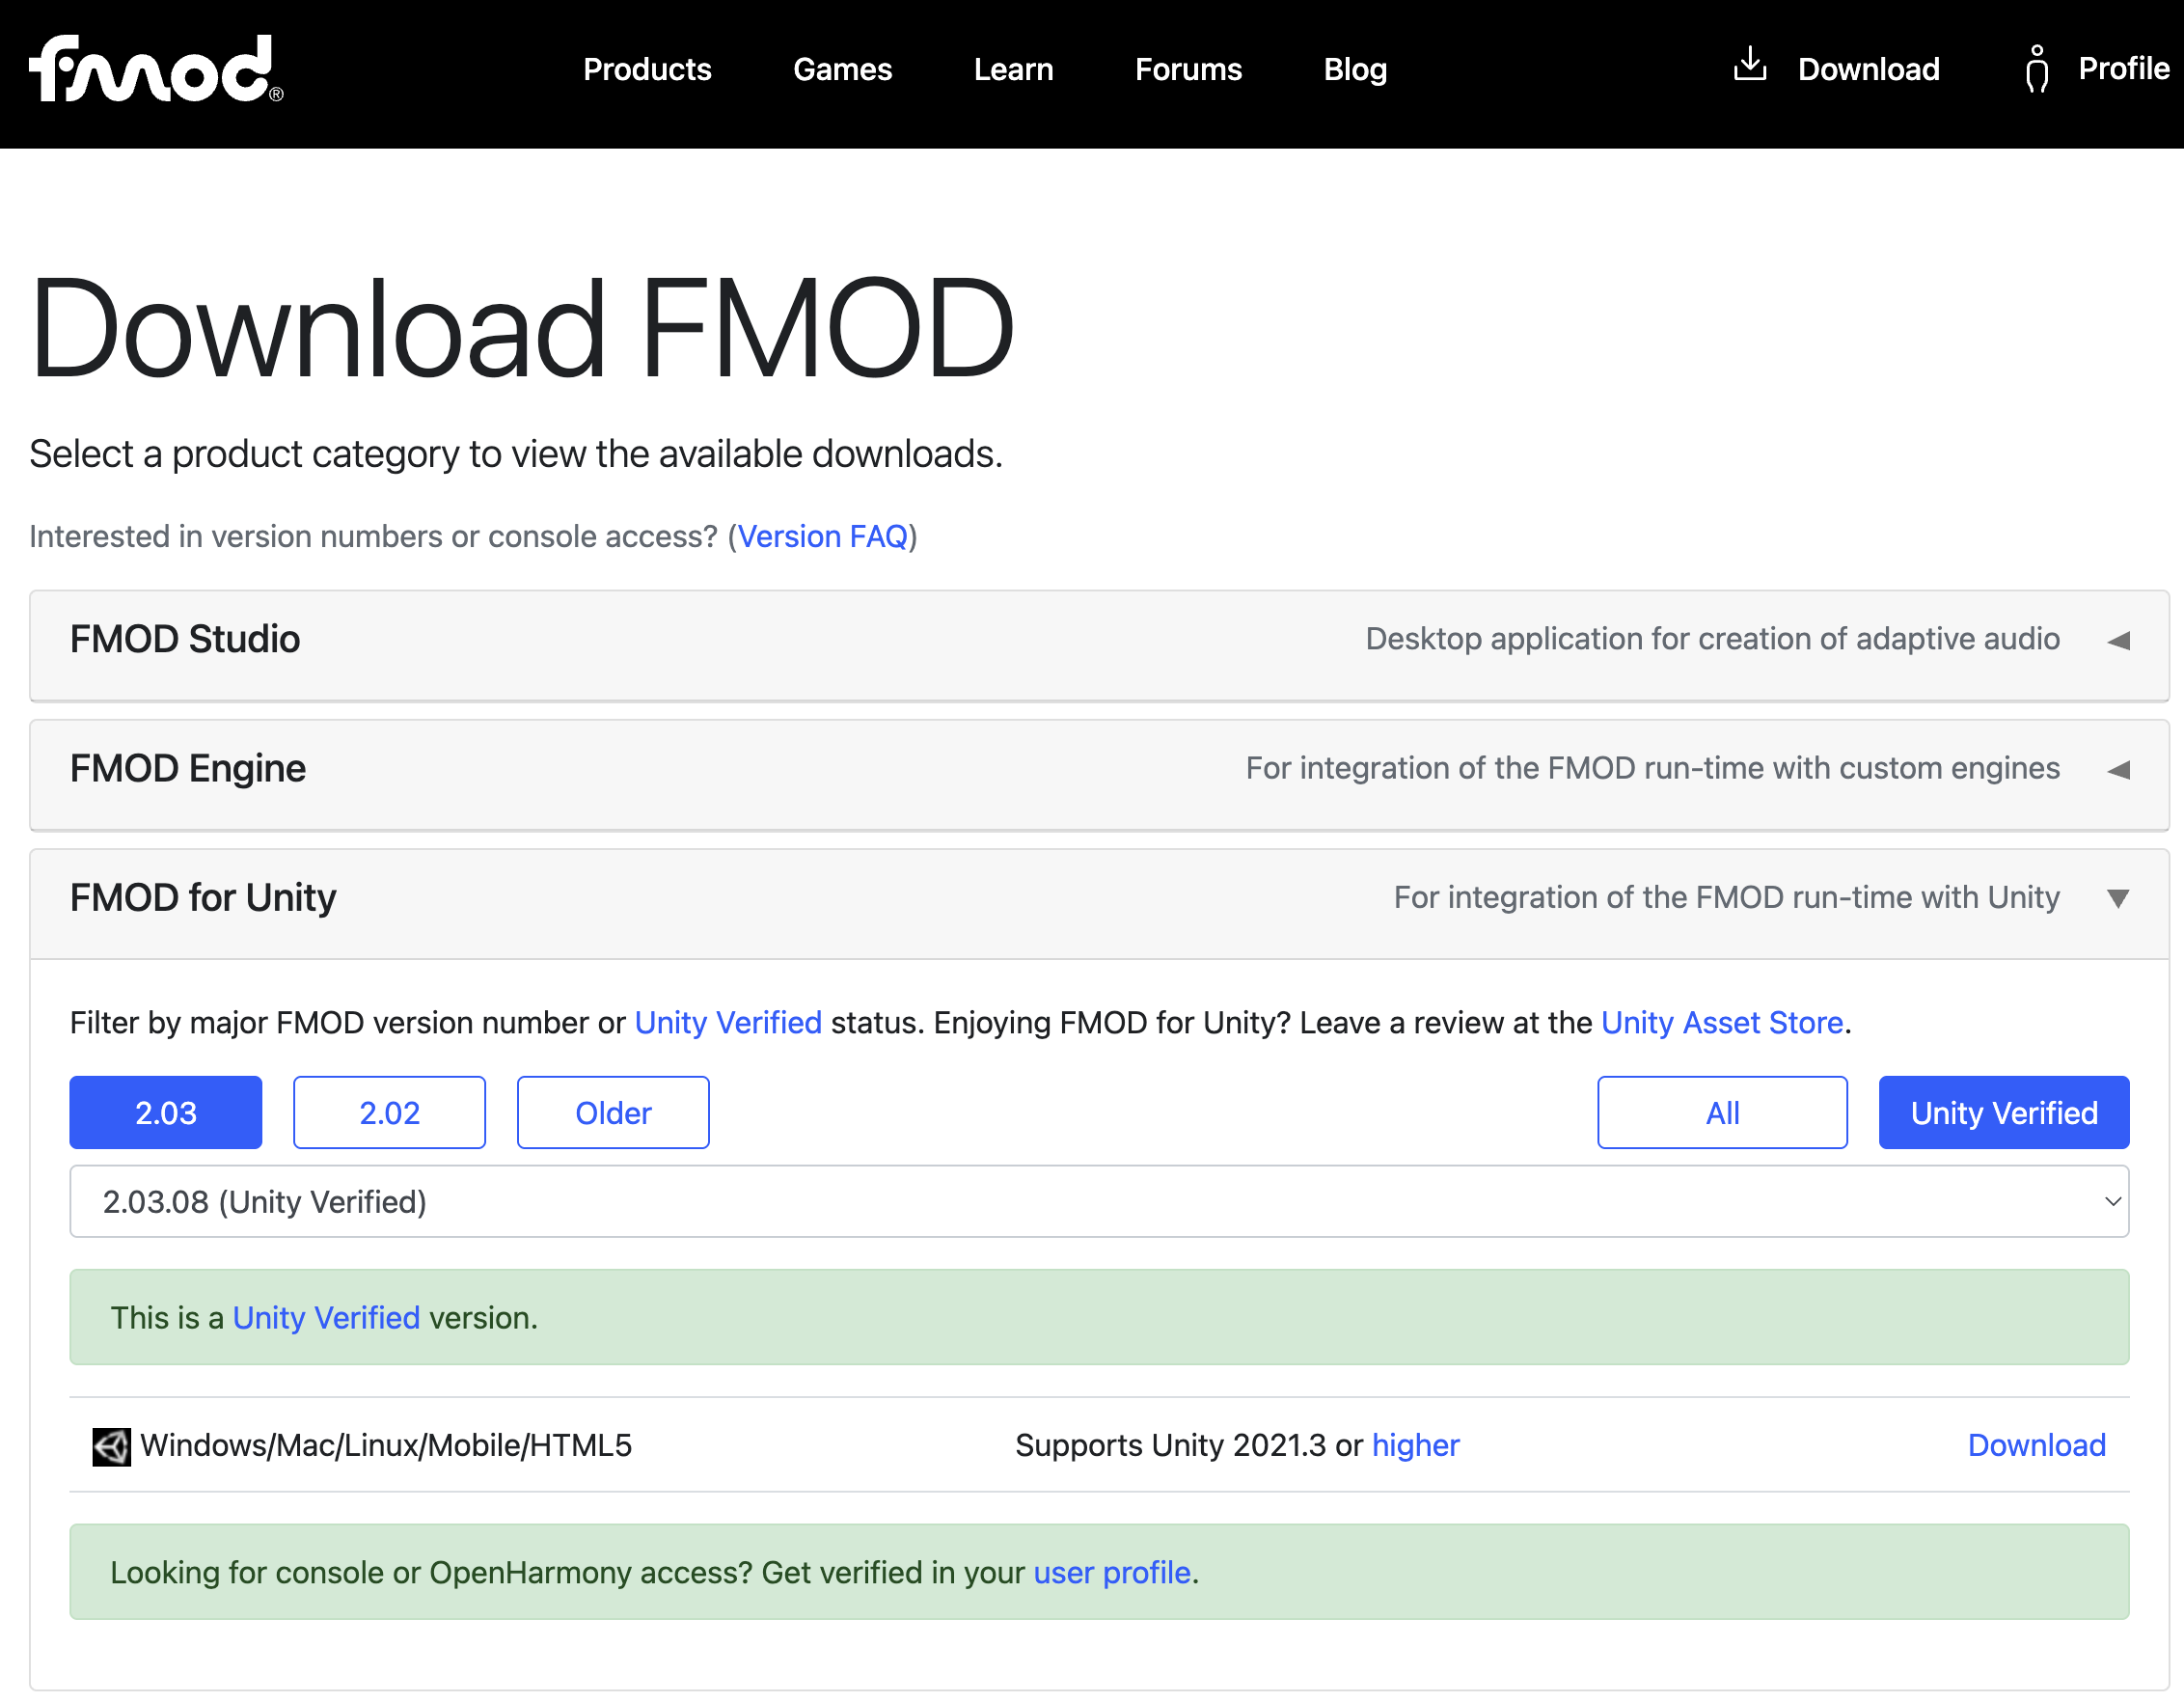
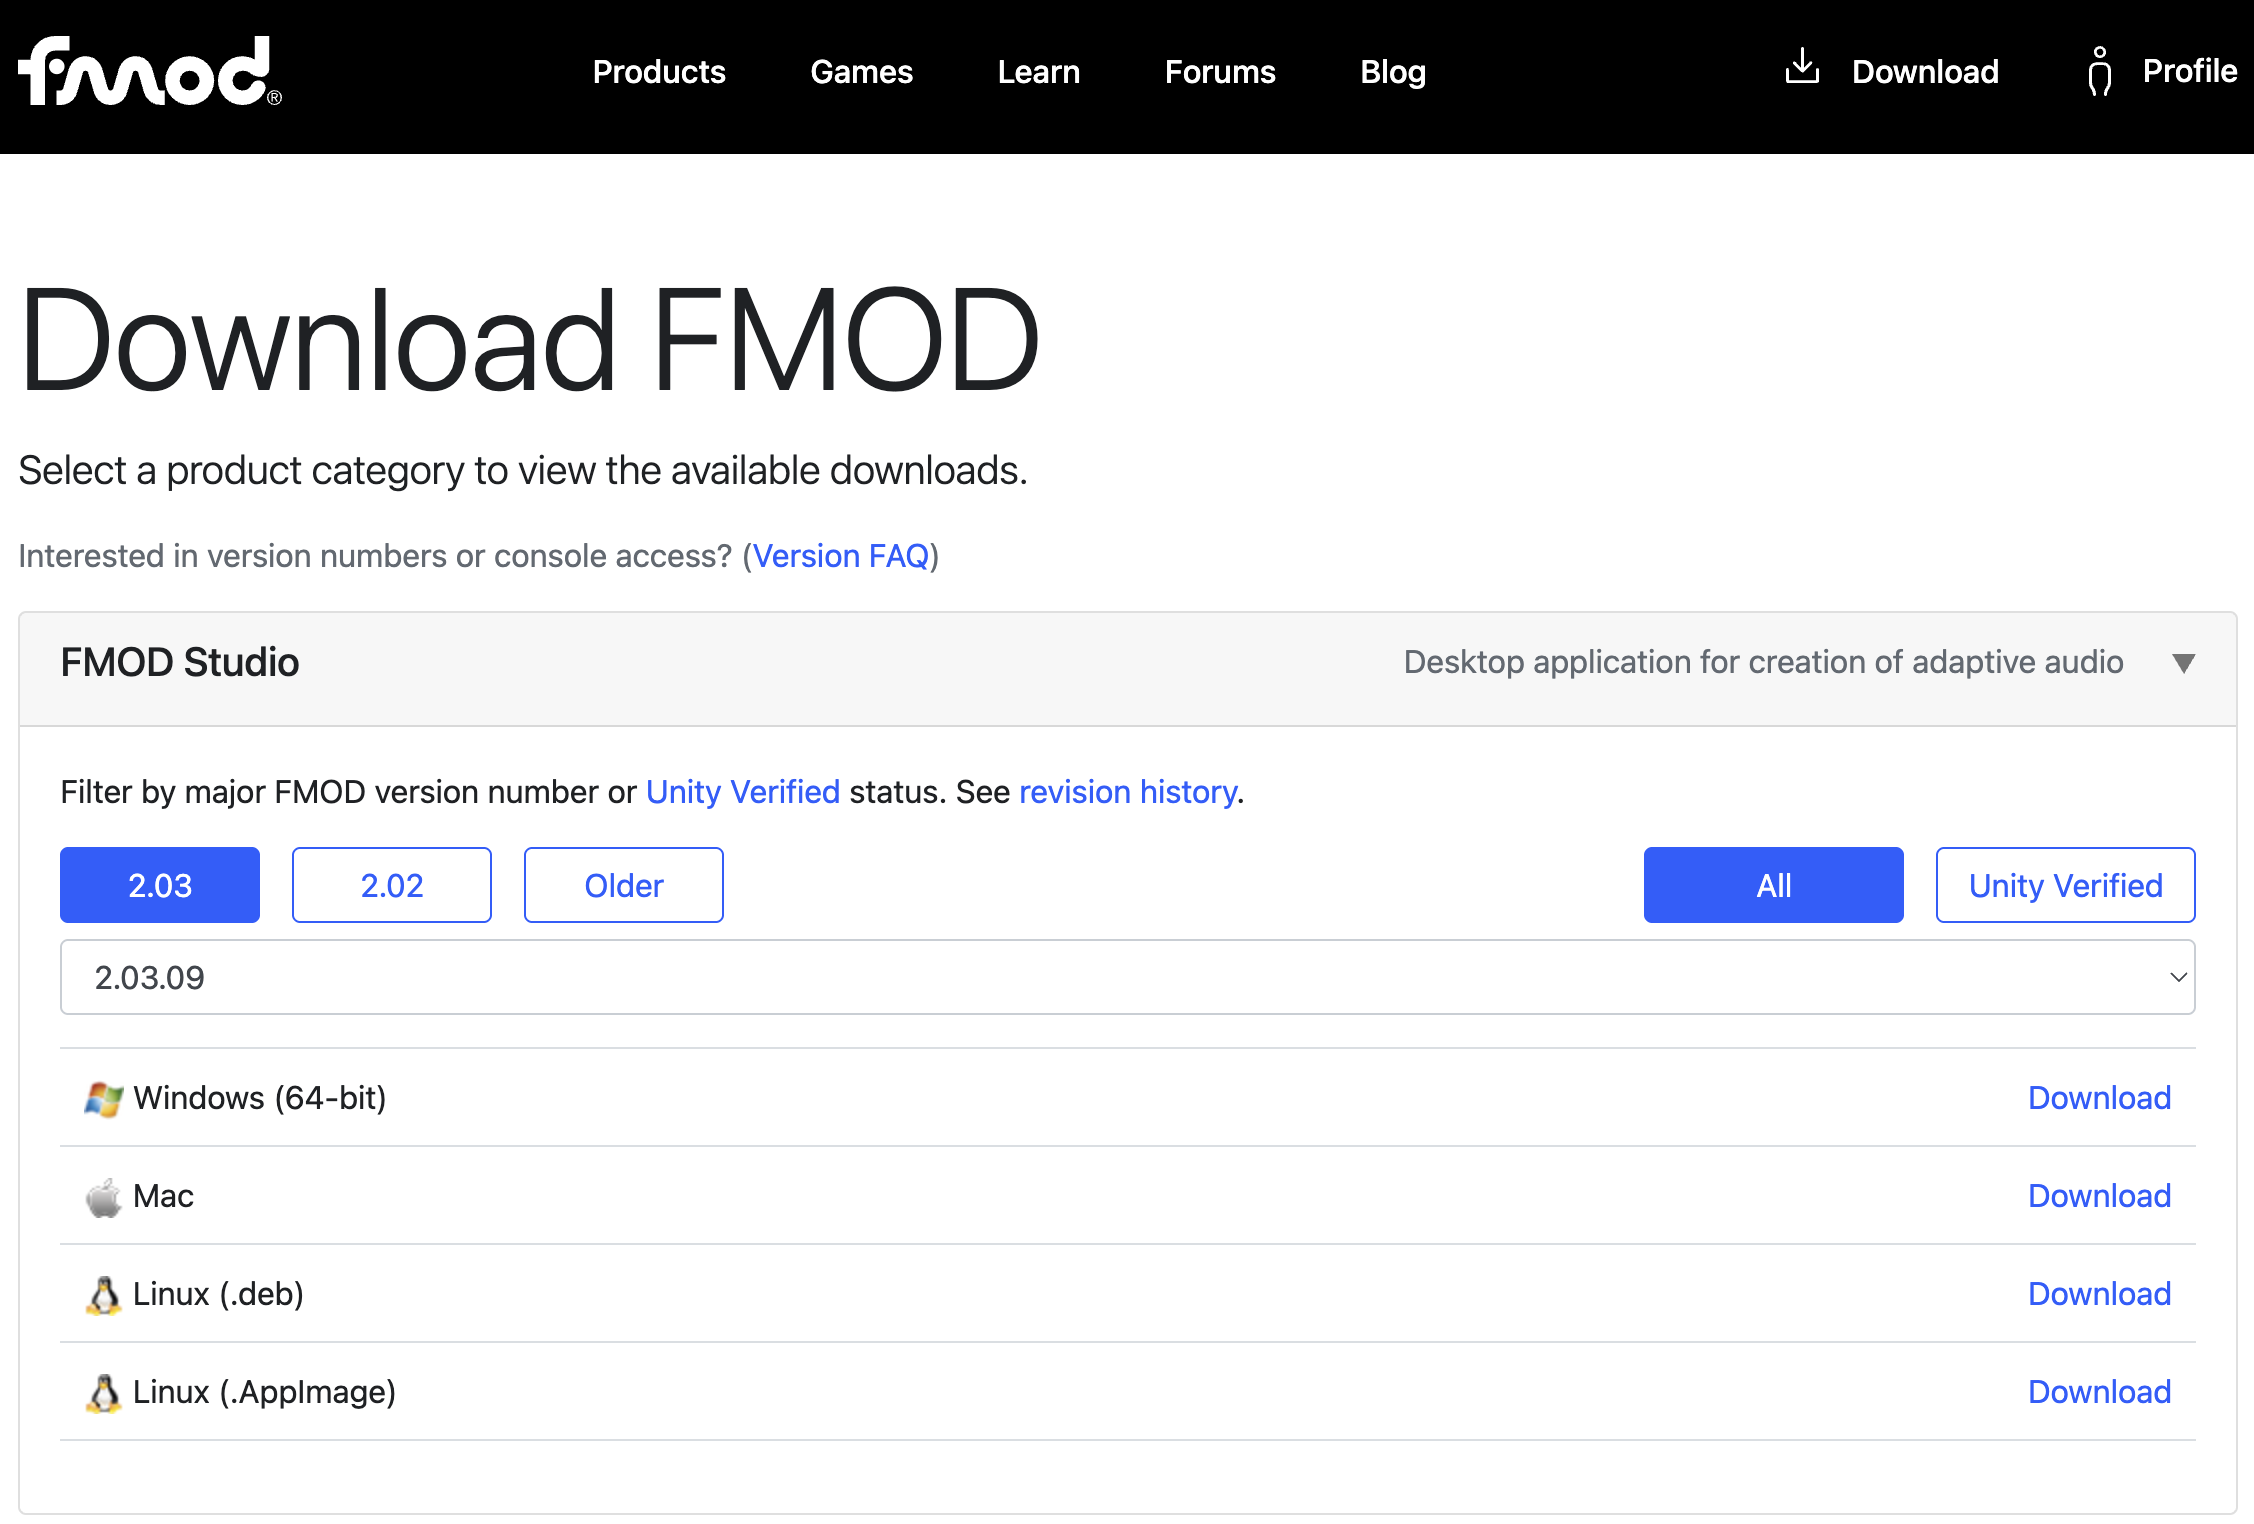
Once signed in, downloads appear at https://www.fmod.com/download. Students must download the "FMOD for Unity" plugin, which we will set up in an upcoming step. This UnityPackage has been archived in your semester's course files to help ensure consistency with the screenshots in these instructions, but the fast-paced evolution of game technologies may make the live website version required as Unity evolves.

Content for the FMOD Plugin is produced in an external tool called FMOD Studio. FMOD Studio can be downloaded from the same webpage, and its installation instructions will depend on your operating system. (FMOD Studio is too large to be archived as part of the course files, and it should be downloaded from the official website.)

Just like with Ink in the prior exercise, our process for this assignment comes in two halves: First, we will configure audio content in FMOD Studio outside of Unity; Finally, we will integrate our sound engineering into gameplay within Unity.

Starting a New FMOD Project

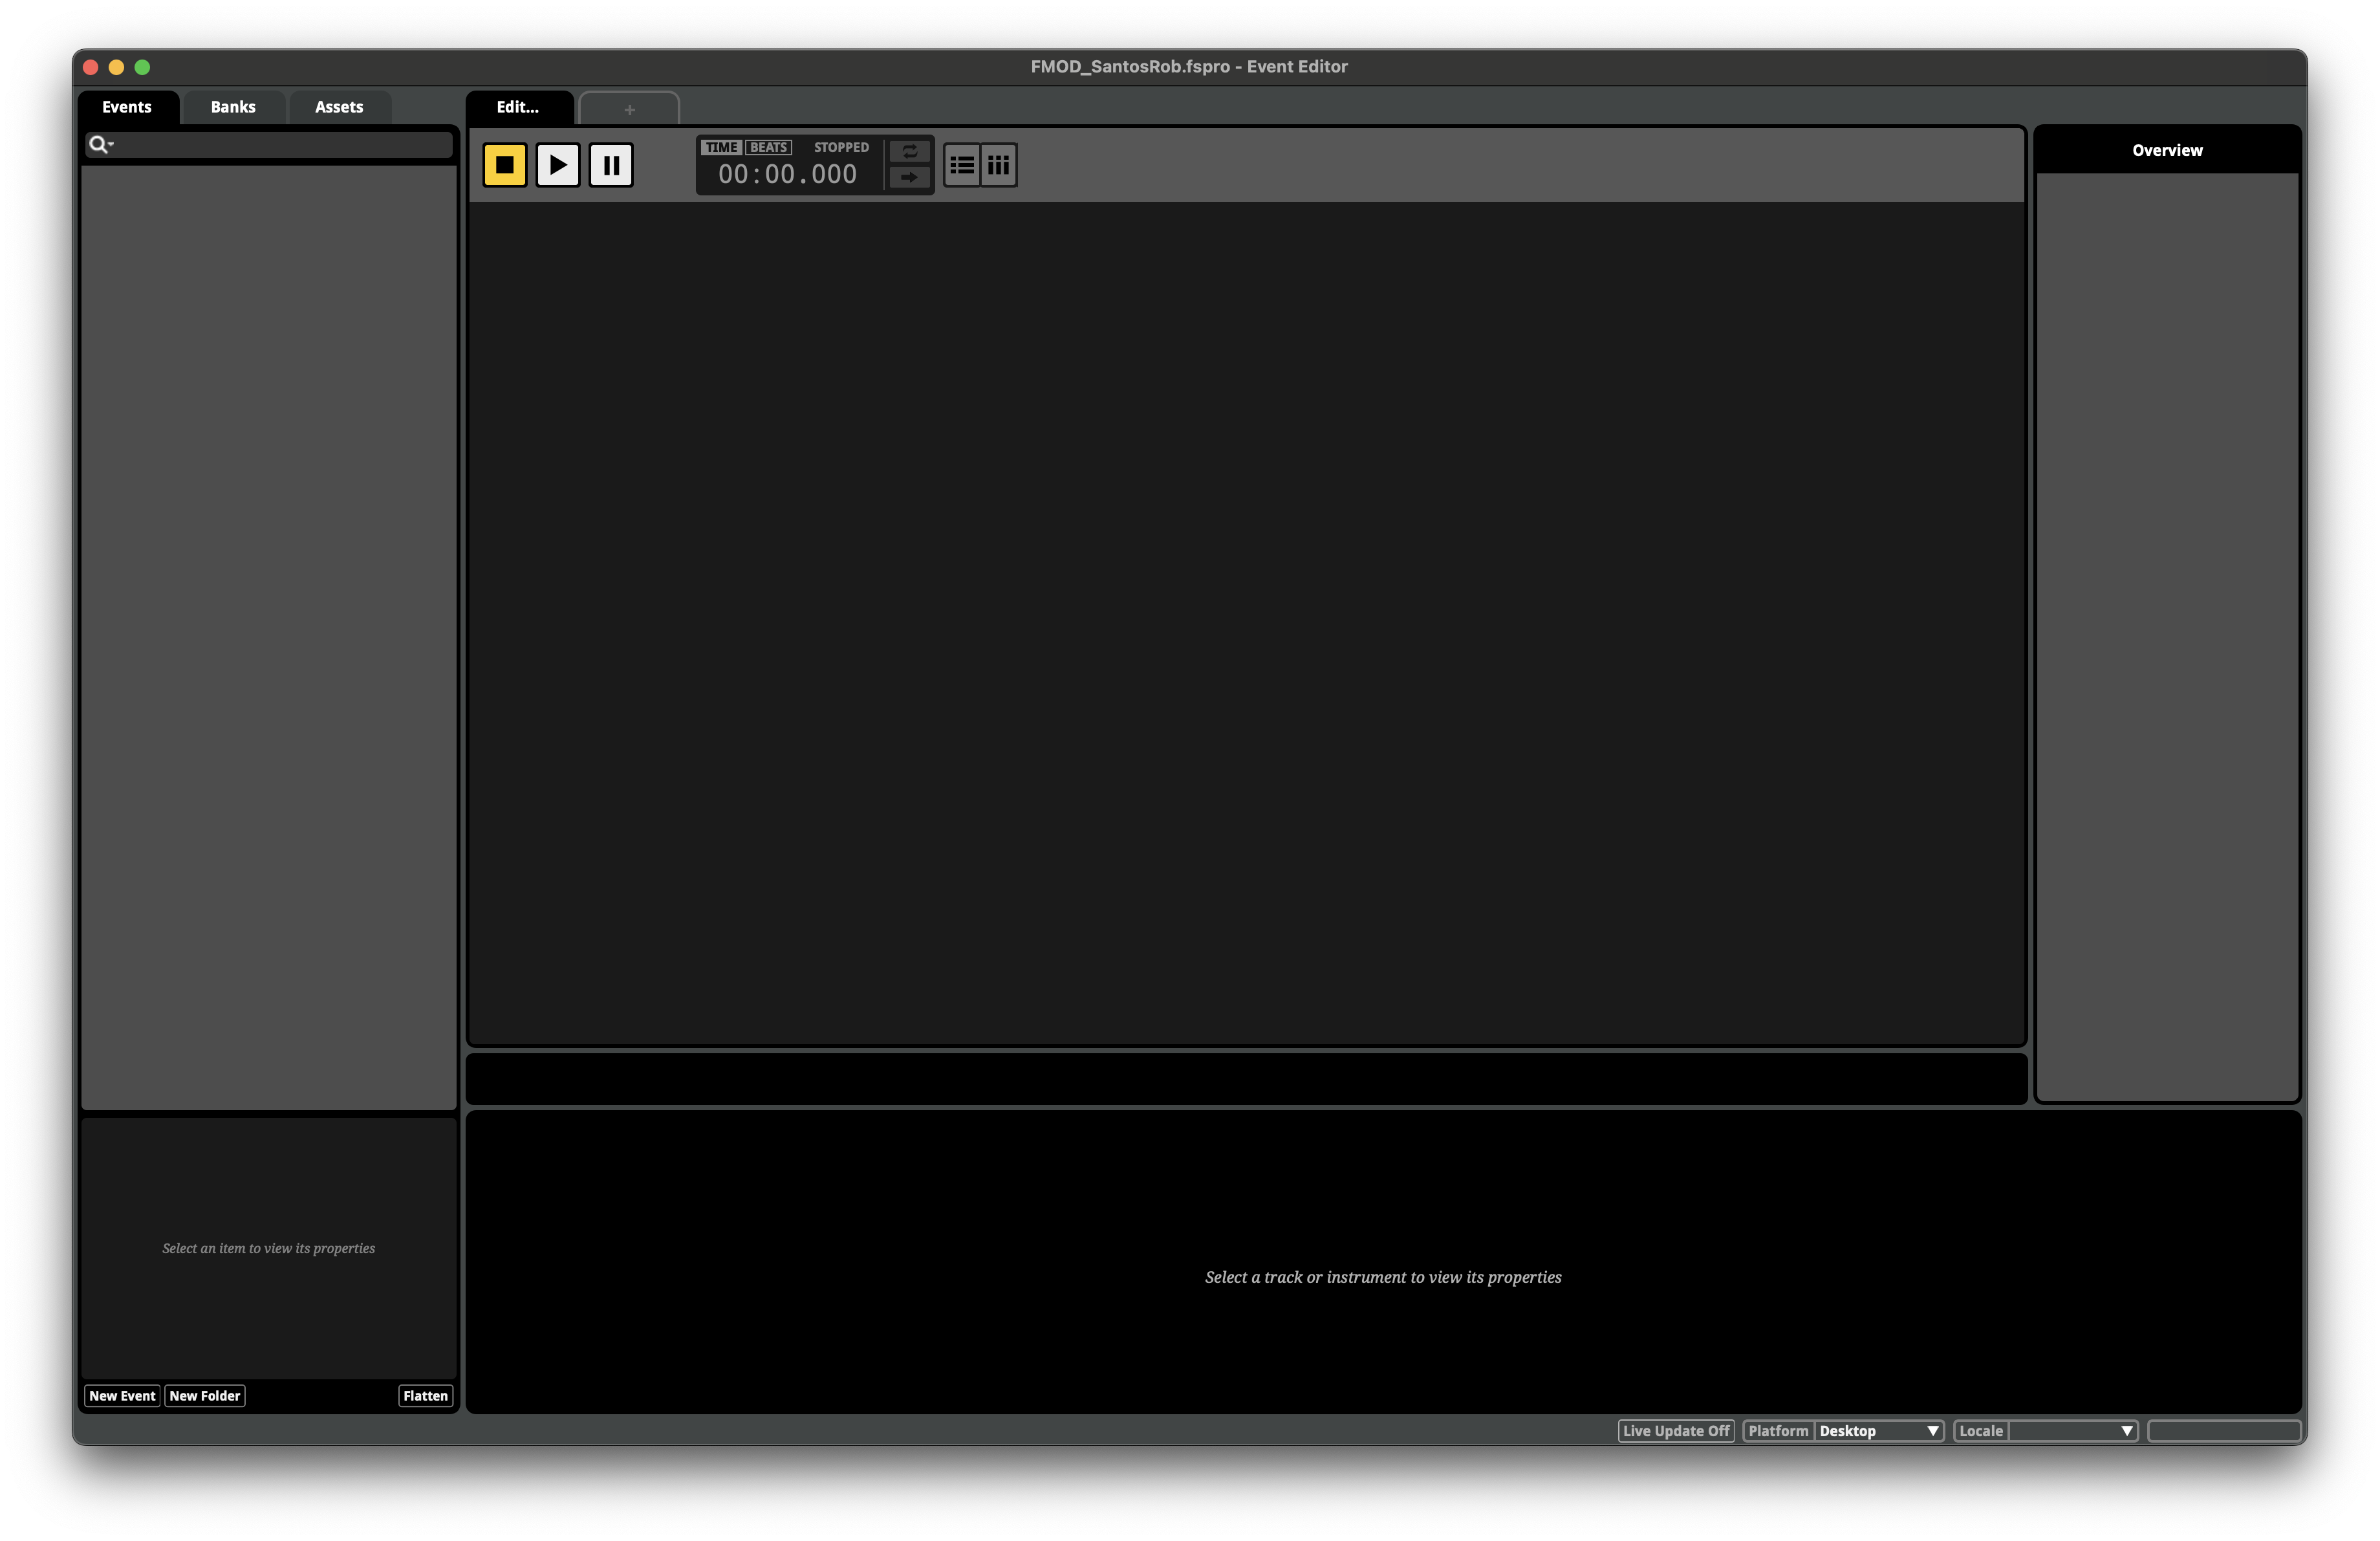
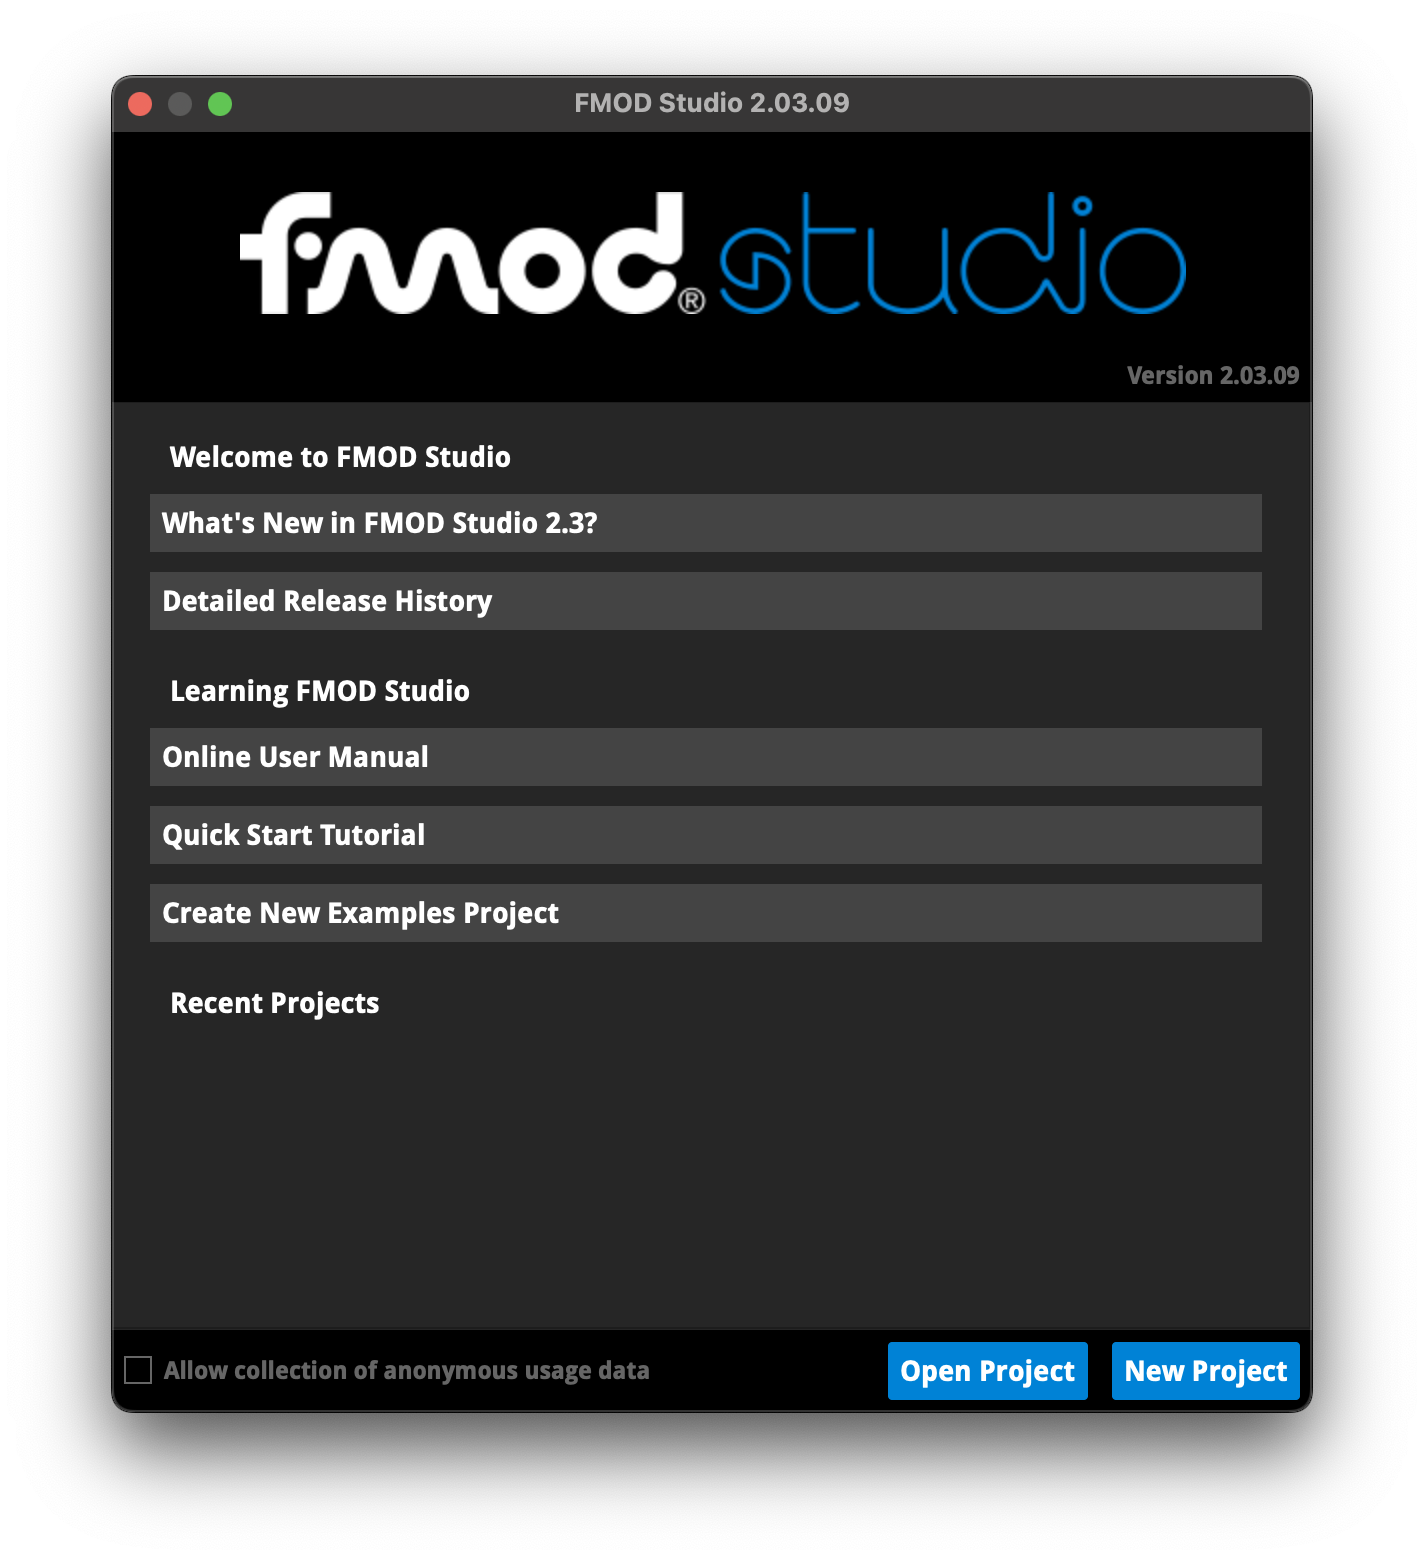
After installation, running FMOD Studio presents a welcome screen. Click the "New Project" button.

Using the File > "Save As..." menu, save your project adjacent your Unity project within the Git folder used by class. It is necessary that you upload your FMOD project for grading in the same repository as your Unity project.

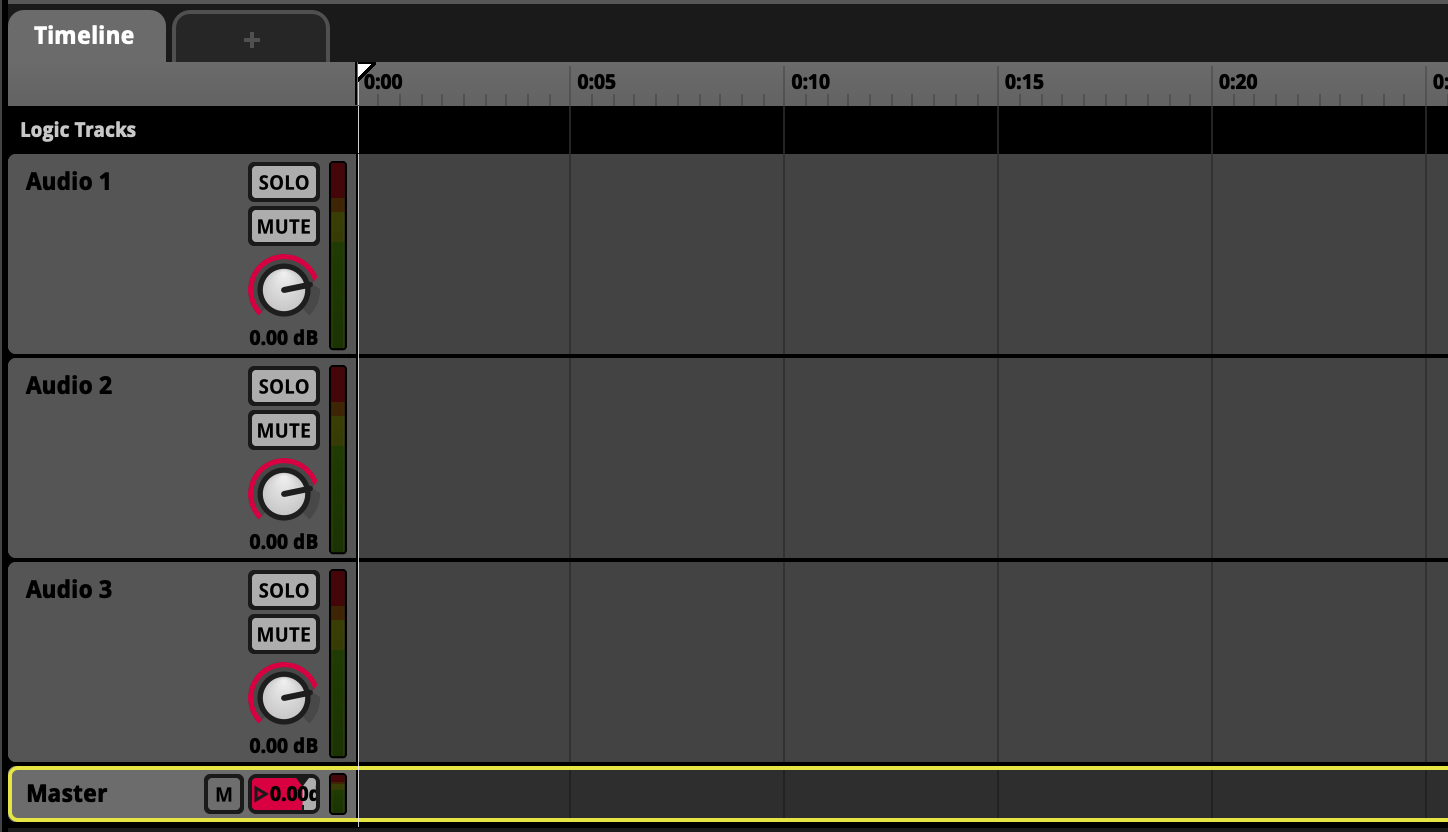
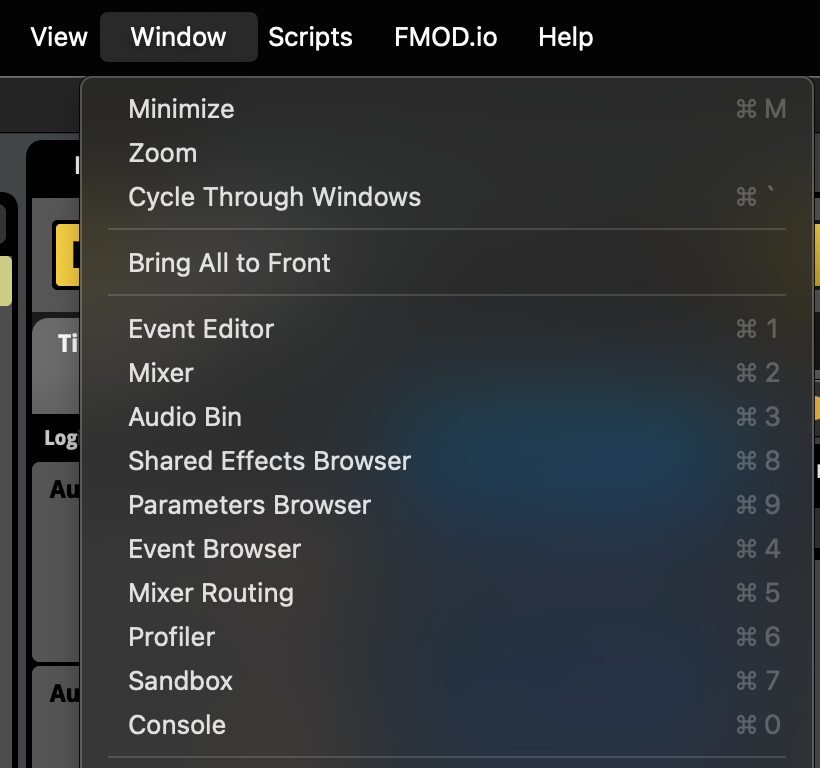
You may recall being a newcomer to the Unity interface when the plethora of windows might have been overwhelming and confusing. Similar to our process in the first semester, we will only concern ourselves with UI that is necessary to complete our introductory tasks. There are many features that we will simply ignore.

Import Audio Assets

In the course files is a folder named "Source Audio" containing a song "Frantic-Gameplay" split into three instrumental tracks saved as ".mp3" files. These files represent the separate bass, drums, and keyboard audio tracks which combine to form a single song.

The song "Frantic-Gameplay" is provided very generously by Eric Matyas of Soundimage.org under a free license documented at https://soundimage.org/sample-page/. An offline copy of that license is stored with the sound files in our course content.

In the upper-left region of FMOD Studio, click the Assets tab. Drag the three ".mp3" files into the sidebar to add them to the FMOD project.

Create an Event

In FMOD, any instance of a sound playing (whether it be a small sound effect or a long musical score) is tied to an Event. We will create a single "Music" event to use in our game.

In the upper-left region of FMOD Studio, click the Events tab. Right-click in the content area of the sidebar and click the "New Event" menu option.

Use "Music" as the name for the resulting Event.

Assign Event to Bank

The end result of working in FMOD Studio is to produce ".bank" files that are imported into Unity and processed by the game engine's FMOD plugin.

In the prior screenshot, you can see the label "#unassigned" in the UI for the "Music" Event. To include our "Music" Event in the ".bank" files exported into Unity, right-click the Event, hover over "Assign to Bank" and click the "Master" bank option.

You will see the "#unassigned" label disappear. You can also confirm by selecting the Banks tab in the upper-left region of FMOD Studio, where you will see Music included within the "Master" Bank.

Add Instruments

Return to the Events tab in the upper-left region of FMOD Studio. Click the "Music" Event to make it the active selection. In the center region of the application, notice the empty space with the text "Click to add a new sheet".

Clicking in this region reveals a few options. Select the "Add Timeline Sheet" option. The Timeline Sheet is the appropriate choice for any sound where the progress of audio over time is relevant. For example, you will see soon that we would like to loop our music after enough time has passed.

The Timeline Sheet has a UI featuring a ruler marking the passage of time. The rows below the ruler represent separate audio tracks. At first, we only have the "Master" track. Right-click the "Master" track and select the option "Add Audio Track".

Repeat adding an audio track until you have three new audio tracks besides the "Master" track.

Switch to the Assets tab in the upper-left region of FMOD Studio. Drag each of the three asset files one below the other onto the separate audio tracks. Make sure all three audio tracks are left-aligned at Time 0.

You can hit the Play Arrow button to preview what the song sounds like with all three instruments playing in unison. You can also drag the circular knob on any audio track to reduce its volume and hear what the song might sound like with instruments missing. Make sure to reset the volume of all three tracks to the default 0.00 dB after any experimentation. You may also that the song abruptly ends at the end of the timeline.

We would like the music to loop, so that it plays continously as the player explores the gameplay experience. Right-click the row above the audio tracks labeled "Logic Tracks" and select the "Add Loop Region" option.

This adds a blue bar within the Logic Tracks row. Click the edges of this bar to expand the loop region to align with the beginning and end of the audio files.

Previewing the song now should reveal that music playback loops to the beginning once we reach the end of the timeline. (The actual music is not a perfect loop, so an abrupt change in the music is expected, but the music should play continuously without any silence.)

Add Parameters

We would like to programmatically automate adjusting the volume of each instrument as you may have done manually while experimenting in the prior step. This implies a sort of programmatic logic in which the volume of the audio should react to changes in some sort of variable. You may recall using Unity's Animator tool in prior semesters. Although the Animator tool is built-in to Unity, it compartmentalizes logic in a similar fashion to Ink or FMOD. Specialist logic can be built within the tool itself, and data is passed into the tool from the rest of Unity through parameters. (Animator screenshot provided below just as a reminder. We are not actually building anything with the Animator in this assignment.)

Similarly, we will set up Parameters inside FMOD that will allow Unity to share information that will influence FMOD's execution.

In the menu bar, click Window > Parameters Browser.

Click the "New Parameter" button in the bottom-left corner of the Parameters Browser.

This reveals another window where you can configure the parameter. Name this first parameter "volumeBass" and select a type of "User: Continuous" with a range of 0 to 1. FMOD's parameter options of Continuous, Discrete, and Label are equivalent to the variable types float, integer, and string, respectively. We also want the initial value of 0 because our band is silent at the beginning of the game. With these settings, Unity will be able to pass to FMOD a float measurement of 0.0 to 1.0 describing the desired volume for the Bass audio track. Click "OK" to save this parameter.

Repeat adding parameters with these same settings until we have volumeBass, volumeDrums, and volumeKeyboard.

By default, parameter changes can be so abrupt that the resulting volume changes will feel jarring. For example, if volumeBass was set to 0, we would prefer the Bass audio to fade away rather than suddenly disappear. To produce this fade effect, the parameter needs to add a "Seek Modulator" which will cause that parameter to transition to the target value smoothly over time instead of instantaneously. In the Parameters Browser, click volumeBass to select it. Near the bottom of this window is a widget portraying the volumeBass parameter. Right-click the "0.00" value text of this widget, and select Add Modulation > Seek.

This adds another widget for the Seek Modulator affecting the volumeBass parameter. Instead of "Instant", adjust the Seek Speed to 3.00/s.

Repeat this process to add a Seek Modulator to volumeDrums...

... and to volumeKeyboard. You can close the Parameters Browser after this last Seek Modulator.

In order to influence the volume of an instrument's audio track, we will add a Gain Effect. Back in the main Timeline screen, click the audio track header (the left part) for the Bass instrument. This will cause some widgets to appear near the bottom of the screen. Click the section to add post-fader effects and choose Add Effect > FMOD Gain.

To control the Bass instrument's Gain Effect with the volumeBass parameter, right-click the knob of the Gain widget and choose "Add Automation".

In the expanded UI, click "Add Curve" and select volumeBass from the parameters.

Click on the dotted red-line to add two points to the curve. Adjust the points, so that a volumeBass value of 0 (on the horizontal axis) results in a gain of -infinity dB (on the vertical axis), while a volumeBass value of 1 results in a gain of 0. (A gain of 0 means no modification of our default volume, which would cause the instrument to play normally. Meanwhile, a negative infinity gain would mute the instrument.)

Repeat adding a Gain Effect using volumeDrums parameter to the Drums audio track...

...and a Gain Effect using the volumeKeyboard parameter to the Keyboard audio track.

To confirm that everything has been hooked up properly, click the Play Arrow to preview the music. Notice that the three instrument parameters are shown in the top-center of the interface. Click-and-drag on each of the parameters to test a range of values and confirm that the matching instrument is affected. Experiment with different volume mixes amongst the instruments to get an idea of the intended experience we will create in Unity.

Building Audio Banks

All of the necessary sound engineering logic within FMOD is complete. To prepare the Event Banks for use in Unity, from the menu bar, click File > Build.

This will output multiple ".bank" files in your FMOD project. We do not need to move these into Unity manually, because we will link Unity to the entire FMOD project in an upcoming step.

FMOD Plugin

While different FMOD Banks may need to be exported to support different platforms, compatibility is based on a particular engine having an FMOD plugin.

The course files supply you with "fmodstudio20308.unitypackage" which is the FMOD Plugin version at the time this tutorial was produced. If it becomes necessary to use a newer version, the latest official plugin can be found at https://www.fmod.com/download.

Do NOT drag the UnityPackage into your /Assets/ folder. UnityPackages must be imported from the Unity Editor application menu. At the top of the Unity Editor window, click Assets > Import Package > Custom Package...

Select the FMOD UnityPackage, and you will see a rather lengthy list of files to import. As this is the official package, it should be safe to import all files.

You may see several progress bars while the files import and compile. Once compilation has completed, FMOD presents you with a welcome screen. The goal of this step is to proceed through the FMOD Setup Wizard resolving each step with a green progress box. There are a lot of steps, but most of the process is automatic. Click the "Start" button.

Both options should have green checkboxes by default. Click "Next" to allow FMOD to keep its own files and code updated and organized.

We will be linking the entire FMOD Studio project instead of just a build folder. Select the "FMOD Studio Project" button and...

...open your FMOD Studio project ".fspro" file.

You should see a green checkbox confirming that you've selected a valid project.

FMOD uses its own audio listener. Click the button to replace the Unity listener with the FMOD Audio Listener in your scene.

The screen should update to confirm the change, and you can click Next.

FMOD is its own audio engine, so you should disable Unity's built-in audio.

The screen updates to confirm the change. Click Next.

We have no existing audio work in this project. Click Next.

Update your Git repository's ".gitignore" and ".gitattributes" files for FMOD support by adding the displayed text.

Everything should show green checkboxes and you can click the "Close" button.

Audio Manager

Now that FMOD has been set up in Unity, we can write an Audio Manager to control and send data to FMOD. Audio Manager also helps bridge the gap between Ink and FMOD.

Create a new C# file named AudioManager.cs in the the project's /Assets/Scripts/ folder.

In the scene Hierarchy, create an empty object named "AudioManager" and attach the AudioManager.cs component to the same game object.

AudioManager.cs

using UnityEngine;
using FMODUnity;
using FMOD.Studio;

public class AudioManager : MonoBehaviour
{
	public static AudioManager instance;
	
	// Configuration
	public EventReference musicEvent;
	
	// State Tracking
	[Range(0f, 1f)]
	public float volumeMusicKeyboard;
	[Range(0f, 1f)]
	public float volumeMusicBass;
	[Range(0f, 1f)]
	public float volumeMusicDrums;
	
	// FMOD Instances
	EventInstance musicEventInstance;
	
	// Methods
	void Awake() {
		instance = this;
	}

	void Start() {
		musicEventInstance = RuntimeManager.CreateInstance(musicEvent);
		musicEventInstance.start();
	}

	void Update() {
		musicEventInstance.setParameterByName("volumeKeyboard", volumeMusicKeyboard);
		musicEventInstance.setParameterByName("volumeBass", volumeMusicBass);
		musicEventInstance.setParameterByName("volumeDrums", volumeMusicDrums);
	}

	void CleanUp() {
		musicEventInstance.stop(FMOD.Studio.STOP_MODE.IMMEDIATE);
		musicEventInstance.release();
	}

	void OnDestroy() {
		CleanUp();
	}
	
	public void StartKeyboard() {
		volumeMusicKeyboard = 1f;
	}
	
	public void StartDrums() {
		volumeMusicDrums = 1f;
	}
	
	public void StartBass() {
		volumeMusicBass = 1f;
	}
	
	public void VolumeDownKeyboard() {
		volumeMusicKeyboard -= 0.5f;
		if(volumeMusicKeyboard < 0) {
			volumeMusicKeyboard = 0f;
		}
	}
	
	public void VolumeUpKeyboard() {
		volumeMusicKeyboard += 0.5f;
		if(volumeMusicKeyboard > 1) {
			volumeMusicKeyboard = 1f;
		}
	}

	public void VolumeDownDrums() {
		volumeMusicDrums -= 0.5f;
		if(volumeMusicDrums < 0) {
			volumeMusicDrums = 0f;
		}
	}

	public void VolumeUpDrums() {
		volumeMusicDrums += 0.5f;
		if(volumeMusicDrums > 1) {
			volumeMusicDrums = 1f;
		}
	}

	public void VolumeDownBass() {
		volumeMusicBass -= 0.5f;
		if(volumeMusicBass < 0) {
			volumeMusicBass = 0f;
		}
	}

	public void VolumeUpBass() {
		volumeMusicBass += 0.5f;
		if(volumeMusicBass > 1) {
			volumeMusicBass = 1f;
		}
	}
}
				

FMOD has its own using statements to provide access to the plugin's functionality (Lines 2 and 3)

Having a static instance variable makes it easier to access AudioManager from other files, such as InkPlayer. (Line 7)

An EventReference variable type lets us select from any FMOD events that were part of the Banks there were built. (Line 10)

We use three variables to track the configured volume of each of the instruments. To match the FMOD parameters, the Inspector UI has been configured to render a slider with a range of 0 to 1. The positions of these sliders can help visualize whether the interactivity of this assignment is working. (Lines 13 to 18)

An FMOD Event is played by creating an instance of it, in the same manner that an instance of an object is created from a class in object-oriented programming. (Line 21)

At the Start of our AudioManager's object life cycle, we create an instance of the "Music" FMOD Event to control. We start playing the "Music" event right away, though you may remember that by default, our volume parameters start all instruments muted because we haven't met the bandmates yet in the story. (Lines 28 to 31)

Every Update event of the game, we pass each instrument's volume slider value into FMOD through the use of parameters. This works just like Animator parameters. (Lines 33 to 37)

It is necessary to clean up FMOD Event Instances, so that the audio stops at the appropriate times, such as when objects are destroyed or the scene changes. (Lines 39 to 46)

These three functions correspond to the three external functions in Ink that are triggered when you first meet a bandmate and they join your party. As soon as you meet them in the story, their instrument begins playing, which makes for a unique build up of music depending on what order you meet the characters. (Lines 48 to 58)

These six functions also correspond to external functions hooked up in the Ink story. You can ask each of the three bandmates to play quieter or louder. Three bandmates with two choices totals to six functions. Volume can never exceed 1 or drop below 0. Each instrument can play full volume, half volume, or mute. (Lines 60 to 100)

Inspect the AudioManager game object in the scene. For the Music Event property, click the magnifying glass and select the "Music" event that was exported in your FMOD Bank. This configures which FMOD Event our code controls.

It's important that the sliders start at 0 because none of the instruments should be playing until you meet the bandmates. You should test what happens when you modify the sliders during gameplay. The matching instrument should respond to changes in its volume, and all three instruments should be able to play in unison with each other. Make sure to always reset the sliders so they start gameplay at 0.

Gameplay Integration

The last step is to integrate AudioManager with InkPlayer, so that the volume changes in response to the narrative instead of us manually adjusting the sliders.

Last assignment, we left several placeholders that make it easy to perform this integration.

InkPlayer.cs

	void StartStory() {
		// Creates a new Story object with the compiled story for us to play
		story = new Story(inkJSONAsset.text);

		// Respond to the External Functions written into our Ink story
		story.BindExternalFunction("StartKeyboard", StartKeyboard);
		story.BindExternalFunction("StartDrums", StartDrums);
		story.BindExternalFunction("StartBass", StartBass);

		// We will add audio functions here in an upcoming assignment
		story.BindExternalFunction("VolumeDownKeyboard", AudioManager.instance.VolumeDownKeyboard);
		story.BindExternalFunction("VolumeUpKeyboard", AudioManager.instance.VolumeUpKeyboard);
		story.BindExternalFunction("VolumeDownDrums", AudioManager.instance.VolumeDownDrums);
		story.BindExternalFunction("VolumeUpDrums", AudioManager.instance.VolumeUpDrums);
		story.BindExternalFunction("VolumeDownBass", AudioManager.instance.VolumeDownBass);
		story.BindExternalFunction("VolumeUpBass", AudioManager.instance.VolumeUpBass);

		// Update UI visuals
		RefreshView();
	}

	void StartKeyboard() {
		hasKeyboard = true;
		AudioManager.instance.StartKeyboard();
	}

	void StartDrums() {
		hasDrums = true;
		AudioManager.instance.StartDrums();
	}

	void StartBass() {
		hasBass = true;
		AudioManager.instance.StartBass();
	}
				

Play through the Ink narrative once again, testing all of the story moments. Observe how the music adapts to the dialogue choices of the player.

Save and Test

Playtest to ensure all interactions work as expected and that the addition of any new features hasn’t broken any earlier interactions.

Submit Assignment

SAVE any open files or scenes.

Submit your assignment for grading following the instructions supplied for your particular classroom.