VG3, Quest 6 - Randomly Generated Landscapes

Download Files

Supporting files for VG3 quests are part of a single archive that you can download here.

Defining Terrain Type

This assignment builds directly upon the random noise generation foundation in the prior assignment. You must have completed those previous steps for these instructions to work.

So far, we have been describing random terrain generation through analogy, whether it be with sound waves or grayscale noise maps.

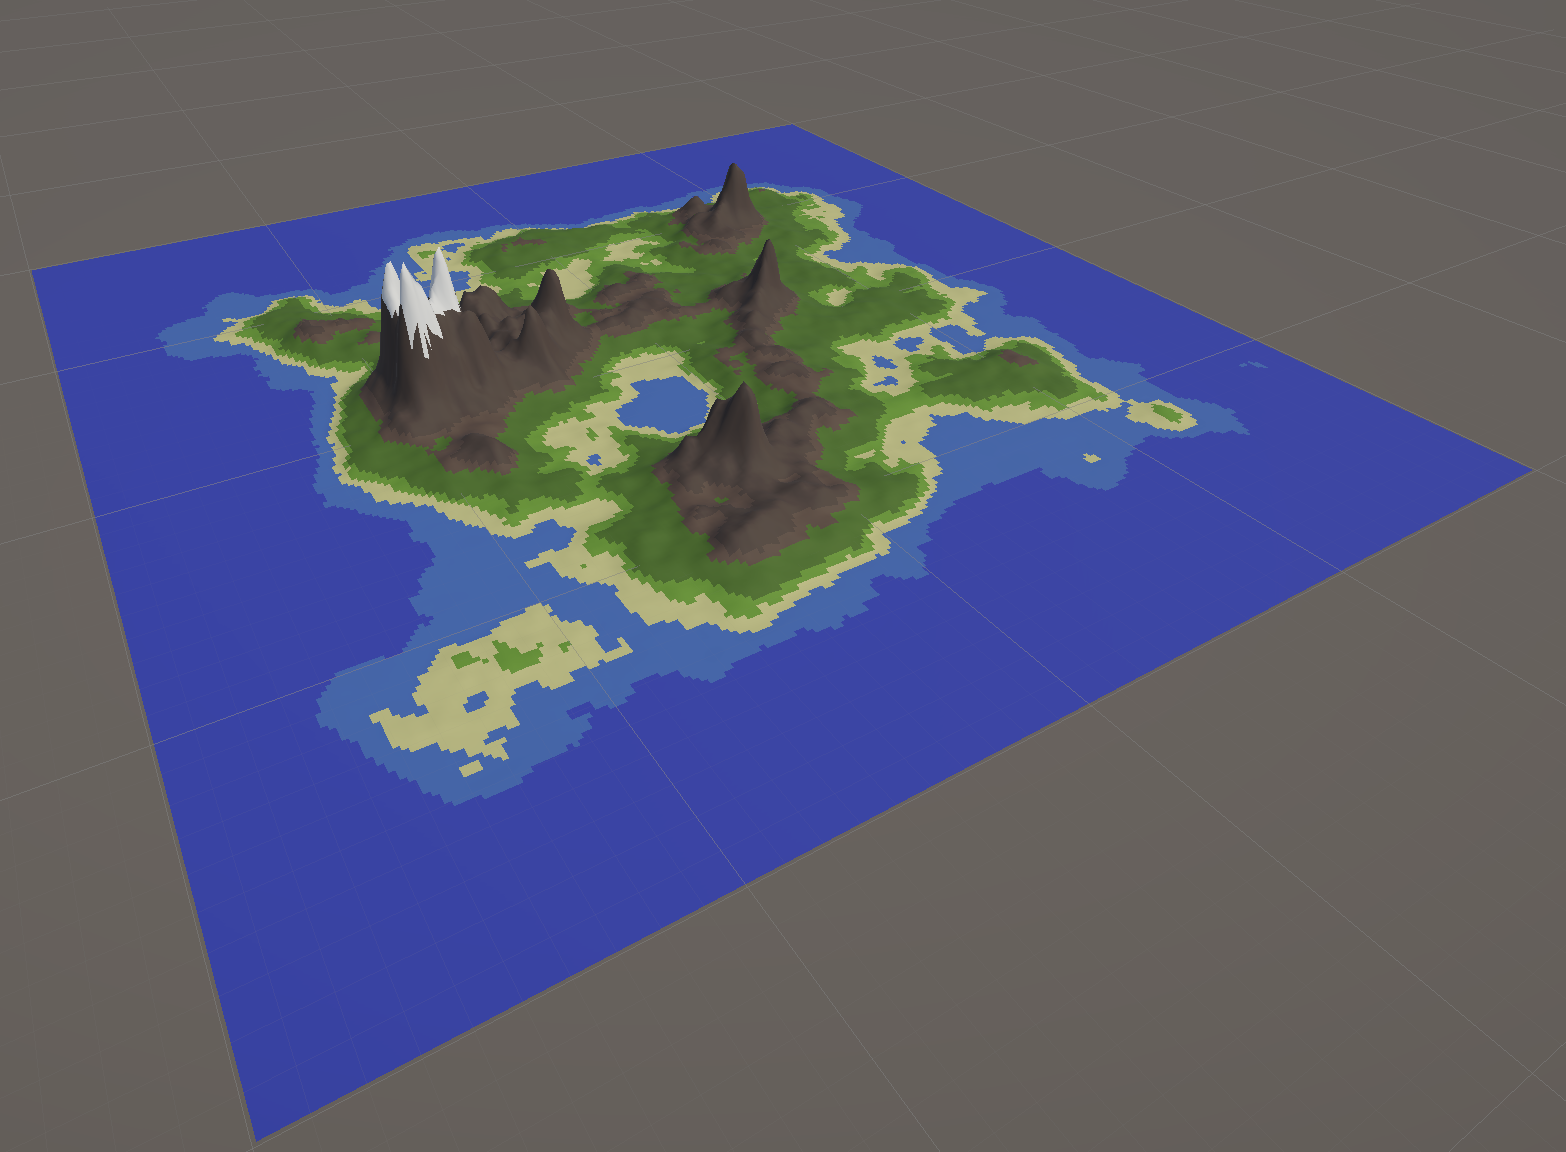
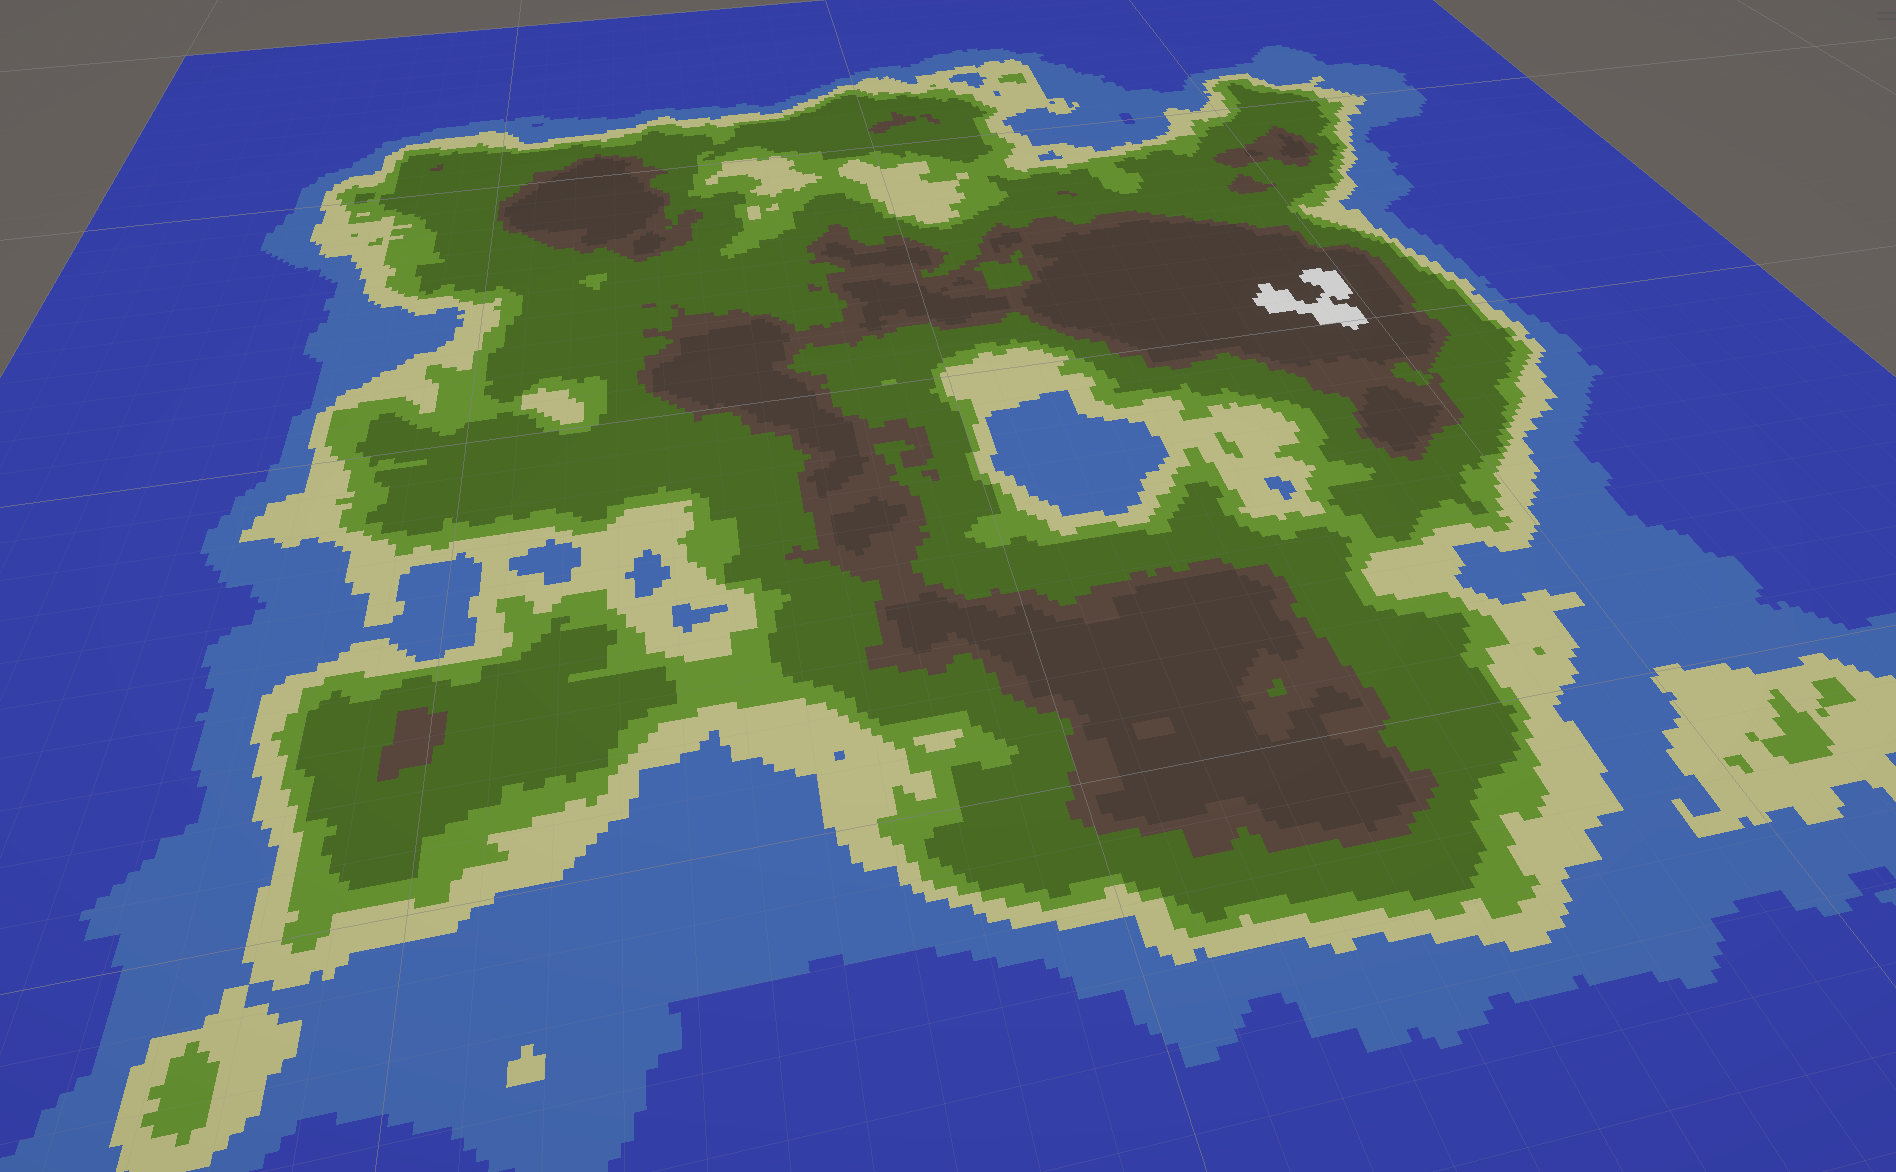
In this assignment, we will take the random numbers generated by your work in prior steps, and use them to render video game landscapes in both 2D and 3D.

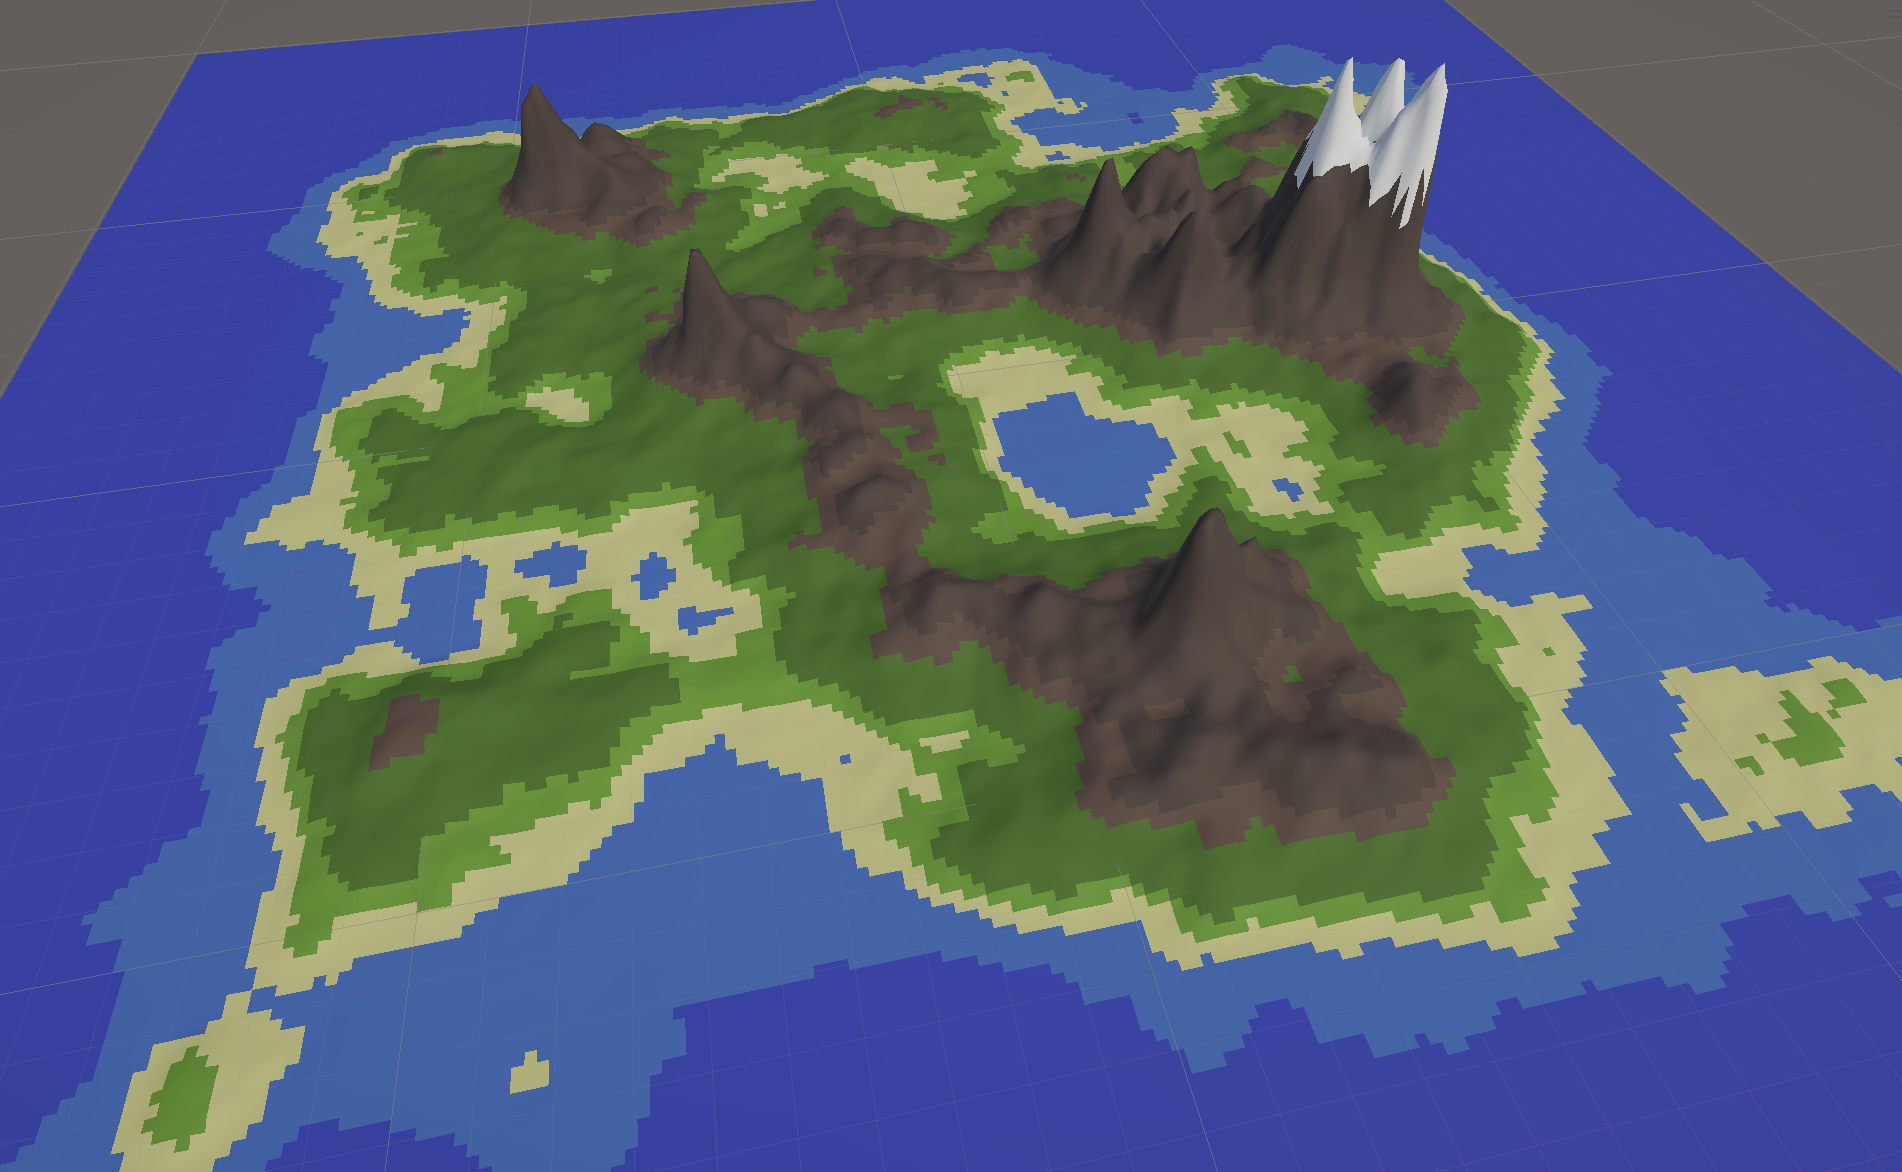
In previous semesters, we discussed the use of height maps to add details to 3D models or to produce terrain using Unity's terrain builder. In this assignment, we'll combine our prior knowledge of heightmaps with the possibilities created by the random number generation.

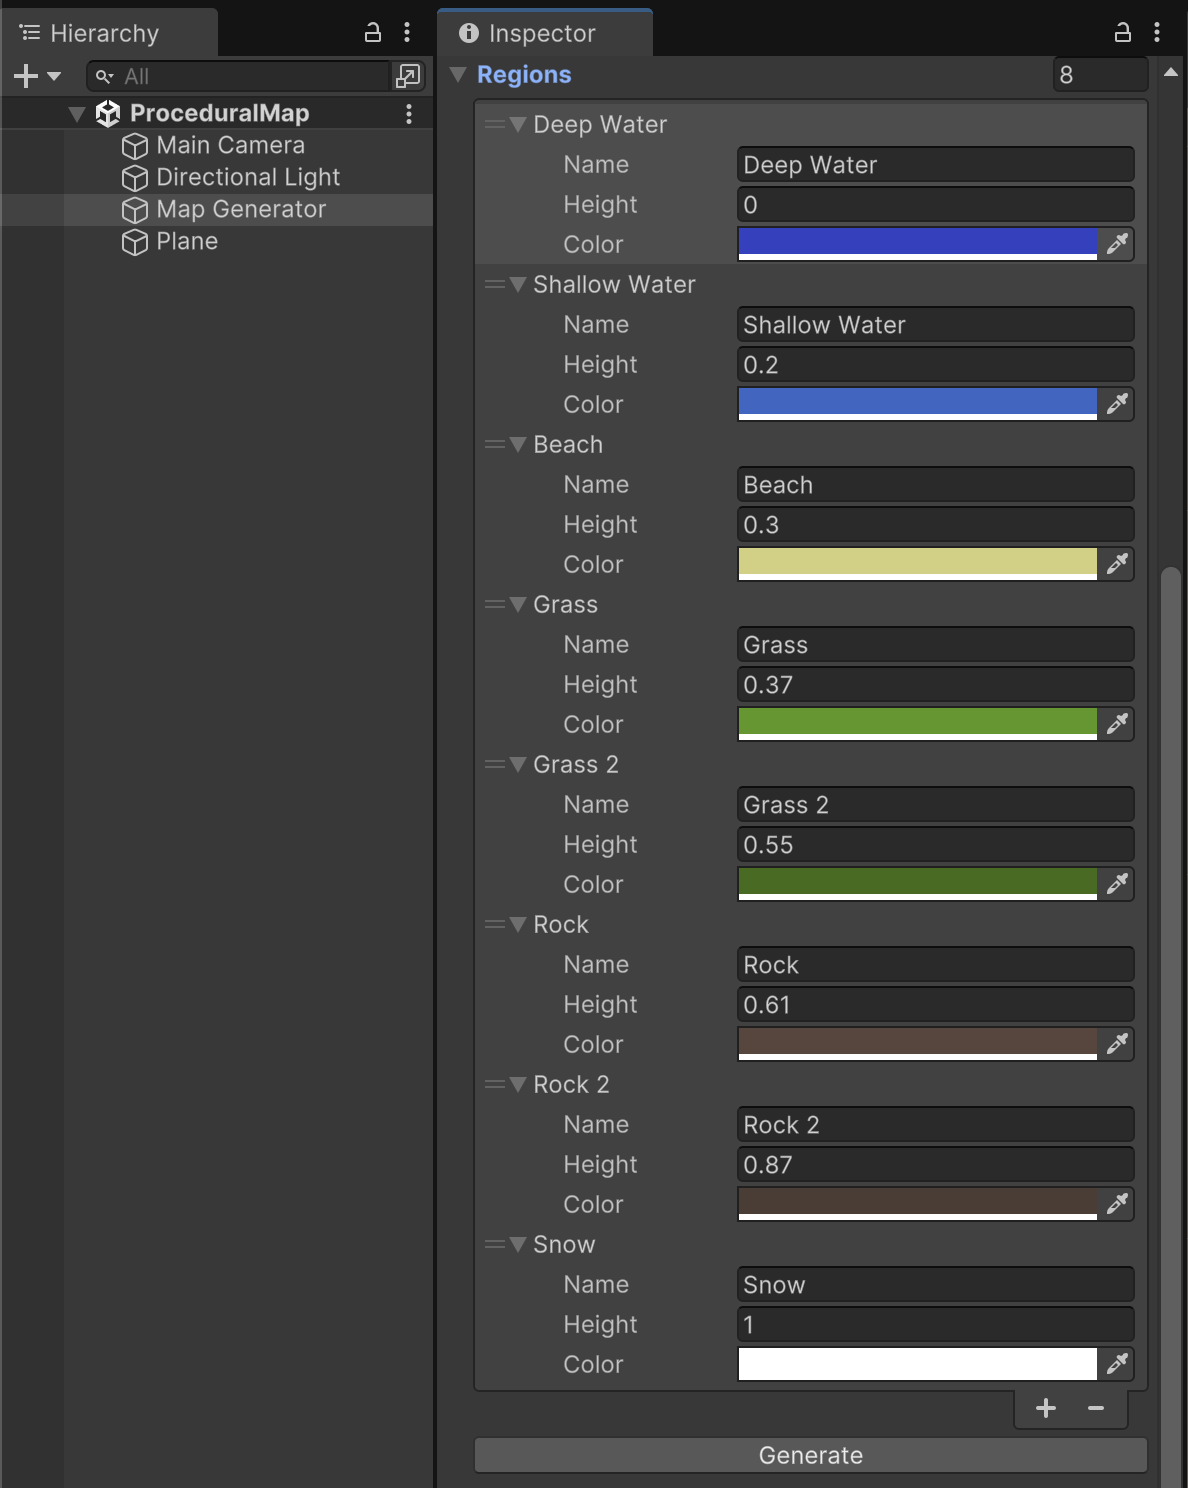
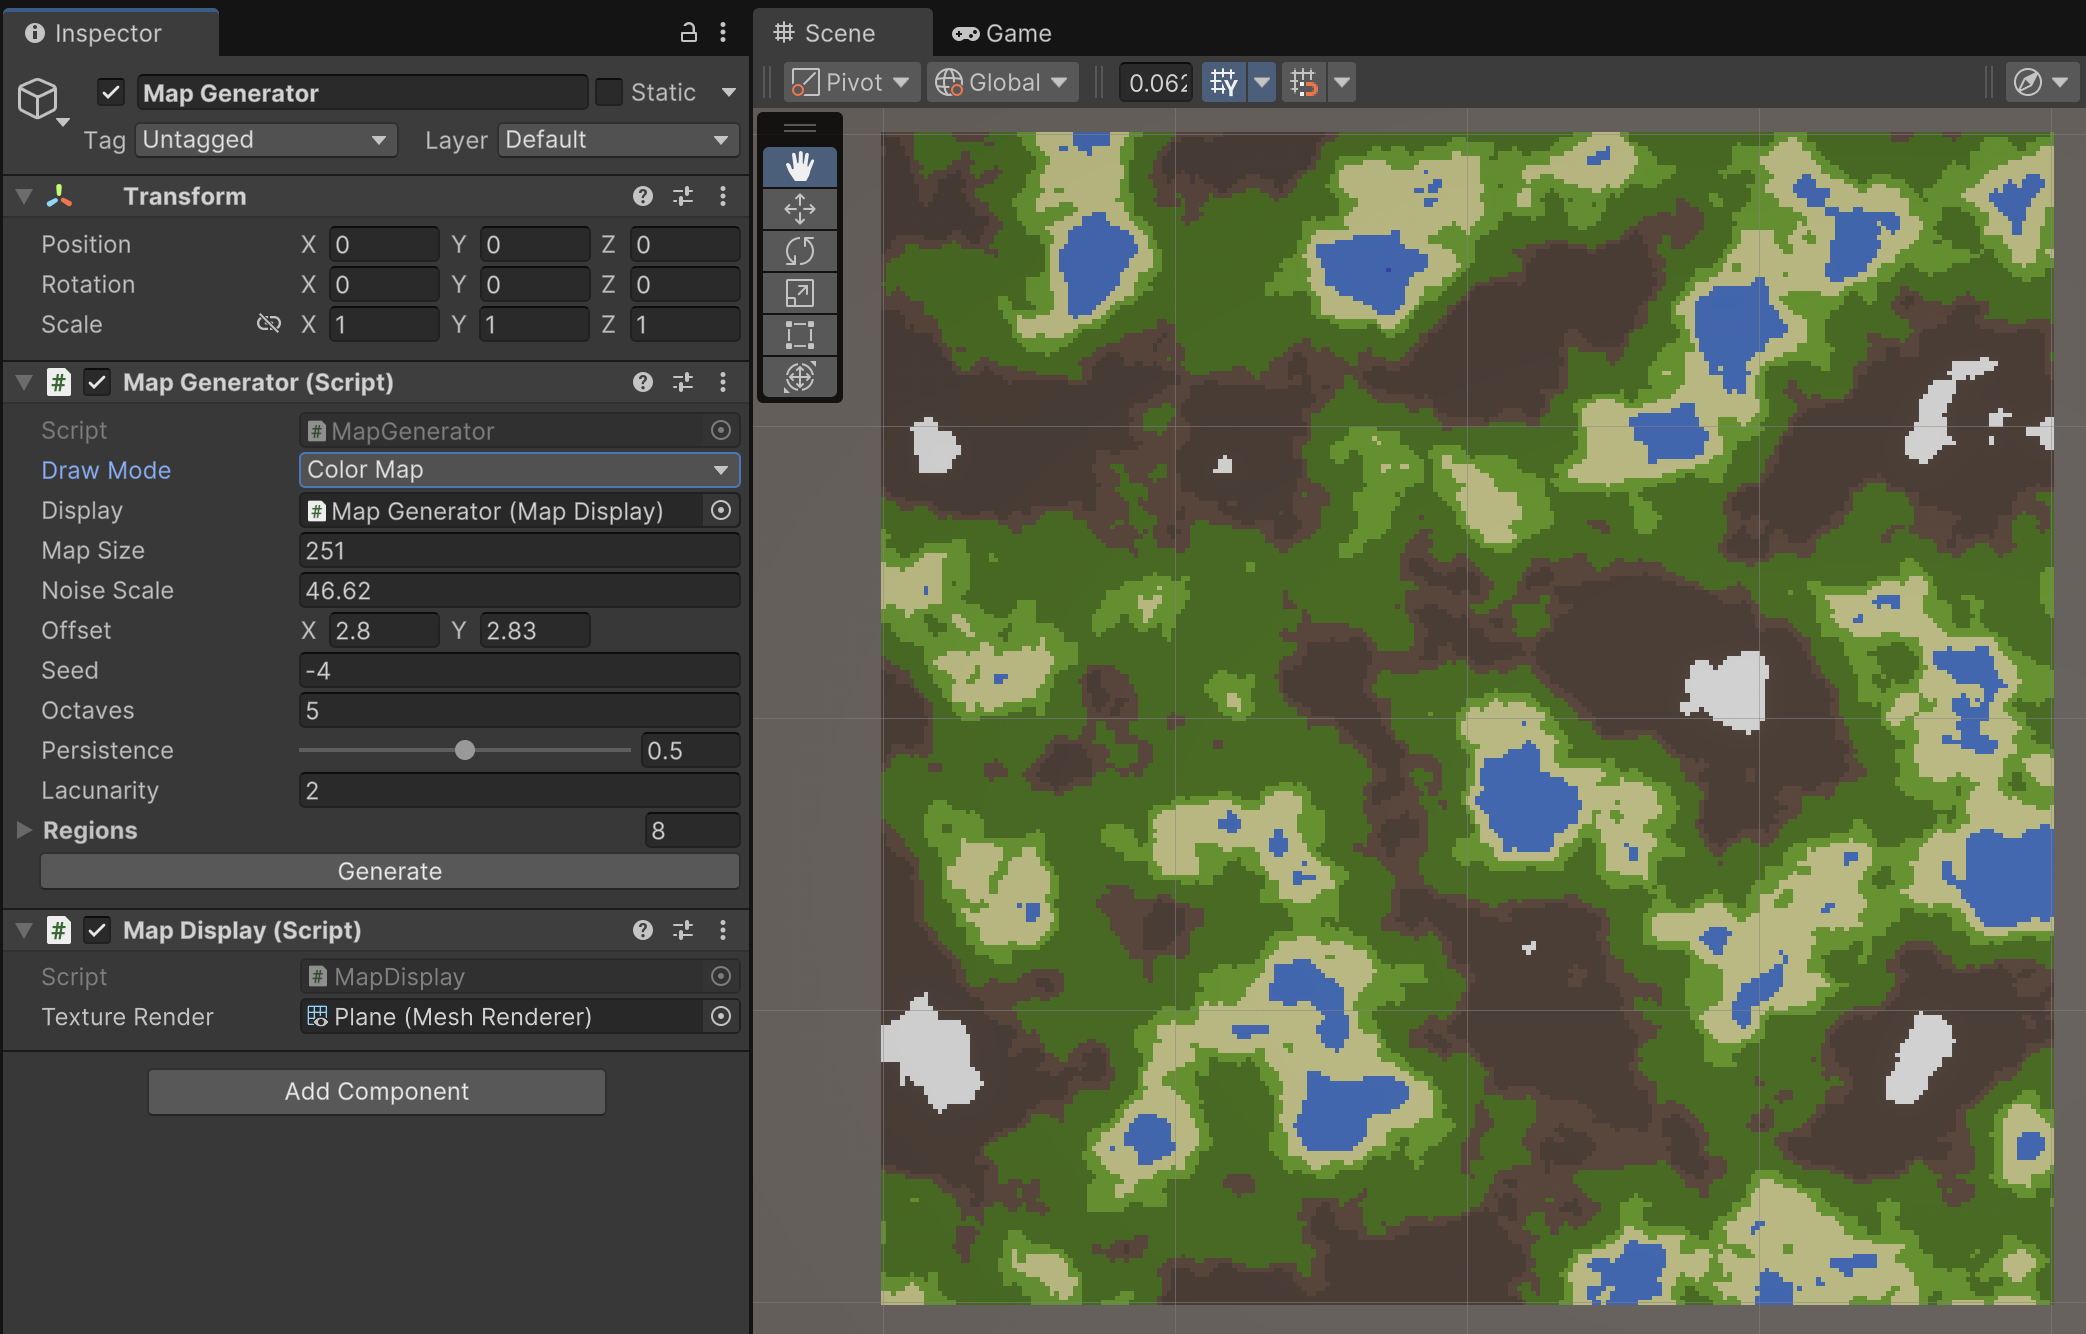
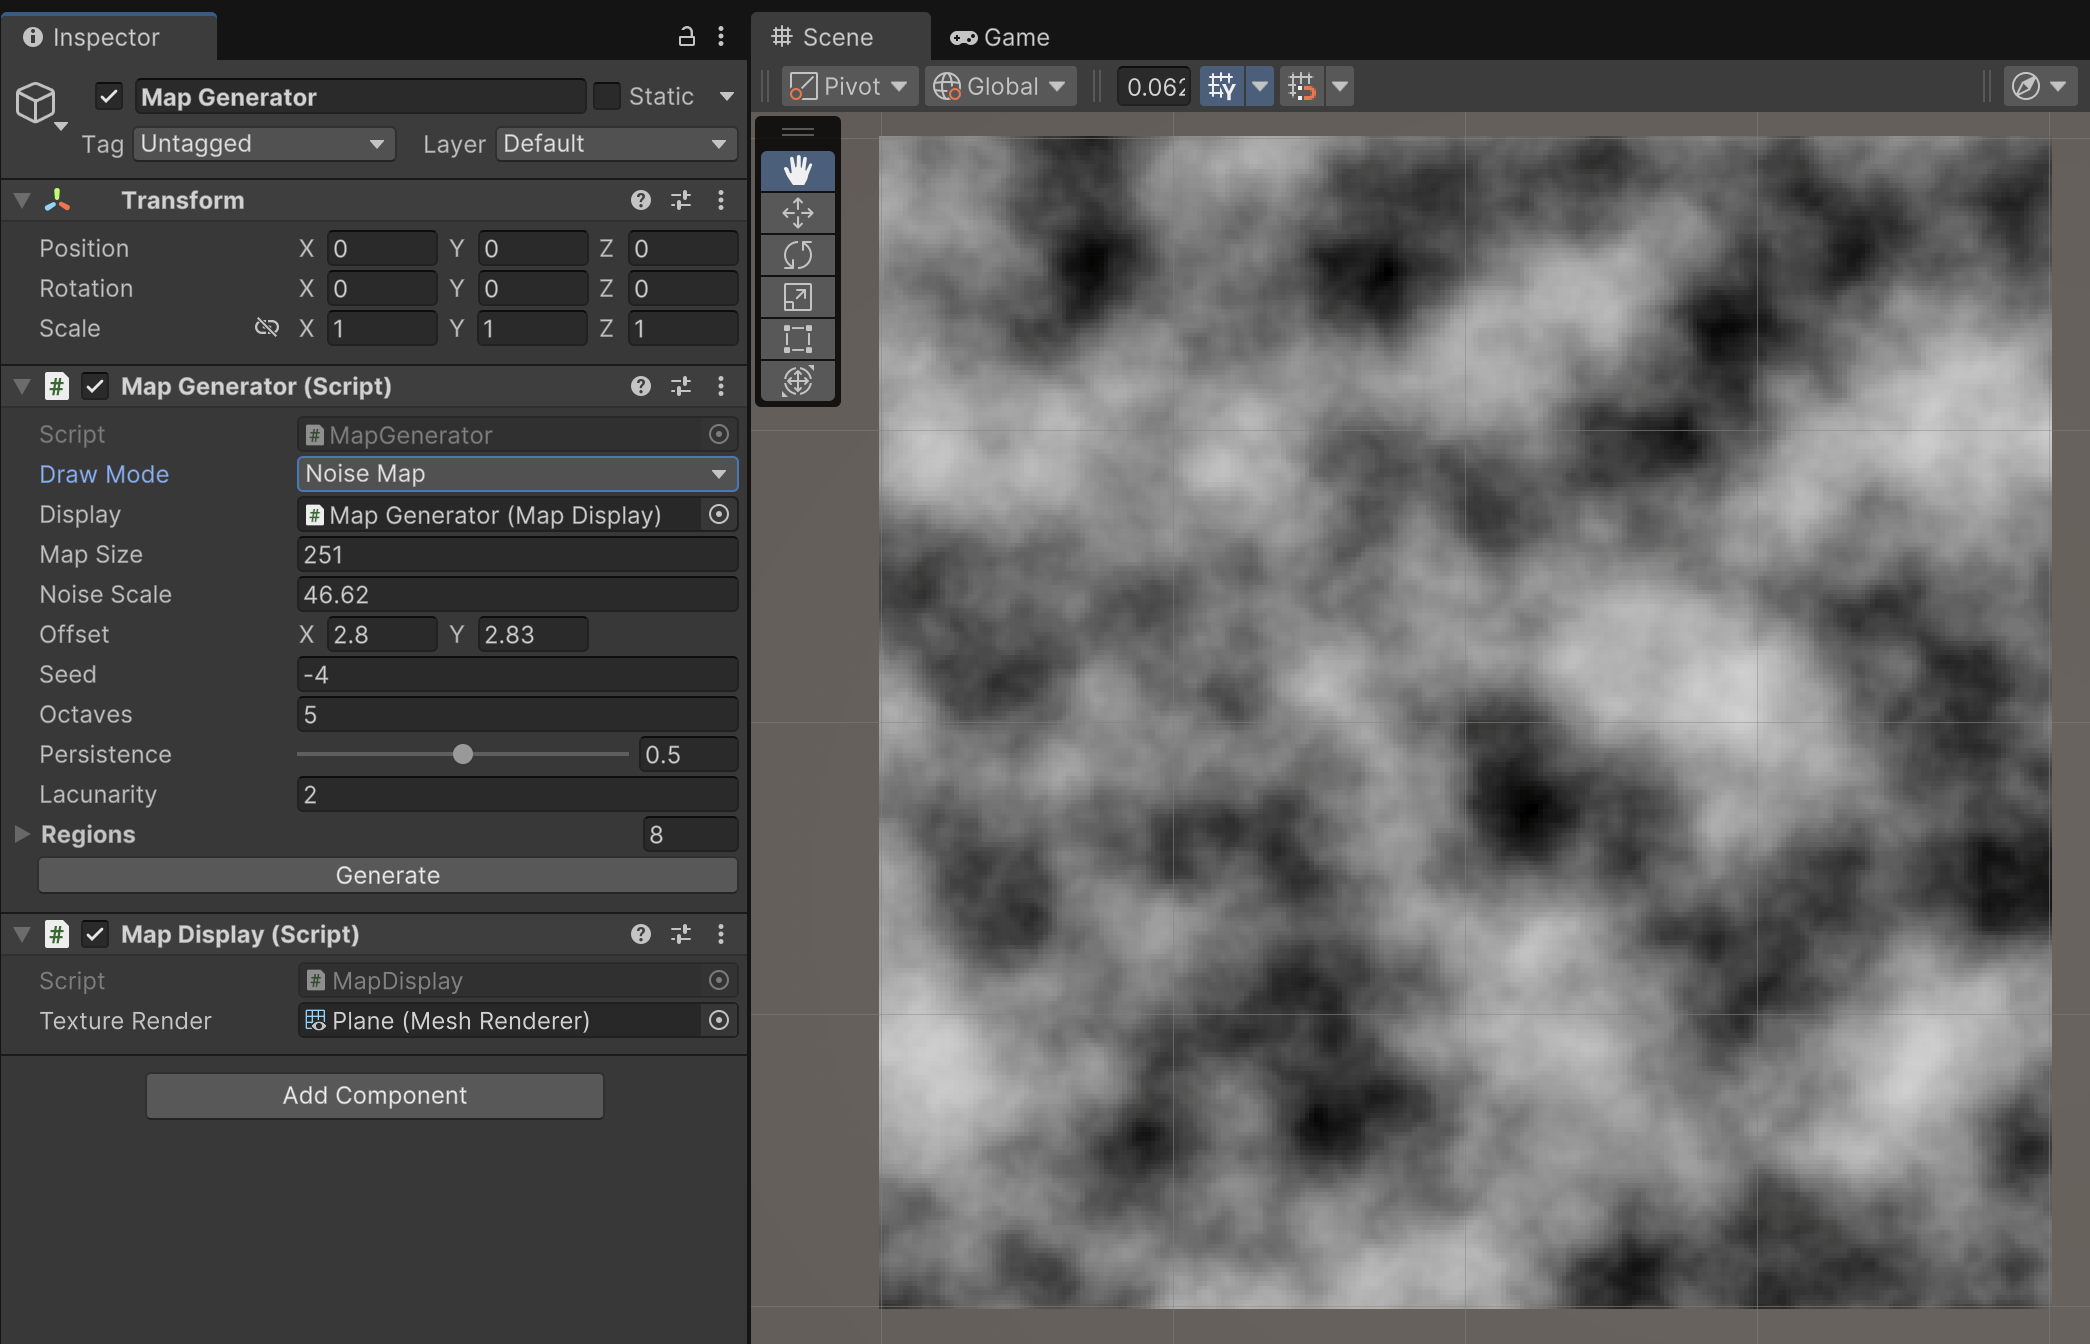
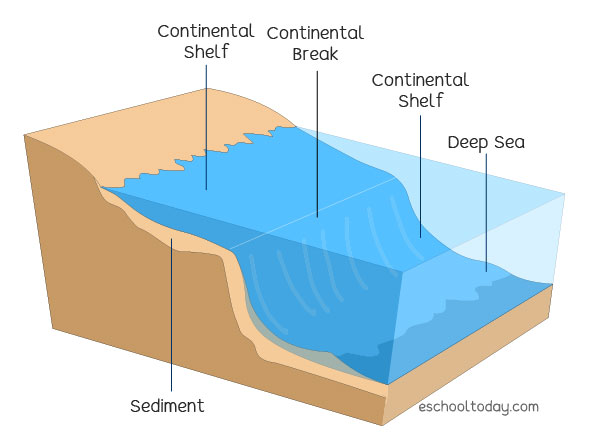
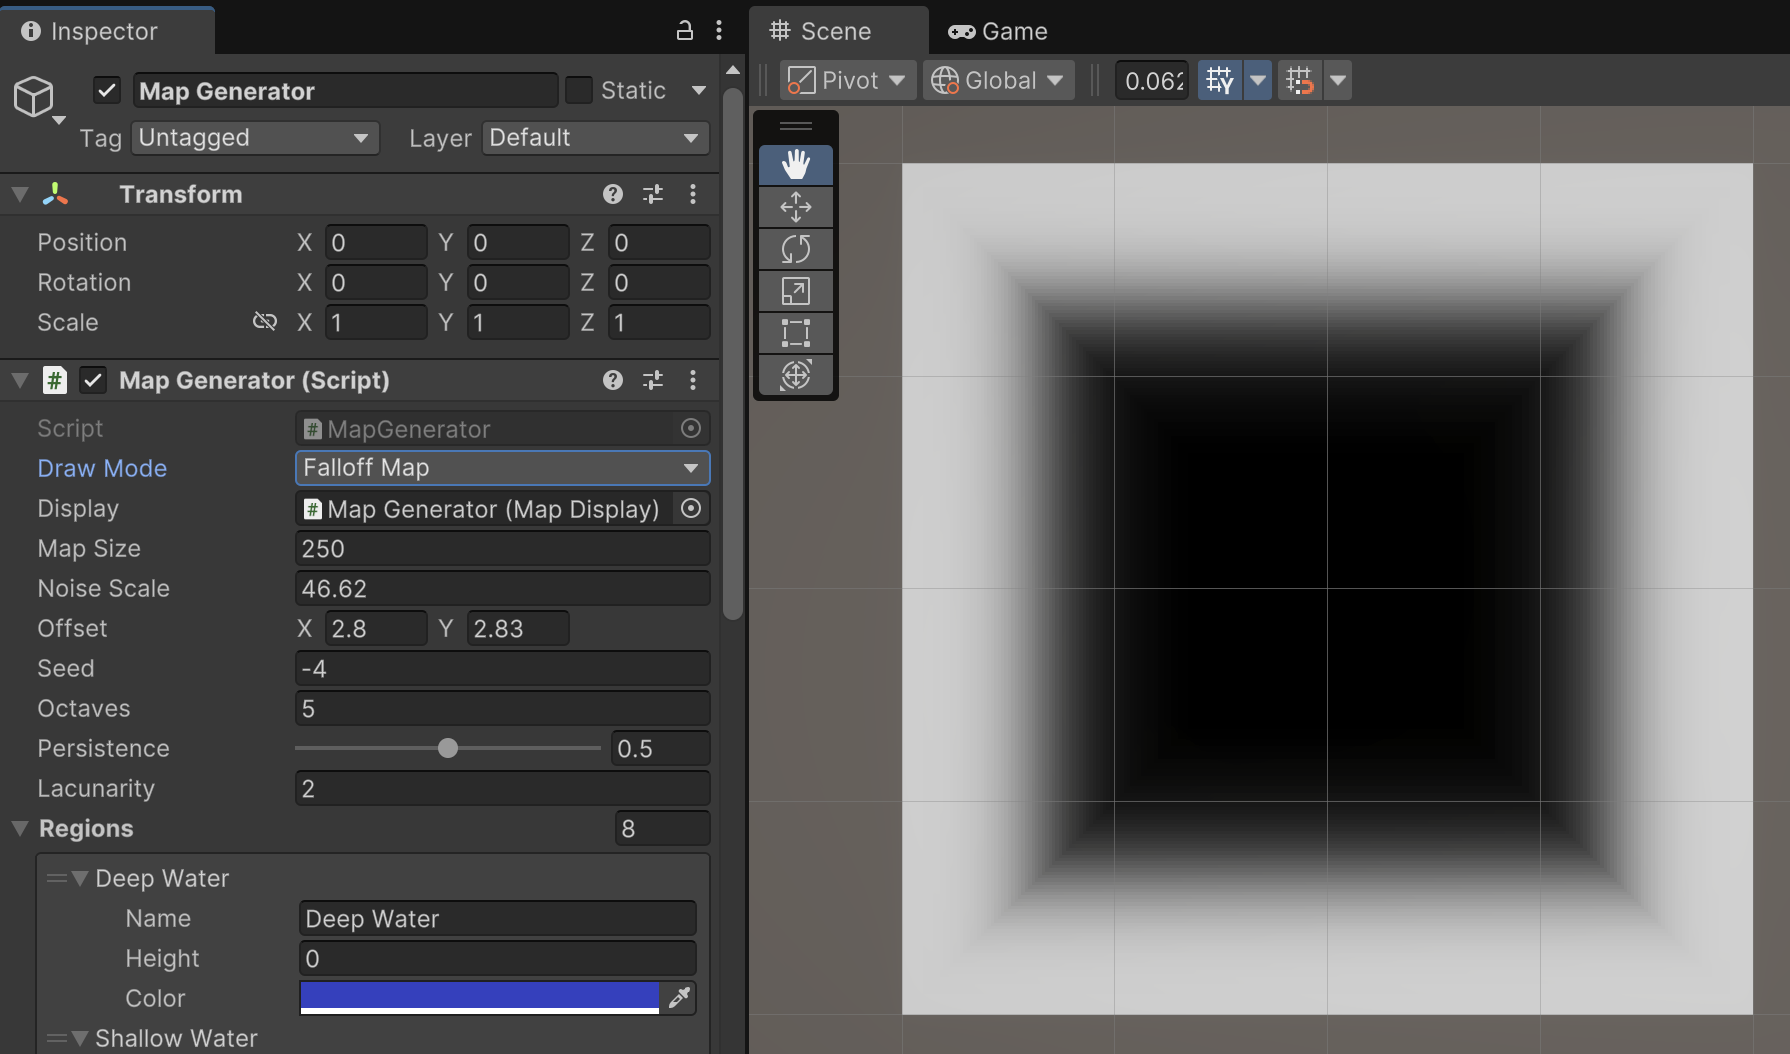
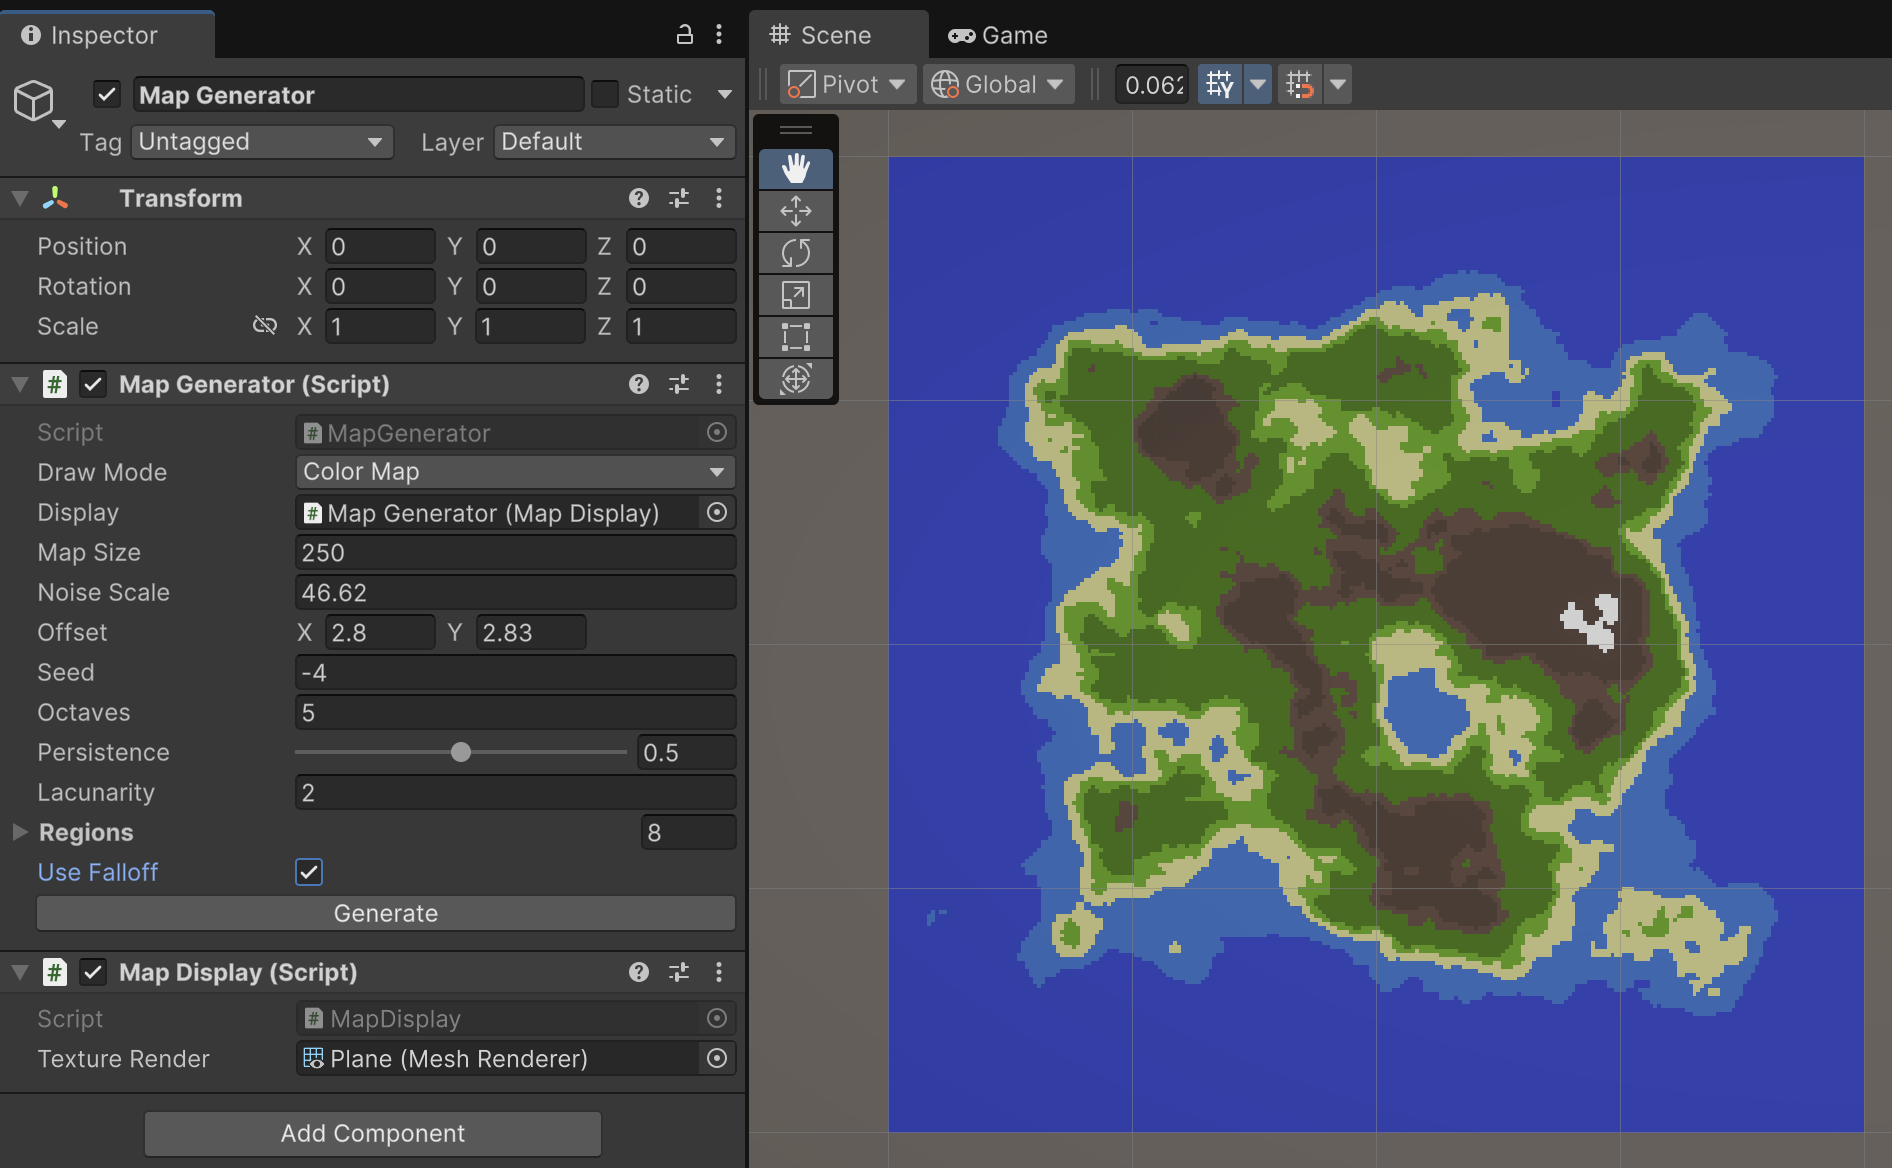
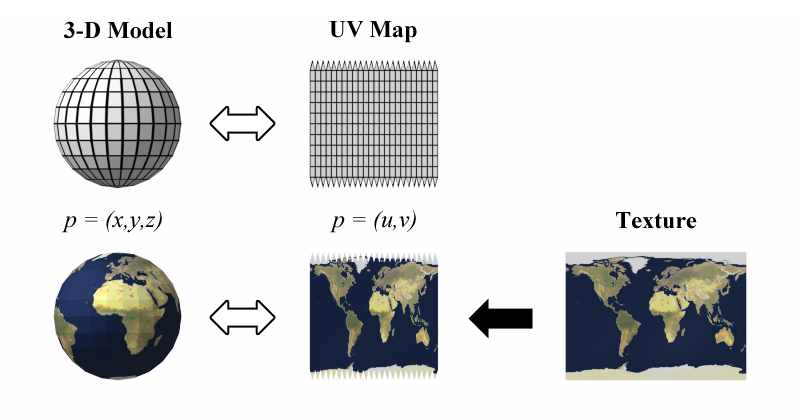
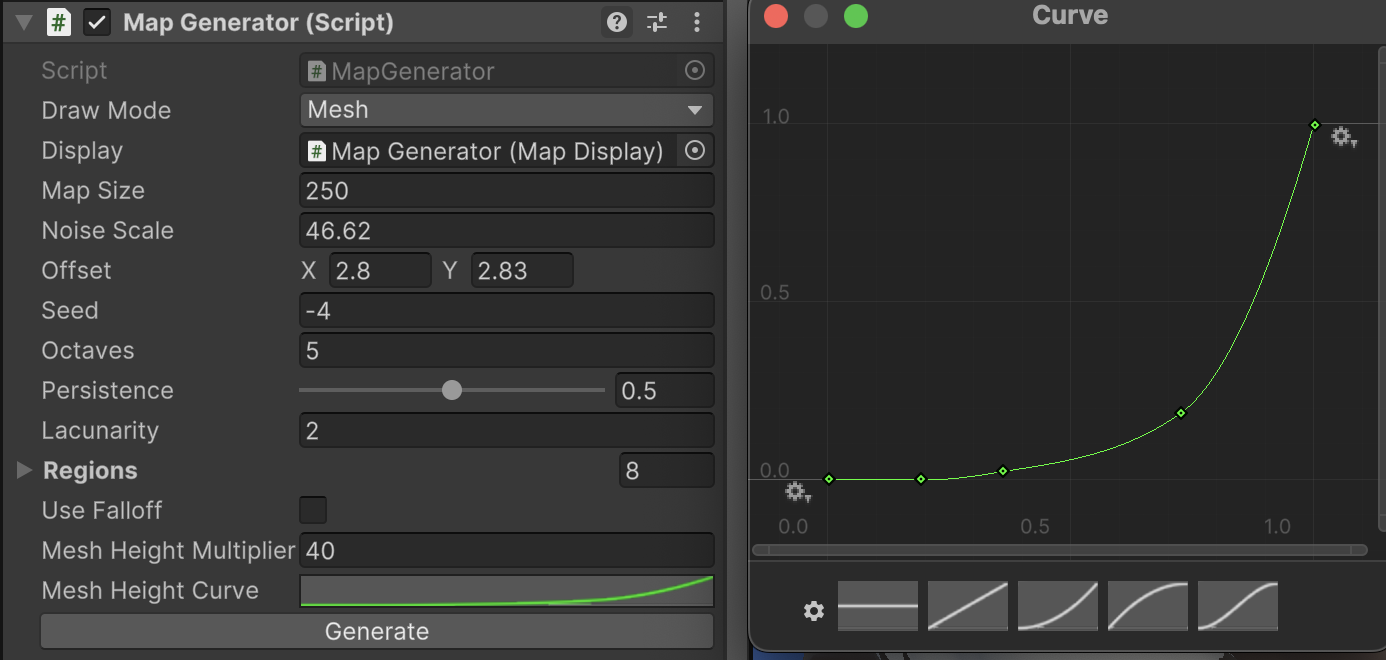
The essence of using heightmaps is the concept that grayscale values equate to different altitudes. Lighter grays are higher altitude, while darker grays are lower altitude. With this in mind, our next goal is to interpret our 2D grayscale noise map as a colorful landscape composed of water, beaches, grasslands, and mountains. The first step toward that goal is to describe what altitudes serve as a cutoff for particular colors. (Naturally, the beach would be found at a lower altitude than snowy mountaintops.) To accomplish this, we'll need to define TerrainType data.

Near the top of MapGenerator.cs, we'll define a TerrainType struct. A struct is an alternative data type compared to writing a class object. It provides us with a convenient way to store a lightweight bundle of variables in one object. It can also be a valid organizational approach for a single file to contain multiple related type definitions, such as how we let MapGenerator.cs contain both the TerrainType struct and the MapGenerator class. The syntax for the struct, its variables, and serializable attribute should be familiar from prior assignments. (Lines 4 to 9)

While we are in this region of code, let's also add the new DrawMode. Add an enum value of ColorMap. Don't forget to include the comma in between enum values. (Lines 14 and 15)
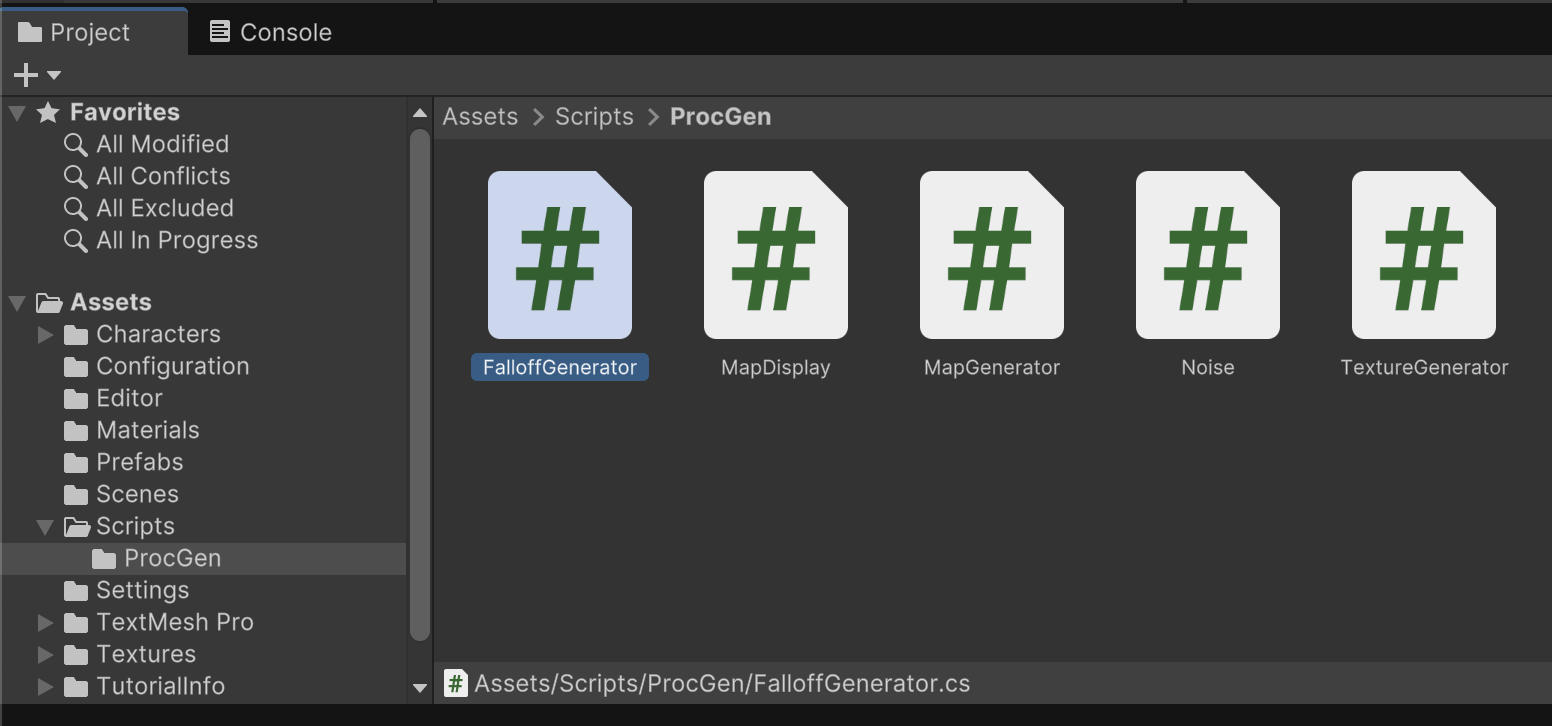
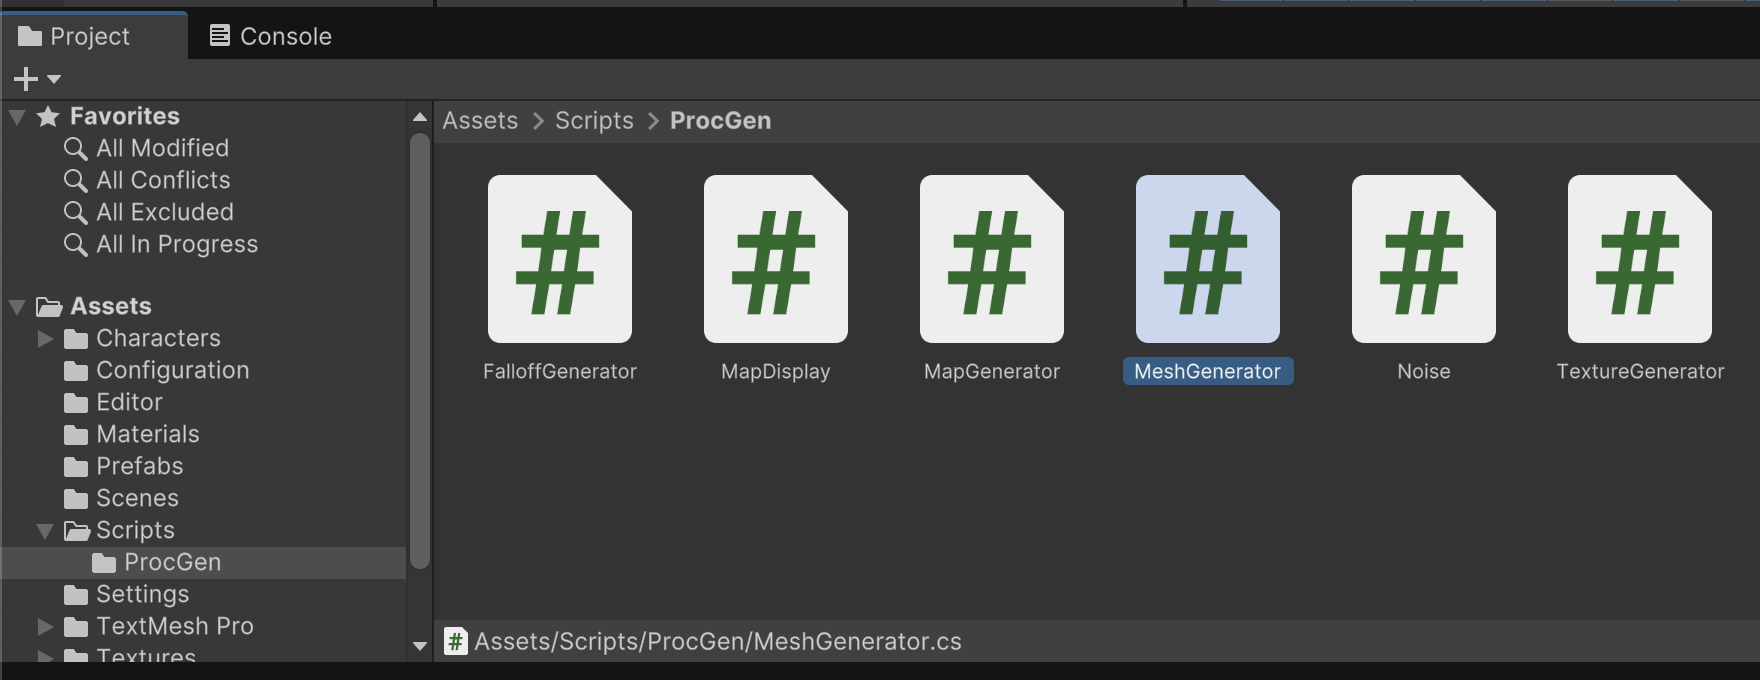
MapGenerator.cs

using UnityEngine;

namespace ProcGen {
	[System.Serializable]
	public struct TerrainType {
		public string name;
		public float height;
		public Color color;
	}
	
	public class MapGenerator : MonoBehaviour
	{
		public enum DrawMode {
			NoiseMap, 
			ColorMap
		}
		public DrawMode drawMode;
				

An individual TerrainType lets us specify a name (useful for human readability), a height to configure as an altitude cutoff, and the desired color for that terrain region.

Configure Regions

Having only one TerrainType object would not be too useful. Structs describe a data type, which means we can create variables using them. We can also make a variable that is an array of multiple TerrainType objects.

MapGenerator.cs

		// Configuration
		public int mapSize = 240;
		public float noiseScale = 50f;
		public Vector2 offset;
		public int seed;
		public int octaves;
		
		[Range(0, 1)]
		public float persistence = 0.5f;
		public float lacunarity = 2f;

		public TerrainType[] regions;
		
		// Methods

Because our struct definition for TerrainType has the serializable attribute, that allows the TerrainType to be editable in the inspector for the "Map Generator" game object.

Create 8 TerrainType regions with the following configuration.

Here are the hexadecimal color values for each region:

I encourage you to have fun and experiment with different settings while building this assignment to understand how this configuration works, but for grading purposes, please use these exact values and colors, so everyone's assignments can be assessed fairly and consistently.

Notice that the landscape heights range from 0 to 1 because our noise map data has also been normalized to be between 0 and 1.

Render Color Map

With our TerrainType regions defined, we can program additional rendering logic to use these colors in our Scene preview. We want to preserve the option for users to view both the grayscale Noise Map from the prior assignment and the new Color Map for this assignment.

MapGenerator.cs

		public void GenerateMap() {
			float[,] noiseMap = Noise.GenerateNoiseMap(mapSize, noiseScale, offset, seed, octaves, persistence, lacunarity);

			// Prepare a colorized version of the noise height map
			Color[] colorMap = new Color[mapSize * mapSize];
			
			// Loop through all the noise height map data
			for(int y = 0; y < mapSize; y++) {
				for(int x = 0; x < mapSize; x++) {
					float currentHeight = noiseMap[x, y];
					
					// Compare this location's height to each of our possible regions
					for(int i = 0; i < regions.Length; i++) {
						// Colorize based on the highest region achieved
						if(currentHeight <= regions[i].height) {
							colorMap[y * mapSize + x] = regions[i].color;
							break;
						}
					}
				}
			}
			
			if(drawMode == DrawMode.NoiseMap) {
				Texture2D mapTexture = TextureGenerator.TextureFromHeightMap(noiseMap);
				display.DrawTexture(mapTexture);
			} else if(drawMode == DrawMode.ColorMap) {
				Texture2D mapTexture = TextureGenerator.TextureFromColorMap(colorMap, mapSize);
				display.DrawTexture(mapTexture);
			}
		}
				

Preview the scene and switch to "Color Map" for the Draw Mode. Notice how colorful the landscape is now! It may still take some imagination, but you can more easily visualize what areas of the map represent tall mountains, water, and everything in between.

For comparison, here is the same map portrayed as grayscale noise data. Some of the landmarks can be still be identified even without their colors.

Explore the different landscapes you can create by adjusting the Seed, Offset, Octaves, Persistence, and Lacunarity values.

Falloff Generator

Right now, the random landscape generator creates a vast world that extends even beyond our rendering boundaries. By increasing the map size, you can preview how the map continues to expand in all directions. However, games often want to constrain player activities to a particular region. The Level Design intent might be to generate a finite region of random content rather than an endless landscape. To achieve this landscape style, we will add a configuration option to use a "falloff" map. The falloff map will help us generate landscapes similar to islands by flooding the edges of the map with water.

The essence of how this works is to imagine the falloff map as a second heightmap. By subtracting the falloff map from our original noise map, much of the landscape would cancel out and reduce to water with an altitude of 0. We will use math to generate a falloff map that looks like the center image below. (Different games can use all sorts of equations or even pre-made images to create different falloff patterns.)

Notice how the center of this falloff map is black meaning the center of our initial noise map will be unaffected. (Any altitude minus 0 is still the same altitude.) Meanwhile, the edges of the falloff map are a strong white meaning even the tallest mountains will be reduced to 0. Between the center toward the edges is a gradient whose grayscale values allow the landscape to organically transition from our random landscape to a guaranteed shoreline.

To generate this falloff map, we'll create a new C# file named FalloffGenerator.cs in the /Assets/Scripts/ProcGen/ folder.

FalloffGenerator is a utility class that does not attach as a component to any game objects. Its sole purpose is to supply other code with a grayscale falloff map that looks like the image above.

FalloffGenerator.cs

using UnityEngine;

namespace ProcGen {
	public class FalloffGenerator {
		public static float[,] GenerateFalloffMap(int size) {
			// Prepare an empty map for us to fill in
			float[,] map = new float[size, size];

			for(int i = 0; i < size; i++) {
				for(int j = 0; j < size; j++) {
					// Shift the coordinate range to be from -1 to 1 instead of 0 to 1
					float x = i / (float)size * 2 - 1;
					float y = j / (float)size * 2 - 1;
				
					// Evaluate all coordinates as their distance from center 0
					float value = Mathf.Max(Mathf.Abs(x), Mathf.Abs(y));
					
					// Compute a portion of the falloff curve for this coordinate
					map[i, j] = Evaluate(value); 
				}
			}

			return map;
		}

		static float Evaluate(float value) {
			float a = 3f;
			float b = 2.2f;

			// Create a curve that has a shallow and a deep falloff
			return Mathf.Pow(value, a) / (Mathf.Pow(value, a) + Mathf.Pow(b - b * value, a));
		}
	}
}
				

It's not easy to visualize from the grayscale preview, and it is definitely difficult to discern from the equation on Line 31, but our falloff gradient has a particular shape that is useful for realistic island generation. If you plug the equation from Line 31 into a visualizer such as Google, you get a graph with the following curve:

This curve climbs upward, but remember that it will be subracted from our noise map, which means the resulting heightmap will adopt this downward curve as if plunging into water. This particular shape is helpful, because it imitates a sort of continental shelf shape found along real-life coastlines.

This curve helps create a nice contrast between shallow water (light blue) and deep water (dark blue) in our maps.

Preview Falloff Map

We've previewed what the falloff map should look like in these instructions, but it would be helpful to confirm how it looks in the game engine.

FalloffMap is a new DrawMode option. Remember to include a comma to separate the new option from the prior value. (Lines 15 and 16) We also add a conditional branch for rendering the FalloffMap draw mode. (Lines 65 to 69)

MapGenerator.cs

	public class MapGenerator : MonoBehaviour
	{
		public enum DrawMode {
			NoiseMap, 
			ColorMap, 
			FalloffMap
		}
		public DrawMode drawMode;
				

MapGenerator.cs

			if(drawMode == DrawMode.NoiseMap) {
				Texture2D mapTexture = TextureGenerator.TextureFromHeightMap(noiseMap);
				display.DrawTexture(mapTexture);
			} else if(drawMode == DrawMode.ColorMap) {
				Texture2D mapTexture = TextureGenerator.TextureFromColorMap(colorMap, mapSize);
				display.DrawTexture(mapTexture);
			} else if(drawMode == DrawMode.FalloffMap) {
				float[,] falloffMap = FalloffGenerator.GenerateFalloffMap(mapSize);
				Texture2D mapTexture = TextureGenerator.TextureFromHeightMap(falloffMap);
				display.DrawTexture(mapTexture);
			} 
				

Switch to the Scene tab and configure the "Map Generator" game object with "Falloff Map" as the Draw Mode. You should see a preview that matches the falloff map in the instructions.

Apply Falloff Map

To generate island landscapes, we'll need to modify our color map processing.

We'll add a configuration bool to use the falloff map in combination with the other draw modes. (Line 35) With this option, Level Designers can still use our tool to generate vast landscapes instead of islands if they want.

The falloff map is the same every time, so there is no reason to waste processing power recomputing it with every map change. Instead, we will compute the falloff map once during the game object's awake event and store the result in a variable. (Lines 37 to 43)

When enabled, the falloff map is subtracted from the noise heightmap during color processing. (Lines 54 to 56) Clamp01 is a function that constrains values to be between 0 and 1. This ensures our falloff map doesn't subtract to the extent of creating negative altitude.

For the falloff map calculation to also work in editor preview while the game is not running, we also compute the falloff map during the OnValidate event. (Line 97)

MapGenerator.cs

		public TerrainType[] regions;
		public bool useFalloff;
		
		// State Tracking
		float[,] falloffMap;
		
		// Methods
		void Awake() {
			falloffMap = FalloffGenerator.GenerateFalloffMap(mapSize);
		}
				

MapGenerator.cs

			// Loop through all the noise height map data
			for(int y = 0; y < mapSize; y++) {
				for(int x = 0; x < mapSize; x++) {
					if(useFalloff) {
						noiseMap[x, y] = Mathf.Clamp01(noiseMap[x, y] - falloffMap[x, y]);
					}
					
					float currentHeight = noiseMap[x, y];
				

MapGenerator.cs

		void OnValidate() {
			if(mapSize < 1) {
				mapSize = 1;
			}
			
			if(octaves < 0) {
				octaves = 0;
			}
			
			if(lacunarity < 1) {
				lacunarity = 1;
			}
			
			falloffMap = FalloffGenerator.GenerateFalloffMap(mapSize);
		}
				

Return to the Scene preview and configure "Map Generator" with both the "Color Map" Draw Mode and "Use Falloff" set to true. You should see an island version of your landscape. Notice the presence of shallow water vs. deep water created by the particular falloff curve we used.

Just to confirm that all level generation functionaliy is still working, also try unchecking "Use Falloff" to see that it restores the rest of the landscape.

Scene Mesh

Our final rendering technique is to portray our random landscape as a 3D mesh. This technique still uses the color map data we previously made, but additional work is needed to produce a 3D model representation of the heightmap.

Select the Plane in the Hierarchy and deactivate this game object in the Inspector. (We'll still use the Plane for the other rendering modes, but for now we are going to work on other game objects.)

For this technique, our existing Plane mesh is not sufficient. We will need to create a new Mesh game object with slightly different settings. In the Hierarchy tab click the + button and select Create Empty object. Name this object Mesh, and attach to it a Mesh Filter component and a Mesh Renderer component. Scale the Mesh game object's Transform by an XYZ of (-10, 10, 10).

The mesh data and texture data will be generated by our randomizer, but the Material must be prepared by hand. Navigate to the /Assets/Materials/ folder in the Project tab. Create a new Material named Mesh. It is difficult to see right now, but to prevent our terrain from looking artificially shiny as if it was plastic, reduce the "Smoothness" property to 0.15 on the Mesh material.

Assign this new material into the Materials property of the Mesh game object.

Because the mesh data has to be generated programmatically, there is nothing yet visible in the Scene preview window.

Mesh Generator

Generating a 3D model, also known as a mesh, involves methodical coordination amongst vertices working together to form triangles and triangles working together to form the overall mesh.

The way in which a texture is wrapped around a model, also known as the mesh's UV map, must also be calculated. (Below image sourced from Wikipedia's article on UV Maps.)

The Mathematics behind these operations falls more appropriately under graphics programming expertise and technical art roles than what is reasonable for our focus this semester. While our code snippets contain the math necessary to generate our 3D landscapes, for the purposes of this assignment, it is sufficient to understand that we are iterating over many triangles and elevating specific vertices of those triangles based on the altitudes measured in our heightmap.

If you are curious how to do this math by hand, I highly recommend the tutorial series which inspired much of this exercise:
https://www.youtube.com/watch?v=4RpVBYW1r5M

To perform mesh generation in our own code, create a new C# file named MeshGenerator.cs in the /Assets/Scripts/ProcGen/ folder.

MeshGenerator.cs organizes two classes within itself: The first is a MeshData class which tracks vertices, triangles, and UV data in a fashion that is easy to edit and export into actual Mesh objects used by Unity. (Lines 4 to 35) The second is a MeshGenerator class which contains a helper function GenerateTerrainMesh() for processing a heightmap into MeshData describing a terrain. (Lines 37 to 65)

MeshGenerator.cs

using UnityEngine;

namespace ProcGen {
	public class MeshData {
		// Configuration
		public Vector3[] vertices;
		public int[] triangles;
		public Vector2[] uvs;

		// State Tracking
		int triangleIndex;
		
		// Methods
		public MeshData(int meshWidth, int meshHeight) {
			vertices = new Vector3[meshWidth * meshHeight];
			uvs = new  Vector2[meshWidth * meshHeight];
			triangles = new int[(meshWidth - 1) * (meshHeight - 1) * 6];
		}

		public void AddTriangle(int a, int b, int c) {
			triangles[triangleIndex] = a;
			triangles[triangleIndex + 1] = b;
			triangles[triangleIndex + 2] = c;
			triangleIndex += 3;
		}

		public Mesh CreateMesh() {
			Mesh mesh = new Mesh();
			mesh.vertices = vertices;
			mesh.triangles = triangles;
			mesh.uv = uvs;
			mesh.RecalculateNormals();
			return mesh;
		}
	}
	
	public static class MeshGenerator {
		public static MeshData GenerateTerrainMesh(float[,] heightMap, float heightMultiplier, AnimationCurve heightCurve) {
			int width = heightMap.GetLength(0);
			int height = heightMap.GetLength(1);
			float topLeftX = (width - 1) / -2f;
			float topLeftZ = (height - 1) / 2f;
			
			MeshData meshData = new MeshData(width, height);
			int vertexIndex = 0;

			for(int y = 0; y < height; y++) {
				for(int x = 0; x < width; x++) {
					float adjustedHeight = heightCurve.Evaluate(heightMap[x, y]) * heightMultiplier;
					meshData.vertices[vertexIndex] = new Vector3(topLeftX + x, adjustedHeight, topLeftZ - y);
					meshData.uvs[vertexIndex] = new Vector2(x / (float)width, y / (float)height);

					if(x < width - 1 && y < height - 1) {
						meshData.AddTriangle(vertexIndex, vertexIndex + width + 1, vertexIndex + width);
						meshData.AddTriangle(vertexIndex + width + 1, vertexIndex, vertexIndex + 1);
					}

					vertexIndex++;
				}
			}

			return meshData;
		}
	}
}
				

Mesh Display

Our map generator will have the capability of drawing both 2D and 3D landscapes. We need to set up the display configuration for rendering either option.

Open MapDisplay.cs and add new properties for interacting with the 3D MeshFilter and 3D MeshRenderer. (Lines 7 and 8) The DrawTexture function which we've been using for 2D maps is altered to show the 2D textureRender object and hide the 3D meshFilter object. (Lines 14 and 15) Similarly, a new DrawMesh function will handle the display of 3D landscapes and the hiding of 2D content. (Lines 18 to 24)

MapDisplay.cs

		public Renderer textureRender;
		public MeshFilter meshFilter;
		public MeshRenderer meshRenderer;

		public void DrawTexture(Texture2D texture) {
			textureRender.sharedMaterial.mainTexture = texture;
			textureRender.transform.localScale = new Vector3(texture.width, 1, texture.height);
			
			textureRender.gameObject.SetActive(true);
			meshFilter.gameObject.SetActive(false);
		}

		public void DrawMesh(MeshData meshData, Texture2D texture) {
			meshFilter.sharedMesh = meshData.CreateMesh();
			meshRenderer.sharedMaterial.mainTexture = texture;
			
			textureRender.gameObject.SetActive(false);
			meshFilter.gameObject.SetActive(true);
		}

Fill in the Mesh Filter and Mesh Renderer properties of the Map Display component. You can drag the same object into both blanks, and the proper components will be selected automatically.

Render Mesh Map

For the MapGenerator to use the new 3D rendering preview, "Mesh" is added as an option to the DrawMode enum. (Line 17) A couple new configuration options are added that describe how to render a 3D mesh. (Lines 38 and 39) "meshHeightMultiplier" lets us scale our 3D model to any desired height despite the source data only ranging from 0 to 1. Instad of interpreting the altitude measurements from 0 to 1 in a linear fashion, "meshHeightCurve" lets you emphasize certain altitudes more than others. You will see in the final render that we use this setting to create a relatively flat grassland amidst towering mountains. Finally, we add the last conditional branch for rendering a 3D map. (Lines 85 to 89)

MapGenerator.cs

	public class MapGenerator : MonoBehaviour
	{
		public enum DrawMode {
			NoiseMap, 
			ColorMap, 
			FalloffMap, 
			Mesh
		}
		public DrawMode drawMode;
				

MapGenerator.cs

		public TerrainType[] regions;
		public bool useFalloff;

		public float meshHeightMultiplier;
		public AnimationCurve meshHeightCurve;
		
		// State Tracking
		float[,] falloffMap;
				

MapGenerator.cs

			if(drawMode == DrawMode.NoiseMap) {
				Texture2D mapTexture = TextureGenerator.TextureFromHeightMap(noiseMap);
				display.DrawTexture(mapTexture);
			} else if(drawMode == DrawMode.ColorMap) {
				Texture2D mapTexture = TextureGenerator.TextureFromColorMap(colorMap, mapSize);
				display.DrawTexture(mapTexture);
			} else if(drawMode == DrawMode.FalloffMap) {
				float[,] falloffMap = FalloffGenerator.GenerateFalloffMap(mapSize);
				Texture2D mapTexture = TextureGenerator.TextureFromHeightMap(falloffMap);
				display.DrawTexture(mapTexture);
			}  else if(drawMode == DrawMode.Mesh) {
				MeshData mapMesh = MeshGenerator.GenerateTerrainMesh(noiseMap, meshHeightMultiplier, meshHeightCurve);
				Texture2D mapTexture = TextureGenerator.TextureFromColorMap(colorMap, mapSize);
				display.DrawMesh(mapMesh, mapTexture);
			}
				

In the Inspector for the "Map Generator" game object, switch "Draw Mode" to Mesh. Your preview probably looks flat by default because we must supply values for the new configuration properties. Increase "Mesh Height Multiplier" until your mountains comfortably rise above the grasslands. Customize "Mesh Height Curve" with a delayed upward swing (as picture) to try to keep the grasslands mostly flat while still allowing the mountains to rise upward.

Like before, experiment with a variety of seeds, offsets, and other settings to understand the possibilities unlocked by procedural generation.

Further Reading

There is only so much we can cover on this topic in a single semester, especially with only a couple assignments. We've examined just a handful of ways intentionally curated random numbers can be used for procedural generation. New video games continue to innovate on the use of these techniques for all sorts of content even beyond landscapes.

The links mentioned in the prior assignment and much other research online can be a helpful resource should you be interested in exploring this topic further:
https://www.redblobgames.com/maps/terrain-from-noise/
https://www.youtube.com/watch?v=wbpMiKiSKm8

Save and Test

Unlike prior assignments, this exercise is not tested by hitting Play and using the Game view. Instead, you should test the game using the Scene preview. Inspect the "Map Generator" game object, and ensure all inspector buttons and configuration options perform as described throughout this assignment.

Submit Assignment

SAVE any open files or scenes.

Submit your assignment for grading following the instructions supplied for your particular classroom.